Pima Hunter-Pro Series Installer Programming Manual
Led keypad
Hide thumbs
Also See for Hunter-Pro Series:
- Installation manual (112 pages) ,
- Installation manual (116 pages) ,
- Installation manual (99 pages)

Related Manuals for Pima Hunter-Pro Series


Summary of Contents for Pima Hunter-Pro Series
- Page 1 RXN-416 LED Keypad Installer Programming Guide For the Hunter-Pro Series P/N: 4410289, A1, ZA en PIMA Electronic Systems Ltd. March 2009 www.pima-alarms.com...
-
Page 2: Table Of Contents
PIMA Electronic Systems Ltd. shall have no liability for any death, personal and/or bodily injury and/or damage to property or other loss whether direct, indirect, incidental, consequential or otherwise, based on a claim that the Product failed to function. -
Page 3: Introduction
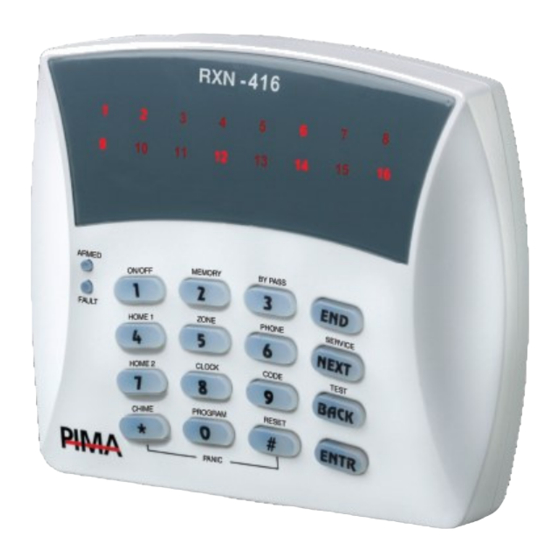
Programming the Hunter-Pro series with a LED keypad NTRODUCTION This guide contains the necessary information for programming PIMA’s Hunter-Pro series alarm systems, using the RXN-416 LED keypad. Programming the system using a LED keypad is based on entering a parameter address first, and then its desired value. -
Page 4: The Leds
Programming the Hunter-Pro series with an LED keypad Figure 2. Setting an address Top line illuminating LED: Location of the ‘cursor’ RXN-416 One byte When inserting discrete data the behavior of the keypad is the same as the LCD one: the top line shows where the ‘cursor’ is (looking from left to right) and the bottom shows the toggle status of the parameter: illuminating LED represents ‘+’... -
Page 5: Hex To Binary Conversion Table
Programming the Hunter-Pro series with a LED keypad 5. The hex values A-F are set by pressing the asterisk key ‘ * ’. Each key press advances the value: Value * Key presses Hex to Binary conversion table 0000 0100... -
Page 6: Setting A Discrete Parameter's Values
Programming the Hunter-Pro series with an LED keypad Setting a discrete parameter’s values The next example demonstrates how setting a set of discrete parameters (e.g. CMS #1 communication parameters) is performed: the LEDs that illuminate in the upper line mark where the ‘cursor’ is; the LEDs in the bottom line mark the value, which can be one of two, in a way that resembles to the LCD keypad display: illuminating LEDs represent ‘+’... - Page 7 Programming the Hunter-Pro series with a LED keypad 2. Press 339 for the address. The LEDs will illuminate as demonstrated in the figure: 3. Press ENTR. The first digit of the current parameter’s value (1) is displayed: the hex digit of the upper line is 0001 which is decimal ‘1’; therefor, the ‘cursor’ is on the first digit of the number (value).
- Page 8 Programming the Hunter-Pro series with an LED keypad 5. Press 5, the second digit of required value of 35. Again, the ‘cursor’ advances to the next digit which is blank at the moment. Differently from the LCD keypad, the data fields in the LED keypad are fully displayed, even if only part of the field is in use.
-
Page 9: Set Zone #3 To Be A 24 Hrs Zone
Programming the Hunter-Pro series with a LED keypad Set zone #3 to be a 24 Hrs zone 1. Again, start by looking in the parameters address table on chapter 4. Zone #3 characteristics menu (byte 1) has the address of 252. Enter the installer code and press 252. - Page 10 Programming the Hunter-Pro series with an LED keypad 3. Press the NEXT button twice to advance the ‘cursor’ to the 3 parameter, ‘24 Hrs. zone’. 'Cursor’ location: third parameter (left to right) RXN-416 Armed Fault 4. Press the pound key (#) to toggle the parameters value between ‘+’ and ‘-’, i.e.
-
Page 11: The Parameters Table
Programming the Hunter-Pro series with a LED keypad ARAMETERS ABLE Parameter Address Parameter Address PSTN Account ID 12 Communication Private Phone 1 (0-9=Digits Radio Account ID 12 A=Pause B='+' C='#' D='*') PSTN Account ID 13 Private Phone 2 Radio Account ID 13... - Page 12 Programming the Hunter-Pro series with an LED keypad Parameter Address Parameter Address SMS Private Configuration Test Private dialer options (1) Fuse Fail Private dialer options (2) Fuse Restore Out SMS Phone Panic In SMS Phone False Code GSM_Configuration Zone 1 Alarm Report...
- Page 13 Programming the Hunter-Pro series with a LED keypad Parameter Address Parameter Address Zone 5 Restore Report Radio Report Codes Mains Fault Zone 6 Restore Report Mains Restore Zone 7 Restore Report Low Battery Report Zone 8 Restore Report Low Battery Restore...
- Page 14 Programming the Hunter-Pro series with an LED keypad Parameter Address Parameter Address Zone 2 Type Zone 11 Characteristics (byte 2) Zone 3 Type Zone 12 Characteristics (byte 1) Zone 4 Type Zone 12 Characteristics (byte 2) Zone 5 Type Zone 13 Characteristics (byte 1)
- Page 15 Programming the Hunter-Pro series with a LED keypad Parameter Address Parameter Address Zone 5 Partition (1-8) Internal Siren Time Zone 5 Partition (9-16) Alarm Output Time Zone 6 Partition (1-8) Anti-Mask Output Time Zone 6 Partition (9-16) Special Alarm 1 Output Time...
- Page 16 Programming the Hunter-Pro series with an LED keypad Parameter Address Parameter Address General Parameters Screen 2, IOR 2 Type Parameters 9-16 (9=N/A 10=Re- IOR 3 Type trigger Open Zones 11=Display IOR 4 Type Armed Partitions 12=Final Door IOR 5 Type...
- Page 17 Programming the Hunter-Pro series with a LED keypad Parameter Address Parameter Address OUT-1000-7 Partition (1-8) ON/OFF Polarity/Active OUT-1000-7 Partition (9-16) Alarm Polarity/Active OUT-1000-8 Partition (1-8) Audio Control Polarity/Active OUT-1000-8 Partition (9-16) OUT-1000 -1 Polarity/Active IOR Partition 1 (1-8) OUT-1000 -2 Polarity/Active...
- Page 18 Programming the Hunter-Pro series with an LED keypad Parameter Address Parameter Address User 4 Settings (byte 2) User 4 Stop Mins User 5 Settings (byte 1) User 5 Start Hrs User 5 Settings (byte 2) User 5 Start Mins User 6 Settings (byte 1)
- Page 19 Programming the Hunter-Pro series with a LED keypad Parameter Address User 15 Start Mins User 15 Stop Hrs User 15 Stop Mins User 16 Start Hrs User 16 Start Mins User 16 Stop Hrs User 16 Stop Mins User 1 Partition (1-8)
Need help?
Do you have a question about the Hunter-Pro Series and is the answer not in the manual?
Questions and answers