Table of Contents
Advertisement
Quick Links
Advertisement
Table of Contents

Related Manuals for Sony F970


Summary of Contents for Sony F970
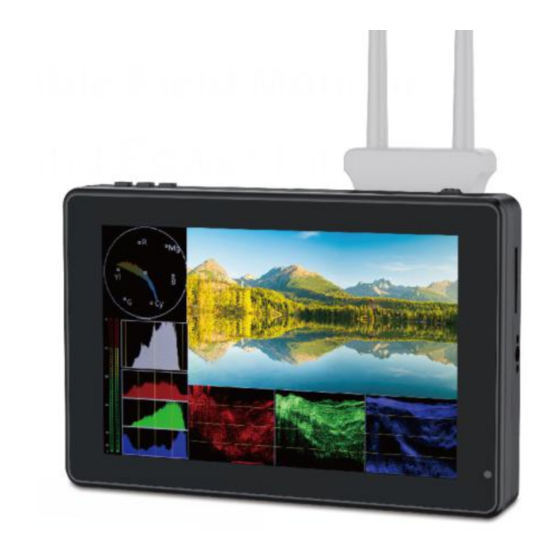
- Page 1 7″ Daylight Viewable Field Monitor F970 Install and Power Kit User Manual...
- Page 2 Mat, Monochrome, Image Freeze, Zoom, Anamorphic etc. It is an ideal, portable and lightweight viewfinder and video monitor. A Sony F970 external install and power kit design is added to the back of the monitor. The external kit can be used to install and install the external equipment, like wireless transmitter, LED light, video converter and others which can be powered by Sony F970 battery.
- Page 3 ● 1920x1200 full HD IPS screen ● 2200nits Daylight Viewable (Light Sensor) ● Sony F970 external install and power kit design can be used to install and supply power to external equipment, easy to install and disassemble, simplify your photography equipment.
-
Page 4: Table Of Contents
1.1 Button Instruction --------------------------------------------- 4 1.2 Port Instruction ------------------------------------------------ 5 1.3 Power Supply Way ------------------------------------------- 6 1.4 Sony F970 Install and Power Kit -------------------------- 7 1.5 Mount Points --------------------------------------------------- 9 2. Menu Operation Instruction ------------------------------ 10 3. Menu Function Instruction -------------------------------- 12 4. -
Page 5: Product Description
1. Product Description 1.1 Button Instruction ①. Indicator Light: After connecting the power, the indicator light is on (red). Long Press button to turn on the monitor, it turns yellow. After the signal is connected, it turns green. ②. MENU: See details: 2.2 MENU Wheel Menu Operation in 2. Menu Operation Instruction ③. -
Page 6: Port Instruction
1.2 Port Instruction ①. F970 Install and Power Kit ⑦. DC 12V Power Input ②. F970 Battery Plate ⑧. HDMI OUT ③. SDI OUT (Optional) ⑨. HDMI IN ④. SDI IN (Optional) ⑩. Power / Touch Function Button Long press to turn on / off; short press to ⑤. -
Page 7: Power Supply Way
1.3 Power Supply Way (1) The rear cover of the monitor is equipped with a F970 battery plate, which is applicable to F970 series of batteries. Sony F970 battery plate for battery of Sony DV: Sony F970 F960 F950 F930 F770 F750 F730 F570 F550 F530... -
Page 8: Sony F970 Install And Power Kit
1.4 Sony F970 Install and Power Kit A Sony F970 external install and power kit design is added to the back of the monitor. The external kit can be used to install and install the external equipment, like wireless transmitter, LED light, video converter and others which can be powered by Sony F970 battery. - Page 9 (3) Steps to remove the kit: ①. Loosen the 2 screws. ②. Use both hands to move the kit up. ③. Move the round holes to the corresponding 2 screws. (You can also install the kit upside down.) ④. Then gently lift the kit upwards and carefully disassemble the 2P power cord. ⑤.
-
Page 10: Mount Points
1.5 Mount Points There are (3) ¼-20 thread points (bottom, right & left) can be easily connected to the hot shoe mount, tripod fixed installation. Tilt Arm Mounting The monitor secures to your camera using the included Tilt Arm via shoe mount or 1/4"-20 thread. -
Page 11: Menu Operation Instruction
2. Menu Operation Instruction After the monitor is properly connected to the power supply, the indicator light is on (red). Long press button to turn on the monitor, the indicator light turns yellow. After the signal is connected, the indicator light turns green. After startup, short press to select to turn the screen touch function on or off. - Page 12 Figure: 2.2 MENU Wheel Menu Operation ①.When the menu is not displayed, directly rotate the wheel to backlight or brightness adjustment. The wheel option can be set to backlight or brightness in the menu ②.Long press the MENU wheel to open the main menu (on the left side of the screen).
-
Page 13: Menu Function Instruction
3. Menu Function Instruction OFF, ON After the Focus Assist is turned on, the Focus Level (1~10) Focus Assist and Focus Color (yellow, red, green, blue, white) can be adjusted. OFF, ON Zebra After the Zebra is turned on, the Zebra Value (1%~100%) can be adjusted. - Page 14 Scan Mode Under Scan, Over Scan auto, 16:9, 16:10, 4:3, 5:4, 1.85:1, 2.35:1, stretch, user Video Aspect Under the “user”, you can customize the Video Width (100% ~ 200%), Video Height (100% ~ 200%) Anamorphic Mode OFF, 1.25x, 1.33x, 1.5x, 2.0x, 2.0x mag OFF, ON Auto Mirror After turning on, the image will automatically adjust upside...
- Page 15 OFF, ON Lut Switch After the LUT Switch is turned on, you can use the Lut (SLOG2, SLOG3, LOGC, VLOG). OFF, ON (With SDI interface version) Lut Out Under the SDI signal, you can choose whether to loop out the LUT after the LUT function is turned on, and the default is off.
- Page 16 Backlight, Volume, Zoom Times After selecting the wheel option, you can click the “<” or “>” Wheel button in the wheel option, or rotate the wheel to select one of the shortcut keys to set it to the rotary wheel adjustment (when the menu is not displayed).
-
Page 17: Support Formats
Exit the menu 4. Support Formats 720p (60/59.94/50/30/29.97/25/24/23.98) 1080i (60/59.94/50) SDI Input 1080p (60/59.94/50/30/29.97/25/24/23.98) Support Format 2048x1080i (60/59.94/50) (SDI version) 2048x1080p (60/59.94/50/30/29.97/25/24/23.98) 720p (60/59.94/50/30/29.97/25/24/23.98) SDI Output 1080i (60/59.94/50) Support Format 1080p (60/59.94/50/30/29.97/25/24/23.98) (SDI version) 480i/480p/576i/576p 720p (60/59.94/50/30/29.97/25/24/23.98) HDMI Input/ 1080i (60/59.94/50) Output Support 1080p (60/59.94/50/30/29.97/25/24/23.98) Format... -
Page 18: Technical Parameters
5. Technical Parameters Panel Size 7” touch screen Resolution 1920 × 1200 pixels Dot Pitch 0.07875 (H) x 0.07875 (W) (mm) Aspect Ratio 16:10 Brightness 2200cd/m (Light Sensor) Contrast 1200:1 Viewing Angle 80°/80°(L/R) 80°/80°(U/D) Backlight Input SDI (Optional), HDMI Output SDI (Optional), HDMI 3.5mm Stereo Headphone Audio... -
Page 19: Trouble Shooting
6. Trouble Shooting Only black and white or monochrome picture ① please check saturation, brightness & contrast adjustment. ② Please check "Monochrome" is in black, white or monochrome image or other condition. NO Image after put on the power ① Check if signal cable connecting is in good condition. ②...
Need help?
Do you have a question about the F970 and is the answer not in the manual?
Questions and answers