Advertisement
Table of Contents
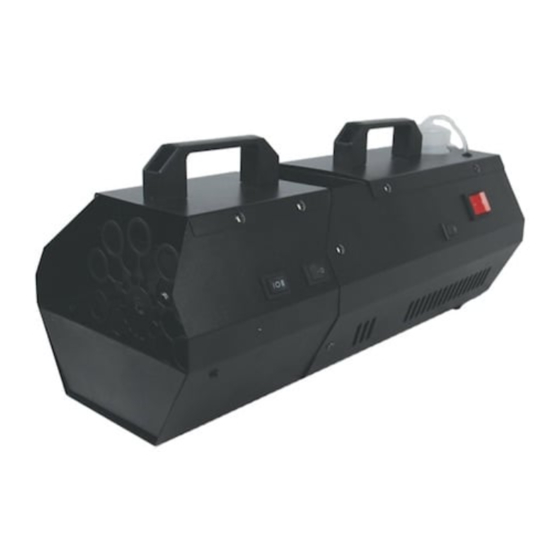
Fobbles F2 400w Fog Bubble User Manual
Diagram:
Please follow these operation, safety and maintenance instructions to ensure a long and safe life for your machine.
UNPACKING & INSPECTION
Open the box to make verify product integrity. In the event that the unit's housing or cable is damaged, do not plug it in and do
not attempt to use it until after contacting your dealer for assistance.
SETUP
•
Remove all packing materials from box and fog machine.
•
Firmly attach trigger control cable to the proper input on the rear of the machine.
•
Place fog bubble machine on a level flat surface, remove fog liquid reservoir cap toward rear of the machine. Fill fog fluid
reservoir with Froggy Fog Brand Fog Fluid. Lower quality fluid can damage the unit. Recap tank.
•
Fill bubble reservoir with a high-quality bubble fluid, such as Froggys Fog Max Bubbles. Lesser quality bubble fluids cannot
withstand the increased pressure of hot fog.
OPERATION
•
Plug power cord into a grounded electrical outlet and switch the main power on via the illuminated red switch.
•
Allow a few minutes for the machine to warm up and for the ready light on the line remote to become illuminated. No
functions of the machine will operate until the unit has come up to temperature.
•
Turning the remote switch on activates the intended function until the unit may need to reheat (depending on settings.)
o Fog Function – Bubble Wand OFF (O), Fan OFF (O), Fog Fluid Pump ON (-)
o Haze Function – Bubble Wand OFF (O), Fan ON (-), Fog Fluid Pump ON (-)
o Bubble Function – Bubble Wand ON (I), Fan ON (-), Fog Fluid Pump OFF (O)
o Fog Bubble Function – Bubble Wand ON (I), Fan ON (-), Fog Fluid Pump ON (-)
Important: Monitor fog reservoir fluid level as you operate, running a fog machine empty can permanently damage the unit. If
output is low, pump is noisy or there is no output at all, unplug immediately. Check fluid level, external fuse, remote connection,
and power connection. If all of the above seem O.K., plug the unit in again. If fog does not come out after holding the remote
button down for 30 seconds, check the fluid hose to make sure there is fluid going through it. If you are unable to determine the
cause of the problem, do not simply continue pushing the remote button, as this may damage the unit. Do not allow the fog
liquid to become contaminated, always replace the caps on the fog liquid container and liquid tank right after filling.
1
Advertisement
Table of Contents

Subscribe to Our Youtube Channel
Related Manuals for Froggy's Fog Fobbles F2


Summary of Contents for Froggy's Fog Fobbles F2
- Page 1 Fobbles F2 400w Fog Bubble User Manual Diagram: Please follow these operation, safety and maintenance instructions to ensure a long and safe life for your machine. UNPACKING & INSPECTION Open the box to make verify product integrity. In the event that the unit’s housing or cable is damaged, do not plug it in and do not attempt to use it until after contacting your dealer for assistance. SETUP • Remove all packing materials from box and fog machine. • Firmly attach trigger control cable to the proper input on the rear of the machine. • Place fog bubble machine on a level flat surface, remove fog liquid reservoir cap toward rear of the machine. Fill fog fluid reservoir with Froggy Fog Brand Fog Fluid. Lower quality fluid can damage the unit. Recap tank. • Fill bubble reservoir with a high-quality bubble fluid, such as Froggys Fog Max Bubbles. Lesser quality bubble fluids cannot withstand the increased pressure of hot fog. OPERATION • Plug power cord into a grounded electrical outlet and switch the main power on via the illuminated red switch. • Allow a few minutes for the machine to warm up and for the ready light on the line remote to become illuminated. No functions of the machine will operate until the unit has come up to temperature. • Turning the remote switch on activates the intended function until the unit may need to reheat (depending on settings.) o Fog Function – Bubble Wand OFF (O), Fan OFF (O), Fog Fluid Pump ON (-) o Haze Function – Bubble Wand OFF (O), Fan ON (-), Fog Fluid Pump ON (-) o Bubble Function – Bubble Wand ON (I), Fan ON (-), Fog Fluid Pump OFF (O) o Fog Bubble Function – Bubble Wand ON (I), Fan ON (-), Fog Fluid Pump ON (-) Important: Monitor fog reservoir fluid level as you operate, running a fog machine empty can permanently damage the unit. If output is low, pump is noisy or there is no output at all, unplug immediately. Check fluid level, external fuse, remote connection, and power connection. If all of the above seem O.K., plug the unit in again. If fog does not come out after holding the remote button down for 30 seconds, check the fluid hose to make sure there is fluid going through it. If you are unable to determine the cause of the problem, do not simply continue pushing the remote button, as this may damage the unit. Do not allow the fog liquid to become contaminated, always replace the caps on the fog liquid container and liquid tank right after filling.
- Page 2 MAINTENANCE Cleaning your fog bubble machine regularly will help reduce costly parts replacement and repair charges. Please follow these instructions for safely cleaning after 40 hours of operation or before storing the fog bubble machine, to ensure long lifespan. Tools: Clean lint free cloth, coffee filter or similar fine mesh filter cloth, plastic or glass container larger than the reservoir size (do not use metal), distilled water and Froggys Fog fluid. Allow the machine to cool down enough to be able to handle. Drain any fog solution that remains in the tank, through the filter, into the container. You may need to pour out the solution in steps depending on the filter mesh. Add distilled water to fill the machine reservoir approximately 1/3. Run machine for 10 minutes. Fog will come out the first few cycles, followed by distilled water vapor. Turn off smoke machine and allow to cool down, then drain the distilled water from the reservoir. Refill the reservoir approximately 1/3 with good quality fog solution. Turn smoke machine on, run for 10-15 minutes. Distilled water vapor will come out the first few cycles, followed by fog. Allow steam to come out of the machine for 5-10 cycles. Turn off machine and allow to cool, then wipe machine clean with clean lint free cloth. Leave the fog solution in the reservoir. The fog solution acts a lubricant and conditioner for the plastic and rubber parts in the fluid pump. Store the smoke machine in a cool, dry place when not in use. Avoid freezing temperatures, high heat above 120 degrees and humid/damp locations which may cause control board failure. If possible, remove from storage after 6 months and operate the smoke machine for 15 minutes or more, then repeat step 8 – 10. SAFETY WARNINGS • Under normal use, bubble solution can build up on surfaces beneath and in front of the machine. Exercise care during use to avoid slipping hazards. • Keep this device dry. The unit may be used outdoors, but must be shielded from inclement weather. Turn off or unplug when not in use. • Use 3-prong grounded electrical outlet only. Prior to use take care to determine that the unit is installed at the rated voltage. • Always unplug your fog machine before filling its tank. • Keep fog machine upright on a level surface or hang from bracket at no greater than 15-degree angle. • The machine is not waterproof or splash proof. If any moisture gets inside the housing, immediately unplug and contact a service technician or your dealer before using it again. • No user serviceable parts inside. Refer to your dealer or other qualified service personnel. • For adult use only. Fog machine must be installed out of the reach of children. Never leave the unit running unattended. • Never point the nozzle directly at people. Fog machine output is very hot (300 degrees C). • Locate the fog machine in a well-ventilated area. Never cover the unit’s vents. Provide adequate ventilation and allow free air space of at least 6”...
Need help?
Do you have a question about the Fobbles F2 and is the answer not in the manual?
Questions and answers