STIEBEL ELTRON DHE 18 AU Operation And Installation
Ully electronically controlled comfort instantaneous water heater
Hide thumbs
Also See for DHE 18 AU:
- Operation and installation (24 pages) ,
- Operation and installation manual (24 pages)

Related Manuals for STIEBEL ELTRON DHE 18 AU


Summary of Contents for STIEBEL ELTRON DHE 18 AU
- Page 1 OPERATION AND INSTALLATION Fully electronically controlled comfort instantaneous water heater » DHE 18 AU » DHE 27 AU...
-
Page 2: Table Of Contents
CONTENTS SPECIAL INFORMATION 13.8 Operation with preheated water ���������������������������� 16 13.9 Horizontal installation of the appliance �������������������� 17 OPERATION Service information ���������������������������������������� 17 General information �����������������������������������������4 Troubleshooting �������������������������������������������� 18 Safety instructions ����������������������������������������������� 4 15.1 Fault code display ���������������������������������������������� 18 Other symbols in this documentation ����������������������� 4 Units of measurement ������������������������������������������... -
Page 3: Special Information
SpECiAl iNfOrmATiON SpECiAl iNfOrmATiON - Observe the maximum permissible pressure (see chapter "Installation / Specification / Data table"). - The appliance may be used by children over - The specific water resistivity of the mains 3 years of age and persons with reduced water supply must not be undershot (see physical, sensory or mental capabilities or a chapter "Installation / Specification / Data... -
Page 4: Operation
OpErATiON General information OpErATiON Other symbols in this documentation Note General information is identified by the adjacent symbol. f Read these texts carefully. General information The chapters "Special information" and "Operation" are intended Symbol meaning for both users and qualified contractors. Material losses The chapter "Installation"... -
Page 5: Test Symbols ������������������������������������������������������ 5 17.3 Dhw Output
OpErATiON Appliance description Heating system CAUTION Burns If children or persons with limited physical, sensory or The bare wire heating system is enclosed within a pressure-tested mental capabilities use the appliance, set a temperature plastic jacket. The heating system with its stainless steel heater limit. -
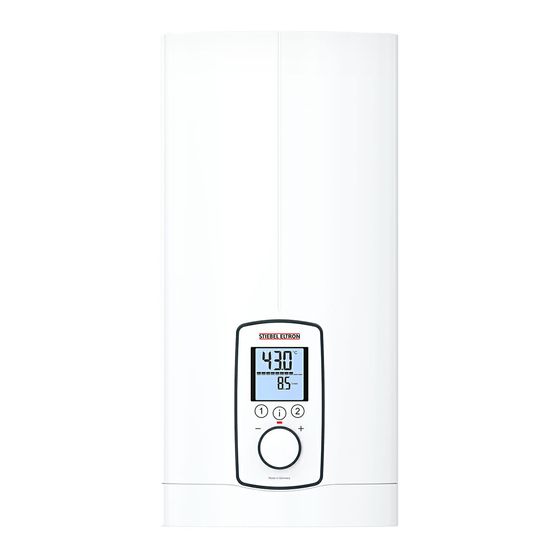
Page 6: Selecting The Set Temperature
OpErATiON Settings and displays Selecting the set temperature Info menu The appliance has an additional display where consumption values can be shown. 4.8.1 Calling up the info menu f Briefly press "i" until "i 1" appears, then continue to press "i" to see further menus. - Page 7 OpErATiON Settings and displays 4.9.2 Parameter menu menu Description Selectable display | Explanations Symbol | setting display P 1 ECO water and energy OFF | ECO1 | ECO2 | ECO3 The ECO function enables you to limit the flow rate to a maximum saving function value.
-
Page 8: Recommended Settings
OpErATiON Cleaning, care and maintenance menu Description Selectable display | Explanations Symbol | setting display P 11 Resetting the consump- Reset ( You can reset the consumption values. "rSEt" is shown on the display. tion values f Press "1" and "2" simultaneously and hold for longer than 5 sec- onds. -
Page 9: Troubleshooting
OpErATiON | iNSTAllATiON Troubleshooting iNSTAllATiON Troubleshooting problem Cause remedy The appliance will not There is no power. Check the fuses / MCBs in start despite the DHW your fuse box / distribu- Safety valve being fully open. tion board. The aerator in the tap Clean and/or descale the or the shower head is aerator or shower head. -
Page 10: Appliance Description
iNSTAllATiON Appliance description Appliance description Oversink installation Standard delivery The following are delivered with the appliance: - Wall mounting bracket - Installation template - 2 plugs - 2 extensions - 2 caps - 2 tees 1 Cold water inlet 2 DHW outlet - 8 flat gaskets - Strainer Note... -
Page 11: Installation
10. Installation Fitting the wall mounting bracket factory settings DHE 18 AU DHE 27 AU Internal anti-scalding protection Tmax (= 60 °C) Tmax (= 60 °C) Standard installation DHE 18 AU DHE 27 AU Electrical connection from below on unfinished walls... - Page 12 iNSTAllATiON installation Installing the appliance f Screw the pre-assembled parts with flat gaskets to the cold water and DHW pipes of the appliance. Note f Fit the cold water inlet pipe and the DHW outlet pipe from If you are installing the appliance with flexible pipe con- the pipework with flat gaskets to the extensions from the nections, also secure the back panel with a screw.
-
Page 13: Commissioning
iNSTAllATiON Commissioning 11. Commissioning Note For undersink installation, the appliance cover should be 11.1 Preparation turned the other way up for easier operation; see chapter "Installation alternatives / Rotated appliance cover". Internal anti-scalding protection via jumper slot Fit the appliance cover 43 °C Tmax 1 Jumper for anti-scalding protection setting... -
Page 14: Recommissioning
iNSTAllATiON Appliance shutdown 13.1 Electrical connection from above on unfinished walls f Switch on the power supply. 11.2.1 Appliance handover f Explain the appliance function to users and familiarise them with how it works. 1 Cable entry installation aid f Make the user aware of potential dangers, especially the risk f Prepare the power cable. -
Page 15: Electrical Connection On Unfinished Walls From Below With Short Power Cable
iNSTAllATiON installation alternatives 13.2 Electrical connection on unfinished walls from below with short power cable 1 Tee for cold water 2 Tee for domestic hot water 3 Cap f Fit the water connections. f Reposition the mains terminal further downwards. To do this, undo the fixing screw. -
Page 16: Wall Mounting Bracket When Replacing An Appliance
iNSTAllATiON installation alternatives 13.5 Wall mounting bracket when replacing an 13.7 Rotated appliance cover appliance The appliance cover should be turned the other way up for un- dersink installation. An existing STIEBEL ELTRON wall mounting bracket may be used when replacing appliances (except the DHF instantaneous water heater), as long as the fixing screw is in the lower right position. -
Page 17: Service Information
iNSTAllATiON Service information 14. Service information 13.9 Horizontal installation of the appliance Note Overview of connections For the horizontal installation alternative, please note the following points: - Installation is only permissible with direct wall mounting. - The installation versions "Installation with offset tiles"... -
Page 18: Troubleshooting
iNSTAllATiON Troubleshooting 15. Troubleshooting Signals of the diagnostic traffic lights (lED) WARNING Electrocution Lights up in the event of a fault To test the appliance, it must be connected to the power Yellow Illuminates in heating mode/flashes when output limit supply. -
Page 19: Specification
iNSTAllATiON maintenance 16. Maintenance 17. Specification 17.1 Dimensions and connections WARNING Electrocution Before any work on the appliance, disconnect all poles from the power supply. ≤ 20 This appliance contains capacitors which are discharged when disconnected from the power supply. The capacitor discharge voltage may briefly exceed 60 V DC. -
Page 20: Pressure Drop
Connected load in kW 38 °C DHW output in l/min. rated voltage Cold water inlet temperature 380 V 400 V 415 V 5 °C 10 °C 15 °C 20 °C DHE 18 AU 16.2 10.1 12.9 18.0 11.2 14.3 19.4 12.0 15.4 DHE 27 AU 23.5 10.2... - Page 21 INSTALLATION | ENVIRONMENT AND RECYCLING Specification 17.7 Data table DHE 18 AU DHE 27 AU 202658 202659 Electrical data Rated voltage Rated output 16.2 19.4 23.5 Rated current 24.7 35.6 37.7 38.9 Fuse protection Frequency 50/60 50/60 50/- 50/- Phases...
- Page 22 Contact person: Customer Service Representative The Stiebel Eltron warranty for the unit is in addition to any rights E-mail: service@stiebel.com.au and remedies you may have under the Australian Consumer Law.
- Page 23 NOTES www.stiebel-eltron.com DHE AU |...
- Page 24 Deutschland Verkauf Tel. 05531 702-110 | Fax 05531 702-95108 | info-center@stiebel-eltron.de STIEBEL ELTRON GmbH & Co. KG Kundendienst Tel. 05531 702-111 | Fax 05531 702-95890 | kundendienst@stiebel-eltron.de Dr.-Stiebel-Straße 33 | 37603 Holzminden Ersatzteilverkauf Tel. 05531 702-120 | Fax 05531 702-95335 | ersatzteile@stiebel-eltron.de Tel.
Need help?
Do you have a question about the DHE 18 AU and is the answer not in the manual?
Questions and answers