
Subscribe to Our Youtube Channel
Related Manuals for Xo XOU24BCGO


Summary of Contents for Xo XOU24BCGO
- Page 1 WATCH THE INSTALLATION VIDEO ON OUR CHANNEL XOU24BCGO I worked really hard on this manual - PANEL READY BEVERAGE CENTER so please read it...
- Page 2 Before you proceed, take just a moment to register your XO at: www.xoappliance.com/register-your-product/ REGISTRATION HELPS YOU BY - Ensuring warranty coverage should you need service Providing ownership verification for insurance purposes Let’s XO notify you in the event of product changes or recalls.
-
Page 3: Where Things Are
Electrical and Grounding Instructions 8 - 1 3 Installation Instruc tions Sizes and Installation Dimensions Integrated Panel Dimensions Leveling Your XO O p erating Instruc tions 14 - 20 Product Over view Control System Over view Set ting the Temperature... - Page 4 the job isn’t done until To ensure that the installation process is successfully completed, here are few things to review... Is the unit plugged in? Are the controls on? (Panel will illuminate.) Are the controls operating correctly? Has the unit been properly leveled - both side to side and front to back - with all 4 leveling feet securely making contact with the floor? This is an OVERLAY unit - have the panels been securely attached and properly aligned? After installation, does the door open sufficiently to fully extend the shelves?
- Page 5 these are the models covered in this book BEVERAGE CENTERS XOU24BCGOR XOU24BCGOL take a minute to circle your model above and record your serial number here in case you need it later...
- Page 6 For maximum efficiency, keep the door tightly shut unless loading or unloading and never overload your XO unit. Before installing, allow your XO unit to sit upright for 2 hours at the install site. This will allow the cooling system to stabilize after transportation. Failure to follow this step may cause problems.
- Page 7 Damages caused by ambient extremes are not covered by the warranty Your XO unit is built to operate on 115V 60Hz and should be plugged directly into a dedicated 15 amp 3 prong outlet. If you are uncertain as to the...
- Page 8 - or - install under counter ALL XO UNDERCOUNTER UNITS ARRIVE PRE-WIRED WITH LOW PROFILE PLUGS FOR EASY INSTALLATION 34 1/8” MIN 7" 4" 24” WHEN INSTALLING WITH THE HINGE SIDE NEXT TO A WALL -...
- Page 9 ( or small, as the case would be height & width XOU24BCGOR & XOU24BCGOL 24” BEVERAGE CENTER 1/8” HIGH 23 7/8” WIDE depth MODELS WITH OVERLAY DOORS WITH THE DOOR OPEN AT 90 23 3/4”...
- Page 10 HOLE TEMPLATES 3/4” FRAME 3/8” DOOR SIDE 13/32” AFTER INSTALLATION UNDERC OUNTER, OVERLAY DOOR MUST BE ABLE TO OPEN 90 . MAXIMUM PANEL THICKNESS 3/4” PANEL MAXIMUM WEIGHT: 20 lbs. * FOR CABINET DOORS LONGER THAN 30” - CONSULT XO.
- Page 11 let’s face it BEFORE BEGINNING - REST THE UNIT ON ITS BACK, WITH THE DOOR FACING UP 1. Remove the two screws that hold the toe kick in place. Remove the toe kick and set aside. 2. Remove the three screws holding the lower hinge in place. Remove the hinge and set aside.
- Page 12 8. Remove the clamps and re-install the rubber gasket by pressing it into the slot making sure it is evenly seated. 9. Place the door back in position and slide to up onto the upper hinge pin, then square it up with the cabinet.
- Page 13 it’s like zen - but cooler get your level out DO NOT NEGLECT THIS IMPORTANT STEP Rotate to raise or lower the LEVELING LEGS located at each of the four corners until all four legs are seated firmly on the floor and the interior floor of the unit is level both front to back and side to side.
-
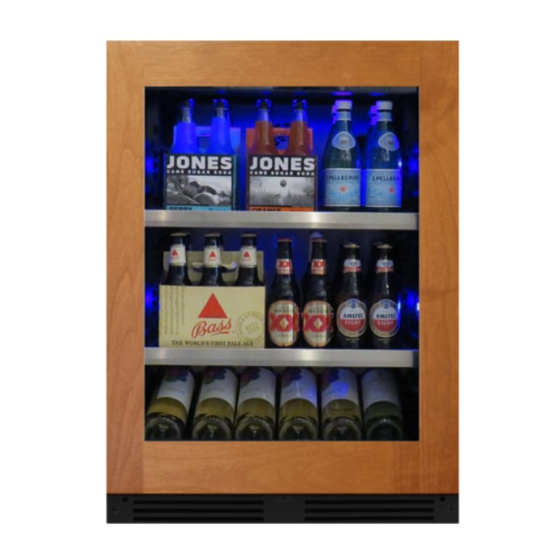
Page 14: Beverage Center
LEVELING LEGS WHAT’S THAT NOISE... You new XO is designed for quiet operation but you may hear some sounds your old unit didn’t make. Because they are new you might be concerned, but they are usually normal. Sounds can also be amplified by hard surfaces like flooring or tiles. Here is a description of the types of sounds you might hear and what might be causing them. - Page 15 a little extra beverage center Your 24” XOU24BCGSO Beverage Center comes with a removable 6 bottle wine cradle which can be used to store, display or serve. The cradle is designed to fit in the bottom of the unit below the bottom shelf. The cradle is included, the wine is not.
-
Page 16: Take Control
Beverage Center Temp. Settings Adjustable Range: 34 F to 50 F Your XO Beverage Center remembers your last temperature setting in case of a power failure and automatically adjusts to the previous setting when power is restored. When the +/- button is pressed, your beverage center automatically enters set up mode. - Page 17 Press the icon again and the lights will change to honey amber. When you turn you XO Unit on, it is set to work in Standard Mode. Press and ECO Mode is turned on, ECO Mode is an energy saver function.
- Page 18 single zone control beverage centers ON /OFF But ton Press & Hold for 1 Second to turn ON Press & Hold for 3 Seconds to turn OFF Press to Silence Alarm Light Function But ton Toggle Bet ween 3 Light Functions L1, L2, L3 Indicator Light TEMPER ATURE D ISPL AY...
- Page 19 how many 12 oz cans can this hold Top view of shelf showing packing density. Store wine in seal ed bot tl es only Avoid overloading Storing lit t l e or no produc t can cause excessive condensation...
- Page 20 ALL S HELVES M UST BE PUS HED ALL THE WAY I N BEFORE CLOSI NG THE DOOR DOOR MUST BE FULLY OPENED BE FORE PULLI NG SHELVES OUT Easy to change + more shelf positions give you more storage options with XO.
-
Page 21: Energy Savi Ng Ti P
Door Surface - Use only mild, non-abrasive detergents applied with a clean sponge or soft cloth. Rinse well with damp cloth. NOTE: Do not use cleaners containing ammonia or alcohol on your XO unit. Ammonia or alcohol can damage the appearance of the appliance. - Page 22 a breathe of fresh air for best results change every 3 to 6 months Your Air Refresh Ch arcoal Filter s Located H ere P/N: XOUAIRFILTER Rotate the filter 1/4 turn to unlock Pull straight out to remove Align the tabs and inser t the new filter Rotate filter 1/4 turn to lock in place...
- Page 23 This may be a sensor malfunction. Unplug the unit and call for service. more “q & a” Why does condensation form on the inside or outside of my XO unit? It may be that the door is either opened repeatedly or not closed completely. It may also be due to an excessive ambient humidity, in which case it will clear when the humidity drops.
- Page 24 OUTSIDE U.S. This warranty does not apply to, and XO is not responsible for, any warranty claims made on products sold or used outside the 48 continental United States.
Need help?
Do you have a question about the XOU24BCGO and is the answer not in the manual?
Questions and answers