
Related Manuals for Ametek TM2000 Pro


Summary of Contents for Ametek TM2000 Pro
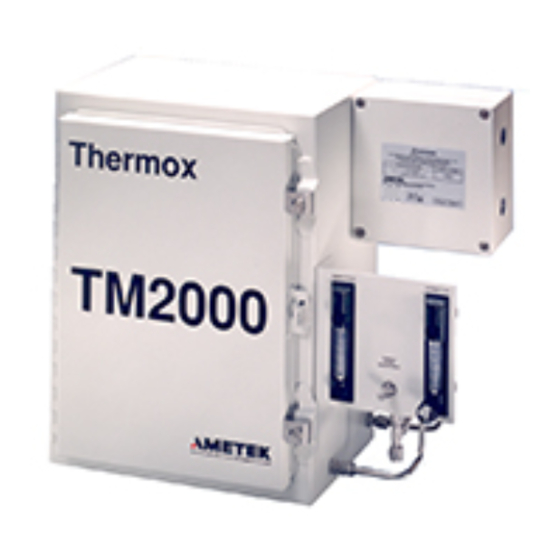
- Page 1 TM2000 Pro Oxygen Analyzer User Manual Process Instruments 150 Freeport Road Pittsburgh, PA 15238 PN 90469VE, Rev. L...
- Page 2 If the instrument or procedures are used for purposes over and above the capabilities specified herein, confirmation of their validity and suitability should be obtained; otherwise, AMETEK does not guarantee results and assumes no obligation or liability. This publication is not a license to operate under, or a recommendation to infringe upon, any process patents.
-
Page 3: Table Of Contents
Contents Offices ........................ii Safety Notes ......................viii Electrical Safety ....................viii Grounding ......................viii Warning Labels ......................ix Environmental Information (WEEE) ..............ix Electromagnetic Compatibility (EMC) ..............x Equipment Used in Class I, Division 2 Hazardous Locations .......xi CHAPTER 1 Overview TM2000 Oxygen Analyzer System Features ............1-1 Sensor ........................ - Page 4 Alarm Contact Connections ............... 3-20 Remote Calibration Unit Connections ............3-21 Digital input to initiate remote calibration unit ........3-21 RS-485 Communications Connections ............3-22 Option Card Installation ................... 3-24 Removing Display Module or Power Supply/Keypad ......3-24 Adding an Option Card ................3-25 Removing an Option Card .................
- Page 5 Configuring the relay ................4-17 Select Function ................... 4-17 Defining the select function ..............4-18 Service Alarm ..................... 4-18 Watchdog Relay ..................4-18 Exception Log .................... 4-19 Accessing the Exception Log ............... 4-19 Analog Range Key .................... 4-20 Analog Output Port ..................4-20 Selecting an analog output port ............
- Page 6 Two-Gas Calibration ..................5-18 Auto Calibrate .................... 5-18 Remote Calibrate ..................5-19 Manual Calibrate ..................5-20 Initiate Verify ....................5-22 Auto Verify ....................5-22 Remote Verify .................... 5-23 Manual Verify ..................... 5-24 Cal/Verify Data ....................5-26 Setting Up Cal/Verify Data Option ............5-26 Calibration data ..................
- Page 7 Development Serial Communication Commands ..........A-5 Command List ....................A-6 Responses ......................A-7 Variable Table ....................A-8 Sample Program ....................A-12 APPENDIX B Menu Option Charts Setup Key Menu ....................B-1 Calibrate Key Menu ....................B-2 Calibrate Key - Set Cal Timers Submenu ............B-2 Alarm Key Menu ....................B-3 Analog Range Key Menu ...................B-3 APPENDIX C Current Outputs: Other Applications...
-
Page 8: Safety Notes
Safety Notes wARnings, cAuTions, and noTEs contained in this manual emphasize critical instructions as fol- lows: An operating procedure which, if not strictly observed, may result in personal injury or envi- ronmental contamination. An operating procedure which, if not strictly observed, may result in damage to the equip- ment. -
Page 9: Warning Labels
Achtung - Heiße Oberfläche Environmental Information (WEEE) This AMETEK product contains materials that can be reclaimed and recycled. In some cases the product may contain materials known to be hazardous to the environment or human health. In order to prevent the release of harmful substances into the environment and to conserve our natural resources, AMETEK recommends that you arrange to recycle this product when it reaches its “end of life.”... -
Page 10: Electromagnetic Compatibility (Emc)
Electromagnetic Compatibility (EMC) Read and follow the reommendations in this section to avoid performance variations or dam- age to the internal circuits of this equipment when installed in harsh electrical environments. The various configurations of the TM2000 Oxygen Analyzer should not produce, or fall victim to, elec- tromagnetic disturbances as specified in the European Union’s EMC Directive. -
Page 11: Equipment Used In Class I, Division 2 Hazardous Locations
501.4(b) or CEC 18-152) and in accordance with the authority having jurisdiction. If the TM2000 is to be powered by a source of 24 VDC other than that supplied by AMETEK, the power source’s output must be isolated from hazardous mains voltages using double or reinforced insulation which has a minimum dielectric strength of 2300 VAC. - Page 12 Series 2000 Controller and the PPM RCU also conform to the following safety standard: UL 1604 UL Listed Process Control Equipment for Use in Hazardous Locations Manufacturer’s Address in Europe: AMETEK Precision Instruments Europe GmbH Rudolf-Diesel-Strasse 16 D-40670 Meerbusch, Germany Mark Coppler...
- Page 13 Process photometric analyzers, process moisture analyzers, and sampling systems are warranted to perform the intended measurement, only in the event that the customer has supplied, and AMETEK has accepted, valid sample stream composition data, process conditions, and electrical area classification prior to order acknowledgment. The photometric light sources are warranted for ninety (90) days from date of shipment.
- Page 14 This page intentionally left blank. xiv | TM2000 Oxygen Analyzer...
-
Page 15: Chapter 1 Overview
OVERVIEW TM2000 Oxygen Analyzer System Features Series 2000 Control Unit: • Modular design. For serviceability and future expansion. • 4-line x 20-character display. The Display section in the Controller/User Interface chapter defines the type of information the control unit can display. On-line help and system diagnos- tics messages are also available. • Two isolated linear current outputs. Each output can be scaled using software for a 4-to-20 mA or 0-to 20-mA current output, and can be reversed to provide a 20-to-4 mA or 20-to-0 mA output. • Two independent alarms. Each alarm is high- or low-selectable. Functions the alarms can track are defined in the Controller/User Interface chapter. • Diagnostics capabilities. These include a watchdog timer and service alarms; system tests for A/D, RAM, EEPROM, and keypad. Display line 4 is reserved for full-text error and diagnostic messages which can be used to troubleshoot. An exception log is also provided to help with diagnostics. • RS-485 two way communications. • Oxygen cell lifetime extender capabilities. • Multiple calibration options. These include completely automatic, timed calibrations using the optional remote calibration unit (RCU). The RCU can automatically verify that your system is within calibration without actually changing your calibration set- tings. -
Page 16: Sensor
Sensor The TM2000 has no operator-serviceable components. Never open the sensor or controller covers. Refer all servicing to qualified ser- vice personnel. Basic Elements of the Sensor The TM2000 analyzer consists of the following basic systems: • Plumbing: Flow control valve, all inlet and outlet tubing, sensing cell and the sensing cell fitting. • Measuring System: Sensing cell, sensor board, interconnecting wiring and the control unit. • Temperature System: Electrical cell heater (furnace), the type “K” thermo- couple (monitors furnace operating temperature), and the sensor board con- taining cold junction thermocouple compensation, interconnect wiring and the control unit. The temperature system keeps the sensing cell at a constant temperature. -
Page 17: Hydrocarbons
at a constant temperature. Some newer high-temperature insitu models use the heat from the process to heat the sensor; the process temperature is continuously measured and used in the software calculation. The oxygen content is then deter- mined from the Nernst equation. Where R and F are constants, T is absolute temperature and O and O are the oxygen partial pressures on either side of the cell. For measuring oxygen in non-combustible gases, the calibration of an analyzer is obtained from the formula: E = AT Log 20.9% AT = 44.0 at 615°C Unk% Where A is constant, T is the cell temperature on an absolute scale (°C + 273) and Unk% is the unknown oxygen concentration of the gas to be analyzed (calcu- lated by the analyzer). The cell produces zero voltage when the same amount of oxygen is on both sides. The voltage increases as the oxygen concentration of the sample decreases. The voltage created by the difference in the sample gas and the reference air is carried by cable to the microprocessor control unit where it is linearized to an output signal. Because of the high operating temperature of the cell, combustible gases that are present may burn. -
Page 18: Proper Sensor Operations
Proper Sensor Operations Ensure your analyzer operates with minimum maintenance and troubleshooting by avoiding these common errors: • Do not use pipe dope or any other contaminant that gives off combustible va- por. This can cause erroneous measurements on joints of the sample tubing. • Do not use calibration gases if they contain a mixture of oxygen and combus- tibles. • Always introduce calibration gases at the recommended flow rate. • When working on the plumbing inside the sensor cabinet, turn the power off. The heater has exposed windings and a short to the plumbing will blow the fuse and could damage the furnace or thermocouple. • Do not handle the cell excessively. Do not try to clean the cell except by rins- ing. • Do not remove a cell or type “K” thermocouple that you may want to use again when the inside of the furnace is still hot. Severe thermal shock can be destructive to both of them. • Always replace the Viton O-ring when replacing the oxygen cell. • Allow at least one hour after closing the sensor door for readings to stabilize. Allow more time after a cold start-up. • If calibrating in the PPM range, calibration gas should be in cylinders made of aluminum, not carbon steel. 1-4 | TM2000 Oxygen Analyzer... -
Page 19: Technical Support
Technical Support AMETEK/Thermox is committed to providing the best technical support in the industry. If you need service or application assistance, please call AMETEK at (412) 828-9040, or your local AMETEK/Thermox representative. Before you call the factory for technical support, run test gases and record the following values (you may be asked by the factory to provide this information when receiving service): • Cell millivolts • Thermocouple millivolts • Cell temperature See the “Display” section in Chapter 4 for help on how to display this informa- tion on the Series 2000 control unit. If you need to return equipment, you will be asked to provide the following infor- mation before obtaining a Return Material Authorization (RMA) number. • Billing and shipping address • Model number • Serial number • Purchase Order number • Telephone number Before returning material, you must get an RMA number from the ... - Page 20 This page intentionally left blank. 1-6 | TM2000 Oxygen Analyzer...
-
Page 21: Control Unit
SpecificationS control Unit 4-line x 20-character vacuum fluorescent. Displays combinations of oxygen (0.1 PPM O to 100%, auto-ranging), time and date, cell Display temperature, user-programmable text, thermocouple mV or cell mV. Password protection, programmable pressure compensation and context-sensitive help are also provided. Two isolated linear current outputs. -
Page 22: Sensor
General purpose wall mount, general purpose 19” rack mount, gen- eral purpose panel mount, weatherproof NEMA 4 (IP 56) wall/panel enclosure mount, and stainless steel weatherproof NEMA 4X (IP 56) wall/panel mount. All are UL Listed for NEC Class I, Division 2 areas. Purged and explosion-proof versions available. - Page 23 INSTALLATION AND START-UP The operations in this chapter should be performed only by quali- fied service personnel experienced with electrical safety techniques. There are no operator-serviceable components inside the TM2000 system. Never open the sensor or controller covers. Never service the controller or sensor unless power has been disconnected from the controller and sensor, and the sensor has been allowed to cool for at least one hour.
-
Page 24: Mechanical Installation
Mechanical Installation Sensor Mounting Gas Plumbing Sample Gas/Calibration Gas Requirements Pressure and Flow Plumbing Options Remote Calibration Unit Installation Sensor -18 °C to 50 °C (0 °F to 122 °F) Ambient Temperature Range Sensor Mounting The TM2000 sensor enclosure is a NEMA 3R (IP54)-rated, polyurethane-coated, carbon steel cabinet that can be mounted on a wall or a pole. Figures 3-1 and 3-2 show mounting dimensions and location of the sample inlet for a TM2000 sensor without sample bypass (3-1) and with sample bypass (3-2) option. -
Page 25: Sample Gas/Calibration Gas Plumbing
Mount the sensor as close to 9.24 23.47 the sampling system as pos- 5.81 sible to improve the response 14.77 Power Cables time and to reduce chances of 1.75 condensing moisture reach- 4.45 ing the sensor. 3.00 8.00 7.62 20.32 Control Cables 14.00 35.56... -
Page 26: Pressure And Flow Requirements
Always use the same flow rate for calibration gases and sample gas to main- tain accuracy. Regulate the calibration gases to provide a delivery pressure that is the same as the sample gas pressure to prevent damage to the sensing cell. -
Page 27: Manual Calibration Setup (No Rcu)
Plumbing options If you do not have the factory-provided RCU, you must provide an- For analyzers with a Remote Calibration Unit (RCU), other means to switch between your sample and calibration gases. refer to the instructions in the NOTE “Clean Gas RCU Installa- tion”... -
Page 28: Rcu Mounting
Once you connect the sample gas, zero calibration gas, and span calibration gas, the RCU automatically switches between the sample and calibration gases during an auto calibration. RCU Mounting Figure 3-5. Clean gas RCU mounting dimensions. Mount the sensor as close to the sampling system as pos- sible to improve the response time. Max distance from sensor: 15 feet (4.58 meters) Max ambient temperature: 122 °F (50 3-6 | TM 2000 Oxygen Analyzer... -
Page 29: Rcu Plumbing
RCU Plumbing All RCU inlet connections are 1/8”compression fittings. NOTE 1. Connect the zero calibration gas to the ZERO gas inlet (2) on the RCU. 2. Connect the span calibration gas to the SPAN gas inlet (3) on the RCU. 1/8” Compression Fittings Sample 1. Sample Inlet 2. Zero Gas Inlet Zero 3. Span Gas Inlet 4. Sample Outlet Sample In Span 3/16” Barbed Fitting 5. - Page 30 (Figure 3-8) Sample 1. Connect the sample gas from your process to Zero the sample inlet on the TM2000 sensor. This connection is located on the bottom of the Sample In Span Bypass T-fitting, and is a 1/4” tube fitting. 2. Connect 1/8” tubing from the top of the Bypass T-fitting to the connection labeled SAMPLE IN (1) on the RCU. 3. Connect 1/8” tubing between the connection Inlet Valve Fitting (1/4”) labeled SAMPLE OUT (4) on the RCU and the To RCU Inlet Valve Fitting on the TM2000 sensor. Sample In 1/4” to 1/8” Reducer fitting (Customer-Installed) Bypass T-Fitting...
-
Page 31: Ppm Measurement Suggestions
PPM Measurement Suggestions You can calibrate using percent gases and still operate using PPM gases. This section provides information for using the TM2000 in low PPM ranges. NOTE Use the sample bypass option to improve response time. NOTE Use Percent Calibration Gases Use percent oxygen calibration gases to calibrate your system, even if your sample gas is in the low PPM oxygen range. These gases are less expensive... -
Page 32: Control Unit Mounting
Control Unit Mounting Find the section that corresponds to the type of control unit mounting configura- tion you ordered, then mount as shown in that section. Weatherproof Panel Figure 3-10 ¼”-diameter fasteners Wall Figure 3-11 ¼”-diameter fasteners 3/8” or 1/2” diameter U-bolt Pole Figure 3-11 (customer-supplied) for a 2... - Page 33 Figure 3-10. Weatherproof panel mount. Figure 3-11. Weatherproof wall/ pole mount. Installation and Start-Up | 3-11...
- Page 34 12.31 5.88 35.58 14.94 12.00 Flange 7.50 30.48 19.05 8.00 5.31 20.32 13.49 13.81 1.50 Pressure 35.08 13.56 Gauge 3.81 34.44 Exhaust Restriction 1.72 4.37 1.28 3.25 1/2” Conduit Metering Entry (2.22 cm) Valve 2.00 Figure 3-12. 5.08 (2) 3/4” Conduit Entries Purge Air Inlet (2.70 cm) Weatherwproof wall/z-...
- Page 35 Figure 3-14. General purpose rack mount. Figure 3-15. General purpose wall mount. Installation and Start-Up | 3-13...
- Page 36 Wiring Connections to the control unit are made through the wiring card. Disconnect AC mains power from the controller before wiring. Wiring Card Location on Control Unit GP Rack Mount Rear of controller GP Panel Mount Rear of controller GP Wall Mount Front bottom of control unit To access the wiring card for all GP control unit versions, unscrew the four screws on the wiring card chassis cover plate.
-
Page 37: General Wiring And Conduit Requirements
General Wiring and Conduit Requirements • Sensor wiring conductors must be rated at a minimum of 80° C. All other wiring conductor ratings should be for the minimum temperature required for the equipment being connected to the analyzer, but not less than 60° C. • Follow all applicable electrical codes for your location. • Use only the applicable NEMA-approved conduit fittings or cable fittings to maintain the NEMA rating for the Series 2000 controller or sensor enclosure. If not using a conduit entry, leave the factory NEMA-approved plugs intact. Never leave any holes unplugged. • For AC mains supply wiring, use between 12 and 14 American Wire Gauge (AWG). For all signal wiring, other than to the sensor, use 18 to 22 AWG. For sensor connections, Figure 3-17 shows the recommended sensor cabling. Sensor Type Number of Twisted Gauge Wire Pairs Needed 22 (to 250 ft.) Figure 3-17. -
Page 38: Control Unit Ac Mains Supply Connections
Control Unit AC Mains Supply Connections Follow general grounding and shielding requirements for all wiring as described in the “General Wiring Requirements” section. Do not run control unit AC mains supply wiring in the same conduit with other AC mains supply wiring. Keeping this wiring separate prevents transient signals from reaching the control unit. -
Page 39: Transient And Rfi Interference
• General Purpose control unit Connect all shields for the conduit entry (other than power) to a supplied shield terminal ring (Figures 3-18a and b). This shield ring is a stainless steel ring with a metal tab. Place the shield ring under the conduit nut. Crimp the shields from all cables for that conduit entry to a ¼” female quick disconnect, then push it onto the tab that sticks out of the conduit shield ring. Keep the shields as short as possible. Figure 3-18a. Figure 3-18b. Direct shield GP method. Direct shield Weatherproof enclosure method. Transient and RFI interference • Although there are transient and noise protectors on all control unit I/O con- nections, this protection is intended to act as a last line of defense against unwanted transient and RFI interference. Follow proper installation practices to prevent the introduction of transients and noise into the system. Inductive loads connected to the control unit must have transient suppressors installed at the inductive loads. Place the transient suppressor as close to the load as possible. Examples of transient suppressors include MOVs, TRANSORBs, and RC snubbers. -
Page 40: Sensor Ac Mains Supply Connections
Sensor Connections Follow all general grounding and shielding requirements as de- scribed in the “General Wiring Requirements” section. Also make sure that AC mains power has been removed from the control unit and sensor before making sensor connections. Follow the connection instructions for the applicable options for your analyzer. All sensor connections require accessing the sensor board (Figure 3-19). Sensor cabling must be twisted pairs in rigid metal conduit or in an ... -
Page 41: Standard Control Unit-To-Sensor Connections
There is no power switch or circuit breaker on the sensor. It must be protected by installing it on a circuit-protected line, maximum 15 amperes, with a switch or circuit breaker in close proximity to the sensor and within easy reach of an operator. Mark the switch or circuit breaker as the sensor disconnecting device. Standard control unit-to-sensor connections (Fig 3-19) Figure 3-20. Control Unit Label Sensor Terminal Number Standard sensor connections. Cell + one pair Cell - Furnace one pair 15V COM T/C + one pair T/C - 15V SPLY one pair 15V SPLY Current Output Connections... -
Page 42: Alarm Contact Connections
Alarm Contact Connections Follow general EMC grounding and shielding requirements for all wiring as described in the “General Wiring Requirements” section. Information on how to set up alarms in software is described in Chapter 4. Alarm Name Label Default Triggered ALARM 1A Watchdog Timer Normally Closed... -
Page 43: Remote Calibration Unit Connections
Remote Calibration Unit Connections Series 2000 Description Wire Color RCU Connections Wiring Card Connections Aspirator Sample gas Zero Zero Cal Gas Green Figure 3-23. Span Span Cal Gas White RCU connections table. Valve Common Solenoid Common Black (2 pin locations) Wires Remote Calibration Unit (RCU) wiring connections between the Series 2000 control unit wiring card and the RCU are as shown in Figure 3-22 and Figure... -
Page 44: Rs-485 Communications Connections
RS-485 Communications Connections See the Appendix A for infor- mation on the RS-485 serial The Series 2000 control unit can communicate with other computers that use the communications protocol. same protocol and have the same hardware interface. Use twisted-pair cable for all connections. Connect all the 2-wire pluses (+) and all the 2-wire minuses (-) in parallel with all the devices in a daisy-chain fashion, 2-Wire Connections including all the control units on the network and the host 4WTX+/2W+... - Page 45 Figure 3-25. 2-wire RS-485 communication connections. Figure 3-26. 4-wire RS-485 communication connections. Installation and Start-Up | 3-23...
-
Page 46: Option Card Installation
Option Card Installation Add an auto calibration card to the control unit, and access the display module and power supply/keypad module. If you ordered this option card when you first purchased your ana- lyzer, it is already installed in the control unit. NOTE Removing Display Module or Power Supply/Keypad Disconnect power from the control unit before working on it. -
Page 47: Adding An Option Card
4. Reverse these steps to reinstall the display module or power supply/keypad module. If you need to replace fuse F1 on the display module, it is a Little- fuse type 273 microfuse or equivalent, voltage rating: 125V AC, ampere rating: 50 mA. NOTE If you need to replace Fuse F1 on the wiring card, it is a Littlefuse type 273 microfuse or equivalent, voltage rating 125V AC, ampere rating: 250 mA. - Page 48 This page intentionally left blank. 3-26 | TM 2000 Oxygen Analyzer...
-
Page 49: Chapter 4 Controller / User Interface
Controller / User InterfaCe overview This chapter provides a brief overview on how to use the Series 2000 control unit. This includes the following topics: • Areas of the Control Unit • Password Restrictions • Control Unit Display • Auto Ranging Feature • Control Unit Keys • Selecting Menu Options • Exiting Menu Options • Automatic Menu Exit •... -
Page 50: Series 2000 Control Unit
series 2000 Control Unit A password may be required to access some menu options or to change system settings. The Setup Key section of this chapter has information on creating a system password. NOTE areas of the Control Unit Display module Power Supply/Keypad Module Access Door... -
Page 51: Control Unit Keys
Control Unit Keys Each of these keys provides a menu of choices. Enter values by pressing the number keys. Control Unit Key function Setup Set the control unit for your specific application. Calibrate Set calibration parameters and start calibrations. Alarm Define parameters that control the alarm relays. Analog Range Define parameters that control analog current outputs. Help Access control unit on‑line help. -
Page 52: On-Line Help
on-line Help Pressing the Help Key brings up a description of the function of any of the op‑ tions in that menu. Pressing the Help Key again exits on‑line help and returns to the menu options (or press Cancel or Enter). For example, to get on‑line help on the Passwords option from the Setup Key, select the Setup Key, then move the arrow pointers to the Passwords option and press the Help Key. 4-4 | TM2000 Oxygen Analyzer... -
Page 53: Setup Key
setup Key setup Key Menu function/options Display Select info for Display Lines 1, 2 and 3 Passwords Create a system password Select positive or negative process pressure Process Pressure Enter Process Pressure value System Tests Perform internal diagnostics View Serial Number and manufacturing num- System Serial # Perform an automatic, remote, or manual pri- Primary Calibration... -
Page 54: Entering User Text
entering user text User text can be up to 20 characters long. The Down Arrow Key on Display Line 3 allows you to see where you are entering the user‑text message. When you first select User Text, the Down Arrow Key appears above the first position. To enter text, use the Up and Down Arrow keys on the keypad to scroll through the ASCII text characters. Once the letter you want appears, press the Right Ar- row Key to move to the next position. You can also press the Left Arrow Key to move back one position in your text message. When you are finished entering your message, press Enter. Use these keys to quickly move to a location in the ASCII text table: number Key Character 0 (zero) space auto ranging feature for oxygen readings If you select to display oxygen on one of the display lines and the oxygen read‑ ing falls below 0.5% O , the display switches from the percent scale to the PPM scale. -
Page 55: System Password
NOTE A system password allows only authorized personnel to access menu options that change system settings. This menu option is also used to disable a password when it is no longer required. setting Up a system Password If you have forgotten the password, you can call AMETEK/Thermox and a service password will be provided so you can access this op- tion and enter a new password. NOTE 1. From the Setup Key menu, Select Passwords. -
Page 56: Process Pressure
Process Pressure Defines the process pressure and whether your process is operating under a positive or nega- tive pressure. Setting this value corrects oxygen measurements for the defined pressure. Use this option only if you are returning the exhaust to the process. If you are venting the exhaust to atmosphere, you do not need to enter a process pressure. NOTE setting Up Process Pressure 1. From the Setup Key menu, select Process Pressure. -
Page 57: System Tests
system tests Check for possible problems and isolate them. Also used to perform system diagnostics for service personnel. Performing these tests is not required under normal operations. NOTE Forces an A/D converter calibration. This is auto- Calibrate a/D matically done during system start‑up. Checks the functionality of the control unit’s inter- test raM nal Random Access Memory (RAM). -
Page 58: Primary Calibration
Primary Calibration Performs a primary calibration on your system rather than a regular calibration which is done using the Calibrate Key. Always try to do a regular calibration before resorting to a primary calibration except when you install a new cell. If a regular calibra- tion doesn’t work correctly, see the Calibration Checks section in NOTE the Troubleshooting chapter for possible calibration setup problems affecting the calibration. -
Page 59: Sensor Configuration
Sensor Configuration Select either normal operations or hydrocarbon upset condition operations. The hydrocarbon upset condition option allows the system to recognize a hydro‑ carbon upset condition and trigger an alarm if that condition is reached. If you do not want to use the Hydrocarbon Upset option, select Nor- mal for the Sensor Configuration. NOTE Configuring the Sensor 1. From the Setup Key menu, select Sensor Config. 2. Select Normal or Hydrocarbon Upset. If you select Hydrocarbon Upset, Alarm 4 becomes fixed as a high ... -
Page 60: Communication
Communication Defines RS-485 communications parameters between the control unit and a host device. This includes the following: Define the baud rate that the control unit and the host com- Baud rate puter are using to communicate. Choices are 300, 600, 1200, 2400, 4800, and 9600 baud. Define the physical address for the control unit (between 0 and 255) on a network so the host computer can iden- tify the control unit if using network communications (see node address... -
Page 61: Remote Switch Configuration
Remote Switch Configuration Defines whether the input should trigger a calibration or a verify when initiating an auto- matic calibration or verification using a digital input. Configuring the Remote Switch See Chapter 3 for help on connecting wiring between Define whether the digital input should trigger an automatic calibration or an the digital input and the automatic verify: TM2000 control unit to acti- vate a digital input signal. 1. From the Setup Key, select Remote Switch Config. 2. -
Page 62: Alarm Key
alarm Key alarm Key Menu functions/options Define alarm set point values. Wheth- See the Wiring section in the Chapter 3 for help on alarm er these alarms are set to activate connections and how alarms Alarm Set Points for high‑ or low‑alarm conditions is are labeled on the control defined using the Alarm Configure unit wiring card. -
Page 63: Overview Of Alarm Functions
overview of alarm functions • Alarms 1 and 2 are reserved for the watchdog alarm (Alarm 1) and the ser‑ vice alarm (Alarm 2). These alarms are not software selectable. • The Select Function menu option applies only to Alarm 3. • The Relay Configure menu option applies to all alarms except for the watchdog and service alarms, which always de‑energize on alarm (fail safe). function select setup/sensor Alarm Configure Relay Configure function Config High O alarm Cal Start Low O alarm alarm 3 Energize on alarm (Only selectable if select function Verify Start is oxygen) High O... -
Page 64: Alarm Configure
PPM value. This option won’t appear if Alarm 3 is not set to activate based on an O reading, but is set to activate on the start of a calibration or verifica‑ tion. 3. You will be prompted to define the Alarm 3 set point value: Alarm #3 = xx New Value? 4. Enter the Alarm 3 set point value, then press Enter (just press Enter if you don’t want to change the current value). 5. Select whether you want to enter the Alarm 4 set point using a percent or PPM range. You are prompted to enter the Alarm 4 set point value: Alarm #4 = xx New Value? 6. Enter the Alarm 4 set point value. 7. Press Cancel or Enter to exit this menu option. Alarm Configure Define whether alarms should trigger based on a high-alarm or a low-alarm condition. Alarm 3 is set high or low only if it is set to track oxygen levels (% ... -
Page 65: Configuring The Alarms
Configuring the alarms 1. From the Alarm menu, select Alarm Configure. 2. Define Alarm 3 and Alarm 4 as high or low alarms. 3. Press Cancel to exit this menu option. Relay Configure This menu option applies to all alarms, except for the service and watchdog alarms, which All Series 2000 control unit relays are Form A—normally open contacts. You are always set to de-energize can use the software to set whether the alarms should close on an alarm condition on alarm (fail-safe). (energize) or open on an alarm condition (de‑energize). Configuring the relay 1. From the Alarm menu, select Relay Configure. -
Page 66: Defining The Select Function
If you select Hydrocarbon Upset as the Sensor Config option from the Setup Key menu, Alarm 4 is fixed as both a high oxygen alarm and the alarm that triggers during a hydrocarbon upset condition. NOTE Defining the select function •... -
Page 67: Exception Log
In addition, the control unit reads the watchdog after reset, and beeps for a brief time if the reset was caused by a watchdog condition. Pressing the reset keys simultaneously (hidden keys to the left and right of the Setup Key) for a long enough time will in turn cause a watchdog, which will indicate as a beep after the system restarts upon release of the reset keys. exception log The exception log provides a history of the following types of events: • System or error messages • Alarm conditions • Hydrocarbon upset condition. • Reset conditions • Start of calibrations or verifications accessing the exception log • Choose Exception Log from the Alarm menu. The system shows you the most recent exception log entry on Display Line 4, and shows when this event was recorded on Display Line 3. Display Line 3 also shows the order in which events are recorded into the log, with number 1 indi‑ cating the most recent entry into the log. The system is able to store the 20 most recent entries in this exception log. Pressing the Down Arrow Key shows later exception log entries. Pressing the Up Arrow Key shows more recent exception log entries. Press Cancel at any time to exit this menu option. Controller / User Interface | 4-19... -
Page 68: Analog Range Key
analog range Key All functions in this section are directed to a specific analog output port. NOTE See Selecting an Analog Output Port for more infor- mation. The Series 2000 control unit directs process readings to either of the two analog output ports on the bottom front of the control unit. -
Page 69: Set Current Range Option
set Current range option Defines the range of readings that the 0-to-20 or 4-to-20 mA (milliamp) out- put will represent. You can also choose to set a reverse analog output range, so for example, 0 mA can correspond to the high end of the oxygen range, and 20 mA can correspond See the Select Function to the low end of the oxygen range. section later in this chapter for the types of readings the The range of readings the current output represents is also a function of the type current output can represent. of process readings the analog output port tracks. setting the current range After selecting an analog output port, set the range of readings that the selected current output represents as follows: 1. From the Analog Range Key menu, select Set Current Range. -
Page 70: Set Track/Hold Option
set track/Hold option Decide what signals to send to the selected analog output port during a calibration or verification. You can either hold the last process reading or track calibration readings. Separate decisions can be made for verify and calibrate operations. For example, you can elect to hold the last process reading during verifications, but track calibration gas readings during calibrations. setting track or hold 1. After selecting an analog output port, From the Analog Range Key, select Set Track/Hold. 2. You can choose to either hold process readings or track calibration readings on the analog output port. Separate choices can be made for calibration and verify operations. For calibration operations, select one of the following: Hold during cal Track during cal Select one of these options, your choice will be confirmed on the display: Out #1 will TRACK during Calibration Out #1 will HOLD... -
Page 71: Set Current Mode Option
set Current Mode option Define either a 0-to-20 or 4-to-20 mA analog output range for the selected analog output port. This output is dependent on both the range of readings you define (see the Set Current Range section), and on the function you track on the analog output. setting the current mode 1. After selecting an analog output port, from the Analog Range Key, select Set Current Mode. 2. Select 4‑to‑20 mA Mode or 0‑to‑20 mA Mode. Out # y is set for 4 - 20 ma Out # y is set for 0 - 20 ma output filtering option Filter out quick transitions in readings to allow a smoother analog output. -
Page 72: Select Function Option
select function option Select what type of information the analog output port should track. Choic- es are: • Oxygen • Cell temperature • Thermocouple millivolts (T/C mV) • Cell millivolts (cell mV) selecting the function 1. After selecting an analog output port, from the Analog Range menu, choose Select Function. 2. Select what you want the analog output port to track. The Series 2000 control unit prompts you with the Set Current Range menu option where you can choose the range of readings that the 0 to 20 mA or 4 to 20 mA analog output represents (see the Set Current Range section in this chapter for details). 4-24 | TM2000 Oxygen Analyzer... -
Page 73: Chapter 5 Calibrate Key
Calibrate Key Overview Calibrate Key Function/Options Initiate Cal Start an automatic, remote, or manual calibration Initiate Verify Start an automatic, remote, or manual verify Cal/Verify Data View latest calibration and verify data Cal Gas Values Enter calibration gas values to match known values of calibration gas cylinders Inject Cal Gas Set pressure and flow of RCU gases without performing a calibration... -
Page 74: Calibration
Calibration Calibration vs. Verification Operations During a verify operation, a calibration gas reading is taken, and the difference between what the system records for the gas value and its known value (from the gas cylinder) Verify is recorded. Internal calibration parameters are not changed. Verify operations are often used to check that the instrument is running within required tolerances. -
Page 75: Password
Password System passwords are created using the Setup Key. See the “Pass- word” section in Chapter 4 for information on defining or disabling a system password. NOTE entering a Password When you select Calibrate Key menu options with password restrictions, you must enter your system password. -
Page 76: Initiate Cal
initiate Cal Perform an automatic, remote, or manual calibration. The Auto Calibrate and Remote Calibrate selections are only available if you have installed an Auto Calibrate card in the control unit and have a Remote Cali- bration Unit (RCU). If the control unit detects that these options are not installed, it See the Remote Calibration will automatically prompt you with a manual calibration operation when you select Unit Connections section... -
Page 77: Single Gas Calibration
Single Gas Calibration auto Calibrate Enter the calibration gas value to match the zero calibration gas cylinder you are using to calibrate your system. Define how long you want the calibration gas to flow through the sensor. Remember that with an auto calibration, the RCU automatically shuts down the zero calibration gas based on the calibration gas duration time you specify. -
Page 78: Remote Calibrate
remote Calibrate 1. Enter the calibration gas value to match the zero calibration gas cylinder you The reading on the far right of the first display are using to calibrate your system (Cal Gas Values). This value is referred to line shows the set point in this section as the set point value. - Page 79 avoid recovery time. Pressing Cancel acts the same as Abort Cal. 4. Select Manual Calibrate. You are prompted to apply the O zero gas to the calibration gas inlet port of the sensor (tubing must be free of oil and dirt): Inject Zero Gas ENTER to Continue CANCEL to Abort...
-
Page 80: Initiate Verify
initiate Verify Perform an automatic, remote, or manual verification. The Auto Verify and Remote Verify selections are only available if you have installed an auto calibrate card in the control unit and have a Remote Calibra- tion Unit (RCU). If the control unit detects that these options are not installed, it will automatically prompt you with a manual verify when you select the Initiate Verify menu option. -
Page 81: Remote Verify
The system beings the automatic verify, and notifies you how long the verify gas will be applied to the sensor from the RCU: Span/Verify Gas xx:xx System Verifying Cal The remaining recovery time displays: Recovery xx:xx System Verifying Cal The system returns to monitoring process readings, and the verify operation is complete. -
Page 82: Manual Verify
not near the set point value on the far right of the display, check the verify gas value you entered and ensure that this value matches the verify gas cylinder for that gas in the RCU. The reading on the far right of the first display line shows the set point When performing a primary calibration or the first calibration after... - Page 83 The verify display appears: xx.x Set xx.x Press ENTER to Verify The reading on the far right of the first display 5. Press Enter once the O reading on the far left of the first display line stabi- line shows the set point lizes.
-
Page 84: Cal/Verify Data
Cal/Verify Data View the results of the latest calibration or verification. For calibration data: • zero calibration gas value vs. zero calibration gas reading, and • zero calibration gas drift. For verify data, the display shows information on the verify gas. Refers to the calibration gas values entered using the Cal Gas Values menu Zero Gas option. -
Page 85: Verify Data
Verify Data For verify data, the display shows the verify gas data: The term verify value on the display is the value the system read during the verify opera- tion, and the term verify gas Verify Value: is the set point value entered using the Configure Verify Verify Gas: option from the Calibrate Key... -
Page 86: Cal Gas Value
Cal Gas Value Enter the zero calibration gas value to match the calibration gas cylinder you use to calibrate your system. To set your verify gas value, use the Configure Verify menu option instead. • Zero Gas - low calibration gas entering Cal Gas Values 1. -
Page 87: Inject Cal Gas
inject Cal Gas You must have an auto cal card and RCU installed to use this menu option. NOTE See the Mechanical Installa- tion section in Chapter 3 for Manually adjust the pressure and flow of your calibration gas (pressure of cali- recommended calibration gas bration gas cylinders and flow into sensor) by cycling through the solenoid valves pressure and flow require-... - Page 88 This page intentionally left blank. 5-16 | TM2000 Oxygen Analyzer...
- Page 89 SiNGle GaS CalibratiON CONtiNUe WitH tHe CalibratiON PrOCeDUre ON PaGe 5 - 30 Set Cal tiMerS 2-Gas Calibration follows on next page. Calibration | 5-17...
-
Page 90: Two-Gas Calibration
tWO-GaS CalibratiON auto Calibrate Enter the calibration gas value to match the zero calibration gas cylinder you are using to calibrate your system. Define how long you want the calibration gas to flow through the sensor (Set Cal tim- ers/Cal Gas Duration). -
Page 91: Remote Calibrate
remote Calibrate Enter the calibration gas value to match the zero calibration gas cylinder you are using to calibrate your system (Cal Gas Values). This value is referred to in this section as the set point value 1. From the Calibrate Key menu, select Initiate Cal. Are the Cal Gas values entered? 2. -
Page 92: Manual Calibrate
Recovery xx:xx System Calibrating After the recovery period, the system returns to process readings. Manual Calibrate To perform a manual calibration, follow these steps: 1. Enter the calibration gas value to match the zero calibration gas you are using to calibrate your system (Cal Gas Values). 2. - Page 93 Inject Zero Gas ENTER to Continue CANCEL to Abort 7. Press Enter once you have applied this cal gas. The Zero gas display appears: The reading on the far right of the first display line shows O2 xx.x Set xx.x the set point value you entered for the O zero gas...
-
Page 94: Initiate Verify
initiate Verify Perform an automatic, remote, or manual verification. The Auto Verify and Remote Verify selections are only available if you have installed an Auto Calibrate Card in the Series 2000 control unit and have a Remote Calibration Unit (RCU). NOTE If the Series 2000 control unit detects that you do not have an RCU and auto cali- bration card installed, it will automatically prompt you with a manual verify when... -
Page 95: Remote Verify
3. Select Auto Verify. The system begins the automatic verify, and notifies you how long the verify gas will be applied to the sensor from the RCU: Span/Verify Gas xx:xx System Verifying Cal Then the system displays the recovery time remaining: Recover xx:xx System Verifying Cal The system returns to monitoring process readings, and the verify operation is... -
Page 96: Manual Verify
lizes. The reading on the far right of the first display line shows If your O reading on the far left of the display has stabilized, yet is the set point value you not near the set point value on the far right of the display, check the entered using the Configure verify gas value you entered and ensure that this value matches the Verify menu option. - Page 97 The verify display appears: O2 xx.x Set xx.x Press ENTER to Verify The reading on the far right of the first display line shows the set point value you entered using the Configure Verify menu option. 6. Press Enter once the O reading on the far left of the first display line stabi- lizes.
-
Page 98: Cal/Verify Data
Cal/Verify Data View the results of the latest calibration or verification. For calibration data, this includes the following: • Span calibration gas value vs. span calibration gas reading. • Zero calibration gas value vs. zero calibration gas reading. The terms Span Gas and •... -
Page 99: Verify Data
If the date or time has not been set, random characters will appear instead of the time and date when the calibration was completed. If this occurs, reset the analyzer’s time and date. NOTE Verify Data For verify data, the display shows the verify gas data: Verify Value: Verify Gas: Verify Diff:... -
Page 100: Cal Gas Value
Cal Gas Value Enter the zero calibration gas value to match the calibration gas cylinder you use to calibrate your system. To set your verify gas value, use the Configure Verify menu option instead. • Span Gas - high calibration gas •... -
Page 101: Inject Cal Gas
inject Cal Gas An auto cal card and RCU are required to use this menu item. NOTE Manually adjust the pressure and flow of your calibration gas (pressure of calibra- See the Mechanical Instal- tion gas cylinders and flow into sensor) by cycling through the solenoid valves on lation section in the Chapter the RCU. -
Page 102: Set Cal Timers
Set Cal timers Set Cal timers Function/Option Set Auto Timers Set cycle times for auto calibration/verification Set Time and Date Set current time and date Auto Cal On/Off Enable or disable auto calibration cycle Define how long cal gases should flow through the sen- Cal Gas Duration sor during automatic calibration or verification Define a recovery duration during which time the sen-... - Page 103 hours, depending on what you selected in Step 3): Cal Cycle = 01 days New Value = xx 4. Enter the number of days (or hours) for the automatic calibration or verify cycle. As you enter the values, they overwrite the XXs on the display. To enter 1 day or 1 hour, enter 01;...
-
Page 104: Auto Cal On/Off
Enter the correct date: The date is YY/XX/ZZ Enter date: Mo/Da/Yr 3. The new date overwrites the mo/day/yr text on the display. Enter the month, the day, the year, then press Enter. If the current date is correct, press Enter. auto Cal On/Off Disable or re-enable the auto calibration or auto verification cycle. -
Page 105: Cal Gas Duration
Cal Gas Duration NOTE: Define how long the RCU should apply the span and zero calibration gases to For a verification, the system the sensor during an automatic calibration or verification. uses the span gas inlet for the verify gas. To find out how long it takes for your calibration gases to reach the sensor and stabilize, select the Inject Cal Gas menu option and record the gas stabilization period. -
Page 106: Configure Verify
recovery Duration This menu option applies to all automatic, remote, and manual cali- brations and verifications. NOTE Define a recovery time so the control unit can return to reading process gases after reading calibration gases without affecting the analog outputs or the trigger- ing of alarms. - Page 107 If during a verify operation (Initiate Verify menu option) the sys- tem detects that the verify gas is not within the acceptable range, a Verify Failure message will appear on the bottom line of the display, NOTE and the Service Alarm will trip. The error message will continue to be displayed until a successful verify is completed (gas value within the range) or a successful calibration is completed.
- Page 108 This page intentionally left blank. 5-36 | TM2000 Oxygen Analyzer...
-
Page 109: System And Error Messages
MAINTENANCE AND TROUBLESHOOTING The operations in this chapter should be performed only by qualified service personnel with a knowledge of electrical safety techniques. There are no operator-serviceable components inside the TM2000 system. An operator should never remove the cover from the controller or sensor. Never service the controller or sensor unless power has been dis- connected from the controller and the sensor, and the sensor has been allowed to cool for at least one hour. -
Page 110: System Messages
System Messages For Auto Calibration option only. An automatic calibration is pending. Once the current calibration or verifi- Auto Cal Pending cation is complete, the automatic calibration will begin. For Auto Calibration option only. An automatic verification is pending. Once the current calibration or verifi- Auto Verify Pending cation is complete, the automatic verification will begin. -
Page 111: Error Messages
Error Messages Error messages on the control unit display indicate problems with the operation of the analyzer. Identify the type of problem indicated by the error message and go to “Diagnostic Checks” at the end of this chapter for help on how to pinpoint the problem. - Page 112 Sensor has failed to increase a minimum of 10°C in a 60-second time frame during start-up. Once the system reaches the operating temperature set point, this message will appear only if the sensor falls below the set point by 15°C and fails to recover within 60 seconds.
-
Page 113: Diagnostic Checks
Diagnostic Checks Display the thermocouple millivolts and cell millivolts during troubleshooting as a troubleshooting aid. You may need this infor- mation if you need to contact the factory for assistance. Be sure to NOTE always include your analyzer model and serial number when calling the factory for technical support. - Page 114 Reversed Thermocouple Thermocouple Compensation Circuit Check Wires Use a volt meter to measure across terminals 4 (-) and 12 (+) on the sensor board. If ~ 15V is not present, check that interconnect- To check if the thermocouple wires ing wiring is correct. are reversed, use the controller to display the thermocouple millivolts If interconnecting wiring is correct, check across 15V Sup and 15V...
- Page 115 Remote Calibration Unit (RCU) Vacuum Check Setup Adjust sample gas and air supply flow valves until the flow rate is 1. Connect a digital volt meter across 150 ml/min and the pressure gauge is slightly greater that 25” H the connections labeled 1 and 2 on pressure.
- Page 116 To correct this problem: Calibration Gas Time Inadequate Select the Inject Cal Gas option from the Calibrate Key menu. Turn on each calibration gas and determine how long it takes for If you are having problems running each gas to stabilize on the control unit display. an auto calibration, you may not have allowed the calibration gases Add a one-minute buffer to each of these times.
- Page 117 To check that you have entered the process correctly, select the Process Pressure menu option from the Setup Key. Make sure Process Pressure Checks that the calibration process pressure equals normal operating process pressure. Cell Checks If the analyzer has been operating for some time and you believe that the oxygen reading is inaccurate, check by running a known If the cell fails when you first begin calibration gas to verify the analyzer’s response.
-
Page 118: Auto Calibration Card Leds
Auto Calibration Card LEDs All auto calibration card LEDs denote that the Series 2000 controller has sent out a 15-volt signal to the RCU to activate the appropriate solenoid valve. LEDs are clearly labeled on the card. NOTE When lit this indicates that the system is not in calibration. This LED remains Normal Operations off for the entire calibration cycle then turns back on during the calibration recovery time and during normal operations when the process gas is flowing... - Page 119 SERVICE AND PARtS The operations in this chapter should be performed only by qualified service personnel with a knowledge of electrical safety techniques. There are no operator-serviceable components inside the TM2000 system. This appendix shows you how to replace system parts, and is divided into the fol- lowing sections: •...
-
Page 120: Warnings
Warnings! • Disconnect power from the sensor and control unit when servicing system components. • The outside of the sensor cover and all sensor assembly components are extremely hot (up to 500° F, 260° C inside the cover), even after power has been removed from the sensor. Use caution and wear appropriate gloves when handling system components! • Always use a backup wrench when working on sensor plumbing. This helps to prevent damaging welds and distorting sensor plumbing. 7-2 | TM2000 Oxygen Analyzer... -
Page 121: Thermocouple Replacement
thermocouple Replacement Disconnect power from the sensor and control unit and allow the sensor to cool before replacing parts inside the sensor. To remove the thermocouple, do the following: 1. Locate the thermocouple wires (red and yellow). Loosen the cable clamp nut on the sensor board that holds these wires in place. Disconnect the wires from terminals C and D on the sensor board and pull them through the con- duit hole connecting the sensor board to the sensor. - Page 122 Cell Cell Clip Ceramic Washers O-Ring Fitting Ferrule Cell O-Ring Cell Fingers Inlet Tube Figure 7-1. Cell replacement. thermocouple Furnace Bracket Screw Mounting Bracket O-Ring Fitting Figure 7-2. Furnace replacement. 7-4 | TM2000 Oxygen Analyzer...
-
Page 123: Cell Replacement
Cell Replacement Disconnect power from the sensor and control unit and allow the sensor to cool before replacing parts inside the sensor To replace the cell (Figure 7-1 and Figure 7-2 ): 1. Remove the two furnace bracket screws (see Figure 7-2). Remove the front bracket screw with a flat blade screwdriver and remove the back one by hand. Keep these screws to reinstall the furnace over the cell. 2. Lift the furnace off the furnace mounting posts to expose the cell assembly. You can leave the furnace and thermocouple wires connected to the sensor board. -
Page 124: Furnace Replacement
Furnace Replacement Disconnect power from the sensor and control unit and allow the sensor to cool before replacing parts inside the sensor. Do the following to replace the furnace (Figure 7-2): 1. Disconnect the furnace lead wires from terminals R and S on the sensor board and slide the furnace wires through the sensor board conduit hole. 2. Loosen the cable clamp nut on the sensor board that holds the thermocouple wires (red and yellow). Disconnect the thermocouple wires from terminals C and D on the sensor board and pull these wires through the sensor board conduit hole. -
Page 125: Parts Replacement List
P/N 80439SE Assembly P/N 80457SE Wiring Card P/N 80440SE Processor Board When ordering, provide the serial number of your analyzer to ensure proper parts are ordered: AMETEK Process and Analytical Instruments Division 150 Freeport Road Pittsburgh, PA, USA 15238 Phone: (412) 828-9040 Fax: (412) 826-0399 Service and Parts | 7-7... - Page 126 This page intentionally left blank. 7-8 | TM2000 Oxygen Analyzer...
-
Page 127: Appendix A Serial Communications
Serial CommuniCationS Communication Protocol Communicating to the Series 2000 control unit through the RS‑485 serial port requires the following communication parameter settings: 8 data bits 1 stop bit No Parity The baud rate on the Series 2000 control unit must match the baud rate of the host device. -
Page 128: Command Message Format
Command message Format Start node Command Data Checksum Character address letter Character “>” 2 hex See commands n characters ‑ 2 hex ASCII char‑ Carriage (ASCII decimal ASCII section for list of depends on com‑ acters (sum except return (ASCII character 6) characters (00‑... -
Page 129: General Serial Communication Commands
General Serial Communication Commands This section provides general serial communication commands. Programming commands and factory‑setup commands are provided later in this chapter. Gener‑ ally, you will use these general serial communications commands. read number (F) Read the value of a variable stored in the Series 2000 Controller. The data section of this command is a number from 00‑FF. - Page 130 read Date and time (m) Read the dates and times stored in the Series 2000 Controller. The data consists of a single digit where: • 0 is used to read the current date and time, • 1 is used to read the date and time of the last calibration, and •...
-
Page 131: Development Serial Communication Commands
Development Serial Communication Commands These commands are used during initial serial communication design. echo (a) Test the serial protocol and line integrity. Any text sent to the Series 2000 Controller is echoed back to the host. Bad Command (B) Just returns a bad command (error code 01) reply. acknowledge (C) Returns a simple acknowledge. -
Page 132: Command List
Command list This section provides the command letters you can use. Command letter Description Echo Bad Command Acknowledge Read Number Calibrate Write Number Data Format Read Date and time Set Date and Time Figure a-1. Serial communication commands list. A-6 | TM 2000 Oxygen Analyzer... -
Page 133: Responses
responses The Series 2000 Controller returns a variety of responses that can be broken into two categories, Success Failure Success All successful responses start with . If there is data returned, it will follow the and have a checksum after it. All responses end with a carriage return ( ). Success ... -
Page 134: Variable Table
Variable table Figure A‑3 provides a summary of the variable locations, names, and descrip‑ tions available. If you need access to more advanced variables, please call AM‑ ETEK. location name Description read/Write *Format Flags_3 See Figure A-4 Read Only H (1 byte) Inf_mess_flag See Figure A-5 Read Only... - Page 135 Description read/Write Format sensor at op temp over/under temp inject cal gas active auto cal is active 1=true Read Only 0=false auto verify is active reserved reserved cal/verify not permitted Figure a-4. Flags_3 variable table. Description read/Write Format temperature rise failure cell is over temperature zero gas range error span gas range error...
- Page 136 Description read/ Format Write relays energize on alarm 1=true 0=false auto cal time is set 1=true 0=false cal timer enabled 1=false 0=true real time clock is set 1=true 0=false Reserved auto verify time is set 1=true 0=false auto verify timer is enabled 1=false 0=true auto cal cycle programmed in 1=hours 0=days...
- Page 137 location name Description Format Alm4_value Alarm 4 PPM Setpoint F (2 dp) Alm_config Current Alarm Configuration Bit 0 - Alarm 3 on High Oxygen Bit 1 - Alarm 3 on Low Oxygen Bit 2 - Alarm 3 on High/Low Flow Bit 3 - N/A H (1 byte) Bit 4 - Alarm 4 on High Oxygen...
-
Page 138: Sample Program
Sample Program This section provides a sample Quick Basic program that reads and writes to the serial port: DECLARE FUNCTION Checksum$ (M$) ‘Serial test routine ‘ Continuously sends a message and prints the string returned ‘Open the communications port OPEN “COM2:9600,N,8,1 “FOR RANDOM AS #1 ‘String to be echoed T$ = “Test message”... -
Page 139: Appendix B Menu Option Charts
Menu OptiOn Charts setup Key Menu setup Key Menu Menu Options Cell Millivolts Date/Time Display Thermocouple Millivolts Cell Temperature User Text Turn Off password Enter password Positive Pressure (enter value) process pressure Negative Pressure (enter value) system tests Various Serial # system serial # Manufacturing # Auto... -
Page 140: Calibrate Key Menu
Calibrate Key Menu Calibrate Key Menu Menu Options Automatic initiate Cal Remote Manual Automatic initiate Verify Remote Manual Cal Data Cal/Verify Data Verify Data Span Gas Cal Gas Values Zero Gas inject Cal Gas set Cal timers See Figure B-3 Define Verify Gas value Configure Verify Define Verify Gas acceptable range... -
Page 141: Alarm Key Menu
alarm Key Menu alarm Key Menu Menu Options Alarm 3 Value alarm set points Alarm 4 Value High O Alarm Alarm Configure Low O Alarm (for Alarms 3 and 4) Energize on alarm Relay Configure De-Energize on alarm select Function Start of Calibration (applies to Alarm 3 only) Start of Verify... - Page 142 This page intentionally left blank. B-4 | TM2000 Oxygen Analyzer...
-
Page 143: Appendix C Current Outputs: Other Applications
Current Outputs: Other AppliCAtiOns This appendix describes how to: • Modulate external power loop using current outputs. • Power current outputs from an external power supply. powering Current Outputs from an external power supply The Series 2000 control unit wiring card contains a set of terminals that can be used to connect an external voltage source to power the standard current outputs: VEXT1,2 + VEXT1,2 ‑ Jumper JP2 on the Series 2000 control unit display module is used to define which power source to use. If there is a JP2 jumper (factory default), the control unit uses the internal supply to power the current output circuits. If you try to use an external voltage at this time, the system will use whichever voltage is higher ‑ control unit voltage is normally about 28 Volts. If the JP2 jumper is removed, the external volt‑ age source must be used to power the current output circuits. The external voltage source must be no greater than 30 VDC. See the “Option Card Installation” section in Chapter 3 for information on how to access or remove the display module. To determine the minimum external voltage supply required to power the current outputs, use the following formula: VEXTmin = .02 amps (RLoad + Rwires) + 4 volt where: VEXTmin = the minimum external voltage required to power current output circuit RLoad = the load resistance of the current output device Rwires = the resistance of the wires... -
Page 144: Modulation Of External Power Loop Using Current Outputs
Modulation of external power loop using Current Outputs Figure C‑1 shows an example of the connection method when you want to pro‑ duce a modulated current loop from an external power supply and a load device. All current output channels (IOUT1 and IOUT2) can be connected as shown in Figure C‑1. IOUT1 and IOUT2 must share the same power supply if both of these channels are used, or two power supplies can be “ORed” together using a diode from each power supply positive terminal (diode anode to power supply) to the VEXT1,2+ terminal. The power supply minuses would be tied together and connected to one side of the both loads. The other side of one of the loads would be connected to IOUT1+ terminal, and the other side of the other load would be connected to the IOUT2+ terminal. For each current output channel used in a current loop modulation application, the jumpers should be removed for that channel. OptiOnAl Output DeViCe eXternAl lOOp (COMputer Or pOWer supplY ChArt reCOrDer) MAX VOltAGe MAX lOAD resistAnCe 30 VOlts DC 1200 OhMs Figure C-1. -
Page 145: Appendix D Using Series 2000 Rcu Signals
Using series 2000 rCU signals You can use the Series 2000 control unit signals to control your switching valve to switch from the sample to calibration gases. However, we recommend the factory-provided Remote Calibration Unit (RCU) as the best way to control the calibration process. - Page 146 This page intentionally left blank. D-2 | TM2000 Oxygen Analyzer...
-
Page 147: Appendix E Drawings And Custom Instructions
Drawings anD Custom instruCtions This appendix provides any custom drawings or instructions you have ordered. If you didn’t order any cutome options, the standard Interconnect drawing is provided. If you ordered special options, the drawings or special instructions provided here supercede any drawings or options provided elsewhere in the manual. - Page 148 This page intentionally left blank E-2 | TM2000 Oxygen Analyzer...
Need help?
Do you have a question about the TM2000 Pro and is the answer not in the manual?
Questions and answers