Table of Contents
Advertisement
Advertisement
Table of Contents

Subscribe to Our Youtube Channel
Related Manuals for Zanussi ZWD76NB4PW


Summary of Contents for Zanussi ZWD76NB4PW
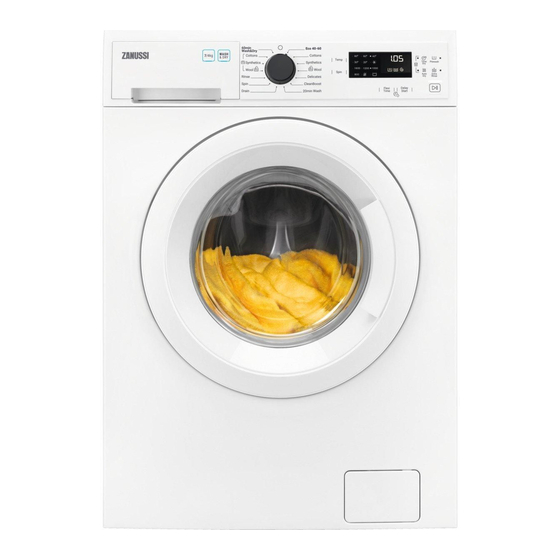
- Page 1 User Manual GETTING STARTED? EASY. ZWD76NB4PW EN User Manual Washer Dryer...
-
Page 2: Safety Information
VISIT OUR WEBSITE TO: Get usage advice, brochures, trouble shooter, service and repair information: www.zanussi.com/support SAFETY INFORMATION Before the installation and use of the appliance, carefully read the supplied instructions. The manufacturer is not responsible for any injuries or damage that are the result of incorrect installation or usage. - Page 3 This appliance is intended to be used in household and similar • applications such as: staff kitchen areas in shops, offices and other working – environments; by clients in hotels, motels, bed & breakfast and other – residential type environments; areas for communal use in blocks of flats or in launderettes.
- Page 4 If the mains power supply cable is damaged, it must be • replaced by the manufacturer, its Authorised Service Centre or similarly qualified persons to avoid an electrical hazard. Wipe away lint or packaging debris that has accumulated • around the appliance. Items that have been soiled with substances such as vegetable •...
-
Page 5: Safety Instructions
SAFETY INSTRUCTIONS INSTALLATION • Before connection to new pipes, pipes not used for a long time, where repair work has been The installation must comply with carried out or new devices fitted (water meters, relevant national regulations. etc.), let the water flow until it is clean and clear. •... -
Page 6: Product Description
SERVICE software, door, door hinge and seals, other seals, door locking assembly, plastic peripherals • To repair the appliance contact the Authorised such as detergent dispensers. Please note that Service Centre. Use original spare parts only. some of these spare parts are only available to •... -
Page 7: Installation
Electrical connection Voltage 230-240 V Overall power 2200 W Fuse 13 A Frequency 50 Hz Level of protection against ingress of solid particles and IPX4 moisture ensured by the protective cover, except where the low voltage equipment has no protection against moisture Cold water Water supply... -
Page 8: Information For Installation
drum. 8. Remove the three bolts. Use the key supplied with the appliance. Pull out the plastic spacers. 5. Put one of the polystyrene packaging elements on the floor behind the appliance. Carefully put 9. Put the plastic caps in the holes. You can find down the appliance with the rear side on it. - Page 9 CAUTION! Make sure there is no damage to hoses and there are no leaks from the couplings. Do not use an extension hose if the inlet hose is too short. Contact the service centre for a replacement inlet hose. 1. Connect the water inlet hose to the back of the appliance.
-
Page 10: Installation On Suspended Flooring
INSTALLATION ON SUSPENDED FLOORING 5. Without the plastic hose guide, to a sink spigot- Put the drain hose in the spigot and tighten it with a Suspended wooden floors are particularly clamp. Refer to the illustration. susceptible to vibration. To limit vibration we recommend placing a waterproof wooden panel, at least 15 mm thick, under the appliance. -
Page 11: Control Panel Description
CONTROL PANEL CONTROL PANEL DESCRIPTION Programme knob Additional rinse (Extra Rinse) Spin speed reduction (Spin) Automatic drying level (Auto Dry) Temperature selection (Temp.) Start/Pause Display Delay start setting (Delay Start) Drying time selection (Time Dry) Time saving (Flex Time) Prewash phase (Prewash) DISPLAY... -
Page 12: Programme Chart
Time area : Programme duration : Selected drying time : Delay start : Alarm codes : Message of error : The programme is completed. Time programme indicators : Normal duration indicator : Quick indicator : Super quick indicator Delay start indicator Child safety lock indicator Door locked indicator Indicators of dryness level... - Page 13 Programme Maximum load Programme description Default temperature Reference spin (Type of load and level of soiling) Temperature range speed Cottons White cotton and coloured cotton. 7 kg 40 °C Normally, heavily and lightly soiled items. 1600 rpm 90°C - (Cold) Synthetics Synthetic items or mixed fabric items.
- Page 14 Programme Maximum load Programme description Default temperature Reference spin (Type of load and level of soiling) Temperature range speed 60min Wash&Dry Complete programme composed of a washing 1 kg 30 °C phase and of a drying phase for a small load of 1200 rpm 40 °C - 30 °C mixed fabrics (cotton and synthetic items).
- Page 15 Programme ■ ■ ■ ■ Wool ■ ■ ■ ■ ■ ■ Delicates ■ ■ ■ ■ ■ ■ CleanBoost ■ ■ ■ 20min Wash ■ Drain ■ ■ ■ Spin ■ ■ ■ ■ ■ Rinse ■ Wool ■ Synthetics ■...
-
Page 16: Automatic Drying
Universal Liquid Liquid for Delicates Programme Special Universal coloureds woollens powder 60min ▲ ▲ Wash&Dry 1) At temperature higher than 60 °C the use of powder detergent is recommended. ▲ = Recommended -- = Not recommended AUTOMATIC DRYING Dryness Level Type of fabric Load Cottons and Linen... -
Page 17: Extra Rinse
Spin Suggested Dryness Level Type of fabric Load (kg) speed duration (rpm) (mins) Cupboard Dry Synthetics and mixed fab- 1200 90 - 105 For items to be stored rics 1200 40 - 50 (jumpers, blouses, underwear, household and bed linen) Wool 1200 80 - 100... -
Page 18: Before First Use
Use this option for persons allergic to detergents You can select: and in areas where the water is soft. • QUICK: to wash items with daily soil. The related indicator comes on. • SUPER QUICK: to wash quickly items with almost no soil. -
Page 19: Using Detergent And Additives
3. Put the laundry in the drum, one item at a time. CHECK THE POSITION OF THE DETERGENT FLAP Do not put too much laundry in the drum. 4. Close the door firmly. 1. Pull out the detergent dispenser until it stops. 2. -
Page 20: Interrupting A Programme And Changing The Options
SETTING A PROGRAMME You can cancel or change the set of the delay start before you press the 1. Turn the programme knob to switch the appliance on and set the required programme: . To cancel the delay start: • The indicator flashes. -
Page 21: Daily Use - Drying Only
AT THE END OF THE PROGRAMME 3. When the programme is completed, and the • The appliance stops automatically. door lock indicator goes off, you can open • The acoustic signal operates (if it is activated). the door. • In the display comes on. -
Page 22: Daily Use - Washing & Drying
more or less than the default size, the appliance • The display shows the door locked indicator adjusts automatically the time value during the cycle. If you set only 10 minutes of drying, 2. Press to start the programme. the appliance performs only a cooling The display shows the door locked indicator phase. -
Page 23: Fluff In The Fabrics
To have a good drying the appliance shows the final time value , that is the total does not let you set a too low spin duration of the washing and drying cycles (washing speed for the items to be washed and + drying + anti-crease + cooling phases). -
Page 24: Stubborn Stains
• Wash and pre-treat heavy soil stains with a suitable detergent before putting in drum. • Be careful with the curtains. Remove the hooks and put the curtains in a washing bag or pillowcase. • Do not wash laundry without hems or with cuts. Use a washing bag to wash small and/or delicate items (e.g. -
Page 25: Care And Cleaning
ECOLOGICAL HINTS • Bed covers. • Duvets. To save water, energy and to help protect the • Anoraks. environment, we recommend that you follow these • Sleeping bags. tips: • Fabrics with residue of hair sprays, nail solvents • Normally soiled laundry may be washed or similar. - Page 26 After each cycle, keep the door and the detergent CAUTION! Do not use the metal dispenser slightly ajar to get air circulation and dry surfaces with chlorine-based the humidity inside the appliance: this will prevent detergent. mildew and odours. If the appliance is not used for a long time: close DESCALING the water tap and unplug the appliance.
-
Page 27: Cleaning The Detergent Dispenser
CLEANING THE DETERGENT DISPENSER CLEANING THE DRAIN FILTER Do not clean the drain filter if the water in the appliance is hot. • Repeat the steps 2 and 3 until the water stops flowing out. • Always keep a rag nearby to dry up any water spillage. 180°... - Page 28 Regularly check the drain pump filter and make sure that it is clean. Make sure that the impeller of the pump can rotate. If it does not rotate, contact the Author- ised Service Centre. Make sure also that you tighten the filter correctly to prevent leakages.
-
Page 29: Troubleshooting
CLEANING THE INLET HOSE AND THE VALVE FILTER 45° 20° EMERGENCY DRAIN 1. Disconnect the mains plug from the mains socket. Because of a malfunction, the appliance cannot 2. Close the water tap. drain the water. 3. Put the two ends of the inlet hose in a If this occurs, do steps (1) through (8) of 'Cleaning container and let the water flow out of the the drain filter'. - Page 30 ALARM CODES AND POSSIBLE FAILURES The appliance does not start or it stops during operation. First try to find a solution to the problem (refer to the tables). WARNING! Deactivate the appliance before carrying out any check. With some problems, the display shows an alarm code and the Start/ Pause button may flash continuously: Problem...
- Page 31 Problem Possible solution • Make sure that the mains plug is connected to the mains socket. • Make sure that the appliance door is closed. • Make sure that there is no damaged fuse in the fuse box. The programme does •...
-
Page 32: Emergency Door Opening
Problem Possible solution After the washing cycle, • Make sure that the flap is in the correct position (UP for powder deter- there are some deter- gent - DOWN for liquid detergent). gent residues in the dis- • Make sure you have used the detergent dispenser according the indi- penser drawer. -
Page 33: Consumption Values
CONSUMPTION VALUES INTRODUCTION This user manual reports two different tables in order to favour a gradual passage from a regulation to the other: • Directive 96/60/EC, valid up to 28th of February 2021, is rela- ted to an energy label reporting the Energy Efficiency classes from A to G for washing and drying cycles. - Page 34 ACCORDING TO COMMISSION REGULATION EU 2019/2023 Washing only Eco 40-60 pro- Litres h:mm °C gramme Full load 1.060 3:20 1551 Half load 0.715 2:30 1551 Quarter load 0.460 2:30 1551 1) Maximum spin speed. Wash and dry cycle Eco 40-60 pro- gramme and Cup- Litres h:mm...
-
Page 35: Environmental Concerns
Programme Litres h:mm °C Cottons 1.15 2:50 1600 60°C Cottons 0.35 2:45 1600 20°C Synthetics 0.65 1:45 1200 40°C Delicates 0.30 1:25 1200 30°C Wool 0.25 1:05 1200 30°C 1) Reference indicator of the spin speed. 2) Suitable for washing heavily soiled textiles. 3) Suitable for washing lightly soiled cottons. - Page 36 WWW.ZANUSSI.COM/SHOP...
Need help?
Do you have a question about the ZWD76NB4PW and is the answer not in the manual?
Questions and answers