Table of Contents
Advertisement
Multi-function Monitoring System
Dear Keto-Mojo
Thank you for choosing the Keto-Mojo
is designed for easy test of blood Glucose/blood Ketone and helps you keep them
under control.
Read this User's Manual carefully before you use your meter system. Please keep
your User's Manual in a safe place; you may want to refer it in the future.
Thank you again for choosing the Keto-Mojo
Principle and Intended Use
The Keto-Mojo
quantitatively
capillary/venous/arterial/neonatal whole blood, and the blood Ketone concentration
in fresh capillary whole blood. The Keto-Mojo
System is based on measurement of electrical current caused by the reaction of
the Glucose/Ketone with the reagents on the electrode of the test strip. The blood
sample is pulled into the tip of the test strip through capillary action.
Glucose/Ketone in the sample reacts with the enzyme and the mediator. Electrons
are generated, producing a current that is positive correlation to the
Glucose/Ketone concentration in the sample. After the reaction time, the
Glucose/Ketone concentration in the sample is displayed. The meter is calibrated
to display plasma calibrated results.
TM
The Keto-Mojo
the body (in vitro diagnostic use) by people at home and healthcare professionals
in clinical setting, as an aid to monitor the effectiveness of diabetes control. The
system should not be used for diagnosis of diabetes. Professionals may also test
neonatal, venous and arterial blood samples.
TM
GKI System User,
TM
GKI Multi-function Monitoring System is designed to
measure
the
GKI Multi-function Monitoring System is intended for use outside
TM
GKI System! Keto-Mojo
TM
GKI System.
blood
Glucose
TM
i
TM
concentration
GKI Multi-function Monitoring
GKI System
in
fresh
Advertisement
Table of Contents
Troubleshooting

Related Manuals for Keto-Mojo GKI


Summary of Contents for Keto-Mojo GKI
- Page 1 The Keto-Mojo GKI Multi-function Monitoring System is intended for use outside the body (in vitro diagnostic use) by people at home and healthcare professionals in clinical setting, as an aid to monitor the effectiveness of diabetes control. The system should not be used for diagnosis of diabetes.
-
Page 2: Table Of Contents
Alternative Site Testing.………………………………………..………….. 14 GKI testing Testing with Control Solution…………………………….……………..20 Using the Meter Memory………………………………………………….. 22 Maintenance and Troubleshooting………………………………..24 Replace Batteries………………………………………………………… GKI Multi-function Monitoring System…. 25 Caring for Your Keto-Mojo Troubleshooting Guide…………………………………………………….. 25 Technical Information…………………………………………………….. 27 System Specifications……………………………………………………... 27 Limitations…………………………………………………………………... 28 Warranty…………………………………………………………………….. -
Page 3: Understanding Your Testing Tools
CHAPTER 1: UNDERSTANDING YOUR TESTING TOOLS Your Meter System Overview The Keto-Mojo GKI Multi-function Meter and Test Strips... -
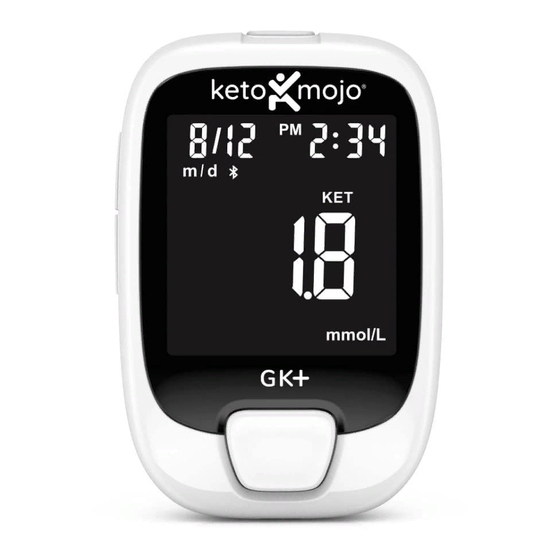
Page 4: Your Meter Display
The picture below shows all the symbols that appear on your meter display. To make sure the display is working properly. All of the segments should be clear and exactly like the picture below. If not, contact Keto-Mojo for further assistance. Icon What it Means Top left area on the screen indicates date. - Page 5 Indicates the temperature is not suitable for testing. Notes: Your Keto-Mojo GKI Multi-function Meter is pre-set with beep sound function, the meter will beep when: • You turn on the meter. • While setting the test type. • When setting the date and time.
-
Page 6: Important Safety Information
• Do not drop blood on the flat surface of the test strip. • Check the expiration dates and discard dates on your test strips foil pouch / kit box and control solution bottle label. • Use only Keto-Mojo Blood Glucose/Blood Ketone Test Strip with your Keto-Mojo GKI Multi-function Meter. -
Page 7: Setting Up Your System
CHAPTER 2: SETTING UP YOUR SYSTEM Before using your meter for the first time or if you change your meter battery, you should check and update your meter settings. Set the Date and Time 1. Enter the setting mode and set the clock When the meter is off, press and hold the power button for more than 2 seconds until the meter beeps to enter the set up mode. -
Page 8: Set The Audio Feature
3. Set the time After the date setting is completed, press the power button until the meter beeps to set, the hour will now flash. Press the side button to adjust the current hour until the hour setting is completed, then press the power button until the meter beeps to set. The minute will now flash, press the side button to adjust the minute until the minute setting is completed. -
Page 9: Set The Test Alarm
Set the Test Alarm After the audio setting is completed, the meter will enter the test alarm setting mode, the reminder function reminds users to take a measurement. You can set up to 5 reminders per day. If you turn 5 test alarms on (A1, A2, A3, A4 and A5), your meter is pre-set with the following times for your convenience, you can adjust each time to suit your needs. -
Page 10: Set The Meal Marker
You can either set a second alarm by pressing side button to turn on the second alarm. Do the same procedures to set the rest alarms. Note: If the meter is on at the test reminder time, the test alarm will not get activated. -
Page 11: Pairing Your Meter With The Smart Phone
3. Look for a device named Keto-Mojo GKI Meter. This is your meter. 4. Tap on the entry that represents your Keto-Mojo GKI Multi-function meter. 5. Enter your meter pass code using the keypad. The pass code is the last 5 digits from the Serial Number on the back of your meter. -
Page 12: Performing A Test
CHAPTER 3: PERFORMING A TEST Set up your meter correctly and have all the materials you will need ready before you begin testing. This includes your Keto-Mojo GKI Multi-function Meter, Keto-Mojo Blood Glucose test strips, Keto-Mojo Blood Ketone test strips, and Keto-Mojo lancing device and lancets. -
Page 13: Getting A Blood Drop And Testing
Hold the lancet firmly in the lancing device and twist the safety tab of the lancet until it loosens, then pull the safety tab off the lancet. Save the safety tab for disposing used lancet. Carefully screw the cover back onto the lancing device. Avoid contact with the exposed needle. - Page 14 2. Press the lancing device against the side of the finger to be lanced with the cover resting on the finger. Push the release button to prick your fingertip. You should hear a click as the lancing device activates. Gently massage from the base of the finger to the tip of the finger to obtain the required blood volume.
- Page 15 Perform a control solution test (See Performing a Control Test for instructions). After checking all of the conditions listed above, repeat the test with a new test strip. If you are still unsure of the problem, please contact Keto-Mojo immediately for further assistance. Removing the Used Lancet Unscrew the lancing device cover.
-
Page 16: Alternative Site Testing
Press the release button to make sure that the lancet is in the extended position. Slide the ejection button forward to discard the used lancet. Place the lancing device cover back on the lancing device. Potential Biohazard Always dispose of the used lancet properly to prevent injury or contamination to others. - Page 17 Screw the clear cap onto the lancing device. Choose a puncture site on the forearm or palm. Select a soft and fleshy area of the forearm and palm that is clean and dry, away from bone, and free of visible veins and hair.
-
Page 18: Gki Testing
GKI result (Glucose Ketone Index). 1. Enter GKI testing mode When screen is on, press power button for 3s –GKI and strip icons will both flash, then press power button again to confirm. 2. Performing Blood Glucose Testing First,a symbol with a test strip with “GLU”... - Page 19 If you insert the wrong strips, the meter will show the error message: 3. Performing Blood Ketone Testing Now, the meter turns to blood Ketone testing. A symbol with a test strip with “KET” and “GKI” will appear letting you know the meter is ready to test blood Ketone.
- Page 20 Please note to perform a GKI test , the time interval between Glucose and Ketone test should be less than 3 minutes , if the time interval between Glucose and Ketone test is more than 3 minutes , the meter will exit the GKI mode and GKI mode will be deactivated.
- Page 21 WHAT IS THE GLUCOSE KETONE INDEX? The Glucose Ketone Index (GKI) is a simple formula that tracks the ratio of blood Glucose to Ketones as a single value. But more important, it’s a biomarker for tracking metabolic health as well as the level of ketosis.
-
Page 22: Testing With Control Solution
Blood Glucose and Ketone tests should be conducted 2 to 3 hours postprandial (after a meal), twice a day, if possible. Testing twice a day best shows how dietary intake affects GKI. Testing with Control Solution Why Perform Control Tests Performing a control test lets you know that your meter and test strips are working properly to give reliable test results. - Page 23 bottle gently and discard the first drop. Squeeze out a second small drop on a clean nonabsorbent surface. Note: Do not apply control solution to the test strip directly from the bottle. Immediately touch the tip of the test strip to the drop of control solution. The control solution is pulled into the test strip through the strip tip.
-
Page 24: Using The Meter Memory
DO NOT use the system to test blood. Contact Keto-Mojo for further assistance. To turn your meter off, just remove the test strip. Dispose of the used test strips as medical waste. - Page 25 Continue to press power button to review previous results in order (including blood Glucose and blood Getone). Results will be shown starting with the most recent, each result will show the date and time the test was taken. When END appears on the display, you have viewed all of the results in the memory.
-
Page 26: Maintenance And Troubleshooting
CHARTER 4:MAINTENANCE AND TROUBLESHOOTING Proper maintenance is recommended for best results. Replace the Battery When the meter needs batteries to be replaced, the battery symbol ( ) will appear. 1. Turn your meter off before changing the batteries. 2. Press firmly on the battery cover and slide. Note: After you change the batteries, your meter prompts you to confirm the meter’s time and date settings. -
Page 27: Caring For Your Keto-Mojo Tm Gki Multi-Function Monitoring System
Multi-function Meter Your Keto-Mojo GKI Multi-function Meter does not require special maintenance or cleaning. A cloth dampened with water and a mild detergent solution can be used to wipe the outside of the meter. Take care to avoid getting liquids, dirt, blood or control solution into the meter through the strip or data port. - Page 28 Potential hardware issue. Take out battery and restart the meter. If the problem continues, contact Keto-Mojo immediately for further assistance. E6-E7 Insufficient sample. Repeat test and apply enough sample to fill check window of the test strip. Blood Glucose test result is...
-
Page 29: Technical Information
CHAPTER 5: TECHNICAL INFORMATION System Specifications: Feature Specification Measurement Blood Glucose: 10 - 600 mg/dL(0.6-33.3 mmol/L); range Blood Ketone: 0.1-8.0 mmol/L Result Plasma-equivalent calibration Blood Glucose: fresh whole blood(capillary, venous, arterial, Sample neonatal); Blood Ketone: fresh whole blood (capillary from fingertip; venous); Blood Glucose: about 0.5µL;... -
Page 30: Limitations
GKI Multi-function Monitoring System. • Blood samples from patients in shock, with severe dehydration or in a hyperosmolar state are not recommended for testing with Keto-Mojo Multi-function Monitoring System. • Dispose of blood samples and materials carefully. Treat all blood samples as if they are infectious materials. -
Page 31: Index Of Symbols
Index of Symbols These symbols may appear on the packaging and in the instructions for the Keto-Mojo GKI Multi-function Monitoring System. Symbols Explanation Consult instructions for use For in vitro diagnostic use only Manufacturer Temperature limitations Contains sufficient for <n> tests...
Need help?
Do you have a question about the GKI and is the answer not in the manual?
Questions and answers