Table of Contents
Advertisement
Quick Links
Advertisement
Table of Contents

Related Manuals for Dudek Jazz


Summary of Contents for Dudek Jazz
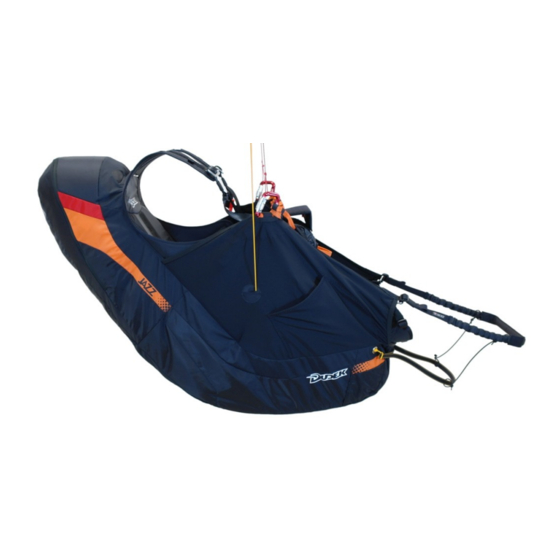
- Page 1 USER’S MANUAL JAZZ 2018 EDITION 1_12/2018...
-
Page 3: Table Of Contents
Congratulations! Thank you for choosing the Jazz harness. We have done our best to present you with a highest quality product, fulfilling all safety requirements and offering maximum functionality. Please read this manual carefully before using the harness for the first time. This will help you utilize all features of the Jazz, thus maximizing comfort and fun factor of each flight. -
Page 4: Safety
Very small weight and dimensions when packed into a backpack make mountain hikes a pleasure. Due to light, carbon seat board as well as other light materials the Jazz weighs just 2,92 kg in M size. -
Page 5: Rescue Chute Installation
3. Rescue chute installation Connect the release handle to the point in the middle of the bag. Connect the v-strap to the rescue chute riser. with a C6 quicklink. Fix the V-riser with an o-ring (see picture on the right) and tighten the nut with a wrench. - Page 6 Place the open frontcontainer as shown on the right picture. Place the V-riser as shown on the left picture.
- Page 7 Place the rescue chute in the frontcontainer as shown on the right picture. Lead the assist lines through the loops of the #1 flaps. Then lead the assist lines through the loops of # 2 flap and lock them with temporary pins.
- Page 8 Lead the assist lines through the loops of the # 3 flap and lock them with temporary pins. Remove the temporary pins and replace them with those of the release handle.
- Page 9 Gently pull the assist lines out.
- Page 10 Tips of the pins are to be shoved into pouches on the #3 flap.
- Page 11 Place the ends of the release handle in dedicated pouches on the #2 flap. Close the pins cover with a velcro strap.
- Page 12 Push the remaining parts if the #1 flaps inside and form the frontcontainer.
- Page 13 The rescue chute must be periodically aired and repacked according to its manual. The Jazz harness will best accommodate light rescue chutes Globe Light 90 or Globe Light 110 manufactured by Dudek Paragliders It is possible to use rescue parachutes by other manufacturers too, as long as their dimensions when packed do not exceed those of the container.
-
Page 14: Frontcontainer
4. Frontcontainer The rescue chute frontcontainer (1) with a centrally placed, well visible release handle (2) is fixed to the chest strap. Short v-strap (3) is integrated with the chest strap and clipped into main carabiners with it. There is an additional instrument panel featuring safety knife (4) attached to the container. - Page 15 4a. Frontcontainer to the chest strap installation. The frontcontainer is fixed to the chest strap in two points only as shown below.
- Page 16 After fixing the frontcontainer connect both ends of the v-strap to the ends of the chest strap.
- Page 17 The instrument panel is fixed both to the chest strap and frontcontainer as shown on the pictures below.
- Page 18 The safety knife is placed on the front side of the instrument panel. It can be moved to the left or right.
-
Page 19: Footrest
5. Footrest Jazz harness was designed to fly with a footrest. It enhances comfort in long flights, helps sitting into the harness after launch and positively influences steering. It is fixed to the harness in four points – to the carabiners and sides of the seat (5), and its length is adjustable (1). - Page 20 After adjusting the footrest length and side attachment points, close the side covers as shown below.
-
Page 21: Speedbar
6. Speedbar Speedbar lines must be led through respective eyelets on the sides of the harness front and through the pulleys (under the seatplate and on the back support). Then put it through slits in the sides and fix the speedsystem clips (hooks). Connect the speedbar to the footrest with an elastic band. -
Page 22: Harness Straps Adjustment
7. Harness straps adjustment Before adjusting the straps please install your rescue chute and fill the back pocket as for normal flight. Watch out for symmetry – left and right side should be adjusted the same. The first, test flight should be done in easy weather conditions, with necessary corrections to be applied afterwards. - Page 23 In the Jazz harness both leg straps (3) are connected to the chest strap, thus significantly reducing risk of launching without leg straps closed. In the strap scheme used in the Jazz, leg straps double as lateral stabilizers of the harness. Shortening of those straps limits the side swings of the harness.
- Page 24 7.4 Chest strap Chest strap controls distance between the carabiners. In the Jazz harness that distance is fixed at 43 cm. The chest strap does not feature neither length adjustment nor buckles. It is to be clipped directly into main carabiners together with the V-strap ends.
- Page 25 In order to avoid falling out of the harness it is imperative to check before each launch if the chest and legs straps are closed. closing the leg/chest straps is extremely dangerous and is a known reason of fatal accidents! 7.5 Seat inclination lines By adjusting the length of those lines the inclination of the seat plate is changed.
-
Page 26: Pockets
8. Pockets The Jazz has a spacious back pocket (some 28 l volume) and two smaller ones on the sides of the pod. The back pocket can easily hold the paraglider’s backpack, camelback and much more. Under the front part of the seat plate there is a small ballast pouch (ca. 3l). It can be used for anything else, too. -
Page 27: Protector
9. Protector The Jazz is equipped with a certified, 15 cm thjck airfoam protector. Fixing the protector in place is shown below. The protector does not need special attention, as long as no hard or water landing occurred. If any of these happens, please follow... -
Page 28: Harness/Paraglider Connection
11. Harness/tow connection The only safe way of attaching the tow line is a dedicated tow release. The Jazz does not feature any additional points to fix the tow release, therefore it is to be mounted directly to the harness’ carabiners or the canopy risers. -
Page 29: Before Flight
12. Before flight Before each flight a thorough check of the harness is required. For your own safety make sure that: - the harness is not damaged in any way - rescue chute container is correctly closed and locked with pins - rescue chute release handle is correctly set up and has the right shape (quite often it happens to be malformed in transport, so it’s important to check if it’s not flattened and easy to grab) - both leg and chest straps are closed... -
Page 30: Landing
Additionally, there is very high risk of getting tangled in lines and drowning. 16. Tandem flying The Jazz harness was not designed - and remains unsuitable - for tandem operations. -
Page 31: Cleaning And Storage
17. Cleaning and storage All materials for the harness have been carefully selected, keeping their quality and durability in mind. Your care and maintenance of the harness will keep in good condition for a long time. The harness is best cleaned with a wet sponge, possibly a bit of soap. Do not use neither detergents nor solvents. -
Page 32: Operation And Repairs
The harness is made out of synthetic materials, which need to be properly disposed of when worn out.. If you are not able to dispose of your gear properly, DUDEK Paragliders will do that for you. Just send your harness to the address given at the end of the manual,... -
Page 33: Technical Data
1 Carbon seat plate 1 V-strap 1 Frontcontainer 2 Dudek 20 kN carabiners Since Dudek Paragliders products are subject to constant improvements, minor differences are possible between the manual and actual product. Dudek Paragliders withholds rights to introduce such changes without individual notice. - Page 34 DUDEK PARAGLIDERS S.J. UL. CENTRALNA 2U 86-031 OSIELSKO POLAND TEL.: +48 52 324 17 40 FAX.: +48 52 381 33 58 EXPORT@DUDEK.EU WWW.DUDEK.EU...
Need help?
Do you have a question about the Jazz and is the answer not in the manual?
Questions and answers