Table of Contents
Advertisement
Quick Links
Advertisement
Table of Contents

Related Manuals for Airlink101 AWLH3028


Summary of Contents for Airlink101 AWLH3028
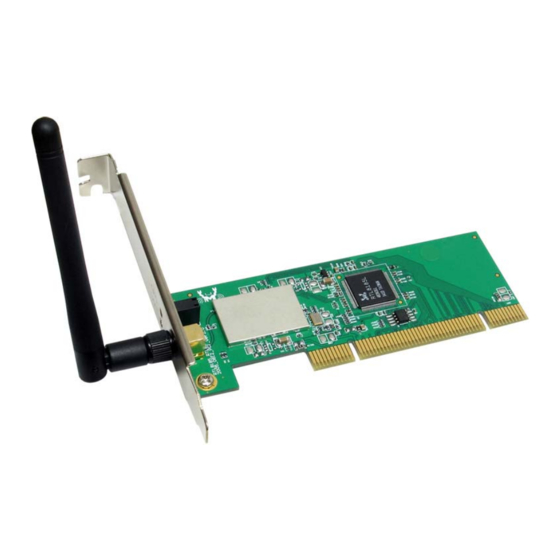
- Page 1 802.11g Wireless PCI Adapter Model # AWLH3028 User’s Manual Rev. 1.1...
-
Page 2: Table Of Contents
1. Introduction... 3 1.1 Package Contents ... 3 1.2 Features ... 3 2. Installation... 4 2.1 Install Driver & Utility... 4 2.2 Verify Driver Installation... 8 3. Configuring the Adapter ... 11 3.1 Windows 2000/XP Configuration... 11 3.2 Windows Vista Configuration ... 16 3.3 Troubleshooting ... -
Page 3: Introduction
1. Introduction Thank you for purchasing the 802.11g Wireless Cardbus Adapter. This Cardbus Adapter is designed to comply with IEEE 802.11g Wireless LAN standard and is suitable for notebook computers or desktop computers with a 32-bit Cardbus slot. This Adapter supports WiFi Protected Access (WPA2-PSK and WPA-PSK) data encryption for higher security that protects your wireless network from eavesdropping. -
Page 4: Installation
2. Installation 2.1 Install Driver & Utility This section provides instructions on how to install the Wireless PCI Adapter. The driver is installed along with the utility. Insert the PCI adapter into an available PCI slot and turn on your computer. Windows 2000/XP Users: After turning on the computer, Windows will launch the Found New Hardware Wizard. - Page 5 Once you see this message, continue to Step 1. Step 1 The Autorun screen will pop up. Select Install Utility and Driver from the menu. Note: If the Autorun screen doesn’t appear automatically, or if you get a blank white screen, go to Start, Run, and type D:\Utility\Setup.exe (where D is the letter of your CD drive) and click OK.
- Page 6 Step 2 Click Next at the welcome screen.
- Page 7 Windows 2000/XP Users: Click Continue Anyway at the Windows Logo Screen. (For Windows 2000, click Yes at the Digital Signature Not Found prompt). Windows Vista Users: When the Windows Security box appears click Install this driver software anyway. Step 3 Click Finish to complete the installation.
-
Page 8: Verify Driver Installation
2.2 Verify Driver Installation To verify if the driver has been installed successfully, please perform the following steps. Step 1 Right-click on My Computer from your desktop and select Properties. Step 2 If you are using Windows XP/2000 select the Hardware tab, then click on Device Manager. - Page 9 If you are using Windows Vista, click on the device manager link on the left side of the screen.
- Page 10 Step 3 Click the “+” next to Network adapters from the list and verify that AirLink101 802.11g Wireless Cardbus/PCI Adapter is listed and no yellow question mark is beside it. If AirLink101 802.11g Wireless Cardbus/PCI Adapter is not listed, or you see a...
-
Page 11: Configuring The Adapter
3. Configuring the Adapter 3.1 Windows 2000/XP Configuration This section describes how to connect your wireless adapter to a wireless network. Note to Windows XP Users: You must disable the Wireless Zero Configuration Utility in order to use the bundled Wireless Utility. - Page 12 If there is no Wireless Networks tab, skip ahead to Step 1 To open the utility, double click on the Wireless Configuration Utility icon in the system tray at the bottom right-hand corner of your screen. Step 2 Go to the Available Network tab, select the SSID (Network Name) of the wireless network you wish to connect to, and click Add to Profile.
- Page 13 If the network you are attempting to connect to does not have encryption enabled, you will see the following box pop up on your screen: Click OK to connect. If the network you are attempting to connect to is configured for encryption, the following window will appear:...
- Page 14 Enter the encryption settings for your router in the appropriate boxes and click OK to connect. Step 3 You should now be connected. Click on the general tab to check the status of your connection. It should say Associated next to status, and there should be green bars next to Signal Strength and Link Quality.
-
Page 16: Windows Vista Configuration
3.2 Windows Vista Configuration Windows Vista has its own built in utility, so the AirLink101 Wireless Configuration Utility is not used. To connect to a network using the Windows Vista utility, right click on the networking icon down in the bottom right hand corner. Then click on Connect to a network. Select your network from the list and click Connect. - Page 17 If the network you are connecting to does not have encryption enabled, you will see the following warning:...
- Page 18 Click Connect Anyway to connect to the network. If the network you are attempting to connect to has encryption enabled, a box will appear asking you to enter your encryption key.
- Page 19 Enter your encryption key into the box and click Connect to establish a connection. If you do not know what your encryption key is, contact your router manufacturer for assistance. You should now be connected to your network.
-
Page 20: Troubleshooting
To save the connection settings so that you don’t have to go through the connection setup process each time you start your computer, check the boxes for Save this network and Start this connection automatically, then click Close to complete the setup. - Page 21 For instructions on changing channels, refer to the documentation that came with your router.
-
Page 22: Wireless Configuration Utility
4. Wireless Configuration Utility This section describes the various functions of the Wireless Configuration Utility that you can configure, including the settings of wireless encryption. 4.1 General The General tab provides you with the status of the current connection, including signal, network name (SSID), IP Address and router channel. - Page 23 Radio Off disables the wireless function of the adapter. Disable Adapter will completely disable the wireless adapter. Wireless Zero Config allows Windows XP users to use the Windows XP Wireless Zero configuration utility instead of using the AirLink101 Wireless configuration utility...
-
Page 24: Profile
4.2 Profile The Profile tab lists current profiles and allows you to create new profiles. Click Add to create a new profile. Select a profile and click Edit to edit an existing profile. Select a profile and click Set Default to activate a profile. - Page 25 Enter a Profile Name and SSID. You can also configure your encryption settings for the profile. Click OK to save the profile.
-
Page 26: Available Network
4.3 Available Network Available network lists all of the networks that the adapter sees in your area. Clicking Refresh will refresh the list. To connect to a network, select a network from the list and click Add to Profile. -
Page 27: Advanced
4.4 Advanced This section contains various advanced wireless settings. These settings are for advanced configuration ONLY. If you do not know what these settings are for, do not change them. Selecting the wrong settings will prevent your adapter from operating properly. - Page 28 Fragment Threshold can be set between 256 and 2432 RTS Threshold can be set between 0 and 2432 Wireless Mode can be set to g/b, g only, or b only. Preamble Mode allows you to set the preamble for the wireless adapter. Channel Plan allows you to modify the channel plan for the adapter.
-
Page 29: Status
4.5 Status The status section provides you with a list of information about the current status of the adapter. -
Page 30: Statistics
4.6 Statistics This section provides transmit and receive statistics. -
Page 31: Wi-Fi Protected Setup
4.7 Wi-Fi Protected Setup Wi-Fi Protected Setup or WPS is a new and convenient way to secure your wireless connection. In order to use it, your wireless router must also support WPS. There are two ways to configure WPS: PIN and PBC (Push button method). For the PIN Method, click on PIN... - Page 32 Click Yes to select your router from the list. Then click Select Write down the PIN Code and enter it into your router.
- Page 33 For the push button method, click on PBC.
- Page 34 Go to your router and press the WPS button to complete the configuration.
-
Page 35: Configuring Encryption
4.8 Configuring Encryption If a network requires encryption settings to be entered manually, you will see the following box when you attempt to connect: For WEP encryption select Shared Key from the Network Authentication box. - Page 36 For data encryption select WEP Enter the encryption key in the Network Key box and enter it again into the Confirm network key box. Click OK to save your settings. For WPA encryption Select WPA-PSK from the Network Authentication box.
- Page 37 For data encryption select TKIP or AES Enter the encryption key in the Network Key box and enter it again into the Confirm network key box. Click OK to save your settings.
-
Page 38: About
4.9 About The About window provides information about the Wireless Configuration Utility version and the current driver version. -
Page 39: Appendix A - Specifications
Appendix A – Specifications Frequency Band • 2.412 - 2.484 GHz ISM bandwidth Standards • IEEE 802.11g • IEEE 802.11b Channel • USA: 11 • Europe: 13 • Japan: 14 Interface • 32-bit PCI Antenna type • 2dBi dipole antenna Security •... -
Page 40: Appendix B - Information
Appendix B – Information Federal Communication Commission Interference Statement This equipment has been tested and found to comply with the limits for a Class B digital device, pursuant to Part 15 of the FCC Rules. These limits are designed to provide reasonable protection against harmful interference in a residential installation. - Page 41 Radio products with the CE marking comply with the R&TTE Directive (1999/5/EC), the EMC Directive (89/336/EEC) and the Low Voltage Directive (73/23/EEC) issued by the Commission of the European Community. Compliance with these directives implies conformity to the following European Norms: EN 60950 Product Safety EN 300 328 Technical requirement for radio equipment EN 301 489-1/-17 General EMC requirements for radio equipment...
-
Page 42: Technical Support
Technical Support E-mail: support@airlink101.com Toll Free: 1-888-746-3238 Web Site: www.airlink101.com *Theoretical maximum wireless signal rate based on IEEE standard 802.11g specifications. Actual data throughput will vary. Network conditions and environmental factors, including volume of network traffic, building materials and construction, mix of wireless products used, radio frequency interference (e.g., cordless telephones and microwaves) as well as network overhead lower actual data throughput rate.
Need help?
Do you have a question about the AWLH3028 and is the answer not in the manual?
Questions and answers