Table of Contents
Advertisement
Quick Links
Advertisement
Table of Contents

Subscribe to Our Youtube Channel
Related Manuals for Airlink101 AWLH6075


Summary of Contents for Airlink101 AWLH6075
- Page 1 Wireless N PCI Adapter Model # AWLH6075 User’s Manual Rev. 1.0...
-
Page 2: Table Of Contents
1. Introduction ...2 1.1 Package Contents...2 1.2 Features...2 2. Install the Wireless PCI Adapter ...3 3. Connect to Wireless Network...8 4. Configure Wireless Monitor...10 4.1 Profile ...12 4.2 Network ...13 4.3 Advanced ...16 4.4 Statistics...17 4.5 WMM ...17 4.6 WPS (Security Push Button) ...19 4.7 CCX ...23 4.8 About ...24 Troubleshooting...25... -
Page 3: Introduction
1. Introduction Congratulations on your purchase of the Wireless N PCI Adapter. Its high bandwidth combined with extended wireless coverage delivers fast and reliable connection for all of your networking applications especially when used with other Airlink101® Wireless N, Wireless 300N products. A full range of security features such as WEP, WPA-PSK, and WPA2-PSK provide the highest level of wireless network security. -
Page 4: Install The Wireless Pci Adapter
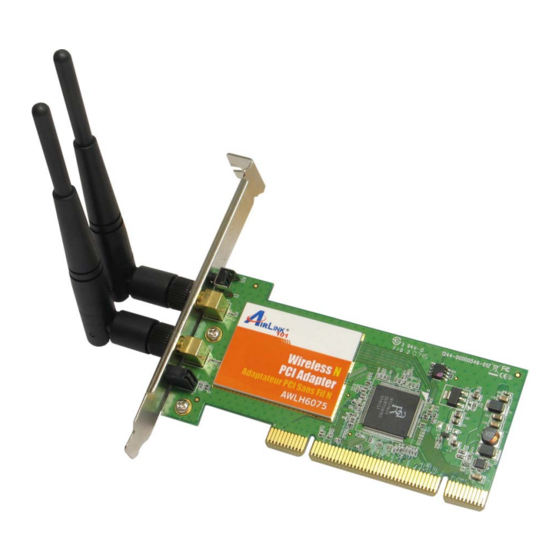
2. Install the Wireless PCI Adapter SWITCH THE COMPUTER OFF, remove the cover and insert the wireless PCI Step 1 adapter into an available PCI slot of your computer. Fasten the 2 antennas to the antenna connectors on the wireless PCI adapter. Step 2 To improve radio reception, please adjust antennas to the position shown in Step 3... - Page 5 Insert the Installation CD in the CD drive. When the autorun screen pops up, Step 6 select Install Utility and Driver. Users: When you get warning message(s), make sure that you click Windows Vista Allow to continue with the installation of the driver software. Click Next.
- Page 6 Click Next to start installing the software. Step 8 For Windows XP, click Continue Anyway at the Windows Logo Screen.
- Page 7 Click Finish and restart your computer as prompted. Step 9 You will see the Airlink101 Wireless Monitor pops up. Step 10...
- Page 8 Congratulations! The Wireless N PCI Adapter has now been successfully installed on your computer.
-
Page 9: Connect To Wireless Network
3. Connect to Wireless Network This section describes how to connect your wireless adapter to a wireless network. Note: If the Airlink101 Wireless Monitor does not open on your desktop, you can open the Airlink101 Wireless Monitor utility by double clicking on the Airlink101 Wireless Monitor Utility icon in the system tray at the bottom right-hand corner of your screen. - Page 10 After the adapter connects to the wireless network successfully, a blue triangle Step 3 will appear at the front of your wireless network.
-
Page 11: Configure Wireless Monitor
4. Configure Wireless Monitor This section describes the various functions of the Wireless Monitor that you can configure. Some general functions of this utility will be described here, and the features of each tab will be described in the following sections. Top Menu: Click on the buttons to go to the specific settings/information you need to change/view. - Page 12 Extra Info: Displays the link status (‘Link is up’ or Link is down’, and the radio transmitting power of your network card. Channel: Displays the radio channel being used now. Authentication: Shows the authentication mode that access point or wireless device uses.
-
Page 13: Profile
4.1 Profile The Profile tab lists the current profiles and allows you to manage and create new profiles. The Profile List box lists all the profiles that you’ve created for your networks. You can create a profile for a wireless network you use very often at certain area, such as the wireless network at your home or office so that you can interchange connections more easily. -
Page 14: Network
4.2 Network The Network tab lists all of the available networks that the network card detects in your area. Rescan: Clicking Rescan will refresh the network list. Connect: To connect to a wireless network, please refer to Step 1 to 3 in Chapter 3. Add to Profile: To add a network to profile, please follow the instructions below. - Page 15 Profile Name: Please give this profile a name, up to 32 alphanumerical Characters and symbols are allowed, but space is not allowed. SSID: The SSID of the wireless access point or wireless device you selected will be displayed here. But if the SSID of access point or wireless device is not available, you have to input it here manually.
- Page 16 Select the profile you just created and click Activate. Step 4...
-
Page 17: Advanced
4.3 Advanced This wireless network card provides several advanced settings for experienced wireless users. You can change these settings to increase data transfer performance, or change operation mode. Wireless mode: Select wireless mode, only 2.4G (single bandwidth) is available here. Enable TX Burst: Check this box to accelerate the data transmit rate. -
Page 18: Statistics
Click Reset Counter to reset all counters to zero. 4.5 WMM The AWLH6075, Wireless N PCI Card provides QoS (Quality of Service) function, which can improve the performance of certain network applications, like audio / video streaming, network telephony (VoIP), and others. When you enable WMM (Wi-Fi MultiMedia) function of this network card, you can define the priority of different kinds of data, to give higher priority to applications which require instant responding. - Page 19 WMM Enable: Check this box to enable WMM function. Please click ‘Apply’ button on the right of this check box after you check or uncheck this box, so corresponding settings in this window will be activated or deactivated respectively. WMM - Power Save Enable: Enable WMM power saving mode to save energy and let your battery live longer.
-
Page 20: Wps (Security Push Button)
User Manual. If your wireless router does not support WPS, you will need to set up the wireless security manually and you can skip this section. We are using the AWLH6075 Wireless N PCI Adapter and the AR675W Airlink101 Wireless N Green Router to illustrate the following setup instructions. - Page 21 If you selected PIN Input method, go to a computer that is connected to your Step 2a Wireless Router. Open the browser; enter Note: 192.168.2.1 is the default IP address of AR675W Wireless N Router; you might have a different one for your residential gateway. Please contact your ISP / router’s manufacture for more information.
- Page 22 Enter the PIN number you just wrote down into the Client PIN Number box Step 2d and click Start PIN. Continue to Step 4. If you selected PBC method, click the Reset/WPS button on the back of the Step 3a router for 3 seconds.
- Page 23 If you cannot connect successfully with WPS, you need to log in to your router’s Note: configuration page and click on Wireless. Then click WPS. Make sure that Disable WPS box is unchecked, refer to Step 2c.
-
Page 24: Ccx
4.7 CCX Enable Cisco Compatible eXtensions. CCX is a wireless feature developed by Cisco used to improve the wireless performance with CCX compatible wireless devices. Check this box if you need to connect to CCX-compatible wireless devices. Enable Radio Measurements: When you’re connecting to CCX-compatible access point, check this box to enable radio measurement function to improve wireless connectivity. -
Page 25: About
4.8 About The About window provides the information about the Wireless Monitor Utility version and the current driver version. -
Page 26: Troubleshooting
Troubleshooting 1. If you cannot open the wireless monitor utility, make sure that the PCI adapter is inserted firmly into the PCI slot. 2. If you cannot connect to the wireless router, you may want to double check the wireless security settings on the router. The network key you entered into the Wireless Monitor utility must match with the settings on the wireless router. -
Page 27: Appendix - Federal Communication Commission Interference Statement
Appendix - Federal Communication Commission Interference Statement This equipment has been tested and found to comply with the limits for a Class B digital device, pursuant to Part 15 of FCC Rules. These limits are designed to provide reasonable protection against harmful interference in a residential installation. This equipment generates, uses, and can radiate radio frequency energy and, if not installed and used in accordance with the instructions, may cause harmful interference to radio communications. -
Page 28: Technical Support
Technical Support E-mail: support@airlink101.com Toll Free: 1-888-746-3238 Web Site: www.airlink101.com *Theoretical maximum wireless signal rate derived from IEEE standard 802.11g and draft 802.11n specifications. Actual data throughput will vary. Network conditions and environmental factors, including volume of network traffic, building materials and construction, mix of wireless products used, radio frequency interference (e.g., cordless telephones and microwaves) as well as network overhead lower actual data throughput rate.
Need help?
Do you have a question about the AWLH6075 and is the answer not in the manual?
Questions and answers