
Subscribe to Our Youtube Channel
Related Manuals for Airlink101 AIC250W


Summary of Contents for Airlink101 AIC250W
-
Page 1: Quick Installation Guide
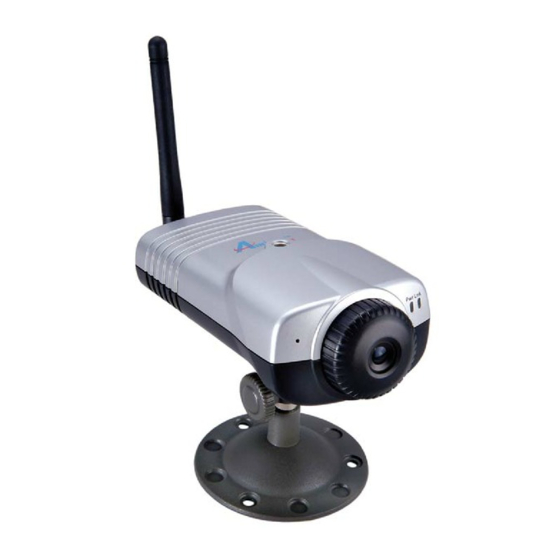
SkyIPCam 250W Wireless Network Camera Model # AIC250W Quick Installation Guide Ver. 1B... -
Page 2: Getting Started
Section 1 This Quick Installation Guide only provides the basic instructions. For more detailed information, please refer to the User’s Manual in the supplied CD. Note: Before using the IP Camera, you’ll need to perform the following tasks: 1. Connect the IP Camera to your network. 2. -
Page 3: Installing The Setup Wizard
Section 2 Installing the Setup Wizard Step 1 Insert the provided CD and wait for the autorun screen to appear. Step 2 Click on Install Wizard. Note: If the autorun screen does not appear automatically, go to Start, Run, type D:\autorun.exe (where D is the letter of your CD drive) and click OK. - Page 4 Step 4 Click Yes to accept the License Agreement. Step 5 Click Next to accept the default Destination Folder. Step 6 Click Finish to complete the installation.
-
Page 5: Gathering Information
Section 3 Note: Before using the Setup Wizard, you’ll need to take note of your local network address and wireless settings. Step 1 Click on Start, Run, and type command (for Windows 95/98/ME) or cmd (for Windows 2000/ XP) and click OK. The command prompt will appear. Step 2 At the command prompt, type ipconfig and press Enter. -
Page 6: Using The Setup Wizard
Section 4 Using the Setup Wizard Step 1 Go to Start > (All) Programs > AirLink101 IP Camera Setup Wizard. Step 2 Select the IP Camera you want to configure from the list and click on the Wizard button. - Page 7 Step 3 If the Camera’s default IP Address is on a different subnet, the following message will appear. Click Yes to continue. Note: If you do not receive this message, skip to Step 4 Enter admin for both the Admin ID and Password and click OK. Step 5 In the IP Address field, change the first three numbers to match your local network address.
- Page 8 Step 6 Enter the Subnet Mask and Gateway fields with exactly the same values as you got from running ipconfig. Click OK to continue. Step 7 After the Camera has restarted, click the Exit button to close the Setup Wizard. Step 8 Start the Setup Wizard again and make sure the Current IP Address field displays the new IP Address.
- Page 9 Step 9 The Setup Wizard appears asking you to change the Admin ID and Password. The default Admin ID and Password is admin. Step 10 Enter admin for both the Admin ID and Password field, click on the Change checkboxes and enter the New ID and New Password and click Next.
- Page 10 Step 11 If you need to change the Camera’s IP Address because another network device is already using the same address, you can assign a new address here and click Next. Step 12 Enter the Network Name (SSID) of your access point / wireless router in the SSID field and select the encryption setting of your wireless network (None / WEP / WPA-PSK) from the Security Mode drop-down menu and click Next.
- Page 11 Step 13a Select the same Encryption Mode (64 Bit / 128 Bit), Key Format (HEX / ASCII), Default Key (Key 1 ~ Key 4), and enter the same WEP keys (passwords) as your wireless network in the appropriate field and click Next. Skip to Step WPA-PSK Step 13b...
- Page 12 Step 14 Click Next. Step 15 Verify that all the fields are correct and click Restart to save the settings and reboot the Camera.
-
Page 13: Viewing Images
Section 5 Viewing Images Note: The following steps describe how to view images from within the same local area network as the IP Camera. To view images from an external network such as the Internet, please refer to the User’s Manual on the provided CD for further instructions. -
Page 14: The Ip Camera Is Ready For Use Now
Step 3 Turn the Camera’s lens clockwise or counter-clockwise to focus. Note: ActiveX and/or Java Applet must be installed and enabled on your Web Browser (Internet Explorer or Netscape) before you can view the live videos. For more information, please refer to the User’s Manual on the provided CD. Step 4 If you need to install Java Virtual Machine on your computer, do not follow the on-screen XP instructions. - Page 15 Section 6 Verifying Wireless Connection Note: You should use a wired connection to verify the wireless connection status before unplugging the network cable from the IP Camera. Step 1 At the Setup Wizard, select the desired Camera from the list and click on the Web Config button. Step 2 Click on System Administration to enter the Web Configuration Utility.
- Page 16 Step 3 Enter admin for both the User name and Password and click OK. Step 4 Click on Wireless. Verify that the Connection Mode is Infrastructure and the Link is Yes. Also verify that the SSID matches the SSID of your wireless router. Note: If the Link does not say Yes, click on the Refresh button until it displays Yes.
- Page 17 Step 5 Once the Link Status is Yes, you may unplug the Camera’s network cable from the wireless router and place the Camera at the desired location.
-
Page 18: Technical Support
Section 6 Technical Support E-mail: support@airlink101.com Toll Free: 1-888-746-3238 Web Site: www.airlink101.com... - Page 19 *Theoretical maximum wireless signal rate based on IEEE standard 802.11g specifications. Actual data throughput will vary. Network conditions and environmental factors, including volume of network traffic, building materials and construction, mix of wireless products used, radio frequency interference (e.g., cordless telephones and microwaves) as well as network overhead lower actual data throughput rate. Copyright ©...
Need help?
Do you have a question about the AIC250W and is the answer not in the manual?
Questions and answers