Table of Contents
Advertisement
Quick Links
Advertisement
Table of Contents

Related Manuals for FAME Grand 3100


Summary of Contents for FAME Grand 3100
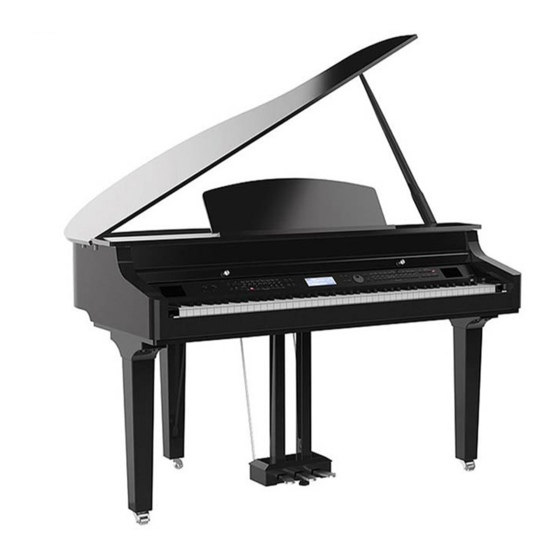
- Page 1 Grand 3100 07/2020 EPI0001116-000 User Manual...
- Page 2 Intended use: The Fame Grand 3100 is a digital piano designed to play sounds on the keyboard and make them audible through built-in speakers or headphones. Improper use of the product is considered improper and can lead to personal injury or property damage. No liability is assumed for damage resulting from improper use.
- Page 3 Important safety instructions! Please read before connection! CAUTION! (Electro Magnetic Interference) The normal function of the product may be disturbed by Strong Electro Magnetic Interference. If so, simply reset the product to resume normal operation by following the owner‘s manual. In case the function could not resume, please use the product in other location.
- Page 4 Hint! (Operating conditions) Due to its structural characteristics, the device is designed for indoor operation (IP20). Never expose the device to rain, moisture or liquids as this may cause damage. Vibrations, dust or solar radiation can also lead to damage, avoid them! Do not apply excessive force to the switches or controls.
- Page 5 Hint! (Interferences with other electrical devices) Radios and televisions placed nearby may experience reception interference. Operate this unit at a suitable distance from radios and televisions. If this equipment does cause harmful interference to radio or television reception, which can be determined by turning the equipment off and on, the user is encouraged to try to correct the interference by one or more of the following measures: •...
-
Page 6: Table Of Contents
Contents: PLUGS & CONNECTORS........07 Metronome Beat..........36 Fade Time............36 SET UP MIDI Output Channel........36 Set Up Guide..........07-11 Song Looping..........36 Auto Power Off..........36 PANEL & DISPLAY DESCRIPTION Bluetooth Link..........37 Front Panel............12 Factory Reset...........37 Rear Panel............13 LCD Display.............14 PERFORMANCE MEMORY......38 CONNECTIONS.........15/16 POWER SUPPLY..........17 SONG RECORDING........39-41 SETTINGS AUDIO RECORDING........41... -
Page 7: Plugs & Connectors
Plugs and connectors: Headphone output - 2x 6.3mm stereo jack sockets - center left signal, first ring Right signal shaft - ground LINE Out - 2 x 6.3mm mono jack socket - center signal, shaft ground LINE In - 2 x 6.3mm mono jack socket - centre signal, shaft ground Mic In - 6.3mm mono jack socket - center signal, shaft ground MIDI IN/Out/THRU - 3 x 5pin DIN USB - for connection to a computer... - Page 8 2. Follow the steps below to assemble the stand. You will need a Phillip‘s screwdriver (not supplied). A. Reverse the carton upside down and then place it horizontally on the floor. (Make sure the bottom surface is on the upside.) Then open the box, and remove the foams which are used to protect the piano body, as shown in the picture.
- Page 9 B. Put the Left leg component (C) on the left side of the Piano body (E). Then align the sunken hole on the Leg component to that on the Piano body. Place a washer into this sunken hole, then use the Wrench (J) to securely tighten the Hexagonal bolt (G)(2 on each side) in clockwise direction, as shown in the picture.
- Page 10 C. Use Screws (H) to affix the two Copper poles (I) onto the back of the Pedal component (A), as shown in the picture. (Make sure the direction of the components is correct before screwing.) D. Carefully reverse the Pedal component, then affix the Pedal component and the Copper poles to the Piano body with Hexagonal bolts (G).
- Page 11 E. Set the piano upright, as shown in the picture. Carefully reverse the piano. Avoid damaging any legs or the pedal component. At this point the Piano is fully assembled. Attention! Caution: Carefully reverse the piano. Avoid damaging any legs.
-
Page 12: Panel & Display Description Front Panel
Panel & Display Description Front Panel: 1. [VOLUME] knob 11. [MAIN B] button Adjust the master volume. In style mode: play the Main pattern B. In song mode: play the current song in a loop. 2. [BRILLIANCE] knob Adjust the brilliance. 12. -
Page 13: Rear Panel
20. [MIXER] button 26. [+/YES] button Press it to enter the Mixer menu. Increase the value. Press [+/YES] and [-/NO] together to 21. [STYLE] button restore default settings. Press it to enter Style mode. 27. [-/NO] button 22. [USB] button Decrease the value. -
Page 14: Lcd Display
LCD Display: 1. Function Indicators 2. 192 x 16 Dot Matrix LCD 3. Function Indicators 4. Chord 5. Transpose 6. Beat 7. Measure/Beat/Time 8. During playback, shows the MIDI Channel Volume When playback stops, shows the track Volume 9. Tempo 10. -
Page 15: Connections
Connections: 1. PEDAL jack Note: Please unplug the microphone when it is not Connect the pedal component. in use. 2. MIDI OUT, MIDI IN, MIDI THRU jacks 5. MIC Volume knob Use a standard MIDI cable to connect the MIDI Rotate it to adjust the input volume of the micro- OUT jack of the instrument to the MIDI IN jack of phone. - Page 16 9. PHONES jack 10. USB Port Plug a pair of standard stereo headphones into the Connect a USB flash drive to the instrument to PHONES jack for private practice or late-night play- save the data you’ve created to the USB flash ing.
-
Page 17: Power Supply
Power Supply: 1. Before connecting the power supply, please set the [POWER] switch to “OFF” and set the master volume level to minimum. 2. Connect the AC power cable to AC power supply jack on the rear panel. 3. Plug the AC power cable into an appropriate AC outlet. -
Page 18: Brilliance
Adjusting the Brilliance: Use the [BRILLIANCE] knob to adjust the overall brilliance level. The brilliance is set to medium by default. Rotate the knob clockwise to brighten the sound, or counter-clockwise to mel- low the sound. Playing the Demos: The instrument features several professional de- mos. -
Page 19: Playing Voices
Playing the Voices: The instrument features a variety of realistic voices. Please refer to the Voice List for details. Playing a Voice 1. Enter the voice mode. Press the [VOICE] button or one of the VOICE select buttons to enter Voice mode. The “R1” indicator appears and the LCD shows the current voice number and name. -
Page 20: Playing Different Voices
Playing Different Voices with Both Hands The Lower function splits the keyboard into two areas so as to create different voices for each of your hands. The left hand voice is the lower voice “L”. 1. Turn on the lower function. Press the [LOWER] button to turn on the Lower function. -
Page 21: Piano Mode
Transpose: The transpose function allows the overall pitch of the instrument to be transposed up or down by a maximum of one octave in semitone steps. 1. Enter the transpose setting interface. Press the [TRANSPOSE+] / [TRANSPOSE-] buttons to edit the transpose setting. The LCD shows the current transpose value. -
Page 22: Twinova
Twinova: The Twinova function splits the keyboard into two areas with the same pitch and voice, for the convenience of playing together with a friend or instructor. 1. Turn on the Twinova function. Press the [TWINOVA] button to turn on the function. The default split point is E3. -
Page 23: Auto Accompanimant
Auto Accompaniment: The auto accompaniment function puts a full backing band at your fingertips. All you have to do is to play chords with your left hand, and the accompaniment will automatically play along, following the chords you play. With auto accompaniment, even a solo performer can enjoy the experience of playing with a full band or orchestra. - Page 24 1. Turn on the A.B.C. function. Press the [A.B.C.] button to turn on the A.B.C. Function. The LED button lights up. Press the button repeatedly to switch between “A.B.C.” ¦ “FULL RANGE” ¦ “OFF”. To select a desired way to play chords, press and hold the [A.B.C.] button to enter the setting menu, then use the [+/YES]/[-/NO] buttons to select a chord type.
-
Page 25: Chord Bassics
Chord Basics A chord, in music, is a harmonic set of three or more notes that are heard simultaneously. The most common type of chord is a triad. A triad is a set of three notes that can be stacked in thirds. When arranged this way, the triad‘s notes, from lowest pitched to highest, are called: the Root, the Third, and the Fifth. -
Page 26: Adjusting Tempo
Single Finger Single-finger makes it easy to produce major, seventh, minor and minor seventh chords by pres- sing a minimum number of keys on the. auto accompaniment section. Multi Finger Multi-finger allows you to play chords in normal fingering. Try playing the 32 types of C chords listed on the right. -
Page 27: One Touch Setting O.t.s
One Touch Setting (O.T.S.) When One Touch Setting is switched on, you can instantly recall all auto accompaniment related settings including voice selection and digital effects, all with the single touch of a button. 1. Turn on the One Touch Setting function. Press the [O.T.S.] button to turn on the function. -
Page 28: Mixer
Mixer: The Mixer function allows you to separately adjust the volume of each track, so as to keep an appropriate volume balance. 1. Enter the Mixer menu. Press the [MIXER] button to enter the Mixer menu. The LCD shows the current parameter. 2. -
Page 29: Dsp Effect
DSP Effect: The DSP effects will add ambiance and depth to your per- formance in a variety of ways. They can be set to simulate sound from a real environment, making your tone more crystal and strong, or even give you distortion for a rougher edge. - Page 30 Parameter Display Range Voice L Global Reverb Level L G.REV SEND 00-32 Send Voice L Global Chorus Level L G.CHR SEND 00-32 Send Echo1, Echo2, Echo3, Phaser1, Phaser2, Microphone DSP Effect Type MIC DSP TYPE Enhanc, Wah, Overdv1, Overdv2, Lo-Fi, Comp, Gate, None(Off) Microphone DSP Effect MIC DSP LEVEL...
-
Page 31: Harmony
Harmony: The harmony function will automatically add harmony effect to the notes you play in the right hand area, enriching your performance with more harmonic expression.. Playing with Harmony 1. Press the [HARMONY] button to turn on the function. The button LED lights up. -
Page 32: Function Menu
Function Menu: 1. Enter the function menu. Press the [FUNCTION] button to enter the function menu. The LCD shows the current parameter. 2. Adjust the settings. Use the data dial to select a parameter. Use the [+/YES]/[-/ NO] buttons to change the setting of the selected item. Press [+/YES] and [-/NO] at the same time to restore the default setting. -
Page 33: Tune
Tune This function adjusts the pitch of the entire keyboard in 2-cent increments over a range of ±50 (100 cents). 1. In the function menu, use the data dial to select “TUNE”. 2. Use the [+/YES]/[-/NO] buttons to change the tune value. Octave This function will shift the pitch of the specified voice layer up or down by one octave. -
Page 34: Twinova Split Point
Twinova Split Point / Octave You can adjust the split point and octave for Twinova mode. 1. In the function menu, use the data dial to select “TWINO- VA SPLIT”/“TWINOVA OCTAVE”. 2. Use the [+/YES]/[-/NO] buttons to change the setting. Harmony Type 1. -
Page 35: String Resonance
String Resonance When a piano voice is selected, pressing the sustain pedal will add a string resonance effect to the notes you play. The string resonance effect faithfully recreates the resonance from the strings and soundboard of an acoustic grand piano. 1. -
Page 36: Metronome Beat
Metronom Beat 1. In the function menu, use the data dial to select “METRO”. 2. Use the [+/YES]/[-/NO] buttons to change the Beat. Fade Time Set the time length (in seconds) for Fade In/Out. 1. In the function menu, use the data dial to select “FADE TIME”. -
Page 37: Bluetooth Link
Bluetooth Auto Link This function decides whether Bluetooth connection is auto- matically linked or not. Once a Bluetooth device is success- fully paired, it will automatically establish a connection when the device is within range. 1. In the function menu, use the data dial to select “BLUE- TOOTH AUTO”. -
Page 38: Performance Memory
Performance Memory: This function is designed to make your performance easy and efficient. It allows you to save virtually all panel settings to a single performance memory for instant recal. Note: To reset the performance memory to factory default, press and hold both the [STORE] and [M1] buttons, then turn on the power. -
Page 39: Song Recording
Song Recording: You can record your performance in two ways: MIDI recor- ding and Audio recording. MIDI Recording In MIDI recording, you can record and save your keyboard performance as a user song on the instrument. You can then play it back and save it to a USB flash drive. Prepare Recording 1. - Page 40 Play back Recording 1. During recording, if you press the [REC] button to stop recording, it will enter Song mode and show the recorded song. Press the [START/STOP] button to play back the user song. 2. In standby mode, press the [SONG] button to enter Song mode, then use the [+/YES]/[-/NO] buttons to select the user song.
-
Page 41: Audio Recording
Note: 1. The settings of the first and the last items above cannot be changed until a USB flash drive is inser- ted. Please refer to Connecting USB Flash Drive for details. 2. If you have used the DSP effects during MIDI recording, when you play back the MIDI file, the pre- set DSP effects for voice R1/ R2/ L will be disabled and the relevant DSP Types will be set to OFF and cannot be changed. -
Page 42: Song
Song The instrument features several complete piano songs. Please refer to the Song List for details. Play the Songs 1. Press the [SONG] button to enter Song mode. The LCD shows the current song number and name. 2. Use the data dial or [+/YES]/[-/NO] buttons to select a desired song. -
Page 43: Bluetooth
Bluetooth Bluetooth Pairing 1. The Bluetooth function is turned on by default, with details as below: Bluetooth Name: PIANO-AUDIO. 2. You can pair the instrument with an external mobile device. After it is paired, the instrument will remember that device and automatically pair it when the mobile device is within range. -
Page 44: Connecting Usb Flash Drive
Connecting USB Flash Drive The instrument recognizes USB flash drives (32M to 128G) in FAT32 format. It does not support multi-partitioned USB flash drives. We recommend formatting the USB flash drive on the instrument before using. Note: A USB flash drive in FAT32 format supports up to 512 files under its root directory. -
Page 45: Midi
Loading 1. Press and hold the [USB] button to enter the USB menu. Use the data dial to select “Load MIDI”. 2. Press [+/YES]. The LCD will show all MIDI files (*.mid) under the root directory. Use the data dial to select one. 3. -
Page 46: Specifications
Specifications: All specifications and appearances are subject to change without notice. Keyboard & Display Keyboard & Display Keyboard 88 Graded Hammer-Action Keys with Triple Sensors Touch Response 6 types, off Display Multi-functional LCD Voices Polyphony (max.) Voices 1200 Sounds, 13 Drum Kits Layer Left, Right1, Right2 Split... - Page 47 Song & Recording Song & Recording Audio Playback Audio Recorder Score Display Pitch Adjustment Transpose -12 ~ +12 Octave -2 ~ +2 Tuning -50 ~ +50 Other Functions Mixer Yes (14 Tracks) Performance Memory 32 preset banks x6 Assignable Controllers Soft Pedal Pitch Bend Modulation...
-
Page 48: Troubleshooting
Troubleshooting: The following overview is intended as an aid to rapid troubleshooting. If you are unsure, contact the manufacturer, the dealer or appropriate specialist personnel. Never open the device by yourself! Symptom Troubleshooting The speakers produce a pop sound whenever the This is normal and is no cause for alarm. -
Page 49: Cleaning
Cleaning: A regular cleaning of the device from impurities and dust increases the durability of the product. Always disconnect the device from the power supply before cleaning it! Never clean the appliance wet! Optical lenses should be cleaned with a dry microfiber cloth to optimize light output. Ventilation grilles and openings should always be cleaned of dust and dirt. -
Page 50: Voice List
Voice List:... -
Page 61: Style List
Style List:... -
Page 63: Song List
Song List:... -
Page 64: Chord List
Chord List:... -
Page 65: Midi Implementation Chart
MIDI Implementation Chart:... - Page 66 Notes Dokument-ID: MS-EPI0001116-000 (07/2020)
Need help?
Do you have a question about the Grand 3100 and is the answer not in the manual?
Questions and answers