Table of Contents
Advertisement
Quick Links
Advertisement
Table of Contents

Related Manuals for Ocean Rodeo Stick-Shift Gen 2


Summary of Contents for Ocean Rodeo Stick-Shift Gen 2
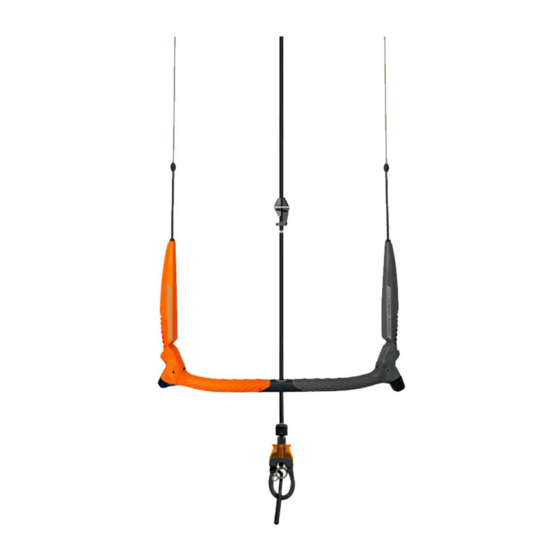
- Page 1 Gen 2 KITE CONTROL BAR - FEATURING SIDEWINDER BACK LINE TRIM.
-
Page 2: Table Of Contents
TABLE OF CONTENTS WARRANTY........................TAKE A LESSON......................SAFETY PRECAUTIONS....................BAR FEATURES......................USING THE R3 SIDEWINDER..................PIGTAIL GUIDE....................... TUNING THE LINES....................... USING THE LOCK IN TUBE................... TRIM LOOP RELEASE CUFF ACTIVATION..............TRIM LOOP RESET......................BELOW BAR SWIVEL....................USING THE R3 G-STOP (BAR STOPPER) ..............THE R3 FORCE TENSIONER SYSTEM................. -
Page 3: Warranty
All kite control bars are covered by a one year warranty offered to the original purchaser on workmanship and materials. Warranty is limited to the repair or replacement at Ocean Rodeo’s sole discretion. This warranty does not cover damage caused by normal wear and tear, misuse or negligence and does not extend to any other equipment possibly damaged in the event of a product failure. -
Page 4: Take A Lesson
TAKE A LESSON! THIS MANUAL IS NOT A KITE LESSON! BEFORE YOU LAUNCH YOUR KITE, TAKE LESSONS FROM A PROPERLY CERTIFIED SCHOOL! For information on lessons in your area go to oceanrodeo.com/kiteboarding/L2K IMPORTANT NOTE Read this manual thoroughly before using your new kite control bar. This is not a kiteboarding instruction manual, nor does it eliminate the need for professional instruction in the sport of traction kiting. -
Page 5: Safety Precautions
Caution: Kite powered sports can be very dangerous and physically demanding. The user of this product should understand that participating in kite powered sports may involve serious injury or death and agree to observe the following safety precautions: � Get instructions specific to your kite and its safety systems. �... -
Page 7: Bar Features
BAR FEATURES .......R3 LINE SPLITTER .........PUSH AWAY KITE LEASH RELEASE CUFF ......BACK FLYING LINES ......... STAINLESS CLIP ..FORCE TENSIONER SPRING CAP WITH NEOPRENE COVER ..R3 FORCE TENSIONER SYSTEM ......EXTENDING LEASH ....R3 G-STOP: BAR STOPPER ........LOCKING TUBE .........BAR FLOATS ........GROOVE BAR .........R3 SIDEWINDER: BACK LINE TRIM TUNER ....R3 G-STOP: BAR STOPPER... -
Page 8: Using The R3 Sidewinder
USING THE R3 SIDEWINDER NOTE: While riding, the R3 Sidewinder should be located on your right side. To add power: Twist the tuning knob clockwise (1). The winder will add ½ cm of trim for every quarter turn of the knob. To depower: Bump or nudge the tuning knob outwards to allow the winder to unspool the wound up trim line in a controlled manner (2). - Page 9 When the bar is at max power, the bar ends will appear as shown in image (1). When the bar is at minimum power, the bar ends will appear as shown in image (2). Warning: Over tightening the back line trim winding mechanism can result in damage to your bar floats, spring tensioning system, and the winder itself.
-
Page 10: Pigtail Guide
PIGTAIL GUIDE Warning: Before riding with your new Ocean Rodeo Pilot bar, please ensure you are using the appropriate pigtails and that your kite is properly rigged. Included with this bar you have received: 4 x 20cm pigtails (A) 2 x 30cm pigtails (B) - Page 11 If you have noticeable front line stretch, you can offset it by replacing the backline pigtails with one of the longer alternative sets provided. For Ocean Rodeo Kites from 2017 and older: Use 35cm (C) pigtails to offset frontline stretch.
-
Page 12: Tuning The Lines
TUNING THE LINES Your kite’s performance relies on properly tuned lines! Make a habit of checking your line lengths regularly. Attach all four lines to a solid object (fence, line wrapped around a tree, etc.) Pick up the kite bar and make sure the winder is set for maximum power before tuning your lines. - Page 13 line lengths using your pigtails. See the Pigtail Guide on the following pages. If the springs are not equally compressed when fully powered, the trimline has stretched and must be adjusted at the winder. To fix this: � Measure the difference between the two spring lengths when fully powered.
-
Page 14: Using The Lock In Tube
USING THE LOCK-IN TUBE The lock-in tube helps keep your trim loop hooked in if you have slack or minimal tension on your lines while riding. To use the lock-in tube, simply flex the tubing into the head of the harness, under the trim loop. -
Page 15: Trim Loop Release Cuff Activation
TRIM LOOP RELEASE CUFF ACTIVATION Note: Always test your quick release before each session! To separate yourself from the trim loop in an emergency situation, push the orange release cuff away from you. As long as your kite leash is attached to the center line leash attachment, the control bar will ride up a single front line and depower the kite. -
Page 16: Trim Loop Reset
TRIM LOOP RESET To reset your trim loop after it has been released: � Begin by locking the cuff in the UP position if it is not already. To do this hold the trim loop system in an upright position and push up on the cuff. �... -
Page 17: Below Bar Swivel
BELOW BAR SWIVEL Twisted front lines can affect the operation of your front line re-ride system. To correct twisted front lines: Grasp the swivel head and turn it in the opposite direction of the line twists. WARNING: Multiple twists in your front lines can create dangerous amounts of friction and prevent proper depowering when the front line re-ride system is activated. -
Page 18: Using The R3 G-Stop (Bar Stopper)
USING THE R3 G-STOP (BAR STOPPER) To adjust the stopper position on the locking tube, align the top edges of both stopper components . To lock the stopper in place, tap it with your control bar. This will offset the two stopper components and engage the friction pad locking mechanism. -
Page 19: The R3 Force Tensioner System
THE R3 FORCE TENSIONER SYSTEM The tensioning system allows the user to depower their kite when there is no tension on the back lines. To keep the tensioning system free from sand and debris, rinse it regularly. This can be achieved by simply dunking the bar in the water as you start your session. -
Page 20: Kite Leash Attachment
KITE LEASH ATTACHMENT Note: Always attach your leash with the rider end release cuff closest to your harness! Follow the images below to attach your leash to the D-ring connection point on your harness:... -
Page 21: Kite Leash Release
KITE LEASH RELEASE Note: Always test your leash release before each session! To eject your leash, push the release cuff away from you as shown in the images below:... -
Page 22: Single Front Line Re-Ride
(This can not be done while lines are wrapped around the bar.) For information on replacing a damaged front leader line contact your ocean rodeo dealer or visit oceanrodeo.com/support... -
Page 23: Storing And Caring
STORING AND CARING For smooth operation; if your bar is covered with sand or debris, give it a quick rinse in the water before and after riding. To avoid tangles, we suggest you wind your lines in a figure 8 pattern around your bar ends. - Page 24 oceanrodeo.com info@oceanrodeo.com NA Toll Free 1-888-544-4969 INT +1 (778) 734-2696 FAX +1 (778) 725-0375...
Need help?
Do you have a question about the Stick-Shift Gen 2 and is the answer not in the manual?
Questions and answers