Table of Contents
Advertisement
Quick Links
Advertisement
Table of Contents

Subscribe to Our Youtube Channel
Summary of Contents for Garmin POWERSWITCH
- Page 1 GARMIN POWERSWITCH ™ Owner’s Manual...
- Page 2 © 2021 Garmin Ltd. or its subsidiaries All rights reserved. Under the copyright laws, this manual may not be copied, in whole or in part, without the written consent of Garmin. Garmin reserves the right to change or improve its products and to make changes in the content of this manual without obligation to notify any person or organization of such changes or improvements. Go to www.garmin.com...
-
Page 3: Table Of Contents
Changing the Fuse in the Vehicle Power Cable............13 Updating Device Firmware....13 Restoring Device Settings....13 Troubleshooting......14 My Garmin PowerSwitch will not stay connected..........14 My accessories are not receiving power............. 14 Can I mount the device in an engine compartment?........ -
Page 5: Getting Started
(Connecting a Control Input, page 4 Connect the device to vehicle power (Connecting the Device to Vehicle Power, page 5 Pair your device with a compatible Garmin navigation device (Pairing with a Garmin Navigation Device, page 8) or a smartphone... -
Page 6: Device Overview
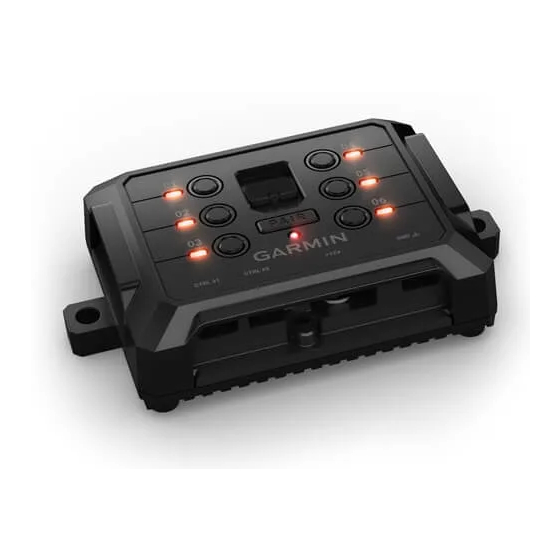
Device Overview Accessory switches Cover latch Pairing button Accessory terminals with #8-32 screws Control terminals with #8-32 screws +12V terminal Device ground terminal (GND) Installation Mounting Considerations • The device must be mounted close to the battery and within the range of the supplied power cable. •... -
Page 7: Mounting The Device
Avoid wires, gauges, air bags, air bag covers, HVAC, and other items when drilling pilot holes and attaching the mount to the vehicle. Garmin is not responsible for any damages or consequences arising from the installation. 1 Place the mount on the selected location. -
Page 8: Opening The Front Cover
Opening the Front Cover You must open the front cover to make electrical connections. 1 Lift the front cover latch and rotate it counter-clockwise. 2 Pull the front cover off of the device. Installation... -
Page 9: Connecting Accessories
Accessory requirements: • Verify the amperage rating of each accessory before wiring it to the Garmin PowerSwitch device. The device supports accessories up to 30 A for each channel and a maximum of 100 A for the entire system. -
Page 10: Connecting A Control Input
Electrical Circuit Protections The Garmin PowerSwitch device limits the amount of electrical current for each output terminal. If a single output exceeds 30 A, the device turns off that output automatically. If the device detects a total system load of more than 100 A, the device turns off all outputs automatically. -
Page 11: Connecting The Device To Vehicle Power
Connecting the Device to Vehicle Power Before you can connect the device to vehicle power, you must remove the warning tag from the +12V terminal on the device. You should always confirm all electrical connections are secure and will not come loose while operating the device. -
Page 12: Pairing And Setup
1 From the app store on your smartphone, install the Garmin PowerSwitch app. 2 Turn on power to your Garmin PowerSwitch device, and place your smartphone within 1 m (3.3 ft.) of your device. 3 On your smartphone, open the Garmin PowerSwitch app. -
Page 13: Garmin Powerswitch App
Displays Garmin PowerSwitch device tabs and custom layout tabs Activating a Power Switch Before you can use the Garmin PowerSwitch app to activate a switch, you must install your Garmin PowerSwitch device in your vehicle and pair it with the Garmin PowerSwitch app. -
Page 14: Customizing A Button
Before you can use control input functions, you must connect a control input to your Garmin PowerSwitch device (Connecting a Control Input, page You can assign one or more switches to turn on when the Garmin PowerSwitch device receives a signal from a control input. 1 Select Settings. -
Page 15: Routines
Routines Routines automate your Garmin PowerSwitch device. When you define a routine on your compatible Garmin navigation device, it turns switches on or off automatically when the conditions of the routine are met. For example, you can set a routine to turn on a switch at specific time each day or when your vehicle reaches a specific speed. -
Page 16: Device Maintenance
Adding a Routine 1 From the Garmin PowerSwitch app, select > Routines. 2 If necessary, select Add Routine. 3 Select When. 4 Select a trigger: • To set a switch to trigger when your vehicle reaches a specific speed, select Speed > Next, and follow the on-screen instructions to enter speed thresholds. -
Page 17: Changing The Fuse In The Vehicle Power Cable
8 Reinstall the top cover. Updating Device Firmware The Garmin PowerSwitch app notifies you when firmware updates for your Garmin PowerSwitch device are ready to install. When the update notification appears, follow the on-screen instructions to complete the update process. -
Page 18: Table Of Contents Device Information
Maximum system output 100 A Current draw with all outputs off 3 mA Water rating IEC 60529 IPX7 The device withstands incidental exposure to water of up to 1 m for up to 30 min. For more information, go to www.garmin.com/waterrating. Troubleshooting... -
Page 19: Index
Index overview 9 cleaning the device 12 control input 10 current limits 6 device, cleaning 13 fuse, changing 13 mounting the device 3–7, 14 pairing 8 phone 8 phone, pairing 8 power cables changing the fuse 13 vehicle 5–7 power switch 9 customizing 10–12 resetting the device 13 smartphone features, connecting 8 software, updating 13 specifications 14 troubleshooting 13, 14 vehicle power cable 7 Index... - Page 20 April 2021 GUID-B958A516-72E8-47CA-8793-6337D398EC08 v2...


Need help?
Do you have a question about the POWERSWITCH and is the answer not in the manual?
Questions and answers