Advertisement
Quick Links
Advertisement

Related Manuals for Certa CTCHSH350WA


Summary of Contents for Certa CTCHSH350WA
- Page 1 350W CHAINSAW SHARPENER CTCHSH350WA...
-
Page 3: Safety And Warnings
SAFETY & WARNINGS WARNING: Read all safety warnings, instructions, illustrations and specifications provided with this power tool. Failure to follow all instructions listed below may result in electric shock, fire and/or serious injury. • Save all warnings and instructions for future reference. •... - Page 4 Personal safety • Stay alert, watch what you are doing and use common sense when operating a power tool. Do not use a power tool while you are tired or under the influence of drugs, alcohol or medication. A moment of distraction while operating power tools may result in serious personal injury.
- Page 5 • Keep cutting tools sharp and clean. Properly maintained cutting tools with sharp cutting edges are less likely to seize and are easier to control. • Use the power tool, accessories and tool bits etc. in accordance with these instructions, taking into account the working conditions and the work to be performed.
- Page 6 • Wear personal protective equipment. Depending on application, use face shield, safety goggles or safety glasses. As appropriate, wear dust mask, hearing protectors, gloves and shop apron capable of stopping small abrasive or workpiece fragments. The eye protection must be capable of stopping flying debris generated by various operations.
- Page 7 • Before starting the grinder, ensure that the grinding wheel is correctly secured and positioned in the up, rest position. Do not over-tighten the wheel mounting flange nut. • Use the vice to hold the chain. It frees both hands for moving the grind head/wheel down to grind the chain.
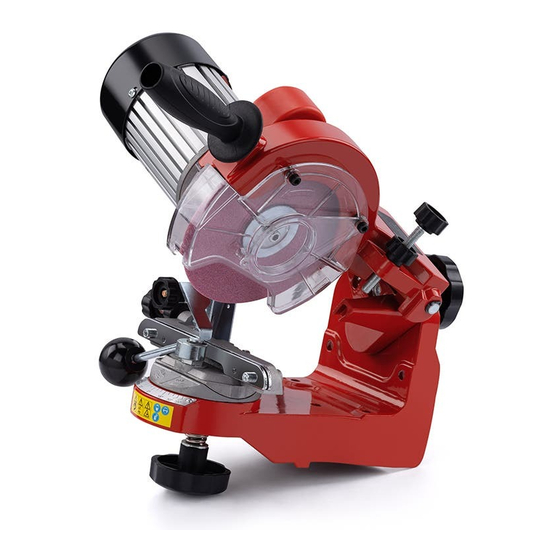
- Page 8 OVERVIEW Part List Handle Grinding disk lateral guard Depth adjustment screw Cutting edge angle adjustment wheel Base Screw clam cradle Angle adjustment wheel Scale Clamping lever Mean distance adjustment screw Guide flap valve Screw clamp Guide position set screw Setting screw Grinding disk Grinding disk protective enclosure...
-
Page 9: Installation
INSTALLATION Mounting Base Unit to Bench/Wall Mount base assembly on a bench top or post, using x2 lag bolts or nuts and bolts (not provided). Mount at chest height for best visibility and ease of operation. For bench mounting, ensure the base unit extends out from the bench edge clearing the extending tabs of the base unit as shown (Figure 1). - Page 10 Mounting Motor/Head Assembly to Base Unit Mount pivot point on the motor/head assembly into the pivot hole located in the centre of the base assembly back (Figure 3). Insert bolt through the holder at the base of the motor/head assembly into the base assembly back (Figure 3).
- Page 11 Mounting Operating Handle Attach operating handle to motor/head (Figure 5). Selecting and Mounting the Grinding Wheel For the appropriate size grinding wheel; Ensure that the grinding wheel is in perfect condition. Hang the wheel by the centre hole and tap it lightly with a metal object on one side near the perimeter. If a flat tone is heard it may be cracked or broken.
- Page 12 Insert the bolt through the arbour (Figure 7). Position the grinding wheel inside the shield guard assembly onto the motor flange and insert arbour bolt, with washer, through the wheel centre hole into motor shaft. Tighten the arbour bolt, with the large 5.5mm Allen wrench (Figures 8 and 9). Do not over -tighten this bolt, as doing so may cause damage to the wheel, rendering it unusable.
- Page 13 Dressing the Grinding Wheel Set the motor/head to the 90-degree position. With the grinder in the “OFF” position. Check the profile of the wheel using the special template (provided with this unit). If the wheel profile is not correct according to the template, the wheel will need to be dressed until it does fit the proper profile.
-
Page 14: Operation
OPERATION Grinding a Chain There is risk of serious personal injury for chain saw operators or bystanders from improperly sharpened saw chain. Read and follow all manufacturer’s instructions for your saw chain. WARNING: Immediately unplug the power cord if the motor does not turn the wheel when the grinder power switch is in the “on”... - Page 15 Grinding for Bench or Wall Mounted Workstations Note: All adjustments must be made prior to applying power to the unit. 1. Position the saw chain to be ground onto the vice (Figure 12). 2. Setting top-plate cutting angle: Set grinder head angle to correct degree (Figure 13). Adjustment is made by loosening adjustment knob, at the back end of the grinder and rotating the grinder head to the desired angle.
- Page 16 Set cutter top-plate grind angle by rotating vice assembly to the right of centre (0°) (Figure 15). Rotate vice assembly to the left of centre (0°) (see Figure 16). Setting vice-tilt angle: The cutting chain vice assembly has a tilting feature, (Figure 17), that is used to control the side plate hook angle on some chains.
- Page 17 Tilt vice to INWARD position for left-hand cutters (Figure 18). Tilt vice to OUTWARD position for right hand cutters (Figure 19). Set the chain stop. Using the cutting chain stop centring knob, centre the chain stop behind the cutter as shown (Figure 20). Make final adjustments to the chain stop by adjusting the knob at the back of the chain stop support.
- Page 18 Centre the cutting chain in the vice. Loosen lock nut with 10mm wrench (Figure 21). Centre chain by using 5.5 Allen wrench (Figure 22). Once centred, retighten nut. Note: This setting will keep the left and right hand cutters equal when grinding top- plates.
- Page 19 Set grind depth. Locate the chain cutter for grinding. Lower the grinding wheel (with motor off) into the gullet (Figure 23). Set depth of grind by using the depth adjustment knob (Figure 24). 10. Grind the cutters. Grind all right-hand cutters, rotate vice and grind all left-hand cutters.
- Page 20 ASSEMBLY...
- Page 21 DIMENSIONS...
-
Page 23: Specifications
SPECIFICATIONS Supply voltage 220-240V/50Hz Motor input power 230W Maximum no-load speed 3000 min Ingress protection IP 20 Weight 5.5kg Grinding wheel Ø145x3.2x22.3mm Maximum mitre angle 40°... - Page 24 Need more information? We hope that this user guide has given you the assistance needed for a simple set-up. For the most up-to-date guide for your product, as well as any additional assistance you may require, head online to help.kogan.com...
Need help?
Do you have a question about the CTCHSH350WA and is the answer not in the manual?
Questions and answers