
Subscribe to Our Youtube Channel
Related Manuals for iWantit iPHWAV10


Summary of Contents for iWantit iPHWAV10
- Page 1 & iPod with clock radio iPHWAV10 instruction manual (iPod and iPhone not included)
-
Page 3: Table Of Contents
Contents unpacking ............................4 product overview ..........................5 - front view ................................... 5 - rear view ..................................... 5 - top view ....................................5 control panel ................................5 remote control ................................6 removing the insulating strip from the remote control ................7 battery installation for the remote control ....................... -
Page 4: Unpacking
Thank you for purchasing your new iWantit Dock for iPhone & iPod with Clock Radio. We recommend that you spend some time reading this instruction manual in order that you fully understand all the operational features it offers. You will also find some hints and tips to help you resolve any issues. -
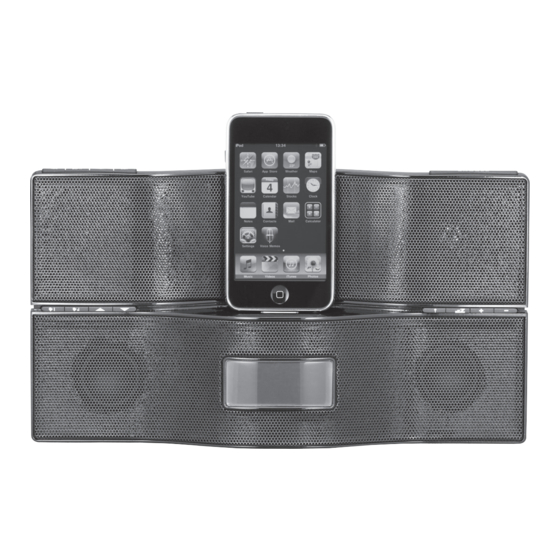
Page 5: Product Overview
product overview front view iPod/iPhone Support LCD Display IR Sensor MEMORY MEM. – MEM. + TUNE – TUNE + STANDBY CL. SET SLEEP AL. 1 AL. 2 SKIP SKIP SOURCE Sensor behind the speaker cover. Speakers Control Panel rear view Control For adjusting the iPod/ iPhone THICKER... -
Page 6: Remote Control
remote control STANDBY/ SOURCE MEM./CL. SET DIMMER MENU SNOOZE ENTER AL. 2 FM ST. AL. ON/OFF MEMORY SLEEP AL. 1 UP/DOWN Button STANDBY/SOURCE Button • In standby mode, press this button Press to select the options on the iPod/ to turn the unit on. iPhone menu screen. -
Page 7: Removing The Insulating Strip From The Remote Control
removing the insulating strip from the remote control Remove the insulating mylar strip from the battery if the battery is being used for the first time. It is located at the bottom back side of the remote control. battery installation for the remote control Press and hold the battery release tab and pull out the battery holder completely. -
Page 8: Remote Control Operation Range
remote control operation range Point the remote control at the unit no more than 5 metres from the remote control sensor and within MEMORY MEM. – MEM. + TUNE – TUNE + STANDBY CL. SET SLEEP AL. 1 AL. 2 SKIP SKIP SOURCE... -
Page 9: Battery Power (For Clock Backup Only)
battery power (for clock backup only) Open the battery door and insert 2 x AAA batteries type (not included) with the correct polarity as indicated by the “+” and “–” symbols inside the battery compartment. Replace the battery door making sure the batteries are firmly and correctly in place. The clock , date and alarm settings are now saved and you do not need to adjust them again even if the main unit is disconnected from power. -
Page 10: Switching On Your Unit For The First Time
switching on your unit for the first time Connect the mains adapter to the unit and then to the mains socket. Press the STANDBY/SOURCE button on the unit or on the remote control to turn the unit on. basic operation switching On/Off After connecting the mains adapter to the unit and the mains socket, the unit will enter Standby mode. -
Page 11: Setting The Clock
setting the clock When the unit is connected to the mains socket with the mains adapter for the first time, time digits ‘ ’ & date digits ‘ ’ will show on the display. In Standby mode, press and hold the MEMORY/CL.SET button on the unit or press the MENU/MEM./CL.SET button on the remote control to enter the clock set mode. -
Page 12: Setting The Alarms
setting the alarms In standby mode, press and hold the MEM –/AL.1 button on the unit or on the remote control to set ALARM 1. The alarm indicator and the hour digits will flash. Press the SKIP buttons to adjust the hour digits, then press the MEM –/AL.1 button to confirm. -
Page 13: Sleep Function
sleep function This function automatically switches the unit to standby mode after the preset time has elapsed. To activate the sleep function, press the SLEEP button on the unit or on the remote control, “120” and “Sleep” indicators will show on the display. Press the SLEEP button repeatedly to select the sleep time (in minutes): 120 mins 90 mins... -
Page 14: Storing Stations
storing stations You can store up to 10 of your favourite stations to the preset stations. This will enable you to access your favourite stations quickly and easily. To store a preset, you must first be listening to the station that you would like to save, then press the MEMORY/CL. -
Page 15: Ipod/Iphone Operation
iPod/iPhone operation selecting iPod/iPhone mode STANDBY/SOURCE button on the unit or on the remote control repeatedly to Press the select iPod mode. inserting the iPod/iPhone Insert your iPod/iPhone into the iPod/iPhone dock. Always remove the case of your iPod/iPhone before inserting it into the dock. Turn the CONTROL behind the speaker to adjust the position of the support until it touches the rear panel of your iPod/ iPhone. -
Page 16: Charging Your Ipod/Iphone
charging your iPod/iPhone Your iPod/iPhone has an internal non-removable battery. The battery may need to be charged if it has not been used for a while. The iPod/iPhone will automatically recharge while it is docked to the unit. Recharging will occur during standby and during operation. • If you charge the iPod/iPhone while playing music, it may take a longer time. -
Page 17: Hints And Tips
If the unit is not working properly disconnect the power source and then reconnect it. specifications model iPHWAV10 Mains adapter Input 100-240V ~ 50/60 Hz 0.3A mains supply Mains adapter Output DC 5V 2.0A output power 2 x 2W battery power 1.5V x 2 (AAA size) (for clock back-up only) -
Page 18: Safety Warnings
safety warnings safety • Read all the instructions carefully before using the unit and keep them for future reference. • Always disconnect the unit from the mains • Retain the manual. If you pass the unit onto a supply before connecting/ disconnecting other third party make sure to include this manual. - Page 19 CAUTION RISK OF ELECTRIC SHOCK DO NOT OPEN The lightning flash with arrowhead symbol, within an equilateral triangle, is intended to alert the user to the presence of uninsulated “dangerous voltage” within the unit’s enclosure that may be of sufficient magnitude to constitute a risk of electric shock.
- Page 20 Apple performance standards. Apple is not responsible for the operation of this device or its compliance with safety and regulatory standards. All trademarks are the property of their respective owners and all rights are acknowledged. DSG Retail Ltd • Maylands Avenue • Hemel Hempstead Herts • HP2 7TG • England (P.N. iPHWAV10-002)
Need help?
Do you have a question about the iPHWAV10 and is the answer not in the manual?
Questions and answers