Franke FCBI 1204 C X Instruction Manual
Hide thumbs
Also See for FCBI 1204 C X:
- Instructions manual (36 pages) ,
- User manual (160 pages) ,
- Installation manual (16 pages)
Table of Contents
Advertisement
Available languages
Available languages
Quick Links
Advertisement
Table of Contents

Related Manuals for Franke FCBI 1204 C X


Summary of Contents for Franke FCBI 1204 C X
- Page 1 Instructions Manual Manual de Instruções FCBI 1204 C X...
-
Page 2: Table Of Contents
INDEX RECOMMENDATIONS AND SUGGESTIONS ......................3 CHARACTERISTICS..............................6 INSTALLATION................................7 USE ..................................... 8 MAINTENANCE ................................. 10 ÍNDICE CONSELHOS E SUGESTÕES ........................... 12 CARACTERÍSTICAS ..............................15 INSTALAÇÃO ................................16 UTILIZAÇÃO ................................17 MANUTENÇÃO................................19... -
Page 3: Recommendations And Suggestions
RECOMMENDATIONS AND SUGGESTIONS The Instructions for Use apply to several versions of this appliance. Accordingly, you may find descriptions of individual features that do not apply to your specific appliance. INSTALLATION • The manufacturer will not be held liable for any damages resulting from incorrect or improper installation. - Page 4 • If the instructions for installation for the gas hob specify a greater distance specified above, this has to be taken into account. Regulations concerning the discharge of air have to be fulfilled. • Use only screws and small parts in support of the hood. Warning: Failure to install the screws or fixing device in accordance with these instructions may result in electrical hazards.
- Page 5 • “CAUTION: Accessible parts may become hot when used with cooking appliances.” MAINTENANCE • Switch off or unplug the appliance from the mains supply before carrying out any maintenance work. • Clean and/or replace the Filters after the specified time period (Fire hazard). •...
-
Page 6: Characteristics
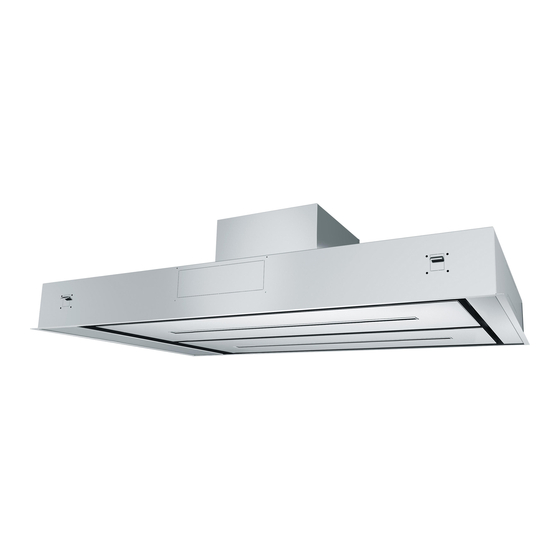
CHARACTERISTICS Dimensions... -
Page 7: Installation
INSTALLATION Fixing the Hood • In all cases where the ceiling is not strong enough at the suspension point, the installer must provide strengthening using suitable plates and backing pieces anchored to the structurally sound parts. ELECTRICAL CONNECTION • Connect the hood to the mains through a two-pole switch having a contact gap of at least 3 mm.. -
Page 8: Use
Control panel Button Led Function Turns the lights ON/OFF at maximum strength. Press and hold for approx. 2 seconds to turn the lighting system on and off at reduced intensity. Fixed Turns the motor on/off at speed one. Delay function: Press and hold the button for approx. - Page 9 REMOTE CONTROL The appliance can be controlled using a remote control powered by a 1.5 V carbon-zinc alkaline batteries of the standard LR03-AAA type (not included). • Do not place the remote control near to heat sources. • Used batteries must be disposed of in the proper manner.
-
Page 10: Maintenance
MAINTENANCE Opening Panel • Open the Panel by pulling it. • Clean the outside with a damp cloth and neutral detergent. • Clean the inside using a damp cloth and neutral detergent; do not use wet cloths or sponges, or jets of water; do not use abrasive substances. - Page 11 Activated Charcoal Filter (Recirculation Version) This cannot be washed or regenerated, and must be changed when led S1 starts to flash, or at least once every 4 months. The Alarm signal, if it has been activated, only appears when the Suction motor is turned on.
-
Page 12: Conselhos E Sugestões
CONSELHOS E SUGESTÕES As instruções para uso aplicam-se a vários modelos deste aparelho. Por isso, é possível que estejam aqui descritas algumas características do equipamento que não digam respeito ao seu aparelho específico. INSTALAÇÃO • O fabricante declina toda e qualquer responsabilidade por eventuais danos decorrentes de instalação ou utilização incorreta ou imprópria. - Page 13 • Utilize apenas parafusos e peças pequenas apropriadas para o exaustor. • Verifique se a tensão da rede elétrica corresponde à indicada na placa de características fixada no interior do exaustor. Advertência: a não utilização de parafusos ou elementos de fixação em conformidade com estas instruções pode causar riscos elétricos.
- Page 14 • “CUIDADO: As partes acessíveis podem aquecer muito durante a utilização dos aparelhos de cozimento.” MANUTENÇÃO • Desligue o interruptor de alimentação do aparelho ou retire a ficha da tomada de corrente, antes de realizar qualquer serviço de manutenção. • Limpe e/ou substitua os filtros, respeitando os intervalos especificados pelo fabricante (perigo de incêndio).
-
Page 15: Características
CARACTERÍSTICAS Dimensões... -
Page 16: Instalação
INSTALAÇÃO Fixação do Exaustor • Nos casos em que o teto não for suficientemente forte no ponto de suspensão, o instalador terá de o reforçar colocando placas e contraplacas fixadas às partes estruturais resistentes. LIGAÇÃO ELÉTRICA • Ligue o exaustor à rede de alimentação elétrica intercalando um interruptor bipolar com abertura mínima entre os contatos de 3 mm. -
Page 17: Utilização
UTILIZAÇÃO Quadro de comandos Tecla Led Função Acende/Apaga a luzes na sua intensidade máxima. Pressionada durante cerca de 2 segundos, liga/desliga o sistema de iluminação, na intensida- de mais baixa. Liga/desliga o motor com velocidade I. Fixo Função Delay: Intermitente Mantendo a tecla pressionada durante cerca de 3 segundos, o sistema Ativará/Desativará... - Page 18 CONTROLE REMOTO É importante utilizar no controle remoto pilhas alcalinas de zinco-carvão de 1,5 V no formato padrão LR03-AAA (não incluído). • Não coloque o controle remoto perto de fontes de calor. • Não abandone as pilhas usadas no meio ambiente; essas devem ser depositadas em recipientes apropriados.
-
Page 19: Manutenção
MANUTENÇÃO Abertura do painel • Abra o painel, puxando-o para fora. • Limpe a parte de fora com um pano úmido e detergente líquido neutro. • Limpe-o também interiormente, utilizando um pano úmido e detergente neutro. Não utilize panos ou esponjas molhados nem jatos de água. - Page 20 Filtros antiodor de carvão ativo (Versão Filtrante) Não pode ser lavado e não é regenerável. Deve ser substituído quando o led S1 começa a piscar ou, pelo menos, de 4 em 4 meses. Se previamente ativada, a sinalização de alarme disparará...
- Page 22 991.0491.144_ver1...
Need help?
Do you have a question about the FCBI 1204 C X and is the answer not in the manual?
Questions and answers