
Subscribe to Our Youtube Channel
Related Manuals for Airflow Duplexvent Rotary DV1500


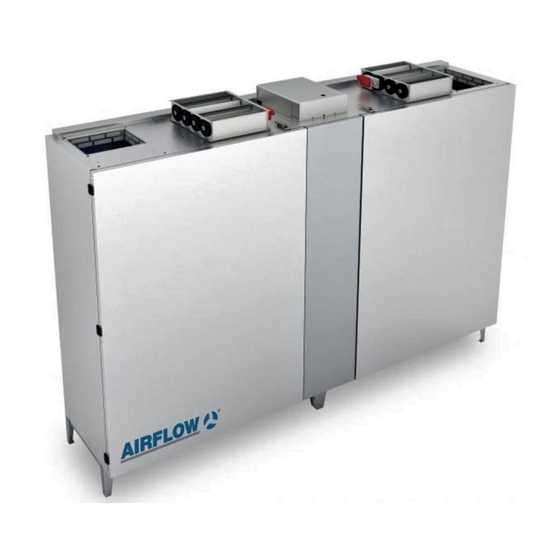
Summary of Contents for Airflow Duplexvent Rotary DV1500
- Page 1 Installation, use and maintenance manual Duplexvent Rotary DV1500-DV15000 (indoor version) Duplexvent Rotary Roof DV1500-DV15000 (outdoor version) Installation, use and maintenance manual...
- Page 2 Dear customer, Thank you for selecting our product. We hope it will work to your full satisfaction. The installation manual contains all necessary instructions, information, advices and recommendations for safe and correct equipment installation and commissioning. Please, read the manual carefully and follow the instructions. Explanation of used symbols: Items or sections marked with Ü...
-
Page 3: Table Of Contents
C o n t e n t s Storage and transport ..................4 Transport of compact units ..................4 Transport of semicompact units ................5 Safety and hygienic instructions ..............5 Safety instructions ....................5 2.1.1 Prior to installation please check: ................6 2.1.2 Prior to the first putting into operation please check: ..........6 2.1.3 When launching the unit for the first time please check:........6... -
Page 4: Storage And Transport
1 S t o r a g e a n d t r a n s p o r t ● The appliance may only be stored in dry, covered places with ambient temperature between -25 °C and +55 °C in such a manner so as to keep the surfaces that will be in contact with transported air weather-protected, dry and clean. -
Page 5: Transport Of Semicompact Units
Transport of semicompact units Semicompact units consist of three blocks that form the unit once they are connected together. This applies on units 8000-15000 Rotary(-N). Lift the units in blocks, one after another. The blocks of units are equipped with rabbets where the rope can lead. Tie up each block from underneath and use bars before lifting the blocks. -
Page 6: Prior To Installation Please Check
heater and control set are not filled with a heating medium, the remaining heating medium must be drained; the appliance must be dried properly and disconnected from power supply. 2.1.1 Prior to installation please check: ● Completeness of the delivery; ●... -
Page 7: Description Of Units Rotary And Rotary-N
such a way so that positive pressure is on the supply side in comparison to the exhaust side. This must be ensured under all operating conditions of the system. For more details see EN 13779. ● Unpack and install air filters in the last step, just before putting the appliance into operation. You will prevent the filters from getting dirty. -
Page 8: Installation Of Compact Units
Rotary-N unit Key: 1. Intake (supply air) 2. Intake flap (supply air) 3. Roof 4. Supply air filter 5. Rotary heat exchanger 6. Water cooling / direct evaporator 7. Water heating 8. Supply fan 9. Exhaust (supply air) 10. Exhaust (extract air) 11. - Page 9 Duplexvent 1500-5000 Rotary-N *) Only configuration with integrated cooler Type Duplexvent Rotary Standard door T (mm) Duplexvent 1500 Rotary Duplexvent 2500 Rotary Duplexvent 4000 Rotary 1200 Duplexvent 5000 Rotary 1200 3. Level the casing of the unit horizontally, adjust the stand feet as needed (part of delivery). The base frame of the unit must not be disassembled or modified in any way –...
-
Page 10: Assembly Of Semicompact Units
2.5 Assembly of semicompact units The following steps describe the assembly of unit with the configuration of blocks and ports in the picture below. The way of connecting wires between blocks via wiring boxes is described in the Chapters 2.5.4 to 2.5.7. The alternative way using connectors is described in the Chapter 7. Key: 1,2,3 –... - Page 11 Duplexvent 8000 – 15000 Rotary-N (outdoor version) *) Only when water heater or chiller is installed **) Only when integrated chiller is installed Type Duplexvent Rotary-N Standard door T (mm) Duplexvent 8000 Rotary-N 1600 Duplexvent 12000 Rotary-N 1800 Duplexvent 15000 Rotary-N 2000 4.
- Page 12 Connecting blocks 1, 2 and 3 5. Place the blocks next to each other and make sure they are all levelled. Adjust the stand feet as needed. Using the spirit level make sure that the blocks 1, 2 and 3 are levelled in all three axes x, y and z.
- Page 13 Tightening the unit blocks together 8. Gradually tighten the connections. Using the spirit level make sure that the blocks being connected remain levelled. 9. Once you connect the blocks 1 and 2 the sealing between the blocks should be adhering to the construction of blocks along the whole length of the sealed connection.
-
Page 14: Description Of Assembled Unit
2.5.2 Description of assembled unit Duplexvent 8000 – 15000 Rotary-N 1. Filter manostat PFe 15. Exhaust (supply air) 2. Intake (supply air) 16. Exhaust (extract air) 3. Shut-off flap (supply air) Se*) 17. Exhaust fan Mi 4. Temperature sensor TEA 18. -
Page 15: Manipulation With Door On The Roof
Duplexvent 8000 – 15000 Rotary-N, rear view 1. Mixing valve *) 2. Water heater pump *) 3. Hood with droplet eliminator *) 4. Exhaust (extract air) *) optional equipment 2.5.3 Manipulation with door on the roof · Handle the door on the roof very carefully, especially when gusts of wind are imminent, to avoid any injury. -
Page 16: Connecting Fans And Propulsion Of Rotary Heat Exchanger
2.5.4 Connecting fans and propulsion of rotary heat exchanger Connected on delivery: · Fan Me is completely connected up to the junction box. · Fan Mi is connected to the wiring box. Connect: ● Lead the cable Mi with the working voltage 400V from the junction box into the wiring box. Lead the cable Rotary from the junction box into the wiring box. -
Page 17: Connecting Pressure Sensors
Connecting temperature sensors 2.5.6 Connecting pressure sensors Connected on delivery: ● Manostat PFi is completely connected up to the junction box; ● Manostat PFe is connected to the wiring box. Connected on delivery, optional equipment: ● Manometer PMe is placed in a wiring box that is connected to the junction box; ●... -
Page 18: Connecting Servo Motors
Connecting pressure sensors 2.5.7 Connecting servo motors Connected on delivery, optional equipment ● Both parts of the circulation damper (SC) are connected to the junction box. ● The circuit of cooler CHW is connected to the hydraulic kit. ● The circuit of heater T is connected to the hydraulic kit. ●... -
Page 19: Roof Assembly (Only 8000-15000 Rotary-N)
Connecting servo motors 2.5.8 Roof assembly (only 8000-15000 Rotary-N) 1. Make sure that the unit is still levelled as described in the Chapter 2.5.1. Protect the unit from adverse weather conditions until the roof assembly is finished. - Page 20 2. Put the roof blocks on the top side of unit casing. The length of roof blocks corresponds with the length of unit blocks. 3. Fix the roof blocks together, use 8 screws M6, place waterproof washers (part of delivery) under the screws.
- Page 21 4. Attach side plates of roof blocks to the side of unit casing. Use holes that are drilled in the side plates. Use tek screws star 4x16mm (part of delivery). Attach the tek screws directly into the casing all around the unit. 5.
- Page 22 7. Seal vertical connections between the middle and outer roof blocks. You will seal 4 connections altogether. silicone 8. Seal the connection between the unit casing and the attached roof by silicone. Seal the connection all around the unit. silicone...
-
Page 23: Ductwork Connection
2.6 Ductwork connection ● Connect the ductwork according to the design documentation ● Ductwork being at least 1m long must be always firmly connected to all ports. This will ensure that an equal air speed profile is achieved throughout the whole port’s cross-section area. The rule does not apply on the intake of supply air e1 when droplet eliminator with hood is fitted here. -
Page 24: Connecting Hot-Water Heating Coil To A Heating Water Supply
2.8 Connecting hot-water heating coil to a heating water supply During the installation of water heating coil follow the guide that is enclosed to this optional accessory. When connecting the water heating coil follow the instructions below: ● Maximum heating medium temperature allowed is 110 °C. The max. -
Page 25: Connecting Direct-Expansion Cooling Coil
2.10 Connecting direct-expansion cooling coil ● When connecting the DX cooling coil follow instructions of your supplier of condensing unit and connecting pipes. 2.11 Installation of manometers for constant flow and constant pressure ● When installing the accessory mechanically and connecting its electronics please follow the guide enclosed to this optional accessory. -
Page 26: Fitting Air Filters
The electrical wiring in the equipment observes valid standards for electrical connections to the TN- C, TN-S, TN-C, S networks. Only a qualified person possessing valid service certificate issued by Airflow Developments Ltd. may carry out the electrical wiring work. The equipment is fitted with terminals for external common grounding. -
Page 27: Commissioning
● A circuit-disconnecting device (a service switch) with the distance of disconnecting contacts of at least 3 mm at all poles must be placed into the power supply to the equipment. This disconnecting device must be fitted appropriately and located near the equipment. A standard circuit-braking device (supplied with the equipment) may be used as such a device if the electrical panel is located is in reachable distance from the equipment. -
Page 28: Access To The Unit Using The Internet
Ü In case of stricter hygienic requirements the measurement of pathogen concentration must be carried out. Ü The appliance must not be operated without air filters. Ü The permanent low-frequency noise level (10 to 100 Hz) generated by the appliance must not exceed the audibility threshold. -
Page 29: Connecting Blocks Of Semicompact Units Using Connectors, Annex
7 C o n n e c t i n g b l o c k s o f s e m i c o m p a c t u n i t s u s i n g c o n n e c t o r s , a n n e x The chapter describes the way of connecting wiring between blocks of semicompact units by using connectors. -
Page 30: Connecting Temperature Sensors
Rotary Connection of fans and propulsion of the rotary heat exchanger = cable comes connected on delivery = cable is to be connected 7.2 Connecting temperature sensors Connected on delivery: ● Sensors TEB and TU1 are completely connected up to the junction box. Connected on delivery, optional equipment: ●... -
Page 31: Connecting Pressure Sensors
7.3 Connecting pressure sensors Connected on delivery: ● Manostat PFi is completely connected up to the junction box; ● Manostat PFe is connected to the connector. Connected on delivery, optional equipment: ● Manometer PMe is placed in a wiring box that is connected to the junction box; ●... -
Page 32: Connecting Servo Motors
7.4 Connecting servo motors Connected on delivery, optional equipment ● Both parts of the circulation damper (SC) are connected to the junction box. ● The circuit of cooler CHW is connected to the hydraulic kit. ● The circuit of heater T is connected to the hydraulic kit. ●...
Need help?
Do you have a question about the Duplexvent Rotary DV1500 and is the answer not in the manual?
Questions and answers