Advertisement
Quick Links
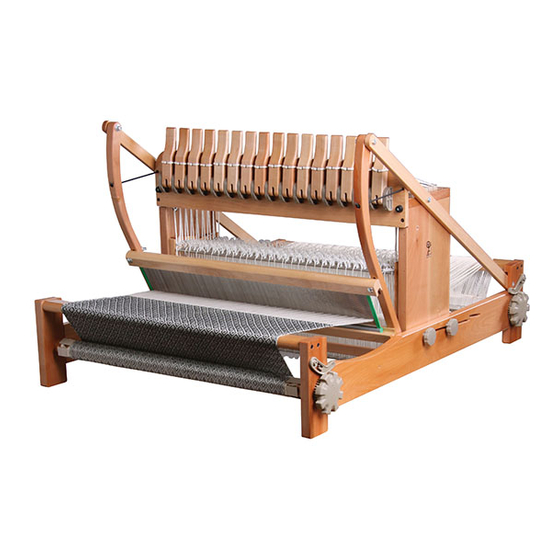
ASHFORD TABLE LOOM - SIXTEEN SHAFT
Ashford Handicrafts Limited
Factory and Showroom: 415 West Street
PO Box 474, Ashburton 7700 New Zealand
Telephone 64 3 308 9087 Facsimile 64 3 308 8664
Email: sales@ashford.co.nz Internet: www.ashford.co.nz
INSTRUCTIONS
610mm (24in)
Ashford Guarantee
Thank you for purchasing this Ashford product. In the unlikely event there is
any fault in manufacture we will replace the item. To validate our guarantee
please visit our website or write to us.
SS610150819V7
Advertisement

Subscribe to Our Youtube Channel
Related Manuals for Ashford TABLE LOOM - SIXTEEN SHAFT


Summary of Contents for Ashford TABLE LOOM - SIXTEEN SHAFT
- Page 1 Ashford Guarantee Factory and Showroom: 415 West Street Thank you for purchasing this Ashford product. In the unlikely event there is PO Box 474, Ashburton 7700 New Zealand any fault in manufacture we will replace the item. To validate our guarantee Telephone 64 3 308 9087 Facsimile 64 3 308 8664 please visit our website or write to us.
- Page 2 Tap the 32 nylon loom cord guides into the castle top. Rest the castle front on a table edge for support. Tap the nylon guides into the cord holes from the back.
- Page 3 Attach the castle top to the castle sides with 8 x 38mm (1½") screws. Check that the pilot holes for the castle front are all on the same side. 30mm (1¼") screws 30mm (1¼") screws 30mm (1¼") screws 30mm (1¼") screws Attach the bottom cross rails to the bottom of the castle sides with 30mm (1¼") screws.
- Page 4 NOTE: We have completed this step for you. Remove and discard the wooden protector blocks. Tap the “clicker pins” for the pawls to the bottom of the holes in both sides. Rest the loom side on a table edge. Tap 25mm (1") hex head bolts through the loom sides. Note: The head of the bolt MUST be level with or below the surface of the side otherwise the pawl will catch on it.
- Page 5 Attach the 4 pawls to the loom sides with 30mm (1¼") machine screws. Note: The “clicker pin” fits into the gap in the pawl. Take care to ensure the “clicker pin” does not damage your table. Rub a little candle wax on the thread of the screws to make assembly easier.
- Page 6 Check the diagonal support arms are the correct way around, locate them onto the bolts and secure with washers and nuts. Leave a 0.5mm (1/32") gap under the nut so the arm can move freely. Attach 4 rubber buffers to the bottom of the feet with 12mm (½") screws.
- Page 7 Locate the 4 pins on the handles into the 4 holes in the cogs. Then give the handles a sharp hit with your fist so they snap down tight onto the cogs. Place the castle inside the frame and attach with 40mm (1½") hex head bolts, washers and nylon knobs. Tap the heads of the bolts into the counter bored hole in the inside of the castle side and tighten the knobs until the heads of the bolts are level or below the surface of the castle side.
- Page 8 Lift the support rails up and attach them to the castle top with 30mm (1¼") screws. Leave a 0.5mm (1/32") gap. Thread the screws into the heddle frame ends using a hand held screwdriver and leave a 5mm (3/16") gap to loop the Texsolv nylon cord over. Note: Do not use an electric screwdriver as it can drive the screws...
- Page 9 Push the metal bars into one heddle frame end, slide 2 bundles of Texsolv heddles over the bars and push the other end in place. Only then remove the plastic ties. If necessary, cut the Texsolv heddles to separate them. Lay each heddle frame on a flat surface and check the two ends are parallel.
- Page 10 Slide the 16 heddle frames into place. Then lift the castle back into the vertical position and thread the knobs back into the castle. There are 2 different lengths of Texsolv cord to attach the heddle frames to the handles. Use the shorter lengths for the front 8 heddle frames.
- Page 11 Use the threading hook. Note: If necessary, slide the cord around the handle until the heddle frame hangs level.
- Page 12 Once all the heddle frames have been attached, re-adjust the Texsolv cords so that the front heddle frame hangs approx 25mm (1") below the castle top and the rear heddle frame hangs approx 10mm (½") below. The holes in the levers are drilled so that the back heddles frames lift more than the front.
- Page 13 Attach beater frame to the support rails. Leave 0.5mm (1/32") gap so the beater can swing freely. Note: If the beater frame rubs against the loom sides loosen the wing nuts and retighten. Stretchy cord - knot the cord at one end, slide through the hole in the beater support rail, the hole in the castle front...
- Page 14 Tie the front and back warp sticks to the front and back rollers. Tie the loops onto the back warp sticks as illustrated. Refer to step 14 and 15 of the learn to weave on the table loom booklet for attaching warp to loom. Tying on the front warp stick Tying on the back warp stick Knot...
- Page 15 Real Scale Hardware List Ashford Handicrafts Limited Factory and Showroom: 415 West Street PO Box 474, Ashburton 7700 New Zealand Telephone 64 3 308 9087 Facsimile 64 3 308 8664 Email: sales@ashford.co.nz Internet: www.ashford.co.nz...
Need help?
Do you have a question about the TABLE LOOM - SIXTEEN SHAFT and is the answer not in the manual?
Questions and answers