Advertisement
Quick Links
Ashford Handicrafts Limited
Factory and Showroom: 415 West Street
PO Box 474, Ashburton, 7700 New Zealand
Telephone 64 3 308 9087 Facsimile 64 3 308 8664
Email: sales@ashford.co.nz Internet: www.ashford.co.nz
INSTRUCTIONS
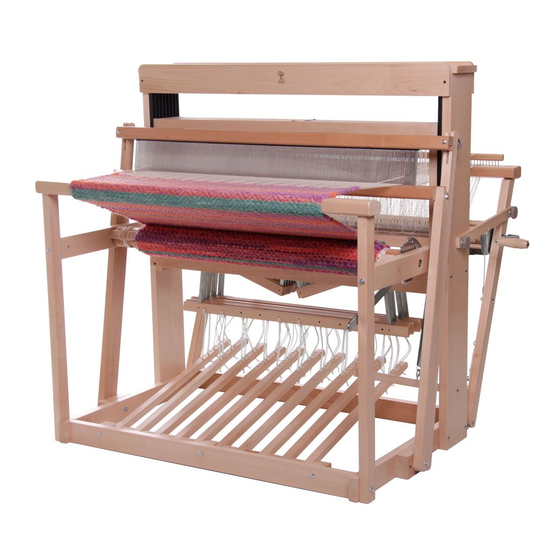
Jack Loom
8 Shaft - 97cm (38ins)
Ashford Guarantee
Thank you for purchasing this Ashford product. In the unlikely event there is any
fault in manufacture we will replace the item. To validate our guarantee please
visit our website or write to us.
JL90ES260117
Advertisement

Summary of Contents for Ashford Jack
- Page 1 Ashford Guarantee Factory and Showroom: 415 West Street Thank you for purchasing this Ashford product. In the unlikely event there is any PO Box 474, Ashburton, 7700 New Zealand fault in manufacture we will replace the item. To validate our guarantee please Telephone 64 3 308 9087 Facsimile 64 3 308 8664 visit our website or write to us.
- Page 2 The Sliver Beech tree is a native of New Zealand and has a lovely variety of colour and grain. This Jack Loom has been finished with a water based lacquer to protect the kiln dried timber from climatic changes and enhance its natural character.
-
Page 3: Hardware Checklist
OVERVIEW HARDWARE CHECKLIST 1 – M8 x 50 Hex Head Bolt 4 – 8 x 1 ½ Screw 2 – M10 Spanner 6 – M6 x 80 Hex Head Bolt 1 – 12 x 1 Pan Head Screw 1 – M13 Spanner 2 –... - Page 4 REAL SCALE HARDWARE 1 – M8 x 50 Hex Head Bolt 1 – M10 Hex Nut 1 – M8 Hex Nut 13 – M6 Hex Nut 2 – M6 x 100 Hex Head Bolt 48 – M8 x 25 Washer 1 –...
- Page 5 PARTS x 16...
- Page 6 ASSEMBLY OF THE LOOM 1. Assemble the base using . Note the holes in rail BX are to the top. M6 x 80 Hex Head Bolt M6 X 16 Washer M6 Barrel Nut Nylon bushes in parts C and CX are on the inside. M6 Barrel Nut M6 X 16 Washer M6 x 80 Hex Head Bolt...
- Page 7 2. Bolt castle side E to the outside of base rail A, and the castle side EX to the base rail AX using M6 x 65 Cup Head Bolts . Note the X 16 Washer M6 Hex Nut nylon shaft guides are to the inside of the frame and holes for the beater stops face forward.
- Page 8 6. Using place 5 onto the two lower steel rods followed by a lever assembly N. Place two washers M8 x 25 Washers, washers onto each lower steel rod followed by another lever assembly N. Repeat this procedure until all the lever assemblies are in position, finishing with 5 washers.
- Page 9 12. Insert the into the inside of the front upright DX for a ratchet lever stop. When transporting the loom lift 12 x 1 Pan Head Screw and pull the lever sideways, then let it hang down. 12 x 1 Pan Head Screw 13.
- Page 10 M6 x 70 Cup M6 x 70 Cup M6 x 70 Cup Head Bolt Head Bolt Head Bolt Steel Rod M6 x 16 M6 x 16 Washer Washer M6 Hex M6 Hex M6 x 70 Cup Head Bolt 14. Slide 5 treadles J onto the long steel rod with a round wooden spacers k between.
- Page 11 17. Remove the wooden spacer P from the castle E to allow the warp roller Z to fit between the uprights without twisting them. Then place the warp roller between the back uprights C and CX by locating the shaft of the warp roller into the nylon bush in CX.
- Page 12 24. Each shaft has holes on both edges of top and bottom rails. The hole for the jack pin is exactly in the centre of the bottom rail to ensure it lifts evenly and is marked with a small hole on the front of the shaft.
- Page 13 25. Rub candlewax on the ends of the shafts before loading them into the nylon guides. Load the shafts and locate the jack pin into the centre hole in the shaft. If any of the shafts are curved, to avoid them touching, load them so that the curves are all in the same direction.
- Page 14 28. Tap the beater stops into the castle sides E and EX. Note the lead holes for M6 x 75 Cup Head Bolt the screws face out. Use wood glue if M6 x 22 Washer necessary. Then attach the M16 Rubber to the stops with Buffer 6 x ½...
- Page 15 Examples of tie ups Two x Two Twill with Tabby on treadles 1 and 10 Illu No 27 Warp: 1-40 Weft: 1-40 Thursday, 27 January 2011 3:26 p.m. Backed Twill...
-
Page 16: Front Roller
There are 5 warp sticks included with your Jack Loom. FRONT ROLLER BACK ROLLER To attach a warp stick to the front roller, thread 1 texsolv cord Thread 1 texsolv cord through the first hole in the warp stick through the first hole in the warp stick and back through the but leave 8 holes leaving approx.


Need help?
Do you have a question about the Jack and is the answer not in the manual?
Questions and answers