
Related Manuals for Techly ICA-PLB 103


Summary of Contents for Techly ICA-PLB 103
- Page 1 LED LCD TV Tilting Wall Mount Istruzioni installazione Installation Instruction ICA-PLB 103 www.techly.it...
- Page 2 LED LCD TV Tilting Wall Mount Gentile Cliente, Dear Customer, grazie per aver scelto un prodotto Techly. thanks for choosing a Techly product. Enjoy the using. Istruzioni disimballaggio Unpacking Instructions • Aprire il cartone con cura, rimuovere il contenuto e distenderlo su • Carefully open the carton, remove contents and lay out on...
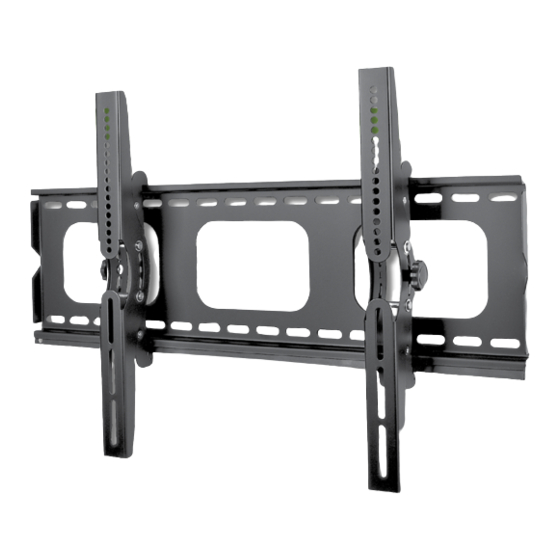
- Page 3 LED LCD TV Tilting Wall Mount LISTA DELLE PARTI FORNITE | SUPPLIED PARTS LIST (1) Placca a muro-a (1) Staffa monitor sinistra-b (1) Staffa monitor destra-c (1) Bassa di bloccaggio-d (1) Wall Plate-a (1) Left Monitor Bracket-b (1) Right Monitor Bracket-c (1)Locking Bar-d (4) M4x12 vite –e (4) M5x12 vite –f (4) M6x12 vite-g (4) M8x16 vite-h (4) M4x12 Bolt-e...
- Page 4 The Wall Plate(a) must be mounted to two wood studs at least 16"(406mm) apart. Use a stud finder to locate two adjacent studs. It is a good idea to verify where the studs are located with an awl or thin nail shown in Diagram B. Pre-drill a 2.4"(60mm) deep hole at the desired height in each stud using a 5/32"(4mm) drill bit. Make sure these holes are in the center area of the studs and level with each other. Use the Wall Plate as a template to mark the location of the second hole in each stud. Drill 2.4"(60mm) deep holes using the 5/32"(4mm) drill bit in the marked locations. Attach the Wall Plate to the wall using the 4pcs Lag Bolts(u) and 4pcs Lag Bolt Washers(v). muro wall Schema A Schema B Diagram A Diagram B Schema B Diagram B Schema A 16 pollici 16 inches Diagram A 16 pollici 16 inches 16 pollici 16 inches www.techly.it...
Need help?
Do you have a question about the ICA-PLB 103 and is the answer not in the manual?
Questions and answers