Table of Contents
Advertisement
Leggere attentamente le istruzioni prima di installare e utilizzare l'apparecchiatura.
Read the instructions carefully before installing and using the appliance.
Vor der Installation und Nutzung des Geräts müssen die Anleitungen aufmerksam durchgelesen werden.
Lire attentivement les instructions avant d'installer et d'utiliser l'appareil.
Léanse atentamente las instrucciones antes de instalar y utilizar el aparato.
Il mancato rispetto delle istruzioni fa decadere la garanzia del fabbricante.
In the event of failure to comply with the instructions, the manufacturer's warranty shall cease to apply.
Die Missachtung der Anleitungen hat den Verfall der vom Hersteller gewährten Garantie zur Folge.
Le non respect des instructions entraîne l'invalidation de la garantie du fabricant.
La inobservancia de las instrucciones provoca la invalidación de la garantía otorgada por el fabricante.
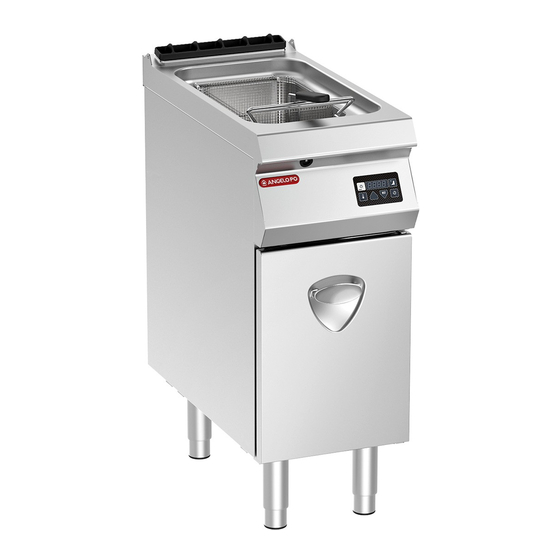
FRIGGITRICE ELETTRICA
ELEKTRISCHE FRITEUSE
FRITEUSE ÉLECTRIQUE
FREIDORA ELÉCTRICA
MANUALE D'USO E INSTALLAZIONE
MANUEL D'UTILISATION ET D'INSTALLATION
ELECTRIC FRYER
USE AND INSTALLATION MANUAL
BEDIEN- UND INSTALLATIONSHANDBUCH
MANUAL DE USO E INSTALACIÓN
0G1FR1ED
1G1FR2ED
Italiano
English
Deutsch
Français
Español
Ed.0
01/2018
3335600
Advertisement
Table of Contents

Related Manuals for Angelo Po 0G1FR1ED


Summary of Contents for Angelo Po 0G1FR1ED
- Page 1 Die Missachtung der Anleitungen hat den Verfall der vom Hersteller gewährten Garantie zur Folge. Le non respect des instructions entraîne l'invalidation de la garantie du fabricant. La inobservancia de las instrucciones provoca la invalidación de la garantía otorgada por el fabricante. FRIGGITRICE ELETTRICA ELECTRIC FRYER 0G1FR1ED ELEKTRISCHE FRITEUSE 1G1FR2ED FRITEUSE ÉLECTRIQUE FREIDORA ELÉCTRICA MANUALE D’USO E INSTALLAZIONE...
- Page 2 Caution - warning Important Never use products containing substances Make a daily check that the safety devices harmful or hazardous for health (solvents, pe- are properly installed and in good working troleum spirits, etc.). order. Caution - warning Caution - warning Before doing any work, cut off the mains The floor, near the appliance, could be slippe- electricity supply.
-
Page 3: Table Of Contents
ref. chapters page 1 GENERAL INFORMATION ..........3 2 TECHNICAL INFORMATION ..........4 3 SAFETY ................7 PART 4 USE AND OPERATION ............. 8 5 SERVICING ..............15 6 FAULT ................16 7 HANDLING AND INSTALLATION ........19 8 ADJUSTMENTS ............... 24 PART 9 REPLACING PARTS ............ - Page 4 Starting and stopping the cooking cycle Testing of the appliance Switching the appliance on and off Transport Troubleshooting Table of alarm indications Unpacking and packaging Technical data English...
-
Page 5: I Identification Of Manufacturer And Appliance
INSTRUCTIONS AND WARNINGS FOR THE READER To find the specific topics of interest to you quickly, part: contains all the information neces- refer to the index at the start of the manual. sary for special categories of reader, i.e. all This manual is subdivided into two parts. -
Page 6: G General Description Of Appliance
For all requirements contact the agents or the When requesting service, state the data provide on headquarters of Angelo Po which can be the nameplate and provide a description of the fault. found in the contacts section of the website http:// www.angelopo.com. -
Page 7: Safety Devices
Main Parts A)Frying well: in stainless steel. B)Drain tap: for draining the oil from the well. C)Control panel: controls the appliance's operat- ing functions. D)Fume exhaust vent: evacuates the heat gener- ated by the heating elements. E)Basket hanger support: to support the basket while foods are being drained. -
Page 8: O Optional Accessories
SAFETY AND INFORMATION SIGNS The illustration shows the position of the signs fitted on the appliance. A)Nameplate with manufacturer and appliance data B)General hazard: read the manual carefully be- fore carrying out any procedure. C)General hazard: when washing the appliance do not point pressurised water jets at internal parts. -
Page 9: Instructions And Warnings For Safety
INSTRUCTIONS AND WARNINGS FOR SAFETY During design and construction, the manufacturer surrounding zones must be cleaned thoroughly. For has paid special attention to factors which may these operations, use only food-approved deter- cause risks to the health and safety of the people in- gents, and never use flammable products or prod- teracting with the appliance. -
Page 10: Instructions And Warnings For Use And Operation
SAFETY WARNINGS AND INSTRUCTIONS CONCERNING ENVIRONMENTAL IMPACT Every organisation is obliged to apply procedures to The Safe Disposal of Waste from Electrical and Electronic Equipment (WEEE Directive identify and monitor the effects of its operations 2002/96/EC) (products, services, etc.) on the environment. The procedures for identifying significant environ- mental impacts must consider the factors listed Important... -
Page 11: D Description Of Controls
DESCRIPTION OF CONTROLS The appliance is fitted with the controls for use of its D)Time setting key: used to set the cooking time main functions. (for information on the use of this function, see page 10). A)Digital display: displays the working parameters and alarm codes. -
Page 12: Cooking Temperature Setting
COOKING TEMPERATURE SETTING This procedure is used to set a temperature thresh- 4 - Press the keys (F-G) together and the display old at which a buzzer is triggered. (A) will show the oil temperature in the cooking Proceed as follows. well. - Page 13 ACTIVATES/DEACTIVATES THE TEMPERATURE HOLDING (MELTING) FUNCTION Proceed as follows. Important 1 - Press key (E) to activate the temperature hold- ing (melting) function. The temperature holding function is always The light (Q) comes on. activated whenever a heating operation is 2 - Press key (E) to deactivate the temperature started with the real temperature in the well holding (melting) function.
- Page 14 STARTING AND STOPPING THE COOKING CYCLE To start and stop the appliance, proceed as follows. 6 - Press key (E) to terminate the temperature maintenance function. Starting 7 - Press key (B) to start the cooking cycle. Lights 1 - Switch on the appliance (see page 10). (P-Q) flash while the oil is heating to the tem- 2 - Press key (B) and then key (E) to activate the perature of use, and then remain constantly on.
-
Page 15: F Filtering Oil
FILTERING OIL To carry out this operation, proceed as follows. Important Before proceeding, allow the appliance to cool for 10÷15 min., so that the oil reaches a temperature between 50÷120°C. 1 - Open the hatch (A). 2 - Fit the extension (B) onto the tap (C). 3 - Place the container (D) and the filter (E), both available as optionals, underneath the exten- sion (B). -
Page 16: Instructions And Warnings For Use
LENGTHY DOWNTIMES OF APPLIANCE If the appliance is to be out of use for a lengthy pe- 3 - Spread a film of edible oil over the stainless riod, proceed as follows. steel surfaces. 1 - Cut off the mains electricity supply using the ap- 4 - Carry out all the servicing procedures. -
Page 17: C Cleaning Instructions
INSTRUCTIONS AND WARNINGS FOR SERVICING Keep the appliance at peak efficiency by carrying At the end of each session of use and whenever out the scheduled servicing procedures recom- necessary, clean: mended by the manufacturer. Proper servicing will – The well (see page 16) allow the best performance, a longer working life –... -
Page 18: Cleaning The Well, Basket Support And Accessories
For all requirements contact the agents or use. the headquarters of Angelo Po which can The user can solve some of these problems him- be found in the contacts section of the web- self, but for others specific technical knowledge or site http://www.angelopo.com. - Page 19 Check the condition of the thermo- stat and activate any ignition ena- The appliance does not heat up to bling device the set temperature Contactor not receiving electrical Check or replace the contactor coil power or faulty Electronic circuit board not receiving Check or swap the phase wire con- The control panel does not come on electrical power...
- Page 20 Alarm Cause Remedy The appliance’s functions are disabled so no cooking cycles can Electronic circuit board be carried out. diagnostics tripped Important Contact the after-sales service. The appliance’s functions are disabled so no cooking cycles can Electronic circuit board be carried out. diagnostics tripped (left well) Important Contact the after-sales service.
-
Page 21: H Handling And Lifting
INSTRUCTIONS AND WARNINGS FOR HANDLING AND INSTALLATION lImportant All handling and installation operations If necessary, the person authorised to carry should be carried out in accordance with cur- out these operations must organise a "safety rent legislation on health and safety at work. plan"... -
Page 22: Installation Of The Appliance
INSTALLATION OF THE APPLIANCE All installation stages must be considered right from production of the general layout. Before starting these stages, as well as deciding the place of installation, if necessary, the person authorised to carry out these operations must or- ganise a "safety plan"... -
Page 23: Assembly Appliances In Banks
LEVELLING Adjust the floor-mounted feet (A) to level the appli- ance. ASSEMBLY APPLIANCES IN BANKS To assemble appliances in banks (side by side) proceed as described below. 1 - Pull off the knob (A). 2 - Undo the screws and remove the control panels (B). -
Page 24: E Electrical Connection
ELECTRICAL CONNECTION 2 - Open the hatch (B). Important 3 - Undo the screws (C) and remove the lid (D). The connection must be made by author- 4 - Connect the circuit-breaker (A) to the terminal ised, skilled personnel, in accordance with board (E) of the appliance as shown in the dia- the relevant legal requirements, using ap- gram and in the electrical system diagram at... -
Page 25: Conversion Of Electricity Supply
CONVERSION OF ELECTRICITY SUPPLY The appliance is supplied at an operating voltage 400V/3N (indicated on the sticker applied to the da- taplate); conversion to 230V/3 can be carried out as described below. Caution - warning Before doing any work, cut off the mains elec- tricity supply. -
Page 26: Adjustments
INSTRUCTIONS AND WARNING FOR SETTINGS The appliance's main functions do not require any special adjustments by specialist staff except the settings made during use by the user. INSTRUCTIONS AND WARNINGS FOR THE REPLACEMENT OF PARTS The appliance does not require the replacement of operating components by specialist staff except the replacement of standard parts which can be carried out by the user.
Need help?
Do you have a question about the 0G1FR1ED and is the answer not in the manual?
Questions and answers