
Related Manuals for Meyer Boss 8200 RT


Summary of Contents for Meyer Boss 8200 RT
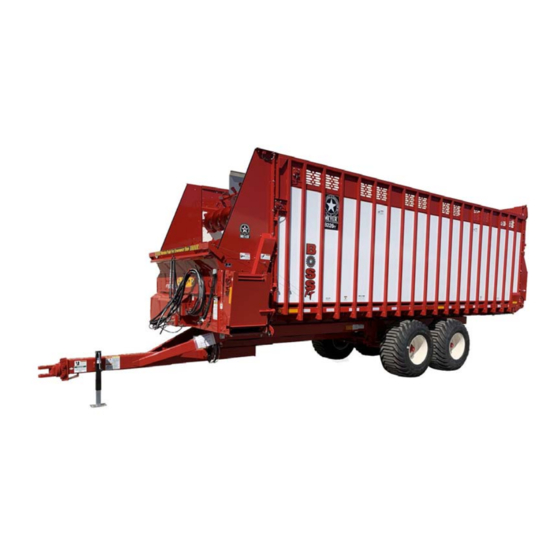
- Page 1 PB-8200-19 8200 BOSS RT Models 8224RT • 8226RT Owner / Operator’s Manual & Parts Book Starting 2019 Model Year 3 / 2021 6990633 (1-13) Printed in U.S.A. © Bobcat Company 2013...
-
Page 2: Important Information
Always use your serial number when requesting information or when ordering parts. HOW TO READ YOUR SERIAL NUMBER EXAMPLE: 19R9201 Model Year / RT / Model / Sequence Of Build Meyer Manufacturing Corporation 674 W. Business Cty Rd A Dorchester, WI 54425 Phone: 1-800-325-9103 Fax: 715-654-5513 Email: parts@meyermfg.com... -
Page 3: Pre-Delivery & Delivery Check List
Owner’s Registration Form. PRE-DELIVERY CHECK LIST DELIVERY CHECK LIST After the New Meyer Forage Box has been completely The following check list is an important reminder of set-up, check to be certain it is in correct running order valuable information that MUST be passed on to the before delivering it to the customer. - Page 4 Meyer Manufacturing Corporation 674 W. Business Cty Rd A Dorchester, WI 54425 Phone: 1-800-325-9103 Fax: 715-654-5513 Email: parts@meyermfg.com Website: www.meyermfg.com FARM EQUIPMENT BUYERS TRUST THE NAME MEYER! Meyer Manufacturing Corporation - 4 - PB-8200-19...
-
Page 5: Introduction
Meyer products the finest in the farm equipment industry today. There is no substitute for quality. That is why thousands of people like you have purchased Meyer farm equipment. They felt it was the best equipment to serve their farming needs, now and in years to come. We ask that you follow our policy of “safety first”, and we strongly suggest that you read through the “Owner /... - Page 6 Black paint in lieu of Red Truck Mount Kit w/Steel Fenders Factory Install of Truck Mount Kit Front Enclosure Front to Back Scissor Tarp (electric) Side-To-Side Roll Tarp (electric) Marker / Clearance Lights & D.O.T Tape Meyer Manufacturing Corporation - 6 - PB-8200-19...
-
Page 7: Table Of Contents
TABLE OF CONTENTS 1.0 IMPORTANT INFORMATION ........... 2 2.0 PRE-DELIVERY &... - Page 8 EXTENSION HYDRAULICS ..........90 Meyer Manufacturing Corporation...
- Page 9 EXTENSION FRONT HOSES ..........91 EXTENSION FRONT HOSES .
- Page 10 Meyer Manufacturing Corporation - 10 - PB-8200-19...
-
Page 11: Manufacturer's Warranty
Except as stated above, Meyer Mfg. Corp. shall not be liable for injuries or damages of any kind or nature, direct, consequential, or contingent, to persons or property. This warranty does not extend to loss of crop or for any other reasons. - Page 12 Meyer Manufacturing Corporation - 12 - PB-8200-19...
-
Page 13: Safety
5.0 SAFETY The Meyer Forage Box is manufactured with operator safety in mind. Located on the forage box are various safety signs to aid in operation and warn of hazardous areas. Pay close attention to all safety signs on the forage box. -
Page 14: Safety Precautions
Keep tractor / truck in a lower gear at all times when traveling down steep grades. • Maintain proper brake settings at all times (if equipped). • Stay away from overhead power lines. Electrocution can occur without direct contact. • Use only properly rated undercarriage and tires. Meyer Manufacturing Corporation - 14 - PB-8200-19... - Page 15 Safety Precautions For Tractor Towed Units: • Do not exceed 20 mph (32 kph). Reduce speed on rough roads and surfaces. • Always install a SMV emblem on pull-type equipment when transporting on roadways and keep clean and bright. • Always yield to oncoming traffic in all situations and move to the side of the road so any following traffic may pass.
-
Page 16: Safety Signs
Safety signs are for operator protection and information. FRONT OF FORAGE BOX PART NO. 46-8500-7 PART NO. 46-0001-35 PART NO. 46-0001-62 (Pull Type Only) PART NO. 46-0001-72 PART NO. 46-0001-205 PART NO. 46-0001-22 Meyer Manufacturing Corporation - 16 - PB-8200-19... - Page 17 REAR OF FORAGE BOX WARNING ENTANGLEMENT HAZARD KEEP ALL SHIELDS IN PLACE WHILE MACHINE IS RUNNING 46-0001-4 PART NO. 46-0001-4 PART NO. 46-9100-4 PART NO. 46-0011-D 1-800-325-9103 PB-8200-19 - 17 - www.meyermfg.com...
- Page 18 PART NO. 46-9100-4 PART NO. 46-8500-7 WARNING ENTANGLEMENT HAZARD KEEP ALL SHIELDS IN PLACE WHILE MACHINE IS RUNNING 46-0001-4 PART NO. 46-0001-4 PART NO. 46-0001-205 PART NO. 46-0001-26 PART NO. 46-0001-5 (Located Under Shield) Meyer Manufacturing Corporation - 18 - PB-8200-19...
- Page 19 RIGHT SIDE OF FORAGE BOX WARNING ENTANGLEMENT HAZARD KEEP ALL SHIELDS IN PLACE WHILE MACHINE IS RUNNING 46-0001-4 PART NO. 46-9100-4 PART NO. 46-0001-4 PART NO. 46-0001-5 PART NO. 46-0001-205 (Located Under Shield) PART NO. 46-0001-26 1-800-325-9103 PB-8200-19 - 19 - www.meyermfg.com...
-
Page 20: Emergency Safety Stop
Pull on the trip cables (Item 2) to shut down the forage box in an emergency. NOTE: The emergency stop mechanism does not stop the rear unloading operation of the forage box. Meyer Manufacturing Corporation - 20 - PB-8200-19... -
Page 21: Resetting The Emergency Stop
5.3.3 Resetting the Emergency Stop Shutoff and lockout power before adjusting, servicing, maintaining, or clearing an obstruction from this machine. Failure to heed may result in serious personal injury or death. Do not reset the emergency stop mechanism until all bystanders, tools and other objects have been cleared from the forage box. -
Page 22: Shutoff & Lockout Power
It is important that everyone who works on this equipment is properly trained to help ensure that they are familiar with this procedure and that they follow the steps outlined above. This manual will remind you when to Shutoff & Lockout Power. Meyer Manufacturing Corporation - 22 - PB-8200-19... -
Page 23: Pre-Operation
6.0 PRE-OPERATION DO NOT allow anyone to operate, service, inspect or otherwise handle this forage box until all operators have read and understand all of the instructional materials in this Operator’s And Parts Manual and have been properly trained in its intended usage. Verify that the forage box is securely fastened to the tractor / truck. -
Page 24: Light Hook-Up
NOTE: Depending on make and model of the truck, it may be necessary to install a light converter. (Meyer part #56-0028). The converter allows signal lights and brake lights to operate according to DOT Lighting Standards. -
Page 25: Hitching To Tractor
6.4 HITCHING TO TRACTOR Move to the operator’s position, start the engine and release the parking brake. Do not allow anyone to stand between the tongue or hitch and the tractor when backing up to the Forage Box. Move the tractor in front of the forage box. Slowly move the tractor backwards towards the forage box and align the drawbar with the implement’s hitch. -
Page 26: Front Unload Start-Up
Move switch on control box to "Power Off". Disengage the truck / tractor hydraulics. Exit the tractor / truck. Verify that the door latches have engaged the apron chain links properly, securing the door in the closed position. Meyer Manufacturing Corporation - 26 - PB-8200-19... -
Page 27: Operational Checks
6.6 OPERATIONAL CHECKS Shutoff and lockout power before performing machine service, adjusting, maintaining, or clearing an obstruction from this machine. Refer to section 5.3 SHUTOFF & LOCKOUT POWER. DO NOT allow anyone to operate, service, inspect or otherwise handle this spreader until all operators have read and understand all of the instructional materials in this Operator’s And Parts Manual and have been properly trained in its intended usage. -
Page 28: Transporting
• Avoid traveling on slopes or hills that are unsafe. • Keep towing vehicle in gear at all times. • Never exceed a safe travel speed (which could be less than 20 MPH.). Meyer Manufacturing Corporation - 28 - PB-8200-19... -
Page 29: Safety Chain
NOTE: Do not use the intermediate support (Item 2) as the attaching point. If you do not have a safety chain, or a replacement safety chain is needed, see your local Meyer dealer and do not operate on public roads until you are able to travel with the safety chain properly installed. -
Page 30: Brake Information
Weight and multiply it by 0.667 and you will get the Minimum Required Weight of the Tractor. Gross Weight FORAGE BOX UNDERCARRAIGE LOAD (LBS) GROSS WEIGHT (GW) WEIGHT, EMPTY WEIGHT (LBS) (LBS) (LBS) Minimum Required Weight of the Tractor GROSS MINIMUM TRACTOR WEIGHT WEIGHT (LBS) (GW) (LBS) 0.667 Meyer Manufacturing Corporation - 30 - PB-8200-19... -
Page 31: Operation
7.0 OPERATION DO NOT allow anyone to operate, service, inspect or otherwise handle this forage box until all operators have read and understand all of the instructional materials in this Operator’s And Parts Manual and have been properly trained in its intended usage. Before operating the forage box, look in all directions and make sure no bystanders, especially small children are in the work area. -
Page 32: Front Unloading
If any component fails, shut off all power to the forage box and move the forage box to a safe work area. Repair or replace damaged components before proceeding with unloading of the forage. Meyer Manufacturing Corporation - 32 - PB-8200-19... -
Page 33: Rear Unloading
7.3 REAR UNLOADING STAND CLEAR, the rear discharge door can spring open quickly and with extreme force. Keep all persons well clear of the rear discharge door, forage box and unloading area. The rear discharge door opens automatically by releasing its latches as the main aprons begin to move. -
Page 34: Unhooking The Tractor
If the door latches are not automatically latching, move the washers on either side of the latch so that the latch is centered in the main apron chain link. If the latch is bent or worn, See REAR GATE on page 56 of this manual for replacement. Meyer Manufacturing Corporation - 34 - PB-8200-19... -
Page 35: Maintenance
8.0 MAINTENANCE 8.1 LUBRICATION SHUTOFF & LOCKOUT POWER before adjusting, cleaning, lubricating or servicing the machine. (See 5.4 SHUTOFF & LOCKOUT POWER on page 22.) Fluid such as hydraulic fluid, grease, etc. must be disposed of in an environmentally safe manner. Some regulations require that certain spills and leaks on the ground must be cleaned in a specific manner. - Page 36 NOTE: 4th Auger Option will have two additional bearings to grease. • Oil two roller chains (Item 2) on the auger drive. NOTE: 4th Auger Option will have one additional roller chains to lubricate. Forage Box Left Side Front Drive Compartment Area Meyer Manufacturing Corporation - 36 - PB-8200-19...
- Page 37 • Apply oil to the two rear gate latch pivot bolts (Item 1). • Grease eight main apron drive shaft bearings (Item 2). Three front drive shaft bearings. Five rear drive shaft bearings. Forage Box Rear • Grease the four cross apron bearings (Item 3). Forage Box Left Side Front Drive Compartment Area Unit Discharge...
- Page 38 (Item 2), and rear drive gearbox (Item 3). • Use EP 80-90 gear lube as needed (Lighter oil may be used in temperatures lower than 20° F.). Front Drive Compartment Area Rear Drive Gearbox Meyer Manufacturing Corporation - 38 - PB-8200-19...
-
Page 39: Adjustments
8.2 ADJUSTMENTS 8.2.1 Cross Conveyor Chain With Cross Apron Hold Downs Correct adjustment of the cross apron chain occurs when 24” of chain, APRON SLAT does not touch the BOTTOM PAN of the cross apron return area at the discharge opening. To tighten the chain, loosen the eight bolts securing the slotted bearing bracket at each side of the discharge opening. - Page 40 Remove the set screw on the inside arm assembly. Tighten the bolt to take up more slack, loosen the bolt to take up less slack on that side of the chain. Once done, reset the set screw. Tighten the chain as previously stated. Meyer Manufacturing Corporation - 40 - PB-8200-19...
-
Page 41: Clean-Out Panel
5-1/2” Correct apron tension occurs when the spring load tensioner measures 5-1/2”. Loosen the tensioner rod (Item 1) on the main apron chain. This will allow easier adjustment of the adjuster bolt. Located on the inner chain strand of each main apron assembly, there is an adjustable, tightening pivot arm with a 1/2”... -
Page 42: Storing The Forage Box
LOCKOUT / TAGOUT the machine / forage box. (See 5.4 SHUTOFF & LOCKOUT POWER on page 22.) Sometimes it may be necessary to store your Meyer forage box for an extended period of time. Below is a list of items to perform before storage. -
Page 43: Parts Repair And Replacement
Instruction sheets may be provided with your parts order. Otherwise, if available, instruction sheets can be e-mailed or faxed for your convenience. Call Meyer Manufacturing Corporation toll free at 1-800-325-9103 or email parts@meyermfg.com. NOTE: Be environmentally friendly and dispose of any waste materials properly. Recycle when appropriate. - Page 44 Meyer Manufacturing Corporation - 44 - PB-8200-19...
- Page 45 This Page Left Intentionally Blank 1-800-325-9103 PB-8200-19 - 45 - www.meyermfg.com...
-
Page 46: Main Body
MAIN BODY Meyer Manufacturing Corporation - 46 - PB-8200-19... - Page 47 KEY PART NUMBER QTY DESCRIPTION 100-8215-1 8224 Main Frame 100-8213-1 8226 Main Frame 25-0391 Remote Grease Line Bracket 49-0403 8224 Floor 100-8212-17 8226 Floor 100-8080-16 Left Side Chain Guide End Cap 100-8080-17 Right Side Chain Guide End Cap 100-8214-5 8224 Front Chain Guide 100-8210-11 8226 Front Chain Guide 100-8080-27...
-
Page 48: Main Apron Drive
MAIN APRON DRIVE 17 18 Meyer Manufacturing Corporation - 48 - PB-8200-19... - Page 49 PART NUMBER QTY DESCRIPTION See Page 74 White 18.3 Cubic Inch Hydraulic Motor See Page 50 2” Bore Berma Apron Gearbox 39-0300-12 Torque Arm Retainer 25-0622-1 Torque Arm Plate 14-0106 Apron Bearing Weldment With Bushings 13-0029 Bronze Bushing 23-0217 Main Apron Drive Shaft Assembly 110-667B7-2.00-3 2-1/4”...
-
Page 50: Front Main Apron Gearbox
FRONT MAIN APRON GEARBOX Meyer Manufacturing Corporation - 50 - PB-8200-19... - Page 51 KEY PART NUMBER QTY DESCRIPTION 19-0209 31.4:1 Berma Apron Gearbox 19-0208-19 Oil Breather Plug 19-0208-1 Housing 19-0203-14 Oil Level Indicator 19-0203-17 Input Gasket 619-0001-16 Snap Ring 619-0001-19 Snap Ring 619-0012-2 Bearing 19-0208-11 Pinion 19-0206-14 19-0206-11 Snap Ring 19-0206-10 Bearing 19-0208-9 Gear 19-0208-10 19-0208-8...
-
Page 52: Rear Gearbox
16 15 NOTE: The seal for the hydraulic motor (Key 20) should be installed dry or with light oil. The hydraulic motor mounting bolts should be torqued to 63 ft-lbs (or 85 N-m). Meyer Manufacturing Corporation - 52 - PB-8200-19... - Page 53 KEY PART NUMBER QTY DESCRIPTION 19-0304-LH Rear Gearbox 19-0204-1 Gearbox Housing 19-0304-1 19-0204-3 Large Gear 19-0204-4 Large Bearing 19-0204-5 Snap Ring 19-0204-6 Small Gear 19-0204-7 Upper Pinion 19-0204-8 Key 16 x 10 x 28 19-0204-17 Small Bearing 19-0204-10 Snap Ring 19-0204-11 Lower Pinion 19-0204-12...
-
Page 54: Main Apron Tightener
MAIN APRON TIGHTENER Meyer Manufacturing Corporation - 54 - PB-8200-19... - Page 55 KEY PART NUMBER QTY DESCRIPTION 25-0750 Chain Return Guide 25-0717-3 2-Way Tensioner 25-0602 Main Apron Right Tightener Assembly 25-0617 Main Apron Left Tightener Assembly 25-0766 Main Apron Tightener Rod Assembly 25-6011 Tightener Bolt Rocking Sleeve Welded Assembly 929-0002 Spring Material Guide 925-3841 Outer Spring Tightener Guide Assembly 815-7510-Z...
-
Page 56: Rear Gate
REAR GATE Meyer Manufacturing Corporation - 56 - PB-8200-19... - Page 57 KEY PART NUMBER QTY DESCRIPTION 100-8211 High Swinging Back Gate Assembly Complete 25-8453 Gate Delay Top Gate Mount Weldment Shear Arm 100-8211-1 High Swinging Back Gate Weldment 100-8060-1-7 High Gate Top Panel 100-8210-12 Rear Gate Catch Doubler Weldment 100-8080-14-2 Rear Swing Gate Clad Tuff 100-8080-14-3 Rear Gate Belting Strip 100-8080-14-4...
-
Page 58: Unit Frame
UNIT FRAME Meyer Manufacturing Corporation - 58 - PB-8200-19... - Page 59 KEY PART NUMBER QTY DESCRIPTION 24-0226 Cross Conveyor Shaft Shield (No Extension) 39-0108 Left End Frame Welded Assembly 25-0506 Pulley Bearing Adjuster Mount Bracket 25-0725 Left Apron Pan Bracket 27-0138 Apron Pan 27-0138-2 Wire Channel Weldment 25-0839 Poppet Valve Mount Plate 25-0838 Poppet Valve Mount Bracket 27-0138-1...
- Page 60 UNIT FRAME CONTINUED Meyer Manufacturing Corporation - 60 - PB-8200-19...
- Page 61 KEY PART NUMBER QTY DESCRIPTION 25-0669 Cross Conveyor Chain Rear Hold Down 25-0668 Cross Conveyor Chain Front Hold Down 24-0214 Idler Shaft Cover 27-0141-1 Upper Auger Panel 24-0242-1 Auger Shield Weldment 24-0241-1 4th Auger Chain Cover Weldment 27-0139-1 Upper Spillage Guard Panel 25-0623 Belt Backer 49-0245...
-
Page 62: Emergency Stop
EMERGENCY STOP Meyer Manufacturing Corporation - 62 - PB-8200-19... - Page 63 KEY PART NUMBER QTY DESCRIPTION 16-0100 Emergency Stop Control Bar Welded Assembly 33-0048 3/32” Thimble System Item 36-0006 23.75 3/32” Uncoated Cable (8222) (Per Foot Per Side) 36-0006 26.5 3/32” Uncoated Cable (8224) (Per Foot Per Side) 36-0006 27.75 3/32” Uncoated Cable (8226) (Per Foot Per Side) 36-0007 3/32”...
-
Page 64: Cross Apron Components
CROSS APRON COMPONENTS Meyer Manufacturing Corporation - 64 - PB-8200-19... - Page 65 KEY PART NUMBER QTY DESCRIPTION 14-0101 1-1/4” 4-Bolt Bearing 25-0610 Pulley Bearing Plate 830-5013-4Z 1/2”-13 x 4” Tap Bolt 810-5013-Z 1/2”-13 Spin Lock Nut 813-5013-Z 1/2”-13 Hex Nut 110-81XB6-1.25-2 Cross Conveyor Sprocket Weldment With Mud Relief 23-0218 Idler Shaft 135-3131-2-1 5/1”...
-
Page 66: Auger Drive Components
AUGER DRIVE COMPONENTS 11 11 Meyer Manufacturing Corporation - 66 - PB-8200-19... - Page 67 KEY PART NUMBER QTY DESCRIPTION 26-0114 Bottom Auger Welded Assembly 26-0115 2nd Auger Welded Assembly 26-0116 3rd Auger Welded Assembly 111-0060-87 #60-87 Roller Chain Including Connector & Offset 35-0006 3/8” x 3/8” x 1-1/4” Square Key 110-60B20-1.38-1 60B20 1-3/8” Bore Sprocket 14-0060 1-3/8”...
-
Page 68: Auger Gearbox
Snap Ring 19-0206-12 Pinion 619-0012-2 Bearing 619-0001-19 Snap Ring 619-0001-16 Snap Ring 19-0206-13 Oil Seal 19-0206-14 Plug 19-0203-16 Oil Breather Plug 19-0206-15 Gasket 19-0206-16 Cover 19-0203-14 Oil Level Indicator 619-0001-27 Screw 19-0203-17 Gasket Meyer Manufacturing Corporation - 68 - PB-8200-19... -
Page 69: Front Hoses
FRONT HOSES FRONT UNLOAD PRESSURE FRONT UNLOAD PRESSURE RETURN BULKHEAD PORTS KEY PART NUMBER QTY DESCRIPTION 155-8010-15 1/2” Male Tip 155-6400-8-8 Straight Fitting 32-0053 Red Cable Tie 32-0054 Blue Cable Tie 155-08R17-109-1 1/2” x 109” Hose 155-2406-12-08 Straight Adapter 155-6500-12 90°... -
Page 70: Rear Hydraulics
REAR HYDRAULICS REAR MOTOR PORTS CASE DRAIN RETURN (B) PRESSURE (A) RETURN RETURN PRESSURE PRESSURE CYLINDER HOSE ROUTING Meyer Manufacturing Corporation - 70 - PB-8200-19... - Page 71 KEY PART NUMBER QTY DESCRIPTION 155-2405-12-12 Straight Fitting 55-0247 8222 236-1/2” x 3/4” Schedule 40 Pipe 55-0020 8224 233” x 3/4” Schedule 40 Pipe 55-0126 8226 249” x 3/4” Schedule 40 Pipe 155-5000-12-12 Straight Fitting 55-0135 8224 22” x 3/4” Schedule 40 Pipe 55-0240 8226 19-1/2”...
-
Page 72: Unit Bulkhead Hydraulics
UNIT BULKHEAD HYDRAULICS TO BOX PRESSURE LINE REAR UNLOAD PRESSURE TO BOX RETURN LINE RETURN FRONT UNLOAD PRESSURE BULKHEAD PORTS Meyer Manufacturing Corporation - 72 - PB-8200-19... - Page 73 KEY PART NUMBER QTY DESCRIPTION 155-2700-LN-12-12 Straight Bulkhead Fitting 155-6602-12A Tee Fitting 155-2406-12-08 Straight Adapter 155-6600-12 Tee Fitting 155-6500-12 90° Fitting 155-12R17-55-1 3/4” x 55” Hose 155-CV-8-1 Poppet Check Valve 155-8XHX7-.062 Inline Orifice 155-08R17-17-1 1/2” x 17” Hose 155-6502-08-08 45° Fitting 155-08R17-24-2 1/2”...
-
Page 74: Unit Hydraulics
Tee Fitting 155-WS-19.6-1 19.6 Cubic Inch Motor 155-6801-4 90° Fitting 155-12R17-27-1 3/4” x 27” Hose 155-04R17-24-1 1/4” x 24” Hose 155-12R17-41-1 3/4” x 41” Hose 155-6803-4 Tee Fitting 155-WS-7.86-1 7.86 Cubic Inch Motor Meyer Manufacturing Corporation - 74 - PB-8200-19... -
Page 75: Truck Mount Hydraulics
TRUCK MOUNT HYDRAULICS OUTLET PRIORITY FLOW CONTROL VALVE PLUMBING TORQUE TO INLET 80-90 FT LBS COOLER REGULATED FLOW BY-PASS FLOW INLET FLOW USE BOTTOM HOLE FOR HOSE HOLDER TO MOUNT RELIEF PRIORITY VALVE RESERVOIR VALVE SELECTOR FILTER VALVE PUMP SELECTOR VALVE PLUMBING CYAN - PROVIDED BY CUSTOMER SELECTOR VALVE OPERATION... -
Page 76: Unit Grease Lines
UNIT GREASE LINES RIGHT VIEW LEFT VIEW Meyer Manufacturing Corporation - 76 - PB-8200-19... - Page 77 KEY PART NUMBER QTY DESCRIPTION 30-0001 1/4”-28 Short Straight Grease Zerk 155-2GK-NUT Bulkhead Nut 155-02R7-71-1-1 1/8” x 71” Left Hand 4th Auger Grease Line 56-0053 1/4” Loom Clamp 155-02R7-55-1-1 1/8” x 55” Left Hand 3rd Auger Grease Line 155-02R7-26-1-1 1/8” x 26” Left Hand 2nd Auger Grease Line 155-02R7-29-1-1 1/8”...
-
Page 78: Rear Lighting (Prior To Sn 2020 Model Year)
REAR LIGHTING (PRIOR TO SN 2020 MODEL YEAR) TRUCK MOUNTED MODELS RT-015 Meyer Manufacturing Corporation - 78 - PB-8200-19... - Page 79 KEY PART NUMBER QTY DESCRIPTION 56-0009 7-Way Stor-A-Way (Trailer Models) 56-0005 Coil Cable Assembly (Trailer Models) 56-0005-4 7-Contact Plug End W/Spring 56-0005-1 4 Pole Plug 56-0004 4-Way Socket (4 Pin) 32-0026 14” Nylon Tie Strap 56-0102 LED Light Harness 32-0024 3/8”...
-
Page 80: Rear Lighting (2020 Model Year & Later)
REAR VIEW FRONT VIEW WHITE WHITE GROUND BROWN BROWN (RIGHT TAIL LIGHTS (TAIL) STOP/TURN) GREEN YELLOW FLASHER & GREEN YELLOW R SIGNAL (LEFT GROUND FLASHER & STOP/TURN) L SIGNAL PHILLIPS CORD SCREW SCREW Meyer Manufacturing Corporation - 80 - PB-8200-19... - Page 81 KEY PART NUMBER QTY DESCRIPTION 56-0295 Front Main Harness With Socket 56-0005 Cable Assembly (Pull Type) 56-0037 Cable Assembly (Truck Mount) 56-0297 8224 Harness Power Extension 56-0296 8226 Harness Power Extension 56-0284 AG Module Harness (Pull Type) 56-0286 Grain Kit Upper Light Y Adapter 56-0267 Rear Sill Harness 56-0260...
-
Page 82: Controller (Cab Control Selector Valve)
TO 30 GPM POPPET KEY PART NUMBER QTY DESCRIPTION 56-0122-1 Control Box Assembly With Mount & Leads 56-0122-2 18’ Implement To Tractor Cable Assembly 56-0122-8 Tri-Cable Harness Assembly 656-0002-3 6' Auxiliary Plug Wiring Harness Assembly Meyer Manufacturing Corporation - 82 - PB-8200-19... -
Page 83: Optional Equipment
10.0 OPTIONAL EQUIPMENT DESCRIPTION PAGE # TRUCK MOUNT FENDER AND MUD FLAP OPTIONAL WAGON MOUNT KIT 4TH AUGER OPTION EXTENSION EXTENSION HYDRAULICS EXTENSION FRONT HOSES EXTENSION 12 VOLT HYDRAULIC LIFT POWER 12 VOLT POWER UNIT HIGHWAY LIGHT PACKAGE (PRIOR TO 2020 MODEL YEAR) HIGHWAY LIGHT PACKAGE (2020 MODEL YEAR &... -
Page 84: Truck Mount Fender And Mud Flap
Red Fender Only 8100-MUD-FLAP Mud Flap & Bracket Kit 49-0092 Mud Flap 25-8014-1 Mud Flap Mounting Bracket 25-8212 Mud Flap Attaching Strip 52-0026-5 1/2” U-Bolt 804-0050-Z 1/2” Fender Washer 815-5020-Z 1/2” Nylon Locknut Meyer Manufacturing Corporation - 84 - PB-8200-19... -
Page 85: Optional Wagon Mount Kit
OPTIONAL WAGON MOUNT KIT RT-013 KEY PART NUMBER QTY DESCRIPTION 8100-WAGON Wagon Mount Kit 25-8025 Wagon Mount Weldment - Front 75-0341-4-HD Chain, 61” Long 851-3816-1.5Z Bolt, 3/8”-16 x 1.5” Hex Head Machine Bolt 805-0038-Z Washer, 3/8” Flat 814-3816-Z Nut, 3/8”-16 Center Lock 25-8026 Wagon Mount Weldment - Rear 851-5013-1.25Z... -
Page 86: 4Th Auger Option
4TH AUGER OPTION Meyer Manufacturing Corporation - 86 - PB-8200-19... - Page 87 KEY PART NUMBER QTY DESCRIPTION 14-0060 1-3/8” 4-Bolt Bearing 26-0117 4th Auger Welded Assembly 100-8212-2-3-3 4th Auger Install Plate 35-0006 3/8” x 3/8” x 1-1/4” Square Key 110-60B38-1.38-1 60B38 1-3/8” Bore Sprocket 111-0060-95 Roller Chain Including Connector & Offset 24-0241-1 4th Auger Chain Cover Weldment 41-0002 3”...
-
Page 88: Extension
EXTENSION Meyer Manufacturing Corporation - 88 - PB-8200-19... - Page 89 KEY PART NUMBER QTY DESCRIPTION 45-0036 24” Extension Frame 45-0038 36” Extension Frame 24-0227 Extension Shaft Shield 45-0022 Front Pivot Assembly 25-0506 Pulley Bearing Adjuster Mount Bracket 813-5013-Z 1/2”-13 Hex Nut 810-5013-Z 1/2”-13 Spin Lock Nut 14-0101 1-1/4” 4-Bolt Bearing 25-0610 Pulley Bearing Plate 830-5013-4Z...
-
Page 90: Extension Hydraulics
2” x 10” Hydraulic Cylinder 155-2-1.125-1-CSK Chief Seal Kit 155-2-1.125-1-DSK Delevan Seal Kit 155-2-1.125-1-MSK Maxim Seal Kit 155-04R17-67-1 1/4” x 67” Hose 155-2700-LN-06-06 Straight Bulkhead Fitting 155-04R17-82-1 1/4” x 82” Hose 155-2501-6-6 90° Fitting Meyer Manufacturing Corporation - 90 - PB-8200-19... -
Page 91: Extension Front Hoses
EXTENSION FRONT HOSES CLAMP ASSEMBLY DETAIL B RAISE EXTENSION LOWER EXTENSION BULKHEAD PORTS KEY PART NUMBER QTY DESCRIPTION 155-04R17-113-1 1/4” x 113” Hose 32-0054 Blue Cable Tie 155-6400-6-8 Straight Fitting 155-8010-15 1/2” Male Tip 32-0053 Red Cable Tie 814-3118-Z 5/16”-18 Center Lock Nut 933-3804 5/16”-18 x 4”... -
Page 92: Extension 12 Volt Hydraulic Lift Power
EXTENSION 12 VOLT HYDRAULIC LIFT POWER PACK BULKHEAD PORTS DETAIL A KEY PART NUMBER QTY DESCRIPTION See Page 93 12 Volt Power Unit 155-6801-06-06 90° Fitting 155-06R17-35-1 3/8” x 35” Hose 155-6500-06-06 90° Fitting Meyer Manufacturing Corporation - 92 - PB-8200-19... -
Page 93: Volt Power Unit
12 VOLT POWER UNIT 15 FEET SO CORD KEY PART NUMBER QTY DESCRIPTION 955-0205 12 Volt Power Unit 955-0205-1 12 Volt DC Electric Motor 822-0025-Z 1/4” Split Lock Washer 955-0205-4 12 Volt Heavy Duty Plastic Start Solenoid Switch 955-0205-3 Tower Half Shroud Connector Assembly 955-0205-2 Manifold 955-0205-11... -
Page 94: Highway Light Package (Prior To 2020 Model Year)
Flat 1-Diode Amber LED Light 25-0847 Front Right Light Bracket 25-0847 Flat 1-Diode Amber LED Light 25-0849 Front Right Light Bracket 56-0112-BT Flat 1-Diode Red LED Light 25-1086-1 Rear Left Clearance Light Bracket Meyer Manufacturing Corporation - 94 - PB-8200-19... -
Page 95: Highway Light Package (2020 Model Year & Later)
HIGHWAY LIGHT PACKAGE (2020 MODEL YEAR & LATER) FRONT REAR KEY PART NUMBER QTY DESCRIPTION 56-0111-BT Flat 1-Diode Amber LED Light 56-0112-BT Flat 1-Diode Red LED Light (Truck Mount) 56-0111-BT Flat 1-Diode Amber LED Light (Pull Type) 56-0112-BT Flat 1-Diode Red LED Light 56-0241 98”... - Page 96 Meyer Manufacturing Corporation - 96 - PB-8200-19...
-
Page 97: Specifications
11.0 SPECIFICATIONS DIMENSIONS 8224RT 8226RT Inside Length 24’ 8” 26’ Inside Width 97” 97” Inside Height - no extension 72” 72” Inside Height w/14” extension 85.5” 85.5” Overall Length 29’ 8” 31’ Overall Width With Conveyor Extension 119” 119” Overall Width Without Conveyor Extension 117’... - Page 98 Meyer Manufacturing Corporation - 98 - PB-8200-19...
-
Page 99: Maintenance Record
MAINTENANCE RECORD MODEL NO. ____________________________________ SERIAL NO. ____________________________________ DATE SERVICE PERFORMED DATE SERVICE PERFORMED Manufactured by: Meyer Manufacturing Corporation 674 W. Business Cty Rd A Dorchester, WI 54425 Phone: 1-800-325-9103 Fax: 715-654-5513 Email: parts@meyermfg.com Website: www.meyermfg.com... - Page 100 Meyer Manufacturing Corporation 674 W. Business Cty Rd A Dorchester, WI 54425 Phone: 1-800-325-9103 Fax: 715-654-5513 Email: parts@meyermfg.com Website: www.meyermfg.com...
Need help?
Do you have a question about the Boss 8200 RT and is the answer not in the manual?
Questions and answers