Advertisement
Table of Contents
- 1 General Information
- 2 Preparing the Pump
- 3 ASSEMBLING the “EK-XTOP Dual DDC 3.2 PWM” with TWO PUMPS (if Disassembled)
- 4 Inserting the Reservoir to Your Computer Chassis
- 5 Connecting Your Reservoir
- 6 MOUNTING RESERVOIR on “EK-XTOP Dual DDC 3.2 PWM” (Option)
- 7 Other Instructions
- Download this manual
Installation and mounting manual for EK-XTOP Dual DDC 3.2 PWM (incl. 2x
This product is intended for installation only by expert users. Please consult with a qualified technician for installation. Improper installation may result in damage to your equipment. EK Water Blocks assumes no liability
whatsoever, expressed or implied, for the use of these products, nor their installation. The following instructions are subject to change without notice. Please visit our web site at
installation of this product please read important notice, disclosure and warranty conditions printed on the back of the box.
The barb hose fittings require only a small amount of force to screw them in; otherwise the high flow fittings might break. These fittings do not need to be tightened with much force because the
liquid seal is made using O-rings. The use of an algaecide and corrosion inhibitors is always recommended for any liquid cooling system.
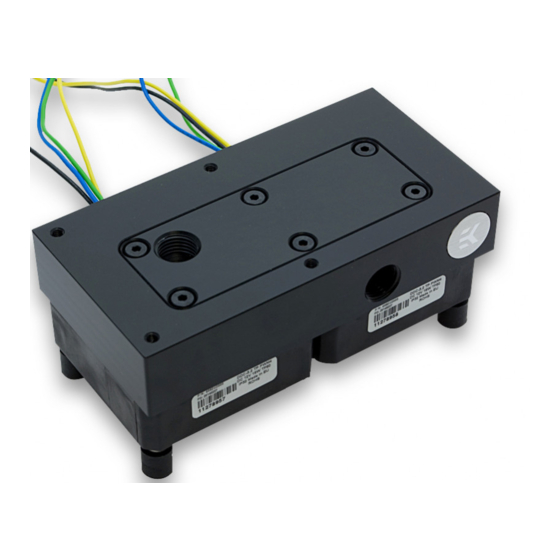
STEP 1: GENERAL INFORMATION
Sample picture of the EK-Xtop Dual DDC without pumps.
STEP 3: ASSEMBLING THE "EK-XTOP Dual DDC 3.2 PWM" WITH TWO PUMPS (if disassembled)
Take motor with impeller of your Laing DDC pump. Place it according to the picture. Do not forget to place back the stock O-rings into the pumps groove. Use
enclosed Allen key to secure the pumps with Four (4) M4×25 DIN 7984 and Four (4) Dumper DDC screws.
2 × DDC pump
M4 Dumper
STEP 4: INSERTING THE RESERVOIR TO YOUR COMPUTER CHASSIS
EK-XTOP Dual DDC can be mounted directly on computer chassis or into 5,25"
bay drive and occupies three (3) 5.25" drive bay expansion slots in your
computer chassis.
If you decided to mount into Bay Drive slots free three slots in case they
are already occupied with other computer components such as optical or
hard disk drives. Place the reservoir in your 5.25" drive bay. After
completing STEP 5 in this manual, secure the reservoir to the drive bay
cage using the enclosed M3x4 DIN 7985 screws with Philips head
screwdriver.
Dumper DDC screw
M4×25 DIN 7984 screw
M3x4 DIN 7985 screw
M4x4 DIN 7984 screw
pump)
STEP 2: PREPARING THE PUMP
Take your Laing DDC pump. Unscrew the screws that connect stock
top (usually you will need a Torx T20 head screwdriver) at the bottom
and put the top away as you don't need it any more. Keep it for a
warranty reason if the pump stops working.
EK-XTOP Dual DDC
CSQ
Place the stock
O-rings.
Revision 1.0. Released on 6
www.ekwb.com
for updates. Before
th
of May, 2014
Advertisement
Table of Contents

Subscribe to Our Youtube Channel
Related Manuals for ekwb EK-XTOP Dual DDC 3.2 PWM


Summary of Contents for ekwb EK-XTOP Dual DDC 3.2 PWM
- Page 1 STEP 3: ASSEMBLING THE “EK-XTOP Dual DDC 3.2 PWM” WITH TWO PUMPS (if disassembled) Take motor with impeller of your Laing DDC pump. Place it according to the picture. Do not forget to place back the stock O-rings into the pumps groove. Use enclosed Allen key to secure the pumps with Four (4) M4×25 DIN 7984 and Four (4) Dumper DDC screws.
- Page 2 INLET G1/4 threaded port OUTLET G1/4 threaded port STEP 6 (Option): MOUNTING RESERVOIR ON “EK-XTOP Dual DDC 3.2 PWM” EK-XTOP Dual At first you need buy optional parts for EK-PLUG G1/4 (sold separate) DDC. Theas optional parts are sold separately in our web shop.
Need help?
Do you have a question about the EK-XTOP Dual DDC 3.2 PWM and is the answer not in the manual?
Questions and answers