Table of Contents
Advertisement
Quick Links
Copyright ©2003 Acer Incorporated
All Rights Reserved.
Changes may be made periodically to the information in this publication without obligation
to notify any person of such revision or changes. Such changes will be incorporated in new
editions of this manual or supplementary documents and publications. This company makes
no representations or warranties, either expressed or implied, with respect to the contents
hereof and specifically disclaims the implied warranties of merchantability or fitness for a
particular purpose.
Record the model number, serial number, purchase date, and place of purchase information in
the space provided below. The serial number and model number are recorded on the label
affixed to your projector. All correspondence concerning your unit should include the serial
number, model number, and purchase information.
No part of this publication may be reproduced, stored in a retrieval system, or transmitted, in
any form or by any means, electronic, mechanical, photocopy, recording, or otherwise,
without the prior written permission of Acer Incorporated.
Model number :____________________________________
Serial number: _____________________________________
Purchase date: _____________________________________
Place of purchase: __________________________________
Acer is a registered trademark of Acer Incorporated. All other trademarks and registered
trademarks are the properties of their respective companies.
Advertisement
Table of Contents

Subscribe to Our Youtube Channel
Related Manuals for Acer PL111


Summary of Contents for Acer PL111
- Page 1 Acer Incorporated. Model number :____________________________________ Serial number: _____________________________________ Purchase date: _____________________________________ Place of purchase: __________________________________ Acer is a registered trademark of Acer Incorporated. All other trademarks and registered trademarks are the properties of their respective companies.
-
Page 2: Fcc Notice
FCC Notice This equipment has been tested and found to comply with the limits for a Class B digital device, pursuant to part 15 of the FCC Rules. These limits are designed to provide reasonable protection against harmful interference in residential installation. This equipment generates, uses and can radiate radio frequency energy and if not installed and used in accordance with the instructions, may cause harmful interference to radio communications. -
Page 3: Safety Instructions
Precautions Safety Instructions Check that the operating voltage of your unit is identical with the voltage of your local power supply. Should any liquid or solid object fall into the cabinet, unplug the unit and have it checked by the qualified personnel before operating it further. - Page 4 Cautions: The projector is equipped with ventilation holes (intake) and ventilation holes (exhaust). Do not block or place anything near these slots, or internal heat build-up may occur, causing picture degradation or damage to the projector. Cautions: When you replace the projector lamp, never touch the new bulb with your bare hands.
-
Page 5: Table Of Contents
Projector features and controls Projector Control panel Remote controller Getting the most out of your projector Remote Controller Auto Off Mode Control Panel Setup Unpacking the Projector Setting Up the Projector Connecting to a Computer Connecting to a Video Source Using the Projector Turning the Audio/Visual (A/V) Equipment On and Off Turning the Projector On and Off... -
Page 6: Projector Features And Controls
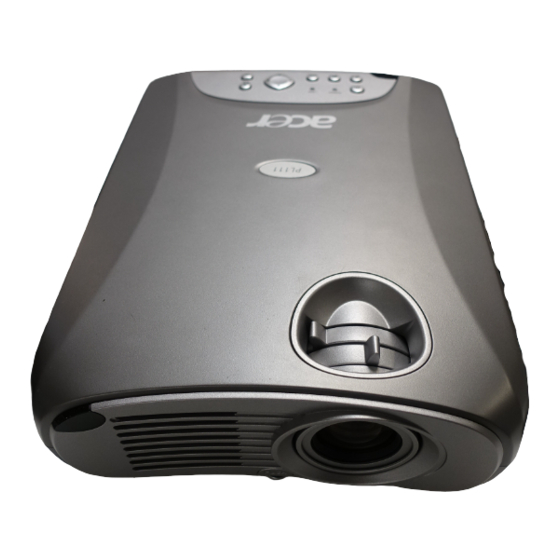
Projector features and controls Projector Item Zoom ring Focus ring Lens Ventilation holes (intake) Ventilation holes (exhaust) Adjuster button Front IR remote controller sensor Speakers Control Panel including Power button AC power socket Rear IR remote controller sensor Security lock receptacle Item Control port Computer IN (D-SUB) connector... -
Page 7: Control Panel
Control panel Description POWER Power LED indicator - indicates power to projector. LAMP Lamp LED indicator - indicates lamp power. Button Function Button Function Turns the projector and lamp ON and OFF. Manually selects an input source. INPUT Automatically adjusts frequency and phase. AUTO Displays (or hides) the on-screen control menus. - Page 8 Button Function Cursor Controller It can be used as a navigation controller to navigate the projector menus. - Scrolls up through the menu choices. - Scrolls down through the menu choices. - Increases the value setting on the selected sub-menus, or confirms a menu selection.
-
Page 9: Remote Controller
Remote controller Button Function Power Turns the projector and lamp ON and OFF. Menu Displays (or hides) the on-screen display menus. Scrolls up through the menu choices. Scrolls down through the menu choices. Increases the value setting on the selected sub-menus, or confirms a menu selection. - Page 10 Button Function Keystone Selects vertical trapezoidal distortion. Mute Cuts off the sound temporarily. Freeze Freezes the current graphics and video image on the screen. Blank Cuts off the screen temporarily. Note: Press the KEYSTONE button to select the trapezoidal distortion. To adjust the trapezoidal distortion of the projection, press the Cautions: When replacing batteries on the Remote Controller, take the following precautions:...
-
Page 11: Getting The Most Out Of Your Projector
Getting the most out of your projector The projector has a full set of features that allow you to control the settings for video, audio, power management, display parameters, and much more. To derive the greatest utility from your projector, read this section for a quick summary of the important features. -
Page 12: Setup
Setup This section tells you how to unpack and set up your projector and connect it to other equipment. The projector must be connected to a computer or a video source such as a video tape deck, camcorder, digital camera or laser disk player in order to make a projection. You may want to connect the projector to both your computer and a video source, or set up the projector for providing audio source. - Page 13 The following cables are optional accessories: Audio Cable Component Video Cable Many of the above optional items may not be required for your particular installation. Retain packaging materials in case you need to move or ship the projector in the future. It should always be transported in its original protective packaging.
-
Page 14: Setting Up The Projector
Setting Up the Projector Place the projector on a sturdy, level surface within five feet of the computer or video source. Caution: Do not hold the projector by the lens. This can damage the lens. Place the projector the correct distance from the screen. The distance between the projector and the screen determines the actual image size. -
Page 15: Connecting To A Computer
Connecting to a Computer Computer VGA OUT The projector will always project at SVGA (800 x 600) resolution. (SVGA is the native resolution of the projector.) However, you can connect the projector to a computer source capable of displaying VGA (640 x 480), SVGA (800 x 600), XGA (1024 x 768) or SXGA (1280 x 1024) resolutions. -
Page 16: Connecting To A Video Source
Connecting to a Video Source DVD Player or VCR DVD Player YPbPr (HDTV to D-SUB Cable) YCbCr (Component Video Cable) You can connect the projector to almost any common video source- VHS player, DVD player, camcorder, laser disc player or any other compatible video image source. -
Page 17: Using The Projector
Note: The projector is not compatible with a cable TV-style coaxial "F" connector. Using the Projector This section describes projector operations: • Turning the projector and A/V equipment on and off • Adjusting the projected image • Projector controls • Checking the projector status Turning the Audio/Visual (A/V) Equipment On and Off... -
Page 18: Focusing And Positioning The Screen Image
To turn off the projector, press the Power button. A message will appear on the screen for about 10 seconds: Press the Power button once again (to turn off the power) while the message is stillshowing on the screen. Note: Please wait until the fan motor and the Lamp LED turn off before removing the power cord from the projector. -
Page 19: Operational Indicator (Led)
Operational Indicator (LED) There are two LEDs on the top of the projector, the Power LED and the Lamp LED. They provide valuable information about the projector. LED TYPE COLOR Power LED Green Power LED Lamp LED Green Lamp LED Lamp LED Amber Lamp LED... -
Page 20: Projector Control Menus
Projector control menus This section describes how to make various adjustments and settings using the menus. Changing a Menu Setting The projector menus can be accessed using either the Projector Control Panel or the Remote Controller. Changing the menu display: Press the MENU button either on the Remote Controller or the Projector Control Panel. -
Page 21: Menu Options
Menu Options The projector is equipped with three types of on-screen display (OSD) menus. Each OSD menu interface you will see on the screen is depending on the type of input signal. Input Signal Type Menu Interface Computer YPbPr/HDTV Input, Picture, Color, Audio, Misc, Option, Language, Reset S-Video Video YCbCr... -
Page 22: Input Menu
Input Menu This menu allows to specify the signal source that you wish to project. This is particularly useful if you have several sources (video and/or computer) connected to your projector. Changing settings procedure (using either the Projector Control Panel or the Remote Controller): Press the MENU button to display OSD menu. - Page 23 Changing settings procedure (using either the Projector Control Panel or the Remote Controller): Press the MENU button to display OSD menu. Press the button to select PICTURE menu. To enter the sub-menu setting, press the or the MENU button. Press the button to select the sub-menu item.
-
Page 24: Color Menu
Color Menu This menu provides precise control of the color settings including: color temperature (preset & user define) and gamma. Changing settings procedure (using either the Projector Control Panel or the Remote Controller): Press the MENU button to display OSD menu. Press the button to select COLOR menu. -
Page 25: Audio Menu
Sub-Menu Option Gamma Gamma1 Gamma2 Note: The color adjustment on the User setting can only be made if the Color Temp selection is "User". Audio Menu This menu allows you to control volume and mute (On/Off) the audio. Changing settings procedure (using either the Projector Control Panel or the Remote Controller): Press the MENU button to display OSD menu. -
Page 26: Misc Menu
The following table provides detail of the available sub-menu choices: Sub-Menu Option Volume Mute MISC Menu This menu includes projector utilities for vertical keystone, freeze (yes/ no) and blank (yes/no) mode settings. Changing settings procedure (using either the Projector Control Panel or the Remote Controller): Press the MENU button to display OSD menu. -
Page 27: Option Menu
The following table provides detail of the available sub-menu choices: Sub-Menu Option V-Keystone Freeze Blank Option Menu This menu includes projector utilities for OSD timeout, OSD horizontal position, OSD vertical position, rear mode, ceiling mode, aspect ratio, auto off and lamp life indication. Changing settings procedure (using either the Projector Control Panel or the Remote Controller): Press the MENU button to display OSD menu. - Page 28 After you have done with the adjustment of a sub-menu item: To resume changing another sub-menu item: press the button. To exit from the current menu: toggle the MENU button. The following table provides detail of the available sub-menu choices: Sub-Menu Option OSD Timeout...
-
Page 29: Language Menu
Sub-Menu Option Lamp Life Note: Lamp life counter is displayed in read-only format, and this setting cannot be manually adjusted. Language Menu This menu enables you to select the language used in the OSD (on- screen display) menus. Changing settings procedure (using either the Projector Control Panel or the Remote Controller): Press the MENU button to display OSD menu. -
Page 30: Other Related Osd Menus
Press the MENU button to display OSD menu. Press the button to select RESET menu. To enter the sub-menu setting, press the or the MENU button. Press the to select YES if you want to restore all projector settings to the factory defaults. - Page 31 Press the button to adjust the value of desired sub-menu item. • On the Source sub-menu, press the the desired setting. After you have done with the adjustment of a sub-menu item: To resume changing another sub-menu item: press the button.
-
Page 32: Other Osd Menus
Sub-Menu Option Sharpness Other OSD Menus Other OSD menus operation and description are the same as the previous pages. • Input Menu: refer to page 17. • Color Menu: refer to page 19. • Audio Menu: refer to page 20. •... -
Page 33: No Input Signal
No Input Signal If there is no input signal attached with your projector, you press the MENU button (on either the Projector Control Panel or the Remote Controller), one of the following on-screen display menus will appear on the screen. Option Menu (refer to page 22) Reset Menu... -
Page 34: Maintenance
Maintenance The projector needs little maintenance. You should keep the lens clean as dust, dirt or spots will project on the screen and diminish image quality. You will also need to clean the air filter located at the bottom of the projector periodically. It is important to keep the air filter clean because a clogged air filter prevents proper ventilation which is necessary to cool the projector and prevent it from overheating. -
Page 35: Replacing The Lamp
To clean the air filter: Switch the projector off and unplug the power cable from the wall socket. Place a protective sheet (cloth) beneath the projector. Turn the projector over so you can see its underside. Remove the air filter by pulling the filter tab. - Page 36 Turn off the projector and unplug the power cable. Turn the projector over so you can access the lamp cover. Remove the access panel screws and open the panel. Remove the screws on the bottom of the lamp assembly. Grasp the lamp handle and pull the lamp assembly directly out of the projector.
-
Page 37: Technical Specifications
Technical specifications Item Projection System Native Resolution Image Brightness Uniformity Lens Focal Length Contrast Ratio Aspect Ratio Screen Size Lamp Projection Type Video Input Input Source Scanning Frequency Horizontal Freq. Vertical Freq. Pixel Rate Digital Keystone Correction Analog RGB (input signal) HDTV Display (YPbPr) Integrated Speaker Audible Noise... - Page 38 Item Remote Control OSD Language Operational Ambient Certification Power Supply Power Consumption Dimension (W x D x H) Weight Design and Specifications are subject to change without prior notice. Description Multifunctional Multilanguage Temperature: 5~35°C Humidity: 35~85% UL, CE, FCC Class B, VCCI, C-Tick, CCC, TUV- GS, PSB, S-Mark AC 100~240V, 50~60Hz 240 Watts...
-
Page 39: Appendix A
Appendix A Preset Signals Preset signal Video 60 Hz Video 50 Hz Component 60 Hz Component 50 Hz 640 x 350 VGA mode 1 VGA VESA 85 Hz 640 x 400 VGA 85Hz 720 x 400 VGA mode 2 VGA VESA 85 Hz 640 x 480 VGA mode 3 VGA VESA 72 Hz... -
Page 40: Hdtv Preset Signals
Preset signal XGA VESA 75 Hz XGA VESA 85 Hz 1152 x 864 SXGA VESA 70 Hz SXGA VESA 75 Hz SXGA VESA 85 Hz 1280 x 960 SXGA VESA 60 Hz SXGA VESA 75 Hz 1280 x 1024 SXGA VESA 60 Hz HDTV Preset Signals Preset Horizontal... - Page 41 Monitor OUT cable (for data) Display Set VGA Cable Monitor IN Connecting the Computer (data) Audio Cable Projector Computer VGA Cable VGA OUT...
- Page 42 Connecting the HDTV (data) AV Composite Cable Audio OUT Audio IN Green,Blue,Red VGA to HDTV Cable Audio IN HDTV (HDTV to D-SUB Cable) Connecting to a Video Source (S-Video, Component, Composite) DVD Player or VCR AV Composite Cable S-Video Cable DVD Player YCbCr (Component Video Cable)
Need help?
Do you have a question about the PL111 and is the answer not in the manual?
Questions and answers