Advertisement
Quick Links
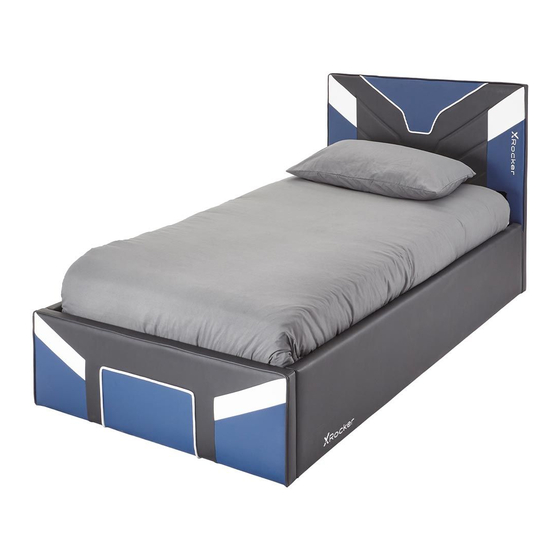
CERBERUS GAMING OTTOMAN TV BED
SIZE : SINGLE 3',SMALL DOUBLE 4',DOUBLE
PLEASE read this leaflet prior to assembly to familiarise yourself with the various stages of construction.
Carefully open the pack supplied and check the contents against the parts and fitting check list. Do not destroy
any of the packing until you are certain that you have all the necessary part for assembly.
CAUTION: There are small components used in the construction of this unit. These loose items should be kept
away from young children while assembling your unit to avoid danger of choking hazards.
IMPORTANT :
Please reading through this leaflet and then follow the simple step-by-step instruction.
Please keep fittings out of children reach.
Please ensure products place on flat & soft surface.
Please ensure you have the right tools, Do Not use power tools to assembly this products.
Please ensure a clean, dry and spacious area for assembly, due to the size of this product we
recommend that it is assembled in the room intended for use.
Please retain these instruction for future reference.
INFORMATION :
Ottoman TV Bed - Upholstery bed, Complies with essential requirements of the EMC.
Directive 2004/108/EC and Low Voltage Directive 2006/95/EC.
Maximum TV dimension W750MM*H450MM*D60MM.
WARNINGS
Ensure products is fully assembled and secured as illustrated before use.
Ensure the legs remain in contact with the ground at all time.
Ensure all screws or bolts are tightened and inspect regularly.
Do Not stand or jump on the product.
Do Not let children play with the mechanism.
Do Not use this product if parts are missing, damage or worn.
Don't insert objects into the TV compartment, do not try to service this product yourself and never use
any lubricants – Seek expert help – contact your retailer.
Do Not expose this product to dripping or splashing, rain or areas with heavy moisture.
Do Not place the product under direct sunlight, open flames such as candles, heat or radiators.
Keep away from temperatures over 35
Do Not use scourer, abrasivers or chemical cleaners, only clean with sponge wipe and warm soapy water.
COLOUR: RED/BLACK, BLUE/BLACK
ASSEMBLY INSTRUCTION
.
4'6''
Page 1 of 12
Advertisement

Subscribe to Our Youtube Channel
Related Manuals for X Rocker CERBERUS GAMING OTTOMAN TV BED


Summary of Contents for X Rocker CERBERUS GAMING OTTOMAN TV BED
- Page 1 CERBERUS GAMING OTTOMAN TV BED COLOUR: RED/BLACK, BLUE/BLACK SIZE : SINGLE 3',SMALL DOUBLE 4',DOUBLE 4'6'' ASSEMBLY INSTRUCTION PLEASE read this leaflet prior to assembly to familiarise yourself with the various stages of construction. Carefully open the pack supplied and check the contents against the parts and fitting check list. Do not destroy any of the packing until you are certain that you have all the necessary part for assembly.
-
Page 2: Electrical Components
CERBERUS GAMING OTTOMAN TV BED COLOUR: RED/BLACK, BLUE/BLACK SIZE : SINGLE 3',SMALL DOUBLE 4',DOUBLE 4'6'' ELECTRICAL COMPONENTS In order to prevent injury, never attempt to remove the cover or any other components. Power cord – only to plugged into an AC 110V – 240V power outlet. - Page 3 Parts (1) Headboard x 1pc (2) Footboard x 1pc (3) Side Rail x 2pcs (5) Long Frame Rail R x 1pc (6) Long Frame Rail L x 1pc (4) Centre Support Rail x 1pc HEADBOARD HEADBOARD (9) Mattress Stopper x 2pcs (7) Horizontal Frame Rail x 1pcs (8) Horizontal Frame Rail x 1pcs (10) Hinge x 2pcs...
- Page 4 Fittings 16mm M8 Bolt 30mm M8 Bolt 40mm M8 Bolt 50mm M8 Bolt Flat Washer M8x22 30mm M6 Bolt 30mm M3 Screw Washer M6 x 13mm NUT M8 x 13mm Spanner M5 Allen Key 15mm M4 Bolt Flat Washer M6 x16 M4 Allen Key End Slat Cap Centre Slat Cap...
- Page 5 Step 2 30mm M8 Bolt M5 Allen Key Step 3 30mm M6 Bolt Washer M6 x 13mm M4 Allen Key Page 5 of 12...
- Page 6 Step 4 30mm M8 Bolt M5 Allen Key Step 5 30mm M3 Screw Page 6 of 12...
- Page 7 Connect the TV lift up Power cord from the control box to the main supply (extention lead might be needed) . The mains supply must be fully earthed when it not in use. TV Lift Up Power cord Extension lead WARNING Up/Down Button HAZARDOUS VOLTAGE.
- Page 8 Step 6 15mm M4 Bolt Flat Washer M6 x16 M4 Allen Key IMPORTANT Please ensure the bedframe is secure before fitting the TV, 2 Persons are required for this step. Attach TV by using the appropriate screws and adjust the sliding vertical arm to sit neatly on top of the TV. Before fitting your TV to bracket, please check and ensure your TV dimensions are suitable for the bed.
-
Page 9: Power Cord
TV Lift Mechanism AV Ethernet Wire Power Cord HDMI Ethernet Wire Additional cable outlets for additional electrical connections AV /HDMI Ethernet Wire Power Cord AV /HDMI Ethernet Wire Power Cord Wire through from bottom of footboard Place the wire cable through the Cable Management Caps to prevent any damage to the wire cable (eg.other power cord) when TV Lift Mechanism is operating. - Page 10 Step 7 16mm M8 Bolt M5 Allen Key Step 8 40mm M8 Bolt NUT M8 x 13mm Spanner M5 Allen Key Page 10 of 12...
- Page 11 Step 9 50mm M8 Bolt Flat Washer M8x22 M5 Allen Key Step 10 Centre Slat Cap End Slat Cap Page 11 of 12...
-
Page 12: Flange Nut
Step 11 Spanner Flange Nut Secure the pneumatic lifting mechanisms on the side rail (3) into place by using flange nuts as shown. Do not over tighten the nuts as this will stop the pneumatic arm rotating freely and could damage the mounting.
Need help?
Do you have a question about the CERBERUS GAMING OTTOMAN TV BED and is the answer not in the manual?
Questions and answers