Table of Contents
Advertisement
instrukcja obsługi
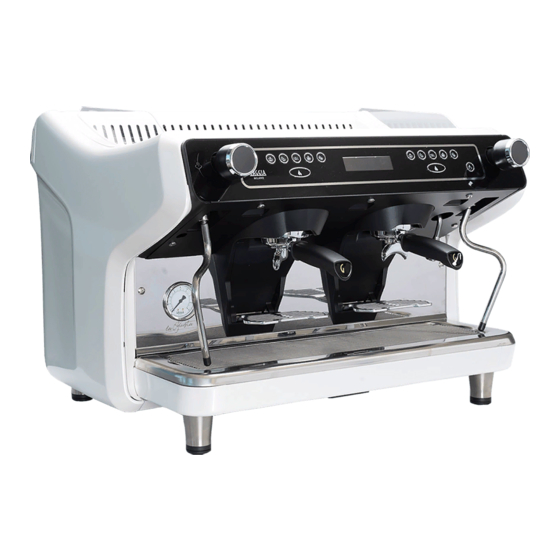
Gaggia
La Giusta
Tchibo Coffee Service Polska Sp. z o.o.
Aleje Jerozolimskie 172 I 02-486 Warszawa
Obsługa Klienta: 22 231 87 51 - 55
biuroservice@tchibo-coffeeservice.pl
www.tchibo-coffeeservice.pl
Kontakt do Serwisu Technicznego:
ZGŁOSZENIE SERWISOWE ONLINE
605 227 788 i 609 043 241
tscserwis@tchibo-coffeeservice.pl
lub
Advertisement
Table of Contents

Related Manuals for Gaggia La Giusta


Summary of Contents for Gaggia La Giusta
- Page 1 Gaggia La Giusta Kontakt do Serwisu Technicznego: Tchibo Coffee Service Polska Sp. z o.o. Aleje Jerozolimskie 172 I 02-486 Warszawa ZGŁOSZENIE SERWISOWE ONLINE Obsługa Klienta: 22 231 87 51 - 55 biuroservice@tchibo-coffeeservice.pl www.tchibo-coffeeservice.pl 605 227 788 i 609 043 241...
- Page 2 English...
- Page 3 English...
- Page 4 English SAFETY INSTRUCTIONS For professional use only. It is forbidden to: use jets of water for cleaning operations. The professional appliance cannot installed Only install the appliance in outdoors. Do not place it places where it can be areas where supervised qualified temperature is lower than...
- Page 5 English Children must not carry out Connect the appliance to a any cleaning and maintenance drinking water main with operations without being pressure between 0.15 MPA monitored. and 0.8 MPA (1.5 and 8 bar); see data on the data plate. Before connecting appliance to the water mains,...
-
Page 6: Table Of Contents
English CONTENTS 1 INTRODUCTION TO THE MANUAL 1.1 PREAMBLE 1.2 ICONS USED 2 ENVISAGED MACHINE USE 3 SAFETY 4 TECHNICAL FEATURES 5 INSTALLATION 5.1 WATER CONNECTION 5.2 ELECTRICAL CONNECTION 6 DESCRIPTION OF CONTROLS 6.1 POWER BUTTON 6.2 TOUCH KEYPAD 6.3 BUTTON DESCRIPTION 7 START UP 7.1 COFFEE FILTERS SUPPLIED 7.2 FILTER HOLDERS SUPPLIED... -
Page 7: Introduction To The Manual
English INTRODUCTION TO THE MANUAL Preamble purpose instructions booklet is to indicate the envisaged uses of the machine for which it has been designed, its technical features in order The current instructions provide advice booklet has been prepared correct use, its cleaning for the machine user, the regulation. - Page 8 English This instructions booklet The manufacturer declines must always be available all responsibility in the for consultation and must event of: be kept in a protected and • the improper or incorrect use of the coffee machine • uncompliant use with what is specifically stated in the dry place.
-
Page 9: Icons Used
English Icons Used Warning Prohibition Important User Maintenance technician... -
Page 10: Envisaged Machine Use
English ENVISAGED MACHINE USE The following are also considered misuse: • any use other than the intended use and/or employing methods other than those described in this manual; • any operation on the appliance in breach of the instructions provided in this manual; •... -
Page 11: Safety
English SAFETY The machine is to be used The user is responsible for solely by adults who have third parties in the working carefully read and fully area. understood this manual The installer, user and and all the safety advice maintenance technician are contained in the same. - Page 12 English Only install the appliance in Prolonged machine places where it can be standstill at temperatures supervised qualified under 0°C (zero personnel. degrees centigrade) may cause serious damage or breakage to the boiler and Installation must the piping. Therefore, it is effected solely necessary to completely...
- Page 13 English The constructor declines The user must comply with all responsibility for any the current safety laws in damage to things, persons force in the country of animals caused installation, well eventual interventions on common sense and ensure the machine by personnel that maintenance not specifically authorized...
- Page 14 English The user must not touch The cups and small coffee the machine with wet or cups must be thoroughly damp hands or feet and dried before placed on the bare feet. Although the relative surface. machine is earthed it is advisable to use wooden Access to the internal area platforms or a cut-out box...
-
Page 15: Technical Features
English TECHNICAL FEATURES 140 (77) 220-240V / 380-415V 3N ~50-60 220-240V / 380-415V 3N ~50-60 3900 3900 3500 3500 below 70 dB below 70 dB... -
Page 16: Installation
English INSTALLATION Water Net Drainage pipe Water filter Protection switch Motor pump power supply cable Drain cup Drain pipe Filling tube Inlet pump... -
Page 17: Water Connection
English Water connection • there are no bumps, signs of knocks or deformities Before connecting • there are no damp patches or marks which could lead one appliance to the water to assume that the packaging has been exposed to the elements mains, please read and •... -
Page 18: Electrical Connection
English Before connecting Electrical connection water filter to the machine, Before proceeding with perform a wash cycle until electrical connection,make the water is clear. Then sure that the voltage rating connect the water filter to corresponds with that the machine. indicated on the CE plate and on the connection plate on the power supply... - Page 19 English If the power cord is damaged, must replaced manufacturer, its service centre or by adequately The yellow-green coloured qualified personnel cable MUST be connected order to avoid any risks. to the room’s earthing system. Depending regulations in force in the Country where machine is being used, the...
-
Page 20: Description Of Controls
English DESCRIPTION OF CONTROLS Left vaporiser tap Control keypad Purge button Left vaporiser pipe Pump pressure gauge Adjustable feet Drain pipe Right vaporiser tap Water collection button Touch display Hot water outlet pipe Right vaporiser pipe Power button USB port Filter holder cup Additional grill... -
Page 21: Power Button
English Power button Button description Keypad symbols Touch keypad... -
Page 22: Start Up
English START UP Do not press the hot water outlet button before the set point temperature display reached. For technical adjustments refer technical manual. Coffee filters supplied Brew groups warming completes in about half an hour after the set point temperature been reached. -
Page 23: Filter Holders Supplied
English Filter holders supplied High-raised group filter holders supplied... -
Page 24: Function / Use And Programming
English FUNCTION / USE AND PROGRAMMING Introduction 8.1.1.1 Display menu 1 • handling 2 coffee groups • control of four different coffee doses for each group • simultaneous function of both coffee and tea groups • volumetric check on coffee doses •... - Page 25 English 8.1.1.3 Display menu 3 8.1.2 Stand-by mode Display menu 3 17 Automatic switching on / switching off settings 18 Display alarms 19 Date / time settings 20 Time 21 Sliding menu 22 Language settings 8.1.2.1 Activating stand-by mode 8.1.1.4 Display menu 4 Display menu 4 23 Stand-by mode 24 Display product count...
- Page 26 English 8.1.3.1 Password settings 8.1.3 Access to the User Menu Only Maintenance Technician able change default password to access the technical menu and the factory settings menu. Access with password protection...
-
Page 27: Programming Coffee Dose
English 8.1.3.2 Exiting the user menu Programming coffee dose • Programming coffee dose with keypad • Programming coffee dose with touch display Make sure the machine is not in the stand-by mode; if this is the case, deactivate this function (see sect. "Deactivating stand-by mode"). - Page 28 English If no dose key is pressed within 30 seconds, it will automatically escape from programming mode. During the programming of a group the operation of the other groups as well as brewing deactivated.
-
Page 29: Programming Tea Dose (Hot Water)
English 8.2.2 Programming coffee dose with touch display Programming tea dose (hot water) • Programming tea dose (hot water) with the keypad • Programming tea dose (hot water) with touch display 8.3.1 Programming dose (hot water) with the keypad If a dose key has already been set, its LED light will be turned off. - Page 30 English If no dose key is pressed within 30 seconds, it will During the programming of automatically escape from tea the group functioning programming mode. brewing disabled. programmed only if the technical parameter "continuous" disabled.
-
Page 31: Structure Of Coffee And Tea Dose Programming Menu
English Dose settings 1EXP 8.3.2 Programming dose (hot water) with touch display Dose settings 1LONG Gr2 Dose settings 2EXP Dose settings 2LONG Gr2 Dose settings CONT Dose settings 1EXP Dose settings 1LONG Gr3 Dose settings 2EXP Dose settings 2LONG Gr3 Dose settings CONT Dose Tea1 Dose Tea2... -
Page 32: Brewing Coffee
English Brewing Coffee Continuous coffee doses Avoid keeping it pressed for more than 5 seconds will enter programming mode. "Continuous" cycle starts within 5 seconds after releasing the T3 key, not when the same is pressed, while it stops by pressing it a second time. -
Page 33: Tea Brewing
English continuous coffee Tea brewing dose can be programmed with the touch display only (see section "Programming coffee dose with touch display"). -
Page 34: Steam Dispensing
English Steam dispensing Special functions Washing It is possible to rotate the knob either clockwise or anticlockwise. -
Page 35: Cleaning And Maintenance
English CLEANING AND MAINTENANCE case faults, Before performing immediately turn off the maintenance and/or appliance, disconnect cleaning operation, turn off from the power supply by the appliance by setting the removing the plug from switches to the "OFF" the socket and contact the position. -
Page 36: Cleaning And Scheduled Maintenance
English coffee group Cleaning and Scheduled seal diffuser Maintenance spout filter All parts must be washed Filter holder with lukewarm water only without using 9.2.1 Daily cleaning and maintenance detergents or solvents that could change their shape or performance. 9.2.1.1 Washing with detergent All removable parts cannot washed dishwasher. - Page 37 English 9.2.1.4 Cleaning the nozzle of the steam wand 9.2.1.3 Cleaning spout Danger of burning. Before making any intervention, make sure the temperature of the spout is not too high. 9.2.1.5 Cleaning housing...
-
Page 38: Unscheduled Maintenance
English 9.2.2 Weekly cleaning and maintenance 9.2.2.1 Cleaning airing filter of hot water dispensing spout Unscheduled maintenance... -
Page 39: Troubleshooting
English TROUBLESHOOTING Problem Cause Solution... -
Page 40: Storage - Disposal
English STORAGE - DISPOSAL 11.1 Location Change • disconnect the appliance from the supply network; • carry out the general cleaning of the appliance as indicated in chapter "Cleaning and Maintenance"; • put the parts back into place and close the doors; 11.2 Inactivity and Storage •... -
Page 41: Instructions For End Of Operational Life Disposal
English INSTRUCTIONS FOR END OF OPERATIONAL LIFE DISPOSAL...
Need help?
Do you have a question about the La Giusta and is the answer not in the manual?
Questions and answers