Table of Contents
Advertisement
Quick Links
Advertisement
Table of Contents

Related Manuals for Megger DPM1000


Summary of Contents for Megger DPM1000
- Page 1 DPM1000 User guide...
-
Page 2: Safety Information
Electrical Specifications section. Do not apply or remove the clamp or test leads on or around uninsulated hazardous live ■ conductors where a potential to cause electric shock, electrical burns or arc flash exists. User Guide www.megger.com... - Page 3 CATIII Measurement category III: Equipment connected between the consumer unit and the electrical outlets. CATII Measurement category II: Equipment connected between the electrical outlets and the user’s equipment. www.megger.com User Guide...
-
Page 4: Unsafe Voltage
DCA auto-zeroing button ■ Peak hold ■ Max/Min hold ■ Smart data hold ■ Phase rotation ■ High frequency noise rejection filter ■ Auto power off (APO) ■ CAT IV 600 V/CAT III 1000 V safety standard ■ User Guide www.megger.com... -
Page 5: Unpacking And Inspection
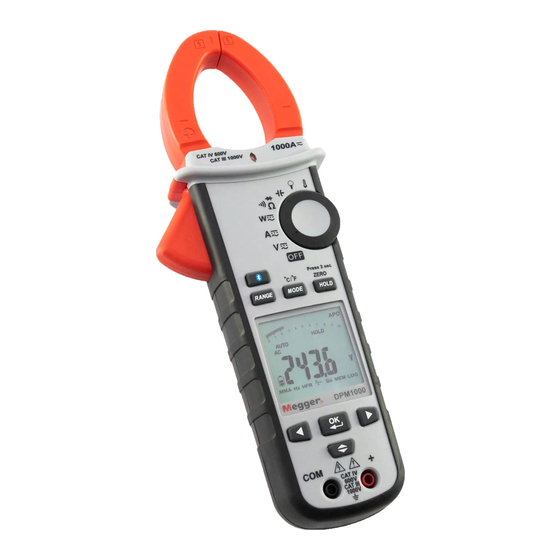
Unpacking and inspection Upon removing your new Power Clamp Meter from its packing, you should have the following items: 1. Megger DPM1000 Power Clamp Meter 2. Test lead set (one black, one red) 3. Test probes (one black, one red) 4. - Page 6 The Meter Description 1. Jaw 2. VoltSeek LED 3. Jaw trigger 4. Rotary function switch 5. LCD display 6. Function / Operation push buttons 7. + input terminal 8. Common input terminal User Guide www.megger.com...
-
Page 7: Auto Power Off
After turning on the meter, the LCD will show Full, hAlf, and Lo to indicate the battery capacity. Auto Power Off After 15 minutes of no activity The meter can operate again by turning it on from the OFF position. www.megger.com User Guide... -
Page 8: Menu Operation
Auto Power Off (APO) disable: Press OK button while turning meter on from the OFF position. Push Buttons Bluetooth LEFT RIGHT UP/DOWN Menu Operation User Guide www.megger.com... -
Page 9: Making Basic Measurements
When connecting the test leads to the DUT (Device Under Test) connect the common test lead before connecting the live test lead. When removing the test leads, remove the live test lead before removing the common test lead. www.megger.com User Guide... -
Page 10: Measuring Voltage
Measuring voltage Warning To avoid an electrical shock, hazard or damage to the meter, do not attempt a measurement that might exceed 1000 V DC or AC RMS. User Guide www.megger.com... -
Page 11: Measuring Current
CAT IV 600 V CAT III 1000 V with respect to earth for the jaw. Fixed Barrier hand guard. Do not hold the meter above the fixed barrier - The torch turns on when the clamp jaws open. www.megger.com User Guide... - Page 12 AC+DC mode: AC+DC RMS value. Note Press MODE button to enter the AC/DC/AC+DC mode. Press MODE button for more than 2 seconds to return to the AUTO SENSE mode. PEAK HOLD (AC mode only) ACV mode >2SEC >2SEC User Guide www.megger.com...
- Page 13 >2SEC >2SEC >2SEC In PEAK HOLD mode, the meter will save the positive peak value and negative peak value. Positive peak value is displayed in PEAK MAX mode. Negative peak value is displayed in PEAK MIN mode. www.megger.com User Guide...
- Page 14 If the measured inrush current could be greater than 100 A AC, please set the range to 1000 A prior to activating inrush current. Time Motor on Trigger Motor off point Waiting for trigger After trigger even User Guide www.megger.com...
- Page 15 Press the HOLD Key > 2 seconds to compensate for any residual magnetism. > 2 Sec - DCA Zero is available in Auto Sense, DC and AC+DC modes. Measuring Frequency (AC mode only) Select the “Hz” icon then press the OK button to enter/exit the frequency measurement mode. www.megger.com User Guide...
- Page 16 The MAX/MIN/AVG mode can also calculate the average of the readings. >2sec NOTE: Press the HOLD key in Max/Min/AVG mode to stop the meter updating the maximum, minimum and average values. HOLD mode must be turned off to continue updating values. User Guide www.megger.com...
- Page 17 (harmonics up to the 25th) Hn=RMS of Individual Harmonic ÷ RMS of fundamental ×100%. Press RANGE button to display harmonic order or the value of the harmonic (unit: %). the value of h01 the value of h25 www.megger.com User Guide...
-
Page 18: Measuring Active Power (W)/Power Factor (Pf)
(The current direction must be the same as the figure below) No sign: Indicates the power flows from the power source to the load. “_” sign: Indicates the power flows from the load to the power source. User Guide www.megger.com... - Page 19 No sign: The phase of the current signal is lagging behind the voltage signal (inductive load). “_” sign: The phase of the current signal is leading the voltage signal (capacitive load). Overrange display: OL.U: Voltage overload OL.A: Current overload ± OL kW: Active Power > 1050 kW or < -1050 kW. www.megger.com User Guide...
- Page 20 Three phase power measurement 3 phase 3 wire balanced / unbalanced Step 1. Set the rotary switch to the “W” position Step 2. Using the MODE button, choose ACW. Load Black Black User Guide www.megger.com...
- Page 21 3 phase 4 wire balanced / unbalanced Step 1. Set the rotary switch to the “W” position Step 2. Using the MODE button, choose ACW. Load Black Black Black www.megger.com User Guide...
- Page 22 Phase rotation Phase 1 Phase 2 Phase 3 User Guide www.megger.com...
- Page 23 ”----” means that the meter is unable to determine the results. d. If the meter displays “LoU”, it is possible that the test leads were removed before completing the full testing procedure. Step 6: To repeat the test, press the OK button again. www.megger.com User Guide...
-
Page 24: Ohm Measurement
Press MODE button to enter the “Ω”, “ “ or “ “ mode. Press MODE button for more than 2 seconds to return to the AUTO SENSE mode. The red LED will turn on, if the resistance of the DUT is < 30 Ω. User Guide www.megger.com... -
Page 25: Measuring Capacitance
To avoid possible damage to the meter or to the equipment under test, disconnect circuit power and discharge all high-voltage capacitors before measuring capacitance. Use the DC voltage function to confirm that the capacitor discharged. Note - The meter will display “diSC” while discharging the capacitor. www.megger.com User Guide... - Page 26 Measuring temperature °C / °F Set the rotary switch to the “ “ position. Vent / Pipe K Type Temperature probe Do not take any high voltage measurement prior to making a temperature measurement as °C/°F measurement accuracy may be affected. User Guide www.megger.com...
-
Page 27: Other Functions
The meter can store a maximum of 1000 data entries. To enter MEM mode use the Arrow keys to select the MEM icon and ress the OK button. In this mode you can operate the following options: www.megger.com User Guide... - Page 28 To exit MEM mode, use Arrow keys to select the MEM icon and press the OK button. A-Save limit. Function Limit V, A, W, Cap 5 % of range 10% of 100 Hz range 5% of 1k/10kHz range User Guide www.megger.com...
- Page 29 To exit the LOG mode, select the LOG icon, and press the OK button Bluetooth The meter uses low-power Bluetooth v4.0 wireless technology to transfer real-time data to the free Megger Link app - available for both iOS and Android. The maximum communication range in open air is approximately 10 m.
-
Page 30: Power-Up Options
Press one of the following buttons while tuning meter on from OFF position. UP/DOWN button: Display of the software version. OK button: Disable auto power off. The display shows “AoFF”. LEFT button: Disable active backlight. The display shows “LoFF”. HOLD BUTTON: Display all LCD symbols approx 10 seconds. User Guide www.megger.com... -
Page 31: Battery Replacement
The battery has 33% power remaining Replace the battery as soon as the low battery indicator appears to avoid inaccurate readings Battery replacement Caution Remove all test leads from Meter before opening the battery cover or meter case. www.megger.com User Guide... -
Page 32: Specifications
0.2 x (Specified accuracy) / °C, < 18 °C, > 28 °C. Over voltage category: IEC 61010-1 600 V CAT IV/1000 V CAT III IEC 61010-2-32, IEC 61010-2-33 Operating altitude: 2000 m (6562 ft) Conductor Size: 40 mm diameter Pollution degree: 2 EMC: EN 61326-1 User Guide www.megger.com... -
Page 33: Electrical Specifications
For Crest Factor of 2.0 to 2.5, add 2.5% to accuracy. For Crest Factor of 2.5 to 3.0, add 4.0% to accuracy. 3 @ 460 V, 460 A 2 @ 690 V, 690 A AC+DC Vrms Accuracy: same as ACV spec. +DCV spec. www.megger.com User Guide... - Page 34 1400 V 140.0 A ± (3.0% + 15dgt) 1400 A Accuracy defined for: Sine wave, ACV>5 Vrms / ACA>5 Arms, Frequency 50~400 Hz. - For square wave, the accuracy is unspecified. - Only suitable for the repetitive events. User Guide www.megger.com...
- Page 35 ± (2.5% + 0.2 A) 999.9 A ± (2.5% + 5dgt) Sine wave, Freq. 50/60 Hz - Operational response approx. 100 ms Trigger level of INRUSH: 1 Arms for 100 A range 10 A rms for 1000 A range www.megger.com User Guide...
- Page 36 Maximum Open Circuit Voltage for Ω, : Approximate 3 V Maximum Open Circuit Voltage for diode: Approximate ±1.8 V Continuity Threshold : <30 Ω Beep On. >100 Ω Beep OFF. Continuity Indicator: 2 kHz Tone Buzzer Continuity response time: < 100 ms. User Guide www.megger.com...
- Page 37 The meter needs 2 hour for stability for any ambient temperature change of more than ± 5 °C. (12) VoltSeek Voltage Range of Sensitivity >100 ~ 1000 V AC (At the top edge of the jaw) Product manufactured in Taiwan www.megger.com User Guide...
-
Page 38: Maintenance
Directive. Please contact either Megger Ltd, your local Megger office or distributor for instructions on the safe disposal of these batteries. Megger is registered in the UK as a producer of batteries. The registration number is BPRN01235. For further information see www.megger.com User Guide www.megger.com... - Page 39 Some states or countries laws vary, so the above limitations or exclusions may not apply to you. Megger Limited Archcliffe Road Dover Kent CT17 9EN Tel: +44 (0) 1304 502 101 Fax: +44 (0) 1304 207 342 www.megger.com www.megger.com User Guide...
- Page 40 Manufacturing sites Megger Limited Megger GmbH Megger USA - Valley Forge Archcliffe Road Weststraße 59 Valley Forge Corporate Center Dover 52074 2621 Van Buren Avenue Kent Aachen Norristown CT17 9EN Germany Pennsylvania, 19403 ENGLAND +49 (0) 241 91380 500 +44 (0)1 304 502101 info@megger.de...
Need help?
Do you have a question about the DPM1000 and is the answer not in the manual?
Questions and answers