Table of Contents
Advertisement
Available languages
Available languages
Automatic Battery Charger
Cargador de baterías automático
Chargeur de batterie automatique
106-4
OWNERS MANUAL / MANUAL DEL USUARIO /
MANUEL D'UTILISATION
PLEASE SAVE THIS OWNERS MANUAL AND READ BEFORE EACH USE. This manual
will explain how to use the battery charger safely and effectively. Please read and follow
these instructions and precautions carefully.
POR FAVOR CONSERVE ESTE MANUAL DEL USUARIO Y LEALO ANTES DE CADA
USO. En este manual le explica cómo utilizar el cargador de batería de manera segura y
confiable. Por favor, lea y siga las siguientes instrucciones y precauciones.
GARDER LE MANUEL D'INSTRUCTION ET LISEZ LE AVANT CHAQUE UTILISATION.
Ce manuel explique comment utiliser le chargeur de batterie d'une façon securitaire et efficace.
S'il vous plaît lisez et suivez ces instructions et precautions.
0099001959E-02
Advertisement
Table of Contents

Subscribe to Our Youtube Channel
Related Manuals for Schumacher Electric SC1352


Summary of Contents for Schumacher Electric SC1352
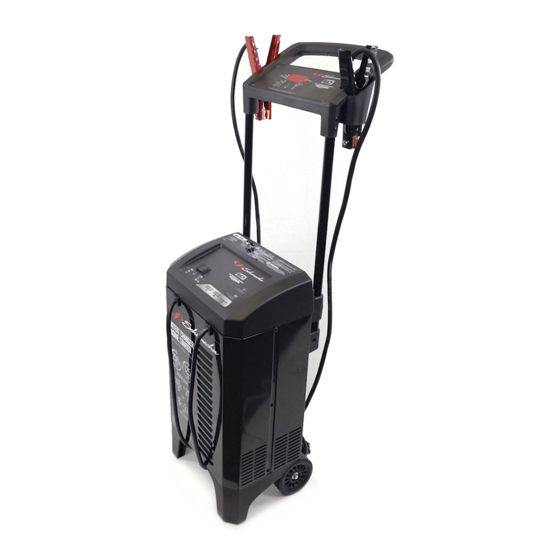
- Page 1 Automatic Battery Charger Cargador de baterías automático Chargeur de batterie automatique 106-4 OWNERS MANUAL / MANUAL DEL USUARIO / MANUEL D’UTILISATION PLEASE SAVE THIS OWNERS MANUAL AND READ BEFORE EACH USE. This manual will explain how to use the battery charger safely and effectively. Please read and follow these instructions and precautions carefully.
-
Page 2: Table Of Contents
CONTENTS IMPORTANT SAFETY INSTRUCTIONS – SAVE THESE INSTRUCTIONS ..........5 PERSONAL SAFETY PRECAUTIONS .......................5 PREPARING TO CHARGE .........................6 CHARGER LOCATION ..........................6 DC CONNECTION PRECAUTIONS ......................6 FOLLOW THESE STEPS WHEN BATTERY IS INSTALLED IN VEHICLE ..........6 FOLLOW THESE STEPS WHEN BATTERY IS OUTSIDE VEHICLE ............7 GROUNDING AND AC POWER CORD CONNECTIONS .................7 ASSEMBLY INSTRUCTIONS ........................7 CONTROL PANEL ............................8... - Page 3 CONTENIDOS INSTRUCCIONES IMPORTANTES DE SEGURIDAD – GUARDE ESTAS INSTRUCCIONES ....15 PRECAUCIONES DE SEGURIDAD PERSONAL ..................15 PREPARACIÓN PARA LA CARGA ......................16 UBICACIÓN DEL CARGADOR.........................16 PRECAUCIONES DE CONEXIÓN EN CC ....................16 SIGA ESTOS PASOS CUANDO LA BATERÍA ESTÉ COLOCADA EN EL VEHÍCULO ......17 SIGA ESTOS PASOS CUANDO LA BATERÍA SE ENCUENTRE FUERA DEL VEHÍCULO ....17 CONEXIONES A TIERRA Y ENERGÍA DE CA ..................17 INSTRUCCIONES DE MONTAJE ......................18...
- Page 4 TABLE DES MATIÈRES CONSIGNES DE SÉCURITÉ IMPORTANTES – CONSERVER CES INSTRUCTIONS ......26 MESURES DE SÉCURITÉ PERSONNELLE ....................26 PRÉPARATION POUR LE CHARGEMENT ....................27 EMPLACEMENT DU CHARGEUR ......................27 PRÉCAUTIONS SUR LA CONNEXION C.C....................27 ÉTAPES À SUIVRE QUAND LA BATTERIE EST INSTALLÉE DANS UN VÉHCULE ......28 ÉTAPES À...
-
Page 5: Important Safety Instructions - Save These Instructions
Automatic Battery Charger OWNERS MANUAL 106-4 PLEASE SAVE THIS OWNERS MANUAL AND READ BEFORE EACH USE. This manual will explain how to use the charger safely and effectively. Please read and follow these instructions and precautions carefully. IMPORTANT SAFETY INSTRUCTIONS – SAVE THESE INSTRUCTIONS SAVE THESE INSTRUCTIONS –... -
Page 6: Preparing To Charge
PREPARING TO CHARGE If necessary to remove battery from vehicle to charge, always remove grounded terminal from battery first. Make sure all accessories in the vehicle are off, so as not to cause an arc. Be sure area around battery is well ventilated while battery is being charged. Clean battery terminals. -
Page 7: Follow These Steps When Battery Is Outside Vehicle
FOLLOW THESE STEPS WHEN BATTERY IS OUTSIDE VEHICLE WARNING: A SPARK NEAR THE BATTERY MAY CAUSE A BATTERY EXPLOSION. TO REDUCE THE RISK OF A SPARK NEAR THE BATTERY: Check polarity of battery posts. POSITIVE (POS, P, +) battery post usually has a larger diameter than NEGATIVE (NEG, N, –) post. -
Page 8: Control Panel
10. CONTROL PANEL DIGITAL DISPLAY The digital display indicates the status of the battery and charger. See the Display Messages section for a complete list of messages. NOTE: During charging, the display will go into sleep mode and will not show the battery percentage, alternator percentage or voltage. -
Page 9: Operating Instructions
TOGGLE SWITCHES These are found on the base of the unit. ON/OFF SWITCH – Use this switch to select between 12V Charge/Maintain, Boost and Engine Start or 24V Boost and Engine Start. • OFF – When the switch is in this position (middle), the charger is turned off. •... - Page 10 BATTERY CONNECTION INDICATOR If the charger does not detect a properly connected battery, charging will not start and the digital display will show one of two messages. If the display shows CONNECT CLAMPS, make sure the charger is connected to the battery and the connection points are clean and making a good connection. If the display shows WARNING CLAMPS REVERSED, unplug the charger from the AC outlet and reverse the connections at the battery.
- Page 11 3. With the charger plugged in and connected to the battery and chassis, set the ON/OFF switch to either the 12V or 24V position, press the Rate Selection button until the Engine Start LED is lit, and then press the START button. 4.
-
Page 12: Display Messages
TESTING AFTER CHARGING After the unit has been changed from tester to charger (by selecting a charge rate and pressing the START button), it remains a charger. To change the battery charger back to a tester, press the START button. NOTE: The battery tester is only designed to test batteries. -
Page 13: Maintenance And Care
13. MAINTENANCE AND CARE A minimal amount of care can keep your battery charger working properly for years. • Clean the clamps each time you are finished charging. Wipe off any battery fluid that may have come in contact with the clamps to prevent corrosion. •... -
Page 14: Before Returning For Repairs
16. LIMITED WARRANTY For information on our one year limited warranty, please visit batterychargers.com or call 1-800-621-5485 to request a copy. Go to batterychargers.com to register your product online. Schumacher is a registered trademark of Schumacher Electric Corporation. ® • 14 •... -
Page 15: Instrucciones Importantes De Seguridad - Guarde Estas Instrucciones
Cargador de baterías automático MANUAL DEL USUARIO 106-4 POR FAVOR CONSERVE ESTE MANUAL DEL USUARIO Y LEALO ANTES DE CADA USO. En este manual le explica cómo utilizar el cargador de batería de manera segura y confiable. Por favor, lea y siga las siguientes instrucciones y precauciones. INSTRUCCIONES IMPORTANTES DE SEGURIDAD –... -
Page 16: Preparación Para La Carga
NUNCA fume o permita la presencia de chispas o llamas en la proximidad de una batería o motor. Tenga especial cuidado para reducir el riesgo de dejar caer una herramienta de metal sobre la batería. Esto podría provocar chispas o un cortocircuito en la batería o en cualquier otra pieza eléctrica que podría provocar una explosión. -
Page 17: Siga Estos Pasos Cuando La Batería Esté Colocada En El Vehículo
SIGA ESTOS PASOS CUANDO LA BATERÍA ESTÉ COLOCADA EN EL VEHÍCULO ADVERTENCIA: UNA CHISPA PROVOCADA CERCA DE LA BATERÍA PUEDE CAUSAR LA EXPLOSIÓN DE LA BATERÍA. PARA REDUCIR EL RIESGO DE PROVOCAR CHISPAS CERCA DE LA BATERÍA: Ubique los cables de CA y CC adecuadamente para reducir el riesgo de daños por la cubierta, la puerta y las piezas móviles o calientes del motor. -
Page 18: Instrucciones De Montaje
USO DE UN CABLE DE EXTENSIÓN El uso de una extensión no se recomienda. Si debe usar una extensión, siga estas pautas: • Las clavijas del enchufe del cable de extensión debe ser el mismo número, tamaño y forma que las del enchufe del cargador. - Page 19 BOTÓN DE SELECCIÓN DE VELOCIDAD Utilice este botón para establecer una de las siguientes selecciones. 6<>2A CARGA/MANTENIMIENTO (12V sólo) – Para la carga de baterías pequeñas y grandes. No se recomienda para aplicaciones industriales. 12V o 24V IMPULSAR – Para la incorporación rápida de la energía a una batería muy descargada o de gran capacidad antes de arrancar el motor.
-
Page 20: Instrucciones De Operación
11. INSTRUCCIONES DE OPERACIÓN ADVERTENCIA: UNA CHISPA PROVOCADA CERCA DE LA BATERÍA PUEDE CAUSAR UNA EXPLOSIÓN. NOTA: Este cargador está equipado con un auto-rectificador. La corriente no llegará a las pinzas de la batería hasta que la batería Las pinzas no harán corto si se juntan una con otra. CARGA DE LA BATERÍA EN EL VEHÍCULO 1. - Page 21 TIEMPOS DE CARGA TAMAÑO DE TIEMPO DE CARGA (Horas) LA BATERÍA APLICACIÓN POWERSPORTS 1,75 1, 5 32Ah AUTOMOTOR 300 CCA 1000 CCA MARINA 50Ah 4,25 105Ah 9, 5 Los tiempos están basados en un 50% descargada batería y pueden cambiar, dependiendo de la edad y la condición de la batería. FINALIZACIÓN DE LA CARGA Y MODO DE MANTENIMIENTO (MONITOREO A MODO DE FLOTE) La carga completa se señala mediante el LED verde y la pantalla digital que muestra FULLY CHARGED AUTO MAINTAINING.
- Page 22 4. Si la batería está conectada correctamente, el LED de arranque del motor se encenderá y la pantalla mostrará ENGINE STARTING ON. Si la pantalla muestra CONNECT CLAMPS, verifique las conexiones de la batería. Cuando la salida del arranque del motor esté habilitada, en la pantalla mostrará READY. 5.
-
Page 23: Muestra De Mensajes
UTILIZACIÓN DE UN PROBADOR DE RENDIMIENTO DEL ALTERNADOR (Solo 12V) 1. Con el cargador desenchufado del tomacorriente de CA, conecte el cargador a la batería siguiendo las instrucciones que figuran en las secciones anteriores. 2. Enchufe el cable de alimentación de CA del cargador al tomacorriente de CA. 3. -
Page 24: Mantenimiento Y Cuidado
13. MANTENIMIENTO Y CUIDADO Con cuidados mínimos puede mantener el cargador de baterías funcionando correctamente durante años. • Limpie las pinzas cada vez que termine de usar el cargador. Limpie el fluido de la batería que podría haber estado en contacto con las pinzas para evitar la corrosión. •... -
Page 25: Antes De Devolver A Reparaciones
Para obtener información sobre nuestra garantía limitada de un año, visite batterychargers.com o llame al 1-800-621-5485 para solicitar una copia. Visite nuestra página en batterychargers.com para registrar su producto en línea. Schumacher es una marca registrada de Schumacher Electric Corporation. ® • 25 •... -
Page 26: Consignes De Sécurité Importantes - Conserver Ces Instructions
Chargeur de batterie automatique MANUEL D’UTILISATION 106-4 GARDER LE MANUEL D’INSTRUCTION ET LISEZ LE AVANT CHAQUE UTILISATION. Ce manuel explique comment utiliser le chargeur de batterie d’une façon securitaire et efficace. S’il vous plaît lisez et suivez ces instructions et precautions. CONSIGNES DE SÉCURITÉ... -
Page 27: Préparation Pour Le Chargement
Soyez extra prudent pour réduire le risque de laisser tomber un outil en métal sur la batterie. Ça pourrait faire une étincelle ou produire un court-circuit à la batterie ou à d’autres parties électriques et pourrait produire une explosion. Enlevez vos objets personnels en métal comme les bagues, les bracelets, les colliers et les montres quand vous travaillez avec une batterie d’accumulateurs au plomb. -
Page 28: Étapes À Suivre Quand La Batterie Est Installée Dans Un Véhcule
ÉTAPES À SUIVRE QUAND LA BATTERIE EST INSTALLÉE DANS UN VÉHCULE AVERTISSEMENT : UNE ÉTINCELLE PRÈS DE BATTERIE PEUT CAUSER SON EXPLOSION. POUR RÉDUIRE LES RISQUES D’ÉTINCELLE PRÈS DE LA BATTERIE : Placer les cordons C.A. et C.C. de manière à éviter qu’ils soient endommagés par le capot, une portière ou les pièces en mouvement du moteur. -
Page 29: Directives D'assemblage
UTILISEZ UNE RALLONGE L’utilisation d’une rallonge n’est pas recommandée. Si vous devez utiliser une rallonge, suivez ces directives : • Les broches de la fiche de la rallonge doit être le même nombre, la taille et forme que celles de la fiche du chargeur. - Page 30 BOUTON DE SÉLECTION DU TAUX Utilisez ce bouton pour sélectionner l’une des options suivantes : 6<>2A CHARGE / MAINTIEN (Seulement pour 12V) – Pour charger les petites et les grosses batteries. Pas conçu pour les applications industrielles. 12V ou 24V BOOST – Pour ajouter rapidement de l’énergie à une batterie fortement déchargée ou batterie de grande capacité...
-
Page 31: Consignes D'utilisation
11. CONSIGNES D’UTILISATION AVERTISSEMENT : UNE ÉTINCELLE PRÈS DE LA BATTERIE PEUT PROVOQUER UNE EXPLOSION. REMARQUE : Ce chargeur est équipé d’une fonction de démarrage automatique. Le courant n’alimentera pas les pinces avant qu’une batterie soit raccordée correctement à celles-ci. Les pinces ne feront pas d’étincelles si elles se touchent. - Page 32 TEMPS DE CHARGEMENT TAILLE DE TEMPS DE CHARGE (Heures) LA BATTERIE APPLICATION POWERSPORTS 1.75 32Ah AUTOMOTOR 300 CCA 1000 CCA MARINA 50Ah 4.25 105Ah Les temps sont basées sur une batterie déchargée à 50% et peuvent changer en fonction de l’âge et de l’état de la batterie. L’ACHÈVEMENT DU CHARGEMENT ET LE MODE DE MAINTIEN DU CHARGEMENT DE LA BATTERIE (MODE DE SURVEILLANCE LIBRE) L’achèvement du chargement est indiqué...
- Page 33 3. Une fois le chargeur branché et connecté à la batterie et au châssis, réglez l’interrupteur MARCHE/ ARRÊT sur la position 12 V ou 24 V, appuyez sur la touche Sélection du taux jusqu’à ce que le voyant DEL Démarrage du moteur soit allumé, puis appuyez sur la touche START. 4.
-
Page 34: Messages D'affichage
ESSAI APRÈS LA CHARGE Une fois que l’appareil est passé du mode testeur au mode chargeur (en sélectionnant un taux de charge et appuyer sur le bouton START), il servira de chargeur. Pour remettre le chargeur de la batterie en mode d’essai, appuyez sur la touche START. -
Page 35: Maintenance Et Entretien
ENGINE STARTING ON (La DEL jaune/orange est allumée) – La batterie est correctement connectée et le mode Démarrage du moteur a été sélectionné. READY (La DEL jaune/orange est allumée) – La sortie du chargeur est activée et le chargeur est prêt à faire démarrer le moteur. -
Page 36: Avant De Retourner Pour Les Réparations
Pour plus d’informations sur notre garantie limitée d’un an, veuillez visiter batterychargers.com ou appeler le 1-800-621-5485 pour demander une copie. Aller sur batterychargers.com pour enregistrer votre produit en ligne. Schumacher est une marque déposée de Schumacher Electric Corporation. ® • 36 •...
Need help?
Do you have a question about the SC1352 and is the answer not in the manual?
Questions and answers
digital read out flashing off and on ,,,, not charging at all . Took charger to repair shop ,,, was advised that the digital mother board is no good. Can you please give me a price and part number for the digital display board for the battery charger sc1352 model ... Thank you