Table of Contents
Advertisement
Available languages
Available languages
Quick Links
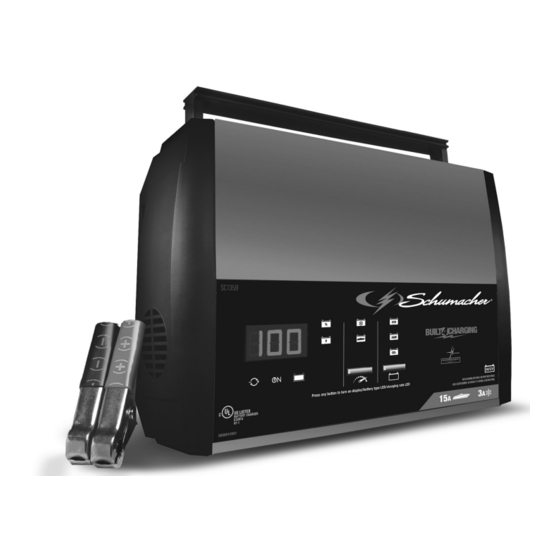
Automatic Battery Charger
Cargador de baterías automático
Chargeur de batterie automatique
OWNERS MANUAL / MANUAL DEL USUARIO / GUIDE D'UTILISATION
97-1
PLEASE SAVE THIS OWNERS MANUAL AND READ BEFORE EACH USE. This manual will explain how
to use the charger safely and effectively. Please read and follow these instructions and precautions carefully.
POR FAVOR CONSERVE ESTE MANUAL DEL USUARIO Y LEALO ANTES DE CADA USO. En este manual
le explica cómo utilizar el cargador de manera segura y confiable. Por favor, lea y siga las siguientes instrucciones
y precauciones.
ESSAYER DE GARDER LE MANUEL D'INSTRUCTIONS ET LE LIRE AVANT CHAQUE UTILISATION.
Ce manuel explique comment utiliser l'unité d'une façon sûre et efficace. S'il vous plaît lisez et suivez ces
instructions et précautions.
0099001999E-03
Advertisement
Table of Contents

Related Manuals for Schumacher Electric SC1359


Summary of Contents for Schumacher Electric SC1359
- Page 1 Automatic Battery Charger Cargador de baterías automático Chargeur de batterie automatique OWNERS MANUAL / MANUAL DEL USUARIO / GUIDE D’UTILISATION 97-1 PLEASE SAVE THIS OWNERS MANUAL AND READ BEFORE EACH USE. This manual will explain how to use the charger safely and effectively. Please read and follow these instructions and precautions carefully. POR FAVOR CONSERVE ESTE MANUAL DEL USUARIO Y LEALO ANTES DE CADA USO.
-
Page 2: Table Of Contents
CONTENTS IMPORTANT SAFETY INSTRUCTIONS – SAVE THESE INSTRUCTIONS ..........................3 PERSONAL SAFETY PRECAUTIONS ....................................3 PREPARING TO CHARGE ........................................3 CHARGER LOCATION ........................................... 3 DC CONNECTION PRECAUTIONS ....................................... 3 FOLLOW THESE STEPS WHEN BATTERY IS INSTALLED IN VEHICLE ..........................4 FOLLOW THESE STEPS WHEN BATTERY IS OUTSIDE VEHICLE ............................ -
Page 3: Important Safety Instructions - Save These Instructions
Automatic Battery Charger OWNERS MANUAL 97-1 PLEASE SAVE THIS OWNERS MANUAL AND READ BEFORE EACH USE. This manual will explain how to use the charger safely and effectively. Please read and follow these instructions and precautions carefully. IMPORTANT SAFETY INSTRUCTIONS – SAVE THESE INSTRUCTIONS SAVE THESE INSTRUCTIONS –... -
Page 4: Follow These Steps When Battery Is Installed In Vehicle
FOLLOW THESE STEPS WHEN BATTERY IS INSTALLED IN VEHICLE WARNING: A SPARK NEAR THE BATTERY MAY CAUSE A BATTERY EXPLOSION. TO REDUCE THE RISK OF A SPARK NEAR THE BATTERY: Position AC and DC cords to reduce risk of damage by hood, door, or moving engine part. Stay clear of fan blades, belts, pulleys, and other parts that can cause injury to persons. -
Page 5: Operating Instructions
11. OPERATING INSTRUCTIONS WARNING: A SPARK NEAR THE BATTERY MAY CAUSE AN EXPLOSION. IMPORTANT: Do not start the vehicle with the charger connected to the AC outlet, or it could result in damage to the charger. NOTE: This charger is equipped with an auto-start feature. Current will not be supplied to the battery clamps until a battery is properly connected. The clamps will not spark if touched together. -
Page 6: Maintenance And Care
POWER-UP IDLE TIME LIMIT If no button is pressed within 10 minutes after the battery charger is first powered up, the charger will automatically switch from tester to charger if a battery is connected. In that case, the charger will be set to charge at the 3A rate and gel cell battery type. TESTING AFTER CHARGING After the unit has been changed from tester to charger (by selecting a charge rate), it remains a charger. -
Page 7: Before Returning For Repairs
14. BEFORE RETURNING FOR REPAIRS For REPAIRS OR RETURNS, visit 365rma.com Visit batterychargers.com for Replacement Parts. 15. LIMITED WARRANTY For information on our one year limited warranty, please visit batterychargers.com or call 1-800-621-5485 to request a copy. Go to batterychargers.com to register your product online. •... -
Page 8: Instrucciones Importantes De Seguridad - Guarde Estas Instrucciones
Cargador de baterías automático MANUAL DEL USUARIO 97-1 POR FAVOR CONSERVE ESTE MANUAL DEL USUARIO Y LEALO ANTES DE CADA USO. En este manual le explica cómo utilizar el cargador de batería de manera segura y confiable. Por favor, lea y siga las siguientes instrucciones y precauciones. INSTRUCCIONES IMPORTANTES DE SEGURIDAD –... -
Page 9: Precauciones De Conexión En Cc
PRECAUCIONES DE CONEXIÓN EN CC Conecte y desconecte las pinzas de salida CC. sólo después de haber establecido todos los interruptores del cargador a la posición de “apagado” (si es aplicable) y de haber desconectado el enchufe de C.A. del tomacorriente eléctrico. Nunca permita que las pinzas tengan contacto entre sí. Sujete las pinzas a la batería y al chasis, como se indica en en las secciones 6 y 7. -
Page 10: Instrucciones De Operación
BOTÓN DE VELOCIDAD DE CARGA Utilice este botón para seleccionar uno de los siguientes: 3A – Para cargar baterías pequeñas, tales como los comúnmente utilizados en tractores de jardín, motos de nieve y motocicletas. También se utiliza para mantener las baterías completamente cargadas de gran tamaño. -
Page 11: Mantenimiento Y Cuidado
MODO DE MANTENIMIENTO (MONITOREO A MODO DE FLOTE) Cuando la luz LED Cargada (verde) está encendido, quiere decir que pasó al modo de mantenimiento. En este modo el cargador mantiene la batería totalmente cargada mediante una pequeña corriente cuando corresponda. Si el cargador tiene que funcionar al máximo en corriente continua de mantenimiento a un periodo de 12 horas, se transladará... -
Page 12: Antes De Devolver A Reparaciones
Localización y resolución de problemas PROBLEMA CAUSA POSIBLE SOLUCIÓN Las pinzas de la batería no hacen corto al Este cargador está equipado con un auto-rectificador. Este No hay problema; es una condición normal. juntarse una con otra. no permitirá paso de corriente si las pinzas de la batería no están conectadas en forma correcta. -
Page 13: Consignes De Sécurité Importantes - Conserver Ces Instructions
Chargeur de batterie automatique MANUEL D’UTILISATION 97-1 GARDER LE MANUEL D’INSTRUCTION ET LISEZ LE AVANT CHAQUE UTILISATION. Ce manuel explique comment utiliser le chargeur de batterie d’une façon securitaire et efficace. S’il vous plaît lisez et suivez ces instructions et precautions. CONSIGNES DE SÉCURITÉ... -
Page 14: Précautions Sur La Connexion C.c
PRÉCAUTIONS SUR LA CONNEXION C.C. Mettre les interrupteurs du chargeur hors circuit et retirer le cordon c.a. de la prise avant de mettre et d’enlever les pinces du cordon C.C. S’assurer que les pinces ne se touchent pas. Attachez les pinces à la batterie et au chassis, comme indiqué dans les sections 6 et 7. ÉTAPES À... -
Page 15: Consignes D'utilisation
BOUTON DE SÉLECTION DU TAUX Utilisez ce bouton pour sélectionner l’une des options suivantes : 3A – Pour recharger les petites batteries, tels que ceux couramment utilisés dans les tracteurs de jardin, les motoneiges et les motocyclettes. Également utilisé pour maintenir de grandes batteries complètement chargées. -
Page 16: Maintenance Et Entretien
MODE DE MAINTIEN (SURVEILLANCE DU MODE DE FLOTTEMENT) Lorsque la Chargé (vert) LED est allumé, le chargeur a commencé en mode maintenance. Dans ce mode, le chargeur maintient la batterie complètement chargée en offrant un courant bas si nécessaire. Si le chargeur doit fournir son maximum actuel maintenir pour une période d’une heure en continu 12, il se met en mode abort (voir la section Charge Avorte). -
Page 17: Avant De Retourner Pour Les Réparations
Dépannage PROBLÈME CAUSE POSSIBLE SOLUTION Les clips de batterie ne jettent pas des Le chargeur est équipé avec une caractéristique d’auto- Aucun problème ; c’est une condition normale. étincelles quand touché ensemble. début. Il ne fournira pas de courant aux clips de batterie jusqu’à...
Need help?
Do you have a question about the SC1359 and is the answer not in the manual?
Questions and answers