
Related Manuals for Campbell SC-USB


Summary of Contents for Campbell SC-USB
- Page 1 SC-USB USB to CS I/O Opto-Isolated Interface Revision: 9/15 C o p y r i g h t © 2 0 0 4 - 2 0 1 5 C a m p b e l l S c i e n t i f i c ,...
- Page 3 Limited Warranty “Products manufactured by CSI are warranted by CSI to be free from defects in materials and workmanship under normal use and service for twelve months from the date of shipment unless otherwise specified in the corresponding product manual. (Product manuals are available for review online at www.campbellsci.com.) Products not manufactured by CSI, but that are resold by CSI, are warranted only to the limits extended by the original manufacturer.
- Page 4 SCIENTIFIC, INC., phone (435) 227-9000. After an application engineer determines the nature of the problem, an RMA number will be issued. Please write this number clearly on the outside of the shipping container. Campbell Scientific’s shipping address is: CAMPBELL SCIENTIFIC, INC.
- Page 5 • Periodically (at least yearly) check electrical ground connections. WHILE EVERY ATTEMPT IS MADE TO EMBODY THE HIGHEST DEGREE OF SAFETY IN ALL CAMPBELL SCIENTIFIC PRODUCTS, THE CUSTOMER ASSUMES ALL RISK FROM ANY INJURY RESULTING FROM IMPROPER INSTALLATION, USE, OR MAINTENANCE OF TRIPODS, TOWERS, OR ATTACHMENTS TO TRIPODS AND TOWERS SUCH AS SENSORS, CROSSARMS, ENCLOSURES, ANTENNAS, ETC.
-
Page 7: Table Of Contents
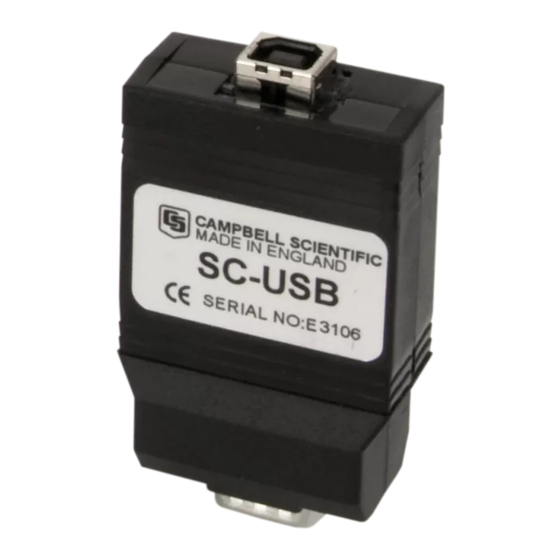
Installing the SC-USB for the First Time ..........5 Fixing a Failed Installation/Upgrading the Drivers ......5 Uninstalling the SC-USB Drivers ............11 Determining Which COM Port the SC-USB Has Been Assigned ..11 4. Set-up Modes – the SC_USB Programming Utility ................ 13 Settings .................... - Page 8 Table of Contents Figure 1-1. Most of the components shipped with the SC-USB. SC12 cable and ResourceDVD not shown............2...
-
Page 9: Introduction
PC at up to 1 MBit/second where the datalogger supports it. The SC-USB will appear in PC software as a new virtual serial port, allowing it to be used with many software packages. The SC-USB PC drivers support various operating systems including Windows 2000, XP, Vista, 7, 8, and 10. -
Page 10: Technical Specifications
SC-USB USB to CS I/O Opto-isolated Interface FIGURE 1-1. Most of the components shipped with the SC-USB. SC12 cable and ResourceDVD not shown. Technical Specifications USB Specifications • USB Version 1.1 • USB transfer rate up to 12 MBits/second •... -
Page 11: General Specifications
Driver Installation The installation procedure is straightforward. Whenever possible you should install the drivers for the SC-USB on the PC before plugging in the SC-USB for the first time. The drivers need to be installed from the CD provided with the product or using the package downloaded from the internet. - Page 12 SC-USB USB to CS I/O Opto-isolated Interface When started, the program will present a menu like this: Select the option to install the 32- or 64-bit drivers depending on your PC operating system (32-bit is the only valid option for Windows XP and Windows 2000).
-
Page 13: Installing The Sc-Usb For The First Time
SC-USB to your computer. Installing the SC-USB for the First Time Connect the SC-USB to a USB port on your PC. If the drivers have been installed on the machine using the process above, the PC should find the correct drivers. - Page 14 Device Manager via the Control Panel or by using the search tool and running devmgmt.msc. If the install failed, in the Device Manager you will see SC-USB USB TO CS I/O INTERFACE listed under Other Devices with a yellow warning symbol to indicate a problem, as there is no driver installed yet.
- Page 15 SC-USB USB to CS I/O Opto-isolated Interface You will then be prompted as to whether to search for the driver or browse the computer. If the driver installation as shown in Section 3.1, Driver Installation , was (p. 3) successful, you can select the first option and the new drivers already installed on the machine should be found.
- Page 16 Once this part of the installation is complete, you will see the following confirmation: Click Close to return to the Device Manager. You will now see SC-USB USB TO CS I/O ISOLATED INTERFACE displayed under Universal Serial Bus controllers as shown below:...
- Page 17 SC-USB USB to CS I/O Opto-isolated Interface You will now notice a new device USB Serial Port displayed under Ports (COM & LPT), again with a yellow warning symbol as a driver is not installed yet. Right click on USB Serial Port and click Update Driver Software in the...
- Page 18 SC-USB USB to CS I/O Opto-isolated Interface The installation will then proceed and you will see the progress as follows: Once this part of the installation is complete, you will see the following confirmation: Click Close to return to the Device Manager.
-
Page 19: Uninstalling The Sc-Usb Drivers
The above installation processes relies on parts of the Windows operating system to assign a COM port number to the SC-USB. Often this will be the next port number that is free. However, if other devices have been installed in the past (some of which may no longer be plugged in), it may be assigned a higher COM port number. - Page 20 As shown below, the COM port number is shown at the end of the description: In some cases, a PC program may not offer the SC-USB COM port in its selection list of available COM ports. Recent versions of Campbell Scientific packages allow you to manually type the COM port into the selection window to overcome this.
-
Page 21: Set-Up Modes - The Sc_Usb Programming Utility
The set-up screen is shown below, and the set-up modes are explained in detail. To run this utility you only need to plug the SC-USB in a USB socket on the computer. A datalogger is not needed and should not be connected at the same time. -
Page 22: Selecting A Fixed Baud Rate
Enable All Comms Modes is the Factory default. 4.1.4 Enable CSDC Address 7 Mode Selecting ‘Enable CSDC Address 7 Mode’ will force the SC-USB to only respond as the CSDC device with SDC address 7. This is useful when you have another SDC-Concurrent device connected on the CSI I/O port. -
Page 23: Enable Sdc Comms Mode
The Modem Enable line (pin 5) is not used and is free for other use. SDC mode allows the SC-USB to be connected in parallel with modem devices. This mode is only supported in CR510, CR10X and CR23X dataloggers with post-2002 standard (non- PakBus) operating systems. -
Page 24: Using The Device Configuration Utility (Devconfig)
In general, the baud rate settings that are offered in the EZSetup or Setup screens can be left at the default settings as they do not apply to the SC-USB which determines the best speed to use by automatically negotiating this with datalogger (see Section 4.1.1, Auto Detect (Automatic Baud Rate Detection) -
Page 25: Troubleshooting
TD dataloggers do not support automatic baud rate detection. In these cases the SC-USB needs to be set to a fixed baud rate. This can either be done using the SC-USB utility program (see Section 4, Set-up Modes – the SC_USB Programming Utility ) or if your software package supports it;... -
Page 26: Electronic Interference
SC-USB cable) cause problems with other equipment, you may be able to reduce such noise by adding a clip-on ferrite choke to the SC-USB cable. Position the choke on the cable close to the USB connector. The size of ferrite is dependent on the level and frequency of noise emitted by the PC, and so needs to be selected by trial and error. - Page 28 Santo Domingo, Heredia 40305 SOUTH AFRICA COSTA RICA • cleroux@csafrica.co.za • info@campbellsci.cc www.campbellsci.co.za www.campbellsci.cc Campbell Scientific Southeast Asia Co., Ltd. Campbell Scientific Ltd. 877/22 Nirvana@Work, Rama 9 Road Campbell Park Suan Luang Subdistrict, Suan Luang District 80 Hathern Road Bangkok 10250...
Need help?
Do you have a question about the SC-USB and is the answer not in the manual?
Questions and answers