Pondmaster Clearguard 2700 Care And Operating Instructions
Pressurized pond filter
Hide thumbs
Also See for Clearguard 2700:
- Care and operating instructions (12 pages) ,
- Care and operating instructions (12 pages)

Related Manuals for Pondmaster Clearguard 2700


Summary of Contents for Pondmaster Clearguard 2700
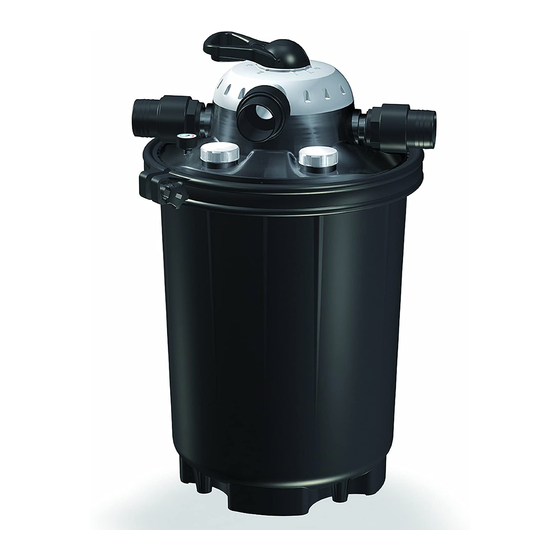
- Page 1 PRESSURIZED POND FILTER CARE AND OPERATING INSTRUCTIONS MODELS ITEM # No UV With UV 120V 230V 2700 05610 05615 05617 5500 05620 05625 05627 8000 05630 05635 05637 16000 05640 05645...
- Page 2 WARNING! PONDS ARE DANGEROUS TO SMALL CHILDREN! NEVER LEAVE CHILDREN UNSUPERVISED NEAR A POND. HOW FILTRATION WORKS Both biological and mechanical ltrations are essential for every pond; without them, your sh would be harmed by ammonia generated by the accumulated sh waste. The bene cial bacteria bed that builds on the lter media nitri es any ammonia in the pond making it a healthier environment for aquatic life.
-
Page 3: Electrical Precautions
ELECTRICAL PRECAUTIONS WARNING: FOR YOUR PROTECTION, ALWAYS UNPLUG THE UNIT FROM ITS POWER SOURCE BEFORE INSTALLING OR SERVICING. DO NOT REACH, REMOVE OR DISASSEMBLE BEFORE YOU DISCONNECT POWER. IMPORTANT SAFETY INSTRUCTIONS Use only three-wire outdoor extension cords that have three-prong grounding plugs and grounding recepta- cles-that accept the appliance’s plug. - Page 4 FOR BACKWASH AIR KIT ONLY INSTALL ADAPTOR* - ONLY if you are planning to use Figure 1 Figure 2 the Pondmaster Backwash Air kit (sold separately). Before using filter, install adaptor into bottom drain opening on FILTER ADAPTOR O-RING DRUM pressure filter.
- Page 5 SECURE COVER WITH CLAMP Once cover is pressed down evenly, place the clamp around the drum and cover anges and pull the open end closed. Note that it is best to position the open end of the clamp away from hose connections for easy access to the tightening knob once hoses are attached.
-
Page 6: Valve Positions
VALVE POSITIONS The valve has 7 positions. They are numbered for identification. CAUTION: Never lift filter using the valve position handle. CAUTION: Always turn off pump when changing valve positions. Change valve positions by pressing down on handle, rotating until pointer points to desired number and release. -
Page 7: Backwash Cycle
FILTER OPERATING INSTRUCTIONS (continued) BACKWASH CYCLE NOTE: REMOVE FOAM FILTER PAD BEFORE BACKWASHING To run a backwash cycle: 1) Turn o Pump. 2) Check that waste hose is properly directing waste water to a dry well or garden area. 3) Set valve to #4 BACKWASH and run the pump for a few minutes. - Page 8 OPEN UV PORT ON FILTER COVER...
-
Page 9: Optional Accessories
WINTERIZATION CAUTION: During harsh winters, water left in the drum may freeze, expand and crack the drum. If necessary, the filter can be drained and winterized at the end of the season. If you live in an area that doesn't experience freezing temperatures, you may never need to do this. To empty the water from the filter drum, it is not necessary to open the filter. -
Page 10: Troubleshooting
TROUBLE SHOOTING Subscribe to our YouTube Channel and view all of our clearguard videos SYMPTOM POSSIBLE CAUSE SOLUTION Filter output is Remo ve rinse and replace lter pad. Filter Pad is clogged. Media needs cleaning. Backwash lter. See BACKWASH CYCLE. sluggish. -
Page 12: Warranty
To validate this warranty, keep your proof of purchase (copy of sales receipt from a certi ed Pondmaster dealer). Warranty covers the repair or prorated replacement of the Danner Mfg. products. Danner Mfg. denies all liability for any other loss including but not limited to loss of equipment, income, livestock, or personal injury.
Need help?
Do you have a question about the Clearguard 2700 and is the answer not in the manual?
Questions and answers