Advertisement
If replacing any parts, use only genuine replacement parts purchased from WEN Products. Use of replacement
parts not sold by WEN Products will void your warranty and could lead to decreased performance or injury.
TOOLS NEEDED
•
Phillips-head screwdriver
•
10mm socket and ratchet
•
Approved gasoline storage container
•
Zip tie
•
Scissors or wire cutter
ENSURE THAT THE ENGINE IS COOL BEFORE BEGINNING ANY MAINTENANCE OR REPAIR WORK. FOLLOW
ALL SAFETY PROCEDURES LISTED IN YOUR OWNER'S MANUAL. USE COMMON SENSE. AVOID INJURY.
Removing the old carburetor
1. Ensure the engine and muffler are completely cool before beginning.
2. Remove the oil access panel, as well as the spark plug access panel, and disconnect the spark plug boot from
the spark plug, as instructed in your manual.
3. Drain the gas tank and carburetor, as instructed in your manual, into an approved gasoline-storage container.
4. Remove the four screws on the generator's side panel, as shown in Fig. 1 below. Remove the panel.
1. NOTE: the side panel has 2 tabs at the top; a flat-head screwdriver may be needed to help remove them.
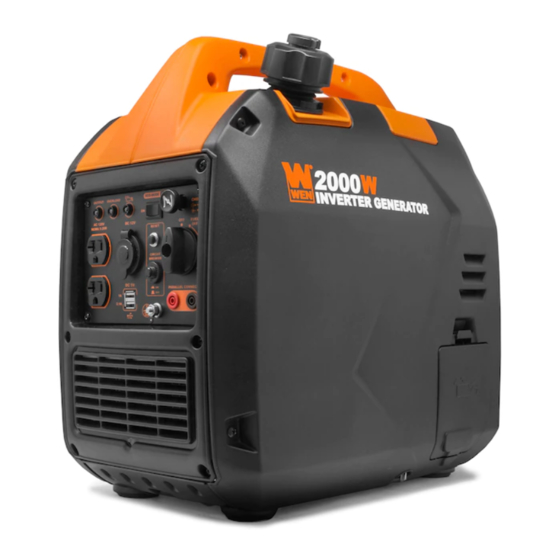
This is a guide to replacing the carburetor for your WEN 56202i, 56203i, or 56235i Inverter
Generator. This guide is best used in conjunction with the generator owner's manual, included
as a physical copy with your unit and available on the WEN website page for the generator
(56202i link here, 56203i link here, 56235i link here), by clicking "Click here to view the
product manual".
If at any point you need assistance, have questions, or want to order parts, call WEN customer
service at 1-800-232-1195, M-F, 8-5 Central Time, or email techsupport@wenproducts.com.
Tools needed
Removing the old carburetor
Fig. 1: Remove these four screws.
TABLE OF CONTENTS
•
Needle-nose pliers
•
Permanent marker
•
Flat-head screwdriver (optional)
•
Flashlight (optional)
•
Magnetic pick-up tool (optional)
1
1
7
7
Date last modified: 2020/10/26
Advertisement
Table of Contents

Subscribe to Our Youtube Channel
Related Manuals for Wen 56235i-126


Summary of Contents for Wen 56235i-126
- Page 1 1-800-232-1195, M-F, 8-5 Central Time, or email techsupport@wenproducts.com. If replacing any parts, use only genuine replacement parts purchased from WEN Products. Use of replacement parts not sold by WEN Products will void your warranty and could lead to decreased performance or injury. TABLE OF CONTENTS...
- Page 2 5. Remove the three screws from the right side of the control panel housing, and the three screws from the left side of the muffler cover, as shown in Figs. 2 & 3 below. Fig. 2: Remove these screws. Fig. 3: Remove these screws. 6.
- Page 3 7. Remove the 4 screws from the generator’s handle. See Fig. 5 below. Fig. 5: Remove these 4 Phillips-head screws. 8. Remove the generator’s right shell. Maneuver the gas tank up and over the engine assembly. 1. NOTE: this may be difficult to do. If desired, you may partially disassemble the other half of the generator’s shell to make disassembly easier.
- Page 4 10. Remove the two screws from the stepper motor housing. See Fig. 7 below. Be careful to not drop the screws. Fig. 7: Remove these two screws. 11. Gently pull the stepper motor out of the carburetor throttle. Set the motor atop the engine. 12.
- Page 5 14. Loosen the choke cable bracket screw (Fig. 12 below) and remove the cable from the bracket. Cut the zip tie (Fig. 13 below) that secures the choke cable to the carburetor bracket. Fig. 12: Choke cable bracket screw. Fig. 13: Zip tie. 15.
- Page 6 Fig. 16: Remove hose clamp and fuel line. 19. Make sure the carburetor/intake gasket remains on the studs (see Fig. 17 below) and is not damaged. Fig. 17: Carburetor/intake gasket. 20. The carburetor has now been completely removed from the engine. Make sure to remove/replace the fuel drain hose, pressure equalization hose, choke cable bracket, etc.
- Page 7 Optional – removing the muffler cover If desired, you may partially disassemble the other half of the generator shell in order to remove the gas tank, as instructed in step 8 above. Follow the directions below. 1. Loosen the 3 screws on the right side of the muffler cover (see step 5) and the 3 screws from the left side of the control panel housing.
- Page 8 7. Re-connect the spark plug boot. 8. Replace the spark plug access panel and the oil access panel. 9. Make sure all hardware is tight. QUESTIONS? PROBLEMS? Contact WEN Customer Service at 1-800-232-1195, M-F, 8-5 CST, or email techsupport@wenproducts.com Date last modified: 2020/10/26...
Need help?
Do you have a question about the 56235i-126 and is the answer not in the manual?
Questions and answers