Advertisement
VESA mount accessory PV04 for
DH110SE and other models of the XPC
slim series
The PV04 VESA75/100 wallmount allows many Shuttle 1.3l models of the
XPC slim series to be installed on to walls or just affixed on the rear
side of a monitor which is particularly interesting for the industry
segment, company buildings and public institutions.
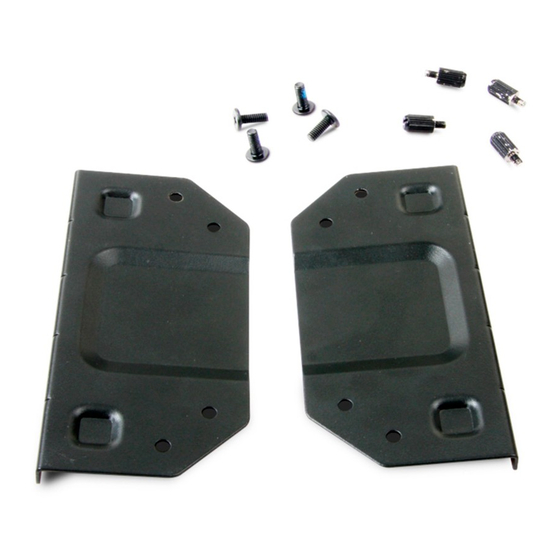
Feature Highlights
VESA mount (two black metal brackets,
ca. 120 x 57.5 x 9 mm)
Four thumbscrews M3 x 5 mm (screws
Scope of
together VESA mount and PC)
delivery
Four screws M4 x 10 mm (to fix the VESA
mount to the external device)
Quick installation guide
Supported VESA
Supports 75 x 75 mm and 100 x 100 mm
Standard
standards
Compatible with Shuttle XPC slim
DH110SE
Also suitable as a spare part for the
following models that already include a
Compatibility
VESA mount as standard: DX30, DL10J,
DS61, DS81(L), DH110, DH170, DQ170,
DH270, DH310, DH370, DS47, DS407(T),
DS437(T), DS57Ux, DS67Ux, DS77Ux,
DH02Ux
Page 1 | 30 April 2018
w w w . s h u t t l e . e u
Product Specification
Shuttle XPC accessory
Images for illustration purposes only.
S h u t t l e C o m p u t er Ha n d e l s G m bH
Fr it z -St r assm an n -St r . 5
25337 Elmsh orn | German y
PV04
Tel. +49 (0) 4121-47 68 60
Fax +49 (0) 4121-47 69 00
sale s@sh u t t le.eu
Advertisement
Table of Contents

Related Manuals for Shuttle PV04


Summary of Contents for Shuttle PV04
- Page 1 DH110SE and other models of the XPC slim series The PV04 VESA75/100 wallmount allows many Shuttle 1.3l models of the XPC slim series to be installed on to walls or just affixed on the rear side of a monitor which is particularly interesting for the industry segment, company buildings and public institutions.
- Page 2 Product Specification XPC accessory PV04 – Installation Guide (1) Due to safety reasons, please turn off your computer completely first and unplug it from the power supply. (2) Use four screws to fasten the VESA mount brackets on the rear of a suitable monitor.
- Page 3 Product Specification Page 3 | 30 April 2018 S h u t t l e C o m p u t er Ha n d e l s G m bH Tel. +49 (0) 4121-47 68 60 Fr it z -St r assm an n -St r . 5 Fax +49 (0) 4121-47 69 00 w w w .
Need help?
Do you have a question about the PV04 and is the answer not in the manual?
Questions and answers