
Related Manuals for Astrel Instruments AST183-X


Summary of Contents for Astrel Instruments AST183-X
- Page 1 Astrel Instruments AST183-X Astrel Instruments AST183-X GETTING STARTED rev A Getting Started 1/19 rev A...
- Page 2 AST183-X Getting started with the Astrel Instruments camera Thank you for purchasing an Astrel Instruments CMOS camera. Your new camera is a leading edge scientific instruments: please take your time to read carefully the following User's Manual to learn how to get the best out of your equipment.
-
Page 3: Camera Connections
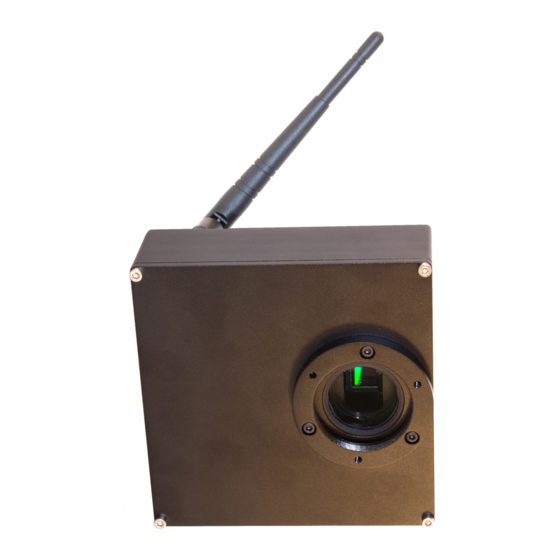
Astrel Instruments AST183-X Camera connections The following picture shows the I/O interfaces available: Getting Started 3/19 rev A... - Page 4 Astrel Instruments AST183-X The following connectors are available on the camera: • 12V: the camera needs a 12V 3A power supply. The use of the included 3 meters cable with its filter box is strongly suggested to connect the camera to a car lighter receptacle using the included adapter, or to the optional 12V 3A power supply.
-
Page 5: Powering Up The Camera
Astrel Instruments AST183-X Powering up the camera To correctly power up the camera, please follow this sequence: • Connect the wifi Antenna. • Connect USB devices. Most of them can be connected and disconnected at any time, but it's always a good rule to connect any needed device before power up. -
Page 6: Powering Down The Camera
Astrel Instruments AST183-X Powering down the camera WARNING: avoid powering down the camera by simply disconnecting power supply: your camera has a true PC inside running Linux and, as any other PC, you should shut it down in the correct way. The Shutdown application in the main page of the Desktop will take care of all this sequence, so, before powering down the camera you must run the Shutdown application. - Page 7 Astrel Instruments AST183-X Wifi operations The camera acts as a WiFi access point, like a normal wifi router, that you can connect to using a PC/tablet/smartphone. The wifi connection is open, no password required, and by default the network name is...
- Page 8 Astrel Instruments AST183-X PC/tablet/smartphone Connected mode The camera is operated using the collection of applications available on-board, which can be accessed using any compatible remote desktop application on a PC/tablet/smartphone with wifi connection. Astrel proprietary applications are collected on the Astrel Desktop, which is organized in pages of icons corresponding to applications.
- Page 9 Astrel Instruments AST183-X • Android: realVNC (available on the store) • Windows Phone: TinyVNC (available on the store) To install them just follows the steps indicated on their websites. WARNING: closing the VNC client application doesn't shut down the camera: the VNC client only shows the camera applications on the PC screen.
- Page 10 Astrel Instruments AST183-X Accessing the camera storage The basic camera main storage is the internal 8Gb SD card, where the operating system and the photos are stored. You can add more storage by simply connecting a USB dongle or even a USB hard disk to either USB connectors.
- Page 11 Astrel Instruments AST183-X Using the vacuum pump The camera adopts a low vacuum approach to avoid frosting on the CCD glass, filters and optical window. Using the included vacuum pump, you can remove the air from inside the camera, so that there's no more water vapor to freeze on the CCD glass and filters. Moreover, reducing the air inside the camera minimizes the heat exchanges due to convection, so the optical window never get too cold due to the low CCD and cold finger temperature.
- Page 12 Astrel Instruments AST183-X Tutorial: from power up to the first photo This tutorial will guide you in the process of making your first photo with your camera. We will use Windows in Connected mode: most of the steps are the same also with Linux in Connected mode, while many steps are not needed in Stand Alone mode.
- Page 13 Astrel Instruments AST183-X • Look for the camera access point name (the default one is AST183X_ap_<serial>) and connect your device to it. • Windows will complain because the access is limited but this is normal because you don't have an internet connection, only a local connection.
- Page 14 Astrel Instruments AST183-X After connection, the VNC viewer window will display the Linux Desktop that includes the Astrel Desktop and the icons of the thid-party applications: STEP 4: start the cooling process • Start the Cooling Control app and insert the desired temperature set point, then push the Start button.
- Page 15 Astrel Instruments AST183-X • The cooling process needs some time to reach a stable temperature set point, so we will use this time to find and focus the object to photograph. STEP 5: select a filterwheel position • Start the Filterwheel app clicking the icon on the desktop, then push the desired filter...
- Page 16 Astrel Instruments AST183-X • When in liveview, frame a medium brightness star, push focus and you will be asked to click on a star in the field. After you click the selected star, the focus interface is started displaying an enlargement of a small portion of sky around the star. The refresh rate depends on the exposure time and can be as fast as nearly 3 frames per second •...
- Page 17 Astrel Instruments AST183-X of the star field, as well as move around using the arrow buttons • Push live again to come back to the liveview interface and frame your object. With liveview taking images in 10x10 binning mode, even an exposure of a few seconds easily reveals most deepsky objects, making the framing process very easy.
- Page 18 Astrel Instruments AST183-X sequence will be stored in the default photo folder, which is the '/home/astro/photos' folder. Advanced user can use any existing path on the camera where they have the permission to write • Each photo of a sequence can be identified using its name. For example, the third exposure with the second filter of the 'm31_lrgb' photo sequence will be saved as 'm31_lrgb_filt2_clear_3.fits'...
- Page 19 Astrel Instruments AST183-X • Open WinSCP and create a new connection. • Choose SFTP protocol and insert the camera ip address (10.0.0.1), port 22, your user name (astro) and password (astronomy) • Copy the files/folders as needed • Method 2: If you stored the photo sequences in an external USB storage, you can of course disconnect it from the camera and plug it to the PC.
Need help?
Do you have a question about the AST183-X and is the answer not in the manual?
Questions and answers