Table of Contents
Advertisement
Advertisement
Table of Contents

Related Manuals for GAS GAS 125 TXT GP 2019


Summary of Contents for GAS GAS 125 TXT GP 2019
- Page 2 2019 GAS GAS All rights reserved Reprinting and reproduction of any kind, either in whole or in part, is prohibited without the written permission of the copyright holder. The company has the right, without prior notice, to change the technical content of the products.
-
Page 3: Table Of Contents
Owner's Manual Contents Thank you to the consumer ................4 Important notice ................... 4 Warranty terms ..................... 5 Recommendations ..................8 Technical data ....................8 Location of components ................10 Maintenance chart ..................13 Serial number ....................14 Control panel ....................15 Steering lock .................... -
Page 4: Thank You To The Consumer
Owner's Manual Thank you to the consumer By choosing the new GAS GAS TXT GP 2019 you have just joined the great GAS GAS team, and as a user of the number one brand of off-road motorcycles, you de- serve the distinguished care that we would like to offer you, both after purchasing your GAS GAS and in the explanations that we set out in this manual. -
Page 5: Warranty Terms
GAS GAS does, however, reserve the right to make changes without prior notice to the consumer and without incur- ring any kind of liability. - Page 6 Owner's Manual Warranty terms During the first six months after the delivery of the repaired good, the seller shall be liable for any lack of conformity which motivated the repair. Any defects detected in the product must be brought to the attention of a GG authorised dealer within the warranty period.
- Page 7 Owner's Manual Warranty terms fuses, carbon brushes, footrest rubbers, tyres, chambers, cables and other rub- ber components. b) Lubricants (e.g. oil, grease, etc.) and operating fluids (e.g. battery fluid, cool- ant, etc.). c) Inspection, adjustment and other maintenance work, as well as all types of cleaning work.
-
Page 8: Recommendations
Digital CDI flywheel magneto TRANSMISSION Transmission type 6 gears, GAS GAS* Four / Six system (patented). Clutch type Hydraulic command, of 1/3 discs of adjustable progressiveness with GAS GAS* diaphragm (patented) Final drive system By chain Gear ratio 1st 2.996 (35x27x28/16x24x23) 2nd 2.571 (36/14) - Page 9 Owner's Manual Technical data Primary reduction ratio 2.777 (75/27) Final reduction ratio 3.9 (39/10). Overall drive ratio 8.891 (6th gear) Transmission oil Capacity 370cc Type NILS CLUTCH TRIAL FRAME Type Tubular profile made with Cr-Mo Tyre measurements Front 2.75 x 21” Trial Rear 4.00 x 18”...
-
Page 10: Location Of Components
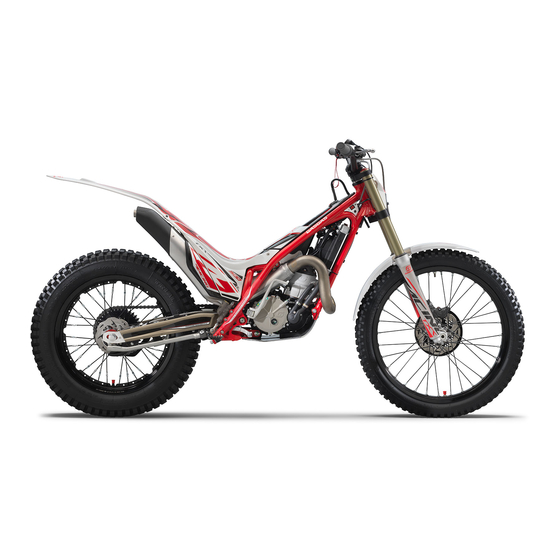
Owner's Manual Location of components 10 11 13 14 18 19 22 23 * Image of the TXT GP 2019 Number Name Number Name Front mudguard Front brake disc guard Front brake caliper Front brake disc Front suspension outer tube Cylinder Front suspension bar Carburettor... - Page 11 Owner's Manual Location of components 29 30 31 32 36 37 38 39 * Image of the TXT GP 2019 Number Name Number Name Number plate holder Rear brake pedal Exhaust protection Kick-starter Frame Water pump Intermediate exhaust Exhaust pipe elbow Radiator Catadioptric Front indicators...
- Page 12 Owner's Manual Location of components 46 47 51 52 53 Number Name Number Name Rear mudguard Clutch pump Silencer Handlebars Left foot peg Left suspension regulation Air filter cover Multifunction Gear shift pedal Right suspension regulation Ignition cover Front brake pump Fuel tank Throttle mechanism cover Fuel tank cap...
-
Page 13: Maintenance Chart
Owner's Manual Maintenance chart The maintenance and adjustment operations shown in the chart are easy and necessary to carry out to ensure that the motorcycle is kept in good condition. MAINTENANCE CHART Check/ Part Adjust Replace/Change Clean Grease/Lubricate Inspect Rear shock absorber Every year Every 2 years Transmission oil... -
Page 14: Serial Number
This number must be used to request a new key in case of loss. The new GAS GAS TXT GP 2019 has a manufacturer’s nameplate with infor- mation that must match the documentation and a frame number marked on the steering tube. -
Page 15: Control Panel
Owner's Manual Control panel The controls for the lights are located by the left-hand grip, the top one of which in the main switch, which rotates to various positions. The indicator control is located at the bottom of the left-hand grip. By moving the switch to the right or left, the right-hand or left-hand indicators turn on. -
Page 16: Steering Lock
Owner's Manual Steering lock The steering lock is located below the bottom suspension clamp, on the right- hand side. For correct functioning, completely turn the handlebars to the right as far as they will go, insert the key into the slot, turn it anti-clockwise, press and then turn it clockwise. -
Page 17: Fuel Tank Cap
The fuel tank cap is quick-acting. To open the cap, lift the tab and give it a ¼ turn anti-clockwise. To close it, place the cap with the words GAS GAS in the upper posi- tion, and turn the tab clockwise. It is advisable to frequently check the condition of the rubber to ensure correct sealing. -
Page 18: Fuel Tap
Owner's Manual Fuel tap Fuel tap (A) needs to be in a vertical position for it to function. Forwards, reserve; downwards, the flow is open; and backwards, closed. RESERVE OPEN CLOSED Starter / Carburation Engine idling speed (A) and mixture inlet (B) are adjusted using the screws marked in the photograph. -
Page 19: Lever Settings
Owner's Manual Lever settings Minimum 3mm The clutch control should be set to the required distance and the lever must not have a set of less than 3 mm. Never remove this play. Like the clutch, the front brake lever should be at the ideal distance for opera- tion. -
Page 20: Draining The Crankcase
Owner's Manual Draining the crankcase The crankcase drain plug is located on the bottom left-hand side. A hole in the crankcase guard enables easy drainage. Cleaning the air filter It is important to regularly check the air filter. Open the hatch located on the tail fairing of the motorcycle as shown in the photograph. -
Page 21: Removing The Fuel Tank
Owner's Manual Cleaning the air filter Remove the rubber visor from the inside of the box to gain free access to the air filter. Removing the fuel tank Before performing any operation on the engine, or on any other interior part of the motorcycle, remove the fuel tank located at the top of the frame. -
Page 22: Filling The Radiator
Owner's Manual Removing the fuel tank Thirdly, remove screw (B) which secures the top and front parts of the tank. The entire tank can now be removed by simply lifting the front part and extract- ing it from the inside of the frame (C). Filling the radiator Cooling fluid -30º... -
Page 23: Removing And Checking The Spark Plug
Owner's Manual Removing and checking the spark plug Regularly check the condition of the spark plug. To do so, remove it from its housing at the top of the cylinder head. First, remove the cap from the current and unscrew the spark plug using a suitable spanner. Blow the spark plug with pres- surised air to remove traces of dirt and prevent debris from entering the engine compartment. -
Page 24: Removing The Filter Box
Owner's Manual Removing the filter box Fig. 2 To carry out any operations on the carburettor, it is advisable to remove the filter box for better access. Follow these steps: 1. Loosen the inlet nozzle clamp. 2. Unscrew the 4 cone-shaped M6 Allen screws that secure the filter box to the frame. - Page 25 Owner's Manual Removing the carburettor It is important to check the fuel level inside the carburettor. The height of the float should be 15.16mm. It is necessary to carry out a thorough cleaning of the carburettor. For this, use compressed air. -25-...
-
Page 26: Removing The Reed Block
Owner's Manual Removing the carburettor Remove and regularly clean the main jet after washing and clean the inside of the carburettor float chamber. Removing the reed block The reed block assembly only consists of a body, reeds and stops. To examine this assembly, remove it by unscrewing the 4 screws that hold it to the back of the left and right-hand crankcases. -
Page 27: Clutch Discs And Spring
Owner's Manual Clutch discs and spring After any clutch actuation circuit disassembly and assembly operations, any traces of air can be removed with a bleeder. (A) The circle indicates where the engine oil is filled up. After many hours of use, check for possible wear to the clutch discs. The mini- mum measurement for correct operation is 9.87 mm. -
Page 28: Preload Of The Clutch Spring
The following table shows how the behavior of the motorcycle according to the pre-selection that is selected. Position Benefits / Performance Soft Medium aggressive To adapt the different preloads in the optimal way, Go to your nearest Gas Gas official dealer. -28-... -
Page 29: Front Suspension
Owner's Manual Front suspension * Air chamber level For an average weight of 75 kg, we preload the spring by 5 turns * Measurement without spring and with compressed hydraulic rod The front suspension is adjusted manually. (A) Right (hydraulic extension) (B) Left (spring preloading) In the lower part of the suspension, we have the following adjustments: right (hydraulic compression) -
Page 30: Rear Suspension
Owner's Manual Rear suspension The preloading of the shock absorber is adjusted by rotating the toothed rings (C) with two special spanners. Starting from the standard preloading of 7.5 mm for 300-280-250 and 7 mm for 125, tighten or loosen, depending on the weight of the rider, reaching a maximum of 9 mm of preloading (see spring and preloading table). -
Page 31: Swinging Arm Joints
Owner's Manual Swinging arm joints It is important to regularly remove and check the condition of the swinging arm bearings and supports. Regularly clean, check and grease the joint adjustments of the lower part of the rear suspension. Joint lubrication With special oil, grease: 1) The clutch and brake lever joints. - Page 32 Owner's Manual Joint lubrication 2) The gear lever joint. 3) Also the rear brake pedal (bearings). 4) Grease the fixings and springs of the footrests. -32-...
- Page 33 Owner's Manual Joint lubrication 5) Grease the engine start lever joint. 6) The drive chain needs to be cleaned and greased regularly due to its constant friction and exposure to all types of elements. 7) Grease the handlebars with a thin coat of oil for smooth operation of the throttle control.
- Page 34 Owner's Manual Joint lubrication 8) Grease and clean the throttle control frequently, especially after washing the motorcycle with pressurised water equipment. 9) Lift the upper cover of the throttle control to access the cam and grease it well. -34-...
-
Page 35: Chain And Wheel Tension Adjustment
Owner's Manual Chain and wheel tension adjustment To tension the chain and centre the rear wheel, the shaft has easily adjustable eccentrics Chain coupling position The coupling of the chain needs to be placed opposite the direction of travel Tyre pressure and condition Fig. -
Page 36: Brakes
Owner's Manual Tyre pressure and condition Fig. 2 Check the condition of the tyres to achieve optimum adhesion. Fig. 2 - Good condition Rear tyre: 4.00 x 18” TRIAL (tubeless) Regularly check tyre pressure. Front wheel pressure: 1.2 bar - normal **0.420 bar - only competition Rear wheel pressure: 1.2 bar - normal... - Page 37 Owner's Manual Brakes The wear of the front and rear brake pads should be checked regularly to ensure effective braking at all times. To eliminate traces of air from the brake circuit, the calipers are equipped with bleeders. Regularly check the level of the liquid. Top up if necessary. To check the level of the tank, place the motorcycle in a vertical position to see the actual level of the liquid.
-
Page 38: Obd System
Owner's Manual OBD system Amber MIL light The OBD (on board diagnostic) system features an MIL indicator light to indicate any malfunctions. When the motorcycle is started, the MIL (malfunction indicator light), located on the top of the switch, turns on. Amber MIL light If there is no error, the MIL turns off after 5 seconds. - Page 39 Owner's Manual OBD system The 4-way socket is located on the right. To connect the Creader VI+ scan tool (or similar), the protection needs to be removed from the connector. When the scan tool is connected, it turns on and the start screen appears connecting to the ISO 15765-4 CAN protocol that our OBD system has.
- Page 40 Owner's Manual OBD system You can cancel the error if you go to Diagnosis Menu - Erase error. If you return to the Monitor Status screen, the MIL Status is OFF and, at the top, the green light appears turning off the red key light... And, at the same time, the MIL turns off on the switch.
-
Page 41: Approved Electrical System
Owner's Manual Approved electrical system -41-... -
Page 42: Ignition Electrical System
Owner's Manual Ignition electrical system -42-... -
Page 43: Tightening Torque
Owner's Manual Tightening torque PART NAME Front wheel axle Swinging arm to frame fixing Shock absorber top fixing 40-50 Shock absorber bottom fixing 40-50 Tie rod fixing 40-50 Handlebars 18-25 Hand levers 7-10 Radiator fixing 7-10 Front fin bridge 7-10 Brake pedal 27-32 Muffler fixing... -
Page 44: Storage
Owner's Manual Storage STORAGE When the motorcycle needs to be stored for a long period of time, you should: - Thoroughly clean the motorcycle. - Start and run the engine for about 5 minutes to heat the transmission oil and then drain it (see the ‘Draining the crankcase’... -
Page 45: Multifunction
Owner's Manual Multifunction Multifunction marker (only on approved models) The multifunction device is water resistant and consists of a red backlit LCD screen WARNING The multifunction device is water resistant but not submersible. Do not wash with pressurised water. Do not leave the device in direct sunlight when the motorcycle is not being used. -
Page 46: Troubleshooting
Owner's Manual Troubleshooting TROUBLESHOOTING NOTE This is not an exhaustive list of faults, just some of the most common. FAULT CAUSE SOLUTION 1 Engine does not run - Seized crankshaft. - Go to a specialized workshop. - Seized cylinder / piston / crank pin - Go to a specialized workshop. - Page 47 Owner's Manual Troubleshooting FAULT CAUSE SOLUTION Engine makes strange noises - Ignition problem. - Go to a specialized workshop. - Overheating. - See section 5. Exhaust backfires - Presence of carbon in combustion - Clean combustion chamber. chamber. - Poor quality petrol or wrong octane - Drain petrol and add new with higher octane rating.
- Page 48 Owner's Manual Troubleshooting FAULT CAUSE SOLUTION 13 Motorcycle unstable - Cable makes turning handlebars - Separate cable or loosen slightly. difficult. - Loosen steering shaft nut - Excessively tight steering shaft nut. - Replace steering bearings. - Damaged or worn steering bearings. - Bent steering shaft.
- Page 49 Owner's Manual Troubleshooting FAULT CAUSE SOLUTION 18 Motorcycle tends to lean to - Bent chassis. - Change frame. - Go to a specialized workshop. one side. - Incorrectly adjusted steering. - Adjust steering. - Go to a specialized workshop. - Bent steering shaft. - Change steering shaft.
-
Page 50: Final Thoughts
In some parts of this manual, information is provided about work to be carried out in a GAS GAS authorised garage. For this reason and in order to increase the life of your motorcycle, periodic checks of the motorcycle must only be carried out by experts in GAS GAS’s After-Sales Service.
Need help?
Do you have a question about the 125 TXT GP 2019 and is the answer not in the manual?
Questions and answers