Table of Contents
Advertisement
Available languages
Available languages
Quick Links
IMPORTANT INSTRUCTIONS -
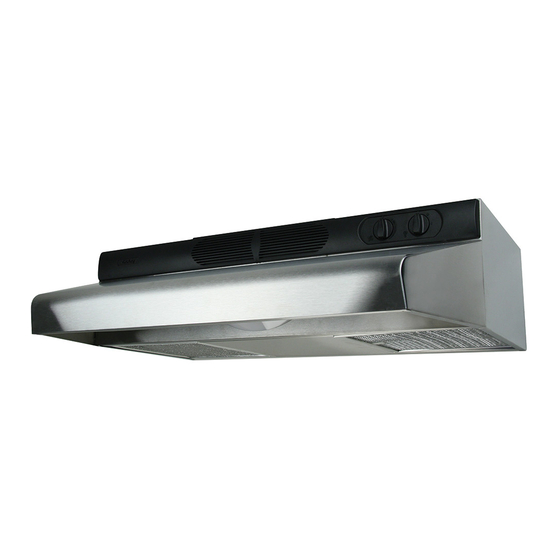
ECQ Series
READ AND SAVE THESE INSTRUCTIONS
READ CAREFULLY BEFORE ATTEMPTING TO ASSEMBLE, INSTALL, OPERATE OR MAINTAIN THE PRODUCT DESCRIBED.
PROTECT YOURSELF AND OTHERS BY OBSERVING ALL SAFETY INFORMATION. FAILURE TO COMPLY WITH
INSTRUCTIONS COULD RESULT IN PERSONAL INJURY AND/OR PROPERTY DAMAGE!
electric shock and injury to person, including the following:
WARNING:
TO REDUCE THE RISK OF FIRE, ELECTRIC SHOCK AND
INJURY TO PERSON, OBSERVE THE FOLLOWING:
a) Use this unit only in the manner intended by the manufacturer.If you have
questions, contact the manufacturer.
b) Before servicing or cleaning the unit, switch power off at service panel and
lock the service disconnecting means to prevent power from being switched on
accidentally. When the service disconnecting means cannot be locked, securely
fasten a prominent warning device, such as a tag, to the service panel.
WARNING:
TO REDUCE THE RISK OF FIRE, ELECTRIC SHOCK AND
INJURY TO PERSON, OBSERVE THE FOLLOWING:
a) Installation work and electrical wiring must be done by qualified person(s) in
accordance with all applicable codes and standards, including fire-related
construction.
b) Sufficient air is needed for proper combustion and exhausting of gases through
the flue (chimney) of fuel burning equipment to prevent back drafting. Follow
the heating equipment manufacturer's guideline and safety standards such
as those published by the National Fire Protection Association (NFPA) and the
American Society for Heating, Refrigeration, and Air Conditioning Engineers
(ASHRAE), and the local code authorities.
c) When cutting or drilling into wall or ceiling, do not damage electrical wiring and
other hidden utilities.
CAUTION:
FOR GENERAL VENTILATING USE ONLY. DO NOT USE TO
EXHAUST HAZARDOUS OR EXPLOSIVE MATERIALS AND VAPORS.
CAUTION:
TO REDUCE THE RISK OF FIRE AND TO PROPERLY EXHAUST
AIR, BE SURE TO DUCT AIR OUTSIDE - DO NOT VENT EXHAUST AIR INTO
SPACES WITHIN WALLS OR CEILINGS OR INTO ATTICS, CRAWL SPACES, OR
GARAGES.
d) Ducted fans must always be vented to the outdoors.
e) This unit must be grounded.
f)
To avoid motor bearing damage and noisy and/or unbalanced impellers, keep
drywall spray, construction dust, etc. off power unit.
g) Read all instructions before installing or using range hood.
6728061 Rev. C 1-15
OPERATING MANUAL
RETAIN INSTRUCTIONS FOR FUTURE REFERENCE.
GENERAL SAFETY INFORMATION
When using electrical appliances, basic precautions
should always be followed to reduce the risk of fire,
SAVE THESE INSTRUCTIONS
WARNING:
USE THIS FAN WITH ANY SOLID-STATE SPEED CONTROL DEVICE.
WARNING: TO REDUCE THE RISK OF A RANGE TOP GREASE FIRE:
a) Never leave surface units unattended at high settings. Boilovers cause
smoking and greasy spillovers that may ignite. Heat oils slowly on low or
medium settings.
b) Always turn hood ON when cooking at high heat or when flambéing food
(ie. Crepes Suzette, Cherries Jubilee, Peppercorn Beef Flambé).
c) Clean ventilating fans frequently. Grease should not be allowed to
accumulate on fan filter.
d) Use proper pan size. Always use cookware appropriate for the size of the
surface element.
WARNING:
EVENT OF A RANGE TOP GREASE FIRE, OBSERVE THE FOLLOWING:
a) SMOTHER FLAMES with a close-fitting lid, cookie sheet, or metal tray, then
turn off burner. BE CAREFUL TO PREVENT BURNS. If the flames do not go out
immediately, EVACUATE AND CALL THE FIRE DEPARTMENT.
b) NEVER PICK UP A FLAMING PAN - You may be burned.
c) DO NOT USE WATER, including wet dishcloths or towels -
a violent steam explosion will result.
d) Use an extinguisher ONLY if:
I.
You know you have a Class ABC extinguisher, and you already know
how to operate it.
II.
The fire is small and contained in the area where it started.
III.
The fire department is being called.
IV.
You can fight the fire with your back to an exit.
WARNING:
DUCTWORK.
www.airkinglimited.com
Range Hood
TO REDUCE THE RISK OF FIRE, ELECTRIC SHOCK, DO NOT
TO REDUCE THE RISK OF INJURY TO PERSONS IN THE
TO REDUCE THE RISK OF FIRE, USE ONLY METAL
1 of 12
Advertisement
Table of Contents

Related Manuals for AirKing ECQ Series


Summary of Contents for AirKing ECQ Series
- Page 1 IMPORTANT INSTRUCTIONS - OPERATING MANUAL ECQ Series Range Hood READ AND SAVE THESE INSTRUCTIONS READ CAREFULLY BEFORE ATTEMPTING TO ASSEMBLE, INSTALL, OPERATE OR MAINTAIN THE PRODUCT DESCRIBED. PROTECT YOURSELF AND OTHERS BY OBSERVING ALL SAFETY INFORMATION. FAILURE TO COMPLY WITH INSTRUCTIONS COULD RESULT IN PERSONAL INJURY AND/OR PROPERTY DAMAGE! RETAIN INSTRUCTIONS FOR FUTURE REFERENCE.
-
Page 2: Installation Instructions
INSTALLATION INSTRUCTIONS The thickness of the strips should be the same as the recess of the cabinet and they should be approximately 2" wide. CAUTION: Install the strips using appropriate length wood screws (not included). Make sure the MAKE SURE POWER IS SWITCHED OFF AT SERVICE PANEL BEFORE strips line up to the keyhole slots of the range hood. - Page 3 SECTION 4 Installing the Range Hood CAUTION: MAKE SURE POWER IS SWITCHED OFF AT SERVICE PANEL BEFORE STARTING INSTALLATION. NOTE: If installing into existing construction and you will not have access to the ductwork once the hood is in place, make ducting connections at this point. Refer to the Ducting Section for instructions.
-
Page 4: Troubleshooting Guide
Changing the Lamp Choosing any speed setting will override the continuous operation of the hood. Once the hood is set to the OFF ( ■ ) position on the main control panel, the continuous operation speed will Remove the lamp cover by squeezing in the sides. The cover is held in place by tension once again engage. -
Page 5: Limited Warranty
LIMITED WARRANTY WHAT THIS WARRANTY COVERS: This product is warranted against defects in workmanship and/or materials. HOW LONG THIS WARRANTY LASTS: This warranty extends only to the original purchaser of the product and lasts for five (5) years from the date of original purchase or until the original purchaser of the product sells or transfers the product, whichever first occurs. -
Page 6: Replacement Parts Diagram
REPLACEMENT PARTS DIAGRAM Qty. Description Replacement Part # Duct Collar 5S1199013 Vent Cover White 5S1428003 Black 5S1428006 Grill 30" - White 5S1423003 30" - Black 5S1423006 36" - White 5S1423043 36" - Black 5S1423046 Switch 5S4199018 Motor Switch Knob White 5S1418003 Black 5S1418006... -
Page 7: Hotte De Cuisinière
INSTRUCCIONES IMPORTANTES – MANUAL DE OPERACIÓN Séries ECQ Hotte de cuisinière LIRE ET CONSERVER CES INSTRUCTIONS LIRE SOIGNEUSEMENT AVANT DE TENTER D’ASSEMBLER, INSTALLER, OPÉRER OU DE RÉPARER LE PRODUIT DÉCRIT. PROTÉGEZ VOUS-MÊME ET LES AUTRES EN OBSERVANT TOUTE L’INFORMATION DE SÉCURITÉ. FAILLIR À SE CONFORM- ER AUX INSTRUCTIONS PEUT RÉSULTER EN BLESSURE PERSONNELLE GRAVE ET/OU EN DOMMAGE À... -
Page 8: Instructions Pour L'installation
INSTRUCTIONS POUR L’INSTALLATION L’épaisseur des bandes doit correspondre au retrait de l'armoire et doit avoir une largeur d'environ 5 cm. MISE EN GARDE : Posez les bandes à l’aide de vis à bois (non comprises) de longueur appropriée. Assurez-vous MAKE SURE POWER IS SWITCHED OFF AT SERVICE que les bandes sont alignées aux encoches en trou de serrure de la hotte. - Page 9 SECTION 4 AVERTISSEMENT : AFIN DE RÉDUIRE LES RISQUES D’INCENDIE, UTILISEZ UNIQUEMENT DES CONDUITS EN MÉTAL. Installation de la hotte Connectez la canalisation au col du conduit de la hotte. Fixez en place avec du ruban MISE EN GARDE : ASSUREZ-VOUS QUE L’ALIMENTATION ÉLECTRIQUE adhésif pour sceller tous les joints (Figure 8).
-
Page 10: Guide De Dépannage
SECTION 9 Changement de la lampe Retirez l’écran protecteur de lampe en appuyant sur les côtés. Le panneau est maintenu Commandes en place grâce à la pression exercée sur les languettes de la hotte. Votre hotte est munie de deux interrupteurs rotatifs dont un règle l’éclairage et l’autre le ventilateur d’évacuation. -
Page 11: Garantie Limitée
GARANTIE LIMITÉE QUE COUVRE CETTE GARANTIE : Ce produit est garanti contre tout vice de fabrication ou de matière. COMBIEN DE TEMPS CETTE GARANTIE DURE : Cette garantie se rapporte seulement à l’acheteur original du produit et dure pendant cinq (5) années de la date de l’achat original ou jusqu’à... - Page 12 TABLEAU DES PIÈCES DE RECHANGE n° Qte. Description Pièces de rechange n° Collet de conduit 5S1199013 Panneau de l’évent Blanc 5S1428003 Noir 5S1428006 Grille 30 po - Blanc 5S1423003 30 po - Noir 5S1423006 36 po - Blanc 5S1423043 36 po - Noir 5S1423046 Interrupteur 5S4199018...
Need help?
Do you have a question about the ECQ Series and is the answer not in the manual?
Questions and answers