Table of Contents
Advertisement
Quick Links
Operation Manual
For The
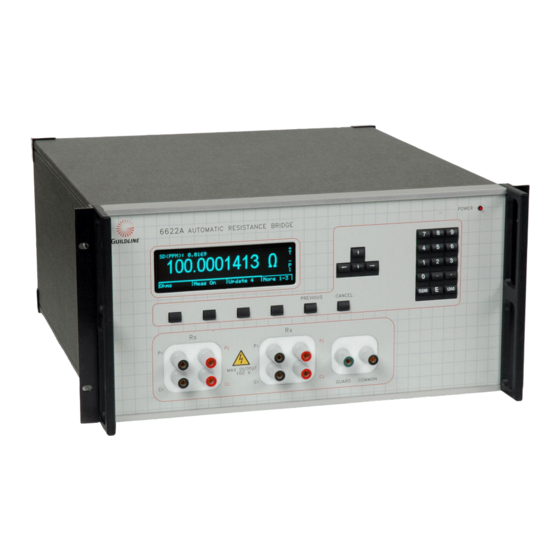
6622A Series
Automatic DCC Resistance Bridges
www.guildline.com
NOTICE
The contents and information contained in this manual are proprietary to
Guildline Instruments Limited. They are to be used only as a guide to the
operation and maintenance of the equipment with which this manual was
issued and may not be duplicated or transmitted by any means, either in whole
or in part, without the written permission of Guildline Instruments Limited.
OM6622A-L-00
2 November 2016
Advertisement
Table of Contents

Subscribe to Our Youtube Channel
Related Manuals for Guildline 6622A Series


Summary of Contents for Guildline 6622A Series
- Page 1 NOTICE The contents and information contained in this manual are proprietary to Guildline Instruments Limited. They are to be used only as a guide to the operation and maintenance of the equipment with which this manual was issued and may not be duplicated or transmitted by any means, either in whole or in part, without the written permission of Guildline Instruments Limited.
-
Page 3: Table Of Contents
Setup And Power On ............................2-3 2.2. INCOMING INSPECTION ..........................2-3 2.3. 6622A SERIES FRONT PANEL DISPLAY AND CONTROLS ..............2-5 2.3.1. Standard Resistor Input Terminals (Bench Model Only) ................2-5 2.3.2. Resistor Under Test Input Terminals (Bench Model Only) ................2-6 2.3.3. - Page 4 QUICK MEASUREMENT GUIDE ................3-1 3.1. MEASUREMENT OPERATION GUIDE ..................... 3-1 3.1.1. Normal Ohm Mode Resistance Measurement (All 6622A Models) ............. 3-2 3.1.2. Low Ohm Mode Resistance Measurement (All 6622A Models) ..............3-5 3.1.3. High Ohm Mode Resistance Measurement (6622A-XR and 6622A-XPR) ..........3-10 3.1.4.
- Page 5 4.6.6. <Sofcal> MENU Fn-3 (MAIN) ........................4-22 4.6.6.1. <GPIB>MENU Fn-1 (Sofcal_MAIN) ....................4-25 4.6.6.2. <Coef Set> MENU Fn-2 (Sofcal_MAIN) ..................4-25 4.6.6.3. <Diagnostic> MENU Fn-3 (Sofcal_MAIN) ..................4-26 4.6.6.4. <P.O.S.T.> MENU Fn-1 (Sofcal_MAIN) ..................4-29 4.6.6.5. <Filter> MENU Fn-2 (Sofcal_MAIN) ....................4-30 4.6.6.6.
- Page 6 7.4. MODEL 6622A REMOTE AND LOCAL OPERATION ................7-7 7.5. MODEL 6622A PROGRAMMING COMMAND SUMMARY ..............7-8 APPENDICES ......................8-1 8.1. GENERAL SPECIFICATIONS ........................8-1 8.2. GENERAL SPECIFICATIONS (continued) ....................8-2 8.3. RESISTANCE MEASUREMENT SPECIFICATION................. 8-3 OM6622A-L-00 2 November 2016...
- Page 7 LIST OF FIGURES FIGURE 1-1 : MODEL 6622A BLOCK DIAGRAM....................... 1-4 FIGURE 2-1 : LINE VOLTAGE SELECTOR ......................... 2-2 FIGURE 2-2 : 6622A FRONT VIEW (BENCH / RACK) ....................2-5 FIGURE 2-3 : 6622A REAR VIEW (BENCH / RACK) ....................2-8 FIGURE 3-1 : RESISTANCE MEASUREMENT RESPONSE VERSUS TEST SAMPLE ..........
- Page 8 LIST OF TABLES TABLE 2-1 : FUSE RATINGS ............................2-2 TABLE 3-1 : RECOMMENDED NORMAL OHM MODE TEST SETUPS ..............3-4 TABLE 3-2 : 6623 RECOMMENDED LOW OHM MODE TEST SETUP ..............3-7 TABLE 3-3 : 6623A-300 RECOMMENDED LOW OHM MODE TEST SETUP ............3-7 TABLE 3-4 : RECOMMENDED 100 V HIGH OHM MODE TEST SETUP ..............
- Page 9 OM6622A-L-00 viii 2 November 2016...
-
Page 10: Introduction
1.2. GENERAL DESCRIPTION The 6622A series bridges can be controlled from the front panel or by a computer system through software. The BridgeWorks Software Users Manual describes the operation of the 6622A with the software. Once the computer system is installed and connected to the IEEE-488 Interface of the 6622A Resistance Bridge, full software control of the bridge is possible. -
Page 11: Overview
The bridge is designed for flexibility and ease of use and is based on the manually operated direct- current-comparator bridge manufactured by Guildline Instruments (model 9975) and also on the original work of the National Research Council of Canada . -
Page 12: Principle Of Operation
Section 1 1.4. PRINCIPLE OF OPERATION A simplified diagram of the automatic direct-current-comparator is shown in Figure 1-1. Two sets of four terminal connections hardware are provided, one set for the standard resistor and one set for the unknown resistance. A current (Ix), set under control of the microprocessor, is passed through the variable turns of winding (Nx) of the comparator and through the unknown resistance (Rx). -
Page 13: Figure 1-1 : Model 6622A Block Diagram
Section 1 5 Mb/s SYNCHRONOUS KEYPAD 6622A SERIAL INTERFACE EACH MESSAGE IS 22 BYTES CONTROLLER/ COMMUNICATION 6622A DISPLAY GPIB FIBRE OPTIC FIBRE OPTIC INTERFACE INTERFACE MAGNETIC MODULATOR AND FLUX DETECTOR ASYNCHRNOUS SERIAL FIBRE OPTIC ISOLATION Rx Tx -AUTORANGING -HIGH INPUT IMPEDANCE Nx=0 to 8747 Ns=648... -
Page 14: Low Ohm Measurement Mode
Section 1 1.4.1.1. Low Ohm Measurement Mode This mode can be used to make 4 terminal resistance measurements down to 0.1 against a 1 . In Low Ohm mode a high current range extender such as the model 6623A is used to improve the accuracy and allow for measurements below the normal Ohm range. -
Page 15: Installation
Section 2 INSTALLATION 2.1. PRELIMINARIES 2.1.1. Unpacking a. Remove the 6622A Automatic DCC Resistance Bridge and the other items from its shipping container in a suitable location. b. The following items are included with each new bridge Operators Manual (OM6622A) Software Users Manual (SUM66XX) iii. -
Page 16: Fuse Replacement
Section 2 2.1.3. Fuse Replacement Only fuses with specified current rating type should be used for replacement if necessary. See Table 2-1. FUSES (TIME DELAY TYPE) 100 V 120 V 220 V 240 V 2 A, 250 V, (T) 2 A, 250 V, (T) 1 A, 250 V, (T) 1 A, 250 V, (T) Table 2-1 : Fuse Ratings... -
Page 17: Setup And Power On
Section 2 2.1.4. Setup And Power On a. Verify that the power switch is off. b. Remove any excess packing material from around the front panel that is provided for shipping purposes only. c. Connect the computer system as applicable in accordance with the documentation provided. - Page 18 Section 2 Enter 10000 on highlighted 'Resistance RX:' line on display by using the numeric key pad. Select the down arrow key to highlight the next line on the display. Enter in 15 for the reversal rate for the measurement. Select the down arrow key to highlight the next line on the display.
-
Page 19: 6622A Series Front Panel Display And Controls
Section 2 2.3. 6622A SERIES FRONT PANEL DISPLAY AND CONTROLS The displayed text for each control of the 6622A Series represents the current applicable state of the bridge. Figure 2-2 : 6622A Front View (Bench / Rack) 2.3.1. Standard Resistor Input Terminals (Bench Model Only) The standard resistor input terminals consist of 4 low thermal binding posts. -
Page 20: Resistor Under Test Input Terminals (Bench Model Only)
Section 2 2.3.2. Resistor Under Test Input Terminals (Bench Model Only) The resistor under test input terminals consist of 4 low thermal binding posts. The binding posts have the 'Rx' label above the group of four posts. The posts are labeled clockwise from bottom left to right, 'C1', 'P1', 'P2', and 'C2'. -
Page 21: Special Keys
Section 2 2.3.8. Special Keys 2.3.8.1. Cursor Movement Keys The 4 movement cursor keys are labeled as follow: <LEFT ARROW>, <UP ARROW>, <DOWN ARROW>, and <RIGHT ARROW>. 2.3.8.2. Function Keys The four unlabelled keys located below the display are the function keys. Their functionality depends on the "soft"... -
Page 22: 6622A Series Rear Panel Connectors And Controls
2.4.1. IEEE-488 Interface The IEEE-488 interface consists of the standard IEEE-488 interface connector. The IEEE-488 interface provides the means for the computer system to obtain complete computer control of the 6622A Series Automatic DCC Resistance Bridge. OM6622A-L-00 2 November 2016... -
Page 23: Line Input Connector
Section 2 2.4.2. Line Input Connector The Line Input Connector is a combination of a 3-prong AC standard male connector, an ON/OFF switch and a fused input line voltage selector. The input line's voltage selector consists of a four-position selector and a fuse holder. The selector allows switching between the four possible tensions: 100 V, 120 V, 220 V and 240 V. -
Page 24: Ground Terminal
2.4.7. Ground Terminal The ground terminal consists of a four way green binding post. The ground terminal is bonded to the chassis of the 6622A Series and to power ground of the line input connector. 2.4.8. Extender Connector The Extender connector is a 6 pin circular connector which is used to connect the necessary signals to and from the 6623A Series or 6623 Range Extenders. -
Page 25: Quick Measurement Guide
Section 3 QUICK MEASUREMENT GUIDE 3.1. MEASUREMENT OPERATION GUIDE This section contains information regarding the measurement of resistors in the range of 1m ohm to 1G ohms. This guide is provided for manual front panel control of the 6622A bridge. An operation guide for full automatic control of the 6622A bridge, through the terminal of the system computer, is provided in the BridgeWorks Software User’s Manual. -
Page 26: Normal Ohm Mode Resistance Measurement (All 6622A Models)
Figure 3-2 shows a typical rear panel connection for this measurement mode. Specifications are based on use of shielded wire connections throughout, with shields connected to the 'GUARD' terminal. Use of SCW cable from Guildline is most recommended. NOTE: In this, as in all measurements, optimum results will be obtained if the environment is controlled. - Page 27 Section 3 Step 2) Connect the Rs and Rx terminals to the terminals of the resistor to be measured. The four terminals are labeled as C1, P1, C2, and P2, and should be connected to the corresponding terminals of the 4 terminal resistor to be measured.
-
Page 28: Table 3-1 : Recommended Normal Ohm Mode Test Setups
Section 3 Ref. U.U.T. Itest Imax Reversal Comment (1) (mA) (mA) Rate (sec) Output current limited to 150 mA 31.6 31.6 3.16 31.6 0.316 31.6 31.6 31.6 10 k 3.16 3.16 10 k 0.316 3.16 100 k 0.032 10 k 3.16 3.16 10 k... -
Page 29: Low Ohm Mode Resistance Measurement (All 6622A Models)
Section 3 3.1.2. Low Ohm Mode Resistance Measurement (All 6622A Models) The 6622A in its Low Ohm Mode enables measurement of resistors below 1 ohm. When used with a 6623A series or 6623 range extender, measurement of low ohm resistors can be made with larger currents. - Page 30 Section 3 Select the down arrow key to highlight the next line on the display. When a model 6623 and the external power supply are used, a user sets the test current on the external power supply, the bridge does not. When a model 6623A range extender is in use, enter the test current (for the resistor to be measured) in Amps.
-
Page 31: Table 3-2 : 6623 Recommended Low Ohm Mode Test Setup
Section 3 Rs > (Extender Ratio) x Rx Ref. U.U.T. Itest Rs Current Extender Reversal Comment (1) (mAmps) Ratio Rate (sec) 0.316 31.6 10:1 1 W test in Rx 0.01 100:1 1 W test in Rx 0.001 31.6 31.6 1000:1 1 W test in Rx 0.0001 1000:1... -
Page 32: Figure 3-3 : Rear Panel Connections - Low Ohm Mode With 6623
Section 3 Figure 3-3 : Rear Panel Connections – Low Ohm Mode with 6623 OM6622A-L-00 2 November 2016... -
Page 33: Figure 3-4 : Rear Panel Connections - Low Ohm Mode With 6623A-300
Section 3 Figure 3-4 : Rear Panel Connections – Low Ohm Mode with 6623A-300 OM6622A-L-00 2 November 2016... -
Page 34: High Ohm Mode Resistance Measurement (6622A-Xr And 6622A-Xpr)
Specifications are based on use of shielded wire connections throughout, with shields connected to the 'GUARD' terminal. Use of SCW cable from Guildline is most recommended. WARNING: The 6622A bridge can produce dangerous voltages of up to 100 V for the XR and XPR models. -
Page 35: High Ohm Mode Resistance Measurement (6622A-Hv)
Specifications are based on use of shielded wire connections throughout, with shields connected to the 'GUARD' terminal. Use of SCW cable from Guildline is most recommended. WARNING: The 6622A bridge can produce dangerous voltages of up to 1000 V for the HV model. -
Page 36: Figure 3-5 : Rear Panel Connections - High Ohm Mode
Section 3 Figure 3-5 : Rear Panel Connections – High Ohm Mode OM6622A-L-00 3-12 2 November 2016... -
Page 37: Bridgeworks Data Acquisition Software
Software will increase the functionality and the productivity of the bridge. Adding optional 6664C Scanner(s) to work along with 6622A Series bridges and software control will create a fully automated Resistance Measurement System. Before using the 6622A with the computer, ensure that the operation of the software package is well understood. -
Page 38: Instrument Operation
Section 4 INSTRUMENT OPERATION 4.1. FRONT PANEL OPERATING PROCEDURE The 6622A Bridges is manually operable from the front panel. The BridgeWorks Software User's Manual contains the operating instructions for fully automatic software control of the 6622A Automatic DCC Resistance Bridge via its computer system. 4.2. -
Page 39: Figure 4-1 : Menu Tree - Measure/Sofcal
Section 4 Measure Setup Sofcal Ratio Meas OFF Update 1 Power x1 No Filter Normal 0.001ppm Quick OFF View Decimation Ohms Meas ON Update 2 Power x2 0.01ppm Quick ON N Average Update4 Delta 0.1ppm PPM SP 1.0ppm Delta SP 10.0ppm (See Fig. -
Page 40: Figure 4-2 : Menu Tree - Setup
Section 4 Measure Setup Sofcal Profiles Edit Ohms Normal High Ohms Low Ohms Edit Edit Scale Edit 6623A-3A Edit 6623A-300A 6623 (etc.) Figure 4-2 : Menu Tree – SETUP OM6622A-L-00 2 November 2016... -
Page 41: Figure 4-3 : Menu Tree - Measure-View
Section 4 Summary Graph Detail Window Edit Graph Previous Next Summary Data Previous Next Summary Refresh Data Det Data Sum Detail Refresh Clear Det Clear Sum Detail Figure 4-3 : Menu Tree – MEASURE-VIEW OM6622A-L-00 2 November 2016... -
Page 42: General Key/Display Operations
Section 4 4.3. GENERAL KEY/DISPLAY OPERATIONS 4.3.1. Base menu Typically consists of four function key (or less) description areas, and a status line. When there are more than four functions for a given menu level a <Scrn n-N> function key will appear. -
Page 43: Basic Menu Operations
Section 4 4.4. BASIC MENU OPERATIONS 4.4.1. Menu Option-<MEASURE> In the menu option <MEASURE>, several function keys are defined where each key can cause one of several actions. If the function key <Fn> has multiple states, pressing the key beneath the displayed function will cause it to toggle between the valid states. -
Page 44: Menu Option -
Section 4 4.4.2. Menu Option - <any other menu but measure> In all other menu options if a function key has a defined set of alternate values, pressing that function key will cause one of the alternate values to be selected and displayed in the associated active area of the display screen. -
Page 45: Base Edit/Select Menu - One Column Of Data
Section 4 4.4.3. Base Edit/Select Menu - one column of data An optional header line can appear at the top of a screen display to prompt or inform the user with "details" of the present menu level. If a header line is displayed the number of selections are restricted to 5 or less. -
Page 46: Operation Of Select/Edit Data Menus
Section 4 4.4.5. Operation of Select/Edit Data Menus 4.4.5.1. Function - <Scrn n-N> If more than one screen of display information is available for selection as current at a menu level, then a <Scrn n-N> software function key will appear above the fourth function key <Fn-4>. -
Page 47: Title Screen
Section 4 4.5. TITLE SCREEN At power ON the 6622A will start its internal power on self-test programming and display its opening banner. This banner will outline the 6622A’s model configuration and the installed options. (i.e. -B, -XP, XPS, -XR, -XPR, -HV) The REMOTE DISPLAY screen will appear only when the 6622A has been addressed by a remote communication device on the GPIB . -
Page 48: Main Menu
Section 4 4.6. MAIN MENU The main menu, on power up will display a null measurement configuration where all parameters have been initialized to zero. On power up the 6622A Bridge will default to a standby condition with the measurement cycle of operations OFF i.e. -
Page 49: Measure> Menu Fn-1 (Main)
Section 4 4.6.1.1. <Measure> MENU Fn-1 (MAIN) Page 1 of 3 The <STATUS LINE> will only appear if the 6622A is currently making a measurement. The information displayed in the <STATUS LINE> depends on the options selected. if <PPM>, <PPM SP>, <DELTA>, or <DELTA SP> is the current selection then the <STATUS LINE>... -
Page 50: Measure> Menu Fn-1 (Main)
Section 4 4.6.1.2. <Measure> MENU Fn-1 (MAIN) Page 2 of 3 Available functions (menu page 2 of 3). Function key <Fn-1> selects the screen measurement update rate as a function of the test current reversal rate. <Update 1> sets a screen update rate at twice the test current reversal rate;... - Page 51 Section 4 4.6.1.3. <Measure> MENU Fn-1 (MAIN) Page 3 of 3 Available functions (menu page 3 of 3), last menu page. Function key <Fn-1> selects the mode of displaying the measurement data as <Normal>; parts per million <PPM>; change <Delta>; change ppm from a set point <PPM SP>;...
-
Page 52: Setup> Menu Fn-1 (Setup_Main)
Section 4 4.6.2. <Setup> MENU Fn-1 (Setup_MAIN) 4.6.3. <Profiles> MENU Fn-1 (Profiles MAIN) Profiles allow the user to save resistor configuration files. 15 profiles are available. Function key <Fn-1>, <Select>, allows the selection and deletion of profiles. Function key <Fn-2>, <Ok>, selects the highlighted profile. Function key <Fn-3>, <Delete>, deletes the currently selected profile. -
Page 53: View
Section 4 Function key <Fn-2>, <Ok>, creates a new profile with the name as entered in the text. Function key <Fn-3>, <Scale>, allows insertion of special text for defining the resistor value. It toggles between m Ohms, Ohms, k Ohms, M Ohms. 4.6.4. -
Page 54: Detail Graph
Section 4 <Detail> switches to the Detail display. <Clear Det> clears the trace buffer. It requires a confirmation to prevent accidental clearing. <Clear Sum> clears the summary buffer 4.6.4.2. Detail Graph <Data> switches to the detail display. <Previous> (if present) scrolls the trace buffer window left. <Next>... -
Page 55: Detail
Section 4 4.6.4.3. Detail <Graph> switches to the graph display. <Previous> (if present) scrolls back by 5 entries. <Next> (if present) scrolls forward by 5 entries. The Up arrow scrolls the trace buffer up by one (1) entry. The Down arrow scrolls the trace buffer down by one (1) entry. The Left Arrow scrolls to the beginning of the trace buffer. -
Page 56: Edit Ohms> Menu Fn-2 (Edit_Ohms Main)
Section 4 Refresh Minimum Scroll Size is the number of entries to leave available for update when the detail graph which is currently being viewed reaches the Detail Graph Window Size. This prevents the screen from doing a complete refresh on each new entry once the window size is less than the number of trace entries. -
Page 57: High Ohms> Menu Fn-2 (Edit Ohms_Main)
Section 4 Press <Edit> and use arrow keys to move the highlight to the data line to be changed. Modify data and press <Ok>. Check resistance limits for Rs and Rx. Check also power limits set by test current. The Test Current value sets the current in the UNKNOWN RESISTOR (Rx). -
Page 58: Low Ohms> Menu Fn-3 (Edit Ohms_Main)
Section 4 Where: Test Voltage(V) is the common terminal voltage providing current for Rs and Rx. Max Voltage(V) is the maximum voltage rating for Rs or Rx. Enter the lower of the two maximum voltage ratings. 4.6.5.3. <Low Ohms> MENU Fn-3 (Edit Ohms_MAIN) Enter range extender configuration data. -
Page 59: Sofcal> Menu Fn-3 (Main)
Section 4 Check also power limits set by Test Current. The Test Current value sets the current in the UNKNOWN RESISTOR (Rx) and can be selected up to 3 Amps with the 6623A-3A and 3000 Amps with the 6623A-3000. With the 6623 the drive current is not entered and is determined by an external power supply. - Page 60 Section 4 Function Key <Fn-2>, <Coef Set>, allows updates to the Line Frequency and ADC Beta. Function Key <Fn-3>, <Diagnostic>, allows selection of functions that control the hardware. This function is useful when diagnosing problems with the 6622A. Sofcal menu selection menu page 2 of 4. Function Key <Fn-1>, <P.O.S.T.>, displays the result of the power on self test and the revision level of the installed software.
- Page 61 Section 4 Sofcal menu selection menu page 4 of 4. Function Key <Fn-1>, <PASSWORD>, allows setting of the unit password feature. By default the password is “6622” OM6622A-L-00 4-24 2 November 2016...
-
Page 62: Gpib>Menu Fn-1 (Sofcal_Main)
Section 4 4.6.6.1. <GPIB>MENU Fn-1 (Sofcal_MAIN) <Address> function key Fn-1 sets the GPIB address. <Mode> function key Fn-2 selects from the options <Talk/Listen>, <Talk Only>, <Disabled>. No GPIB settings will be saved or acted upon until <FN-3> the <Ok>. key has been pressed. -
Page 63: Diagnostic> Menu Fn-3 (Sofcal_Main)
Section 4 4.6.6.3. <Diagnostic> MENU Fn-3 (Sofcal_MAIN) To enter the Diagnostics window a password must be supplied. Diagnostic menu selection page 1 of 4. Function Key <Fn-1>, <Monitor> selects the monitor menu level and displays the value of the internal channels reported from the servo card assembly. - Page 64 Section 4 4.6.6.3.2. <Diagnostic> MENU Fn-1 (Sofcal_MAIN) Diagnostic menu selection page 2 of 4. Function key <Fn-1>, <Sign> enables sets the direction of current flow and the polarity of the voltage outputs. Function key <Fn-2>, <milliamps> sets the magnitude of the current output.
- Page 65 Section 4 WARNING: The 6622A bridge can produce dangerous voltages of up to 1000 V for the HV model and 100 V for the XR and XPR models. Exercise caution when setting output voltages as to avoid injury or equipment damage. Function key <Fn-3>, <Volts>...
-
Page 66: P.o.s.t.> Menu Fn-1 (Sofcal_Main)
Section 4 Function key <Fn-1>, enables or disables the automatic ramping feature for the Current. For current to flow to the Rs and Rx terminals, the <Mode> must be set to NORMAL. Function key <Fn-2>, enables of disables the automatic ramping feature for Voltage. -
Page 67: Filter> Menu Fn-2 (Sofcal_Main)
Section 4 ERROR STATUS displays the error bits in hexadecimal notation. ╔════════════════════════════════════════════════════════════╗ ║ 0 0_0000_0000 ║ ║ │ │ │ ││││ ││││ ║ ║ │ │ │ ││││ │││└ ROM 1 CHECKSUM ║ ║ │ │ │ ││││ ││└─ ROM 2 CHECKSUM ║... -
Page 68: Datum> Menu Fn-3 (Sofcal_Main)
Section 4 4.6.6.6. <Datum> MENU Fn-3 (Sofcal_MAIN) The values displayed in this menu are used as datum values when the 6622A is measuring ratio or resistance. The datum function is applied to the <Measure> menu. 4.6.6.7. <Sys Time>MENU Fn-2 (Sofcal MAIN) This allows the updating of the system date and time. - Page 69 The 6622A always sets current to zero(0) and then sets the specified current during state changes. (turns or polarity) For a standard Guildline Product the setting for this stage is 1 second.
- Page 70 For a standard Guildline product this is 3.0 A. Cascade state is used to select the stage. For a standard Guildline product this is 0 or blank. Slave state is used to select the stage. For a standard Guildline product this is 0 or blank.
- Page 71 The 6622A always sets current to zero(0) and then sets the specified current during state changes. (turns or polarity) For a standard Guildline Product the setting for this stage is 1.5 seconds.
- Page 72 The 6622A always sets current to zero(0) and then sets the specified current during state changes. (turns or polarity) For a standard Guildline Product the setting for this stage is 2.0 seconds.
- Page 73 For a standard Guildline product this is 1. Slave state is used to select the stage. For a standard Guildline product this is 1. For a Guildline 6623A-3000 the slave count is set to 20. OM6622A-L-00 4-36...
-
Page 74: Password> Menu Fn-1 (Sofcal_Main)
Section 4 4.6.6.9 PASSWORD> MENU Fn-1 (Sofcal_MAIN) In order to obtain access to change the system password the current password must be supplied. In enter the current password, first press the <Edit> key, enter the current password and press <OK>. An invalid password will not allow access. When the <Edit>... -
Page 75: Verification And Calibration
Section 5 VERIFICATION AND CALIBRATION 5.1. RATIO ACCURACY VERIFICATION This procedure covers the ratio accuracy verification of the 6622A Automatic DCC Resistance Bridge. This procedure is not a self-calibration but an intermediary check on whether the bridge is operating within its specifications relative to its last calibration. The following procedure can be automated in using a test sequence Bridgeworks Data Acquisition Software if the 6622A is connected through a 6664C scanner. -
Page 76: Equipment Required
6664C scanner as defined above. Set these standard resistors into the controlled temperature environment and allow time for them to stabilize. The Guildline model 6634A offers up to 10 of these resistors in a temperature stabilized rack mountable chamber. Open the BridgeWorks Data Acquisition Software in the computer. -
Page 77: Verification
Section 5 5.1.4. Verification 1. Use the “Test Sequence” function of the “Configuration” menu of the BridgeWorks Data Acquisition Software to measure the resistance ratio of each resistor pair with the corresponding excitation current and reversal rate listed below. See the BridgeWorks Software User’s Manual for the particulars of running a test sequence. - Page 78 Section 5 2. For each resistor pair, calculate and report the interchange closure error. For example, if the Rx:Rs ratio of the first measurement is R and the Rx:Rs ratio of the second measurement, where the two resistors are exchanged with one another, is R , then the interchange error e in ppm of the nominal ratio is:...
-
Page 79: Troubleshooting And Maintenance
Section 6 TROUBLESHOOTING AND MAINTENANCE 6.1. INTRODUCTION This section covers troubleshooting, repair and verification of the 6622A Automatic DCC Resistance Bridge. 6.1.1. Error Messages The 6622A Automatic DCC Resistance Bridge will display error messages either on the front panel display of the 6622A Resistance Bridge in manual mode or on the computer monitor when using the BridgeWorks Data Acquisition Software. -
Page 80: Table 6-1 : Model 6622A Error Messages
Section 6 Error Number Error Corrective Measures nV Detector Communication -None, fatal hardware error (try power Failure switch) Invalid Test Setup -Resistors not wired to Rx and Rs terminals properly, improper test setup Servo Railed -No current path on Rx or Rs terminals Nano Zero, nVoltmeter not -Cycle power... -
Page 81: Model 6622A Setup Warnings
Section 6 6.1.2. Model 6622A Setup Warnings The model 6622A Resistance Bridge provides limit checks for variables that can be setup during the configuration of a measurement. Below is a listing of the warnings that may appear on its display in manual operation or on the computer monitor when the BridgeWorks Data Acquisition Software is used. -
Page 82: Quick Ratio Check
Section 6 6.2. QUICK RATIO CHECK This procedure covers the quick ratio check of the 6622A Automatic DCC Resistance Bridge. The following procedure is can be automated in using a test sequence BridgeWorks Data Acquisition Software if the 6622A is connected through a 6664C scanner. 6.2.1. - Page 83 Section 6 Software User’s Manual for the particulars of running a test sequence. These measurements can also be made manually. If they are made manually, allow sufficient time for the measurement to settle (5-10 minutes) and ensure that all measurements made that are related to a given closure are with in 4 hours of each other.
-
Page 84: Remote Control
Section 7 REMOTE CONTROL The model 6622A Automatic DCC Resistance Bridge series operates directly from the front panels or under remote control of the computer supplied with the system. Remote control can be interactive, with the user controlling each step from a terminal (not supplied with the system), or under the control of the computer running the model 6622A as an automated system with the use of the BridgeWorks Data Acquisition Software. -
Page 85: Controller
Guildline Instruments Part Number 996-23006 is a suitable IEEE-488 cable assembly of length 2 meters. Each connector assembly is fitted with a pair of captive locking screws. -
Page 86: Typical System
Section 7 7.2.4. Typical System The 8-Data Input/Output Lines form the data bus over which data between the various devices is transmitted under the supervision of the controller. The message bytes are carried on Data I/O signal lines in a bit parallel byte serial form, asynchronously and generally in a bi-directional manner. -
Page 87: Address And Talk/Listen Selection
Section 7 7.2.5. Address And Talk/Listen Selection The IEEE-488 Address and Talk/Listen status can be set using the front panel controls as directed by the operator menu system. If there is no controller and the model 6622A is hooked up to a printer for hard copy, then Talk Only mode should be selected as the preferred mode of operation. -
Page 88: Table 7-2 : Ieee-488 Connector Pin Designations
Section 7 ┌────────┬────────┬────────────────────────────────────────────┐ │ │ NAME │ DESCRIPTION │ ╞════════╪════════╪════════════════════════════════════════════╡ │ │ DIO1 │ Data Input Output Line 1 │ ├────────┼────────┼────────────────────────────────────────────┤ │ │ DIO2 │ Data Input Output Line 2 │ ├────────┼────────┼────────────────────────────────────────────┤ │ │ DIO3 │ Data Input Output Line 3 │... -
Page 89: Ieee-488 Output Buffering
Section 7 ┌──────────────────────┬───────┐ │ Source Handshake │ │ ├──────────────────────┼───────┤ │ Acceptor Handshake │ │ ├──────────────────────┼───────┤ │ Talker │ │ ├──────────────────────┼───────┤ │ Listener │ │ ├──────────────────────┼───────┤ │ Service Request │ │ ├──────────────────────┼───────┤ │ Remote Local │ │ ├──────────────────────┼───────┤ │ Parallel Poll │... -
Page 90: Command Language
Section 7 7.3. COMMAND LANGUAGE The commands for IEEE-488 mainly correspond to the labels assigned to the front panel menus. The examples will not show the termination character. 7.3.1. General Syntax For Commands The model 6622A uses a sophisticated command parser which can usually determine which command was desired, even if the command is entered incorrectly. -
Page 91: Model 6622A Programming Command Summary
Section 7 Remote: When the Remote Enable (REN) line is asserted and the controller addresses the model 6622A as a listener, the model 6622A enters the remote state. Front panel operation is restricted to the use of the Remote softkey/pushbutton. Pressing the Remote softkey or sending the GTL (Go To Local) interface message returns the model 6622A to the local state. - Page 92 Section 7 ; set when (SRQ_mask|GPIB_STAT_PORT) != 0 bit 5 = ESB (event summary) ; set when bitwise AND of ESE, register is not zero bit 4 = MAV (message available) ; set when GPIB Tx buffer has data available ;...
- Page 93 Section 7 COMMAND COMMENT <unit> :== R|O|V type <letter> R:==Ratio O:==Ohms V:==Volt MEASure:UNIT? query, display the units of measurement MEASure:FILTer <function> setup the digital filter for the display data <function>:== 0|1|2 type <digit> 0 :== Filter OFF 1 :== Decimation 2 :== Simple average MEASure:FILTer? query, display the filter setup...
- Page 94 Section 7 COMMAND COMMENT type <boolean> 0:== OFF 1:== ON MEASure:VOLT? query nanovoltmeter status CONFigure configure instrument operating parameters MEASure:SELF<state> initiate or terminate the internal self test process CONFigure:DATUm <unit>, <value> initialize the datum to be used as the set point in all difference calculations <unit>...
- Page 95 Section 7 COMMAND COMMENT <Tst_Max>:==<nr3> max current(Is)/volts for ref resistor CONFigure:RESIstor? query, display active resistor configuration information CONFigure:RESIstor:DISPlay <unit>, <rate>, <filter>, <size>, <power> set the active display parameters for resistor measurements <unit>:== R|O type <letter> R:==Ratio O:==Ohms <rate>:== 0|1|2 type <digit> 0:==1 updates/cycle 1:==2 updates/cycle 2:==4 updates/cycle...
- Page 96 Section 7 COMMAND COMMENT CONFigure:VOLTmeter? <Range> query, display the voltmeter calibration setup <range>:== 0|1|2|3|4 type <digit> 0:== 20V range 1:== 2V range 2:== 200mV range 3:== 20mV range 4:== 2mV range SYSTem – set the unit operating conditions SYSTem:COMMunicate:GPIB <address>, <mode> setup GPIB communications <address>:== <unsigned>...
- Page 97 Section 7 COMMAND COMMENT type <boolean> 0:== OFF 1:== ON HardWareFilter? query, display the hardware filter status HardWareFilter <status> set the hardware filter status <status>:==0|1 type <boolean> 0:== OFF 1:== ON IXTurns? query, display relay turns setting IXTurns <turns> set relay turns <turns>:==<unsigned>...
- Page 98 Section 7 COMMAND COMMENT 3 :== fast OHmmode? Query, display the ohm mode OHmmode <mode> set the ohm mode <mode>:==0|1|2 type <digit> 0 :== normal 2 :== low ohms RESET reset instrument to power on reset state Range? query, display the selected range Range <range>...
- Page 99 Section 7 COMMAND COMMENT 2:==100 ohm Rs range 3:==1k ohm Rs range 4:==10k ohm Rs range <corr>:==<nr3> correction coefficient (ppm of ratio) <uncert>:==<nr3> uncertainty (ppm of ratio) SOFCAL <beta> set adc beta <beta>: == <unsigned> 200 beta 300 SOFCAL <beta> ? query, display adc beta for the nanovolt detector SOFCAL: FREQuency <Hz>...
-
Page 100: Appendices
D 18.36 , W 20.67 , H 8.75 Table 8-1 : General Specifications NOTE: 1. The 6622A Series bridges are always configured for 240 VAC. It is configured to other customer requirements for line frequency at the time of order. -
Page 101: Table 8-2 : General Specifications (Continued)
Section 8 8.2. GENERAL SPECIFICATIONS (continued) Table 8-2 : General Specifications (continued) OM6622A-L-00 2 November 2016... -
Page 102: Resistance Measurement Specification
Section 8 8.3. RESISTANCE MEASUREMENT SPECIFICATION ► ► ◄ ► ► ◄ ► ◄ ► ◄ ► ◄ ► ◄ ► ◄ ► ◄ ► ► ► ◄ ► ► ◄ ► ◄ ► ◄ ► ◄ ► ◄ ► ◄... - Page 103 Section 8 ► ► ◄ ► ► ◄ ► ◄ ► ◄ ► ◄ ► ◄ ► ◄ ► ◄ ► ► ► ◄ ► ► ◄ ► ◄ ► ◄ ► ◄ ► ◄ ► ◄ ► ◄ ► ►...
-
Page 104: Table 8-3 : Resistance Measurement Specification (All 6622A Models)
Section 8 ► ► ◄ ► ► ◄ ► ◄ ► ◄ ► ◄ ► ◄ ► ◄ ► ◄ ► ► ► ◄ ► ► ◄ ► ◄ ► ◄ ► ◄ ► ◄ ► ◄ ► ◄ ► ►... -
Page 105: Table 8-4 : Resistance Measurement Specification (All 6623A Models)
Section 8 ± Table 8-4 : Resistance Measurement Specification (All 6623A Models) OM6622A-L-00 2 November 2016...
Need help?
Do you have a question about the 6622A Series and is the answer not in the manual?
Questions and answers