
Related Manuals for 3Com HomeConnect 3CRWE50194


Summary of Contents for 3Com HomeConnect 3CRWE50194
-
Page 1: User Guide
User Guide HomeConnect™ Home Wireless Gateway 3CRWE50194 Home Network Management Solution http://www.3com.com/ http://www.3com.com/productreg Part No. 09-2015-000 Published October 2000... - Page 2 3Com Corporation. 3Com Corporation reserves the right to revise this documentation and to make changes in content from time to time without obligation on the part of 3Com Corporation to provide notification of such revision or change.
-
Page 3: Table Of Contents
Welcome To Home Wireless HomeConnect Wireless Gateway Wireless Gateway Advantages Firewall Technology Kit Contents Installation Map Minimum System and Component Requirements Where Do I Go Next? Home Wireless Gateway Front Panel Rear Panel Basic Installation Introduction 11 Home Networking and Wireless Networking Basics Positioning the Home Wireless Gateway 12 Attaching the Non-skid Feet Connecting the Wireless Gateway to the Internet... - Page 4 Home Wireless Gateway 39 Cable or DSL Modem Wireless Network Ethernet Networks 3Com KnowledgeBase Technical Support Online Technical Services 41 World Wide Web Site 3Com FTP Site Support from Your Network Supplier Support from 3Com Returning Products for Repair 44 Glossary...
- Page 5 Contents Index Warranty and Regulatory Compliance...
-
Page 7: List Of Figures
Home Network Without a Wireless Gateway Home Network Using a Wireless Gateway HomeConnect Wireless Gateway Kit Contents Home Wireless Gateway Home Wireless Gateway - Front Panel Home Network Gateway - Rear Panel Cable or DSL Modem Connected to the Gateway Connecting the Gateway to an Ethernet Network Web Browser Location Field Home Network Gateway Main Screen... -
Page 9: Welcome To Home Wireless
Computer networks are among the fastest ways to share information, and wireless computer networks are rapidly becoming the most convenient way of connecting computers. 3Com has brought this exciting technology into the home with the HomeConnect The products that compose the HomeConnect line give you, the home user, the same power, flexibility, and protection that has been available only to large corporations. -
Page 10: Wireless Gateway Advantages
1 Welcome To Home Wireless capability. Both wired and wireless connections can be made to the gateway, expanding the number of computers you can have in your home network. Figure 2 Home Network Using a Wireless Gateway Internet Wireless Gateway Advantages Shared Internet connection without cables. - Page 11 The firewall looks for known data patterns used by hackers, and prevents them from harming your network. Updates are available online to detect and block out new hacker patterns. Your firewall will: Protect the personal, financial, and work-related information on your network.
-
Page 12: Kit Contents
1 Welcome To Home Wireless TCP null scan: This is a more advanced hacker scan technique to detect open ports that can be penetrated. The null scan packet turns off all flags and is transparent to weaker firewalls that only block SYN packets. TCP SYN flooding: The SYN packet is the first packet sent when two systems try to establish a TCP connection. -
Page 13: Installation Map
Installation Map If you want to perform a basic installation of your HomeConnect Wireless Gateway, please refer to the included installation map. The installation map provides a graphical, step-by-step procedure that allows you to set up your home network for multiple computers and other devices. Minimum System and Component Requirements Your HomeConnect Wireless Gateway requires that the computer(s) and components in your home wireless network be configured with at least the... - Page 14 Chapter 6, Troubleshooting, provides troubleshooting tips. Appendix A, Technical Support, provides information on how to contact 3Com for technical support. Glossary, which provides definitions for key terms concerning the installation and operation of the gateway.
-
Page 15: Home Wireless Gateway
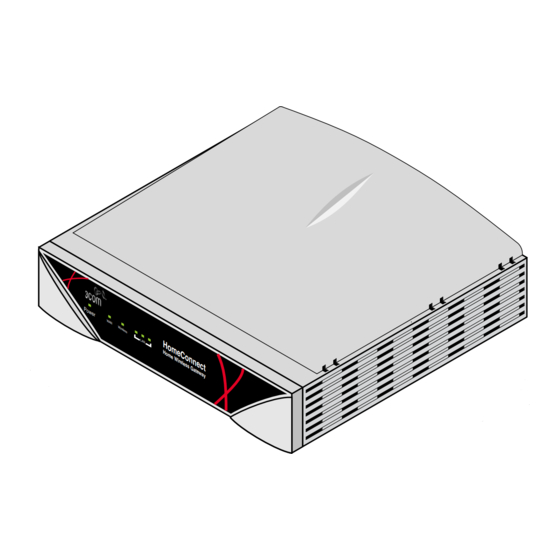
This chapter will familiarize you with your HomeConnect Home Wireless Gateway (Figure 4). Figure 4 Home Wireless Gateway W ir e le Information in this chapter includes: A description of the gateway front panel indicator lights (LEDs). A description of the rear panel connectors. Front Panel The front panel of the gateway contains a series of indicator lights (LEDs) that help describe the state of various networking and connection operations. -
Page 16: Rear Panel
2 Home Wireless Gateway Table 1 Front Panel LEDs Description Power The Power indicator LED informs you when the gateway is on or off. If this light is on, the gateway is on; if it is not on, the gateway is off. During firmware upgrades and resets, this light will blink yellow (see “Update Firmware”... - Page 17 Table 2 Rear Panel Connectors Connector Description Power Adapter The power adapter socket accepts the power adapter connector. To Socket power up the gateway, simply insert the connector into the socket, and then plug the other end into a standard electrical wall socket. For easy identification, the power adapter socket is surrounded by a yellow border.
-
Page 19: Basic Installation
With the addition of the 3Com Home Wireless Gateway to your home network, you can combine both wireless and wired networking. -
Page 20: Positioning The Home Wireless Gateway
3 Basic Installation Positioning the Home Wireless Gateway You should place the home wireless gateway in a location that: is centrally located to the computers that will connect wirelessly to the gateway. In a two-story home, this location might be on top of a centrally-located high shelf or similar furniture to optimize wireless connections to computers in both horizontal and vertical directions, allowing coverage throughout the entire house. -
Page 21: Connecting The Wireless Gateway To Your Network
Figure 7 Cable or DSL Modem Connected to the Gateway R e s Cable/DSL port 1 Insert one end of an Ethernet (RJ-45 Category 5) cable into the Cable/DSL port on the rear panel of the gateway. 2 Insert the other end of the cable into the RJ-45 port on your cable or DSL modem This port would normally be used to make an Ethernet connection to your computer or home network. -
Page 22: Installing Adapters For Wireless And Wired Connections
Wireless network interface cards, such as the 3Com AirConnect Card, can be purchased at your local electronics retailer. Follow the instructions that come with the card to install it into your computer. -
Page 23: Powering Up The Gateway
Figure 8 Connecting the Gateway to an Ethernet Network Powering Up the Gateway 1 Plug the cable of the included power adapter into the power adapter socket located on the back panel of the gateway (refer to “Power Adapter Socket” in Table 2 on page 9). 2 Attach the appropriate plug adapter for your country to the power adapter. -
Page 24: Macintosh
3 Basic Installation 3 From the TCP/IP dialog box, select IP Address. 4 Select “Obtain an IP address automatically.” 5 Click OK and OK again. 6 Set the ESSID (also called the Wireless LAN Service Area) for each computer according to the instructions provided with the wireless PC card you have installed in the computer. -
Page 25: Windows
Basic procedures are given below for setting up Windows-based and Macintosh-based computers for Ethernet communication with the gateway. Each of the computers on your home network needs to have settings in its TCP/IP control panel adjusted to take advantage of the gateway. Windows If you are using a Windows-based computer, use the following procedure to change your TCP/IP settings:... -
Page 27: Running The Setup Program
Macintosh computer (Netscape Navigator or Internet Explorer). Remember that a connection to the Internet is not required to set up or use the 3Com Home Wireless Gateway. 1 Turn on your modem and home wireless gateway. 2 If you have not yet done so, connect the gateway to one of your computers. -
Page 28: Navigating Through The Setup Program
4 Running the Setup Program NOTE: Be sure to bookmark this screen for easy reference if you should want to change gateway settings. Figure 10 Home Network Gateway Main Screen Navigating Through the Setup Program Main Menu Moving through the pages of the setup program is simple. At the top right of all screens is a main menu, as shown in Figure 10. -
Page 29: Gateway Setup Wizard
Gateway Setup Wizard By clicking Go to Gateway Setup Wizard (which appears on several pages of the setup program), you will be guided, step-by-step, through a basic setup procedure. If you have the Internet access information provided by your ISP (IP address, subnet mask address, ISP gateway address, and DNS address), you can configure the gateway by using the Gateway Setup Wizard. -
Page 30: Setup Screen
4 Running the Setup Program NOTE: If your Web browser succeeds in gaining access to the Internet, complete the rest of this procedure, then proceed directly to the “Setting Up Your Gateway for Wireless Communication” procedure in this chapter. If your Web browser fails to gain access to the Internet, complete the rest of this procedure, then proceed to “Setting Up Your Gateway for an Internet Connection”, if an Internet connection is desired. -
Page 31: Setting Up Your Gateway For An Internet Connection
Enter. 5 Enter your password. 3Com recommends entering a password when setting up the gateway for the first time. The gateway is shipped from the factory without a password. When the Change Password screen appears, type a password in both the New Password and Re-enter Password for Verification text boxes. -
Page 32: Cable/Dsl Setup | Standard Screen (Top Portion)
4 Running the Setup Program 2 Enter the networking setup information that you acquired from your ISP. When the Cable/DSL Setup | Standard page appears (Figure 12), you will be asked to enter the information you received from your ISP. If you have the information and your ISP has given you an IP address, select Yes after the first question. -
Page 33: Cable/Dsl Setup | Standard Screen (Bottom Portion)
4 Running the Setup Program Figure 13 Cable/DSL Setup | Standard Screen (Bottom Portion) 3 If applicable, enter PPPoE information. Your ISP may need you to enter host name or PPPoE (Point-to-Point Protocol over Ethernet) settings. Select Advanced below Cable/DSL on the Options menu to display the Cable/DSL Setup | Advanced screen. - Page 34 4 Running the Setup Program Figure 14 Cable/DSL Setup | Advenced Screen NOTE: Since the gateway firmware contains its own PPPoE client proxy, you no longer need to run PPPoE client software from your ISP to access the Internet. You can simply start your browser and surf the Internet immediately after setting up your cable or DSL modem.
-
Page 35: Setting Up Your Gateway For Wireless Communication
Setting Up Your Gateway for Wireless Communication Your home wireless gateway can be set up for wireless communication independently of your Internet connection. 1 Select Wireless from the Options menu on the left side of the page. The “Wireless Setup” screen appears. 2 There are several channels available for use by your Home Wireless Gateway. - Page 36 4 Running the Setup Program NOTE: A hexadecimal digit is a number or letter in the range 0-9 or A-F, for example, 3C 42 BE D7 5A. NOTE: If you decide to use encryption, you will need to have the corresponding keys configured identically on each of your wireless clients, otherwise the clients will not be able to connect to the Home Wireless Gateway.
-
Page 37: Advanced Features And System Tools
This chapter describes advanced features and system tools available to you with your Home Wireless Gateway. NOTE: 3com recommends that you use the default values for all advanced settings, particularly for the NAT, firewall monitoring and logging, and DHCP settings. -
Page 38: Advanced Settings
5 Advanced Features and System Tools Advanced Settings Advanced settings include NAT (Network Address Translation), firewall monitoring and logging, DHCP, and access control (client privileges). 3com recommends that you keep the default values for the NAT, firewall monitoring and logging, and DHCP settings. -
Page 39: Firewall
5 Advanced Features and System Tools Firewall The firewall feature of the home wireless gateway provides a level of Internet security on the cable/DSL port by providing a defense system for your home network against hackers. The firewall, which is always on, looks for known data patterns used by hackers and prevents them from harming your network. -
Page 40: Dhcp Server
5 Advanced Features and System Tools DHCP Server The home wireless gateway contains a Dynamic Host Configuration (DHCP) server that can automatically configure the TCP/IP settings of every computer on your home network. Selecting DHCP Server from the Advanced Settings portion of the Options menu in the Setup screen displays the Advanced Settings | DHCP Server screen (Figure 18). -
Page 41: Controlling Access By Setting Client Privileges
5 Advanced Features and System Tools Controlling Access by Setting Client Privileges Assigning client privileges is a way for you to control what kind of Internet service each of the computers on your home network can use. For example, you may not want your children’s computer to have access to the Internet during a period of time in which you cannot monitor its use. -
Page 42: To Assign Client Privileges
5 Advanced Features and System Tools To assign client privileges: 1 Choose an IP address or host name from the available pool. Click the drop-down list to view the available pool of IP addresses and host names. Click one to choose it, and write the address or host name down on a piece of scrap paper. -
Page 43: Special Considerations For Advanced Settings
5 Advanced Features and System Tools 7 Restart your computer to save the changed settings. To block services on other computers on your network, choose another IP address from the available pool, and repeat the procedure. Special Considerations for Advanced Settings If you connect to the Internet through a cable or DSL router (a modem that has its own NAT and DHCP servers), connect the router to the home wireless gateway through one of the three 10/100 Mbps LAN connectors and... -
Page 44: Reset Home Wireless Gateway
This will take you to the 3Com support web site. 3 Choose your product name and check the latest firmware. If the firmware on the 3Com Web site has the same version number and date as the version you noted in step 1, your gateway is running the latest firmware. - Page 45 5 Advanced Features and System Tools 7 Once you have located the file, click Start to update your firmware. The setup program will notify you when the upgrade has finished. During the update, the Power LED will flicker. CAUTION: Do not turn off the gateway while the firmware is being updated.
-
Page 47: Troubleshooting
Home Wireless Gateway Check power connection. Verify Power LED status. Check connections for modem and networking interface(s). If you are unable to access the gateway's user interface, please check the network settings of the computer you are using to access the gateway. Verify that your TCP/IP settings are correct (refer to “Setting Up Computers for Wireless Networking”... -
Page 48: 3Com Knowledgebase
Mac OS 8.5 (or higher). 3Com KnowledgeBase If none of the above information has resolved the problem with your gateway, please search the online 3Com KnowledgeBase at: http://knowledgebase.3com.com Refer to Appendix A, Technical Support for additional information about how... -
Page 49: A Technical Support
Download drivers, patches, software, and MIBs across the Internet from the 3Com public FTP site. This service is available 24 hours a day, 7 days a week. To connect to the 3Com FTP site, enter the following information into your... -
Page 50: Support From 3Com
3Com. Support from 3Com If you are unable to obtain assistance from the 3Com online technical resources or from your network supplier, 3Com offers technical telephone support services. To find out more about your support options, please call the 3Com technical telephone support phone number at the location nearest you. - Page 51 Country Telephone Number Australia 1800 678 515 Austria 0800 297468 Belgium 0800 71429 Denmark 800 17309 Finland 0800 113153 France 0800 917959 Germany 0800 1821502 Hong Kong 800 933 486 Hungary 06800 12813 Indonesia 001 80061 009 Ireland 1 800 553117 Israel 1 800 9453794 Italy...
-
Page 52: Returning Products For Repair
Technical Support Returning Products for Repair Before you send a product directly to 3Com for repair, you must first obtain a Return Materials Authorization (RMA) number. Products sent to 3Com without RMA numbers will be returned to the sender unopened, at the sender’s expense. -
Page 53: Glossary
DNS Server Address DNS stands for Domain Name System, which allows Internet host computers to have a domain name (such as 3com.com) and one or more IP addresses (such as 192.34.45.8). A DNS server keeps a database of host computers and their respective domain names and IP... - Page 54 Glossary “3com.com” into your Internet browser), the user is sent to the proper IP address. The DNS server address used by the computers on your home network is the location of the DNS server your ISP has assigned. DSL modem DSL stands for digital subscriber line.
-
Page 55: Mac Address
IP address IP stands for Internet Protocol. An IP address, which consists of a series of four numbers separated by periods, identifies a single, unique Internet computer host. Example: 192.34.45.8. Internet Service Provider. An ISP is a business that provides connectivity to the Internet for individuals and other businesses or organizations. -
Page 56: Subnet Mask
Glossary Subnet mask A subnet mask, which may be a part of the TCP/IP information provided by your ISP, is a set of four numbers configured like an IP address. It is used to create IP address numbers used only within a particular network (as opposed to valid IP address numbers recognized by the Internet, which must assigned by InterNIC). - Page 57 Numerics 3Com KnowledgeBase 40 3Com URL 41 Access control 33 Access point (see Gateway) 46 Adapters wired 14 wireless 14 Advanced features client privileges 33 DHCP server 32 firewall 31 NAT (Network Address Translation) 30 special considerations 35 Advanced settings 30...
- Page 58 Index Kit contents 4 LAN 47 LAN 8 power 8 WAN 8 wireless 8 LEDs front panel 7 LEDs, front panel 7 Lights Cable/DSL 39 MAC address 47 Macintosh 16 Mac OS 5 Main menu 20 Main screen 20 MIBs 41 Minimum system and component requirements 5 Modem...
- Page 59 TCP/IP 48 TCP/IP settings 39 Macintosh 16 Windows 15 Technical support 3Com URL 41 network suppliers 41 product repair 44 Telnet 34 Time zone, setting 23 Troubleshooting 6 Cable/DSL modem 39 Ethernet network 39 gateway 39 wireless network 39 Update firmware 36...
-
Page 61: Com Corporation Limited Warranty
Customer an equivalent product or part to replace the defective item, or if neither of the two foregoing options is reasonably available, 3Com may, in its sole discretion, refund to Customer the purchase price paid for the defective product. All products that are replaced will become the property of 3Com. - Page 62 January 1, 2000, and Customer notifies 3Com before the later of April 1, 2000, or ninety (90) days after...
-
Page 63: Regulatory Compliance Information
IMITATION OF IABILITY TO THE FULL EXTENT ALLOWED BY LAW, 3COM ALSO EXCLUDES FOR ITSELF AND ITS SUPPLIERS ANY LIABILITY, WHETHER BASED IN CONTRACT OR TORT (INCLUDING NEGLIGENCE), FOR INCIDENTAL, CONSEQUENTIAL, INDIRECT, SPECIAL, OR PUNITIVE DAMAGES OF ANY KIND, OR FOR LOSS OF REVENUE OR... - Page 64 Warranty and Regulatory Compliance NOTE: This product was tested to comply with FCC-15 Class B requirements in the cases of the following configuraqtions: a) 802.11b Transceiver for Home or Office Use NDUSTRY ANADA LASS MISSION OMPLIANCE TATEMENT This Class B digital apparatus complies with Canadian ICES-003. VIS DE ONFORMIT É...
- Page 65 Warranty and Regulatory Compliance ’ U.S. FCC P 15 D ANUFACTURER ECLARATION OF ONFORMITY 3Com Corporation 5400 Bayfront Plaza Santa Clara, CA 95052 U.S.A. Declares that the device: HomeConnect Home Wireless Gateway Date: 10 October, 2000 Name: Home Wireless Gateway Model Number: 3CRWE50194 Equipment Type: 802.11b WLAN...
-
Page 66: 3Com End User Software License Agreement
NO ASSIGNMENT; NO REVERSE ENGINEERING: You may not transfer or assign the Software and/or this License Agreement to another party without the prior written consent of 3Com. If such consent is given and you transfer or assign the Software and/or this License Agreement, then you must at the same time either transfer any copies of the Software as well as the supporting documentation to the same party or destroy any such materials not transferred. - Page 67 ENTIRE AGREEMENT: This License Agreement sets forth the entire understanding and agreement between you and 3Com, supersedes all prior agreements, whether written or oral, with respect to the Software, and may be amended only in a writing signed by both parties.
Need help?
Do you have a question about the HomeConnect 3CRWE50194 and is the answer not in the manual?
Questions and answers