Table of Contents
Advertisement
Quick Links
INSTALLATION AND MAINTENANCE INSTRUCTIONS
OSI-RIE-xx
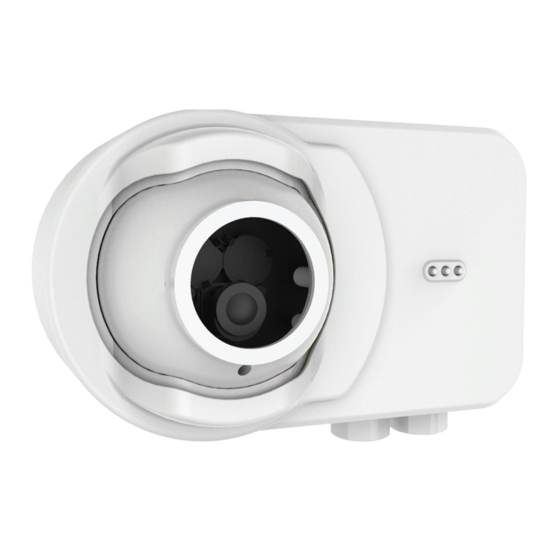
Smoke Detection System
SPECIFICATIONS
Wire Gauge for Terminals:
Operating Voltage Range:
Maximum Standby Current:
Maximum Alarm Current (LED on):
Operating Humidity Range:
Operating Temperature Range:
Adjustment Angle:
Sensitivity Levels:
Fault Condition (Trouble):
Alignment Aid:
Alarm Indicator:
Intellectual Property and Copyright
This document includes registered and unregistered trademarks. All
trademarks displayed are the trademarks of their respective owners.
Your use of this document does not constitute or create a license or any
other right to use the name and/or trademark and/or label.
This document is subject to copyright owned by HPSS (Honeywell
Products & Solutions Sarl). You agree not to copy, communicate to the
public, adapt, distribute, transfer, sell, modify or publish any contents
of this document without the express prior written consent of System
Sensor.
Disclaimer
The contents of this document is provided on an "as is" basis. No
representation or warranty (either express or implied) is made as to the
completeness, accuracy or reliability of the contents of this document.
The manufacturer reserves the right to change designs or specifications
without obligation and without further notice. Except as otherwise
provided, all warranties, express or implied, including without
limitation any implied warranties of merchantability and fitness for a
particular purpose are expressly excluded.
General Warning
This product must only be installed, configured and used strictly in
accordance with the General Terms and Conditions, User Manual and
product documents available from System Sensor. All proper health
and safety precautions must be taken during the installation,
commissioning and maintenance of the product. The system should not
be connected to a power source until all the components have been
installed. Proper safety precautions must be taken during tests and
maintenance of the products when these are still connected to the power
source. Failure to do so or tampering with the electronics inside the
products can result in an electric shock causing injury or death and may
22 AWG (0.64 mm, 0.34 mm²) to 14 AWG (1.6 mm, 2.08 mm²)
Without isolator: 15 to 32 VDC
With isolator: 15-28.5V
13 mA @ 32 VDC, 20 mA @ 15 VDC
22 mA @ 32 VDC, 22 mA @ 15 VDC
0% to 95% Relative Humidity, Non-condensing
–4°F to 131°F (-20°C to +55°C).
UL-Listed for use from 32°F to 100°F (0°C to 37.8°C)
20 degrees vertical, 50 degrees horizontal
Level 1 25%, Level 2 30%, Level 3 40%, Level 4 50%
Long-term drift reference out of 20% range, beam blockage or detector out of alignment, imager saturated
LED directional arrows
Local red LED and remote output
cause equipment damage. System Sensor is not responsible and cannot
be held accountable for any liability that may arise due to improper use
of the equipment and/or failure to take proper precautions.
Critical Product Security
Open Source Software
This product contains open source software provided by third parties. It
does not necessarily use all of the third party software components. Go
to
http://www.security.honeywell.com/opensource/
the third party software used and the associated open source license
agreement(s).
Firmware Updates
This device supports firmware upgrades via its USB port. When
performing a firmware update the new firmware update file should be
downloaded from the System Sensor website and saved to a USB
memory device that has had all of its content removed.
Approved firmware version: S05-0089-006.
Device and System Security
Before installing this product ensure that the two security seals on the
packaging are unbroken and the product has not been tampered with
since leaving the factory. Do not install this product if there are any
indications of tampering. If there are any signs of tampering the product
should be returned to the point of purchase.
It is the responsibility of the system owner to ensure that all system
components, i.e. devices, panels, wiring etc., are adequately protected to
avoid tampering of the system that could result in information
disclosure, spoofing, and integrity violation.
This device utilizes Secure Boot to validate the device's software using
a hardware root of trust and cryptographic signatures. If the software
1
Pittway Tecnologica S.r.l.,
Via Caboto 19/3,
34147 TRIESTE, Italy
for a detailed list of
E56-6965-000
Advertisement
Table of Contents

Subscribe to Our Youtube Channel
Related Manuals for System Sensor OSI-RIE Series


Summary of Contents for System Sensor OSI-RIE Series
- Page 1 System Sensor website and saved to a USB The manufacturer reserves the right to change designs or specifications memory device that has had all of its content removed.
- Page 2 Used for the result of an action. from System Sensor. Contact Us System Sensor is not liable to you or any other person for incidental, indirect, or consequential loss, expense or damages of any kind System Sensor including without limitation, loss of business, loss of profits or loss of Pittway Tecnologica S.r.l.,...
-
Page 3: Specifications
Specifications Electrical Value General Value Voltage: Without isolator: 15 to 32 VDC (24VDC Range: 16.4 to 328 Feet (5 to 100m) nominal) Sensitivity: Automatic sensitivity threshold level setting at start With Isolator: 15-28.5V when using isolators Standby Current Maximum Standby Current (25%, 30%, 40% and 50%) @32V polling device 1 per second 13mA Spacing:... - Page 4 Dimensions Figure 3-1: Detector dimensions E56-6965-000...
- Page 5 140 mm Figure 3-2: Reflector dimensions E56-6965-000...
- Page 6 These conditions will impair the proper operation of the detector and must be Before Installation avoided. Please thoroughly read this guide and applicable sections of OSID Global Approved Accessories Application Note, document no. (25686). This manual is available online at www.systemsensor.com.
-
Page 7: Detector Placement
Detector Placement 1/2 S maximum This section of the manual discusses the placement of projected beam Tx/Rx Reflector 1/4 S detectors. maximum Though this information is based upon industry expertise, it is intended to be used only as a technical guide. Always comply with the requirements of applicable codes and standards such as, NFPA 72, National Fire Alarm Code, Tx/Rx Reflector... -
Page 8: Mounting Locations
form of a polygon rectangle of width (l = l 1 + l 2) and length (L). This R e fe r to lo c a l re method is applicable for risks with flat or sloped roofs. In the latter case, the g u la ti o n in s ta ll a ti s fo r... -
Page 9: Mounting Considerations For Single Ended Beam Detectors
Holes for the fixing Cable knock-outs of the detector Large knock-out for 4” J-Box Cable knock-outs bottom Mounting holes Figure 3-11: Mounting pilot holes Mounting Considerations for Single Figure 3-9: Reflector Mounting Guidelines Ended Beam Detectors 10° maximum There must be a permanent clear line of vision between the detector and the reflector. - Page 10 installed in separate grounded conduit. Do NOT mix fire system wiring in the Rotary switches same conduit as any other electrical wiring. for setting the address When installing the beam smoke detector in applications where the head unit will be mounted to either a wall or the ceiling using the multi- mount kits (6500MMK) and flexible conduit will be used.
-
Page 11: Pre-Alignment Checklist
Pre-alignment Checklist Fine Adjustment Ensure that both the detector and reflector are mounted securely to It is important to be well aligned as the IR power drops rapidly out of the stable surfaces. centre of the beam. Ensure that all wiring is correct. The maximum beam size is dependent on the distance (D) between detector Ensure that terminal blocks are fully seated into their receptacles on the and reflector and can be calculated as 0.07x D. -
Page 12: Testing And Determining The Sensitivity Of The Unit
system will be temporarily out of service. Disable the zone or system undergoing maintenance to prevent unwanted alarms. Before testing the detector, check for the presence of the flashing green OK LED at the receiver, making sure not to disturb or block the beam. If it does not flash and the detector is not in trouble or alarm, power has been lost to the detector (check the wiring). -
Page 13: Operation After A Power Failure
The remote fault LED will blink the set sensitivity of the detector. The Operation After A Power Failure number of blinks, similar to number of blinks from the arrows, will represent the set sensitivity and the sequence is repeated every 3 seconds till the The detector has the reflector location/position, set sensitivity and other detector is reset. -
Page 14: Appendix I. Operation Modes And Troubleshooting Guide Osi-Rie-Xx
Appendix I. Operation Modes and Troubleshooting Guide OSI-RIE-xx: Yellow and Red and Remote Modes Remote Trouble Green Initiating means Comments and Troubleshooting Tips Alarm Output Output Power On Blink Apply Power from discharged state. All wiring correctly done. Address switches set. Alignment Blink Lever in 3:00 position and... -
Page 15: Appendix Ii. Reflector Drilling Template
Increase the separation between the equipment and receiver. Connect the equipment into an outlet on a circuit different from that to which the receiver is connected. Consult the dealer or an experienced radio/TV technician for help. E56-6965-000 ©2020 System Sensor. 10/28/2020... - Page 16 THREE-YEAR LIMITED WARRANTY System Sensor warrants its enclosed smoke detector to be free from defects in materials and workmanship under normal use and service for a period of three years from date of manufacture. System Sensor makes no other express warranty for this smoke detector.
Need help?
Do you have a question about the OSI-RIE Series and is the answer not in the manual?
Questions and answers