
Related Manuals for Tascam 16


Summary of Contents for Tascam 16
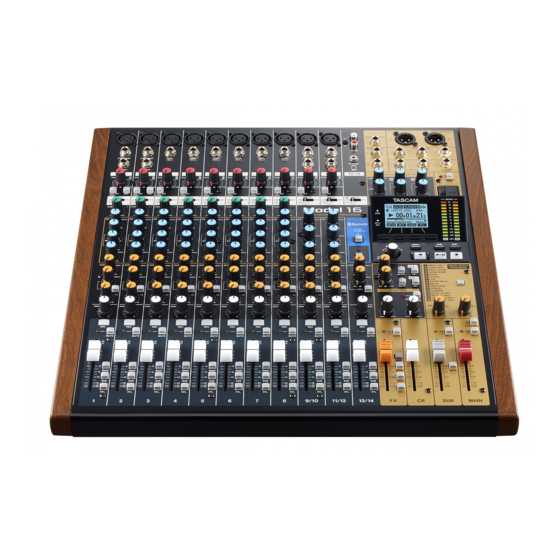
- Page 1 042972000 Model 16 Multitrack Live Recording Console OWNER'S MANUAL ENGLISH MODE D’EMPLOI FRANÇAIS MANUAL DEL USUARIO ESPAÑOL...
- Page 2 Always use this equipment properly. TEAC Corporation will bear no responsibility for rights infringements committed by users of this product. TASCAM Model 16...
-
Page 3: Important Safety Instructions
(volume) from earphones or headphones can cause hearing loss. If you are experiencing problems with this product, contact TEAC for a service referral. Do not use the product until it has been repaired. TASCAM Model 16... -
Page 4: Wireless Equipment Precautions
For more detailed information about the disposal of old electrical/electronic equipment and waste batteries/ accumulators, please contact your city office, waste disposal service or the shop where you purchased the equipment. For China “仅适用于海拔2000m以下地区安全使用” “仅适用于非熱帯气候条件下安全使用” “環境保護使用年限” 产品有毒有害物质或元素的名称及含量 机种: Model 16 有毒有害物质或元素 铅 汞 镉 六价铬 多溴联苯 多溴二苯醚 品名... -
Page 5: Instructions De Sécurité Importantes
APPAREIL À LA PLUIE NI À L'HUMIDITÉ. Pour le Canada CET APPAREIL NUMÉRIQUE DE LA CLASSE B EST CONFORME À LA NORME NMB-003 DU CANADA. Ce produit est conforme aux impératifs des directives européennes et autres règlements de la Commission. TASCAM Model 16... - Page 6 Des précautions doivent être prises en cas d'utilisation d'écouteurs ou d'un casque avec le produit car une pression acoustique excessive (volume trop fort) dans les écouteurs ou dans le casque peut causer une perte auditive. TASCAM Model 16...
- Page 7 Pour des informations plus détaillées sur la mise au rebut des vieux équipements électriques/ électroniques et piles/accumulateurs hors d'usage, veuillez contacter votre mairie, le service d'ordures ménagères ou le magasin dans lequel vous avez acquis l'équipement. TASCAM Model 16...
-
Page 8: Précautions Concernant Les Appareils Sans Fil
Modèle pour l'EEE (Espace économique européen) Cet équipement est conforme à la norme EN.62311 : Évaluation des équipements électroniques et électriques en relation avec les restrictions d'exposition humaine aux champs électromagnétiques ; la norme harmonisée de la Directive 2014/53/UE. TASCAM Model 16... - Page 9 Este aparato cumple con todos los requisitos establecidos por las Directivas Europeas, así Para EE.UU. como por otras Regulaciones de la Comisión Declaración de conformidad Europea. Modelo: Model 16 Fabricante: TASCAM Responsable: TEAC AMERICA, INC. Dirección: 10410 Pioneer Blvd. Suite #1, Santa Fe Springs, California 90670, U.S.A.
- Page 10 STANDBY/ON no esté en la posición ON. El enchufe de alimentación sirve como dispositivo de desconexión, por lo que colóquelo de forma que siempre pueda acceder a él fácilmente. Una presión sonora excesiva en los auriculares puede producirle daños auditivos. TASCAM Model 16...
- Page 11 Ayuntamiento, empresa de limpieza o recogida de basuras o con el comercio en el que adquirió este aparato. TASCAM Model 16...
- Page 12 Modelo para la Unión Europea Este equipo cumple con la norma EN.62311; Evaluación de equipos eléctricos y electrónicos en relación a las restricciones en la exposición de las personas a los campos electromagnéticos; standard armonizado por la DIRECTIVA 2014/53/EU. TASCAM Model 16...
-
Page 13: Table Of Contents
Changing the playback position..........40 Product registration ................19 Using the direct locate function to locate ....... 40 About TASCAM customer support service ........19 Repeat playback function ..............40 Punch in/out function ................. 40 2 - Names and Functions of Parts ......... 20 Using the footswitch to punch in/out ........ - Page 14 Computer system requirements ............. 61 Windows ....................61 Mac ......................61 Supported audio drivers ..............61 Audio performance ................61 Bluetooth ....................62 Other ......................62 Dimensional drawings ................ 62 Block diagram ..................63 Level diagram ..................64 TASCAM Model 16...
-
Page 15: Introduction
Information shown on a computer display is written like this: p 4-band semi-parametric equalizer for output OK . p 16 TASCAM preset effects can be used for a variety of p As necessary, additional information is provided under TIP, applications NOTE and CAUTION headings. -
Page 16: Precautions For Placement And Use
Places with significant vibrations this product from the TEAC Global Site (http://teac-global.com) Next to a window or in another location exposed to direct to find the list or contact the TASCAM customer support service. sunlight Near heaters or other extremely hot places... -
Page 17: Codecs
You can download updates for this unit from the TEAC Global Site: http://teac-global.com/ In the TASCAM Downloads section, select the desired language to open the Downloads website page for that language. Product registration Customers in the USA, please visit the following TASCAM website to register your TASCAM product online. -
Page 18: Names And Functions Of Parts
Built-in effects operation section Operate the built-in effects and adjust the output levels for each output in this section. f Analog output adjustment section Adjust the output levels from the FX, MAIN OUTPUT, SUB OUTPUT and CONTROL ROOM output connectors. TASCAM Model 16... -
Page 19: Analog Input Jack Section
Use the GAIN knobs to adjust the input levels of each channel. its SIG indicator will light green when a signal is input (-40dB or higher). If a SIG indicator stays lit red continuously, lower the GAIN knob. TASCAM Model 16... -
Page 20: Input Channel Mixing Section
When a PAN knob is turned all the way to the right (R), that channel signal is sent only to the right MAIN MIX L/R bus. It is not sent to the left bus. TASCAM Model 16... -
Page 21: Analog Output Jack Section
For convenience, the four buttons under the display are called the function buttons in this manual. From left to right, Shows a variety of information. they are called the F1, F2, F3 and F4 buttons. USB indicator This lights when the USB connection is working. TASCAM Model 16... -
Page 22: Built-In Effects Operation Section
Use these to adjust the levels of signals sent from the built-in SD MAIN MIX RETURN switch effects to the MONITOR OUT 1/2 buses. When this switch is on (pushed in), playback of stereo master files recorded on the SD card is output from the MAIN OUTPUT jacks. TASCAM Model 16... -
Page 23: Analog Output Adjustment Section
Do not do this when the unit is operating (including Connect the included power cord here. recording, playing back or writing data to an SD card). Doing so could cause proper recording to fail and recorded data to be lost. TASCAM Model 16... -
Page 24: Home Screen
The current playback position is shown by a bar. 9 Automatic punch in/out point setting status When the automatic punch in/out function is on, these show the status of automatic punch in/out point setting. Punch in point Punch out point TASCAM Model 16... -
Page 25: Meters Screen
This shows the elapsed time from the beginning of the song. 3 Track level meters These show the signal levels of each channel. NOTE Channels 15/16 show the MAIN MIX L/R bus levels. 4 Level meter guide NOTE This provides guidance for level adjustment. The guide is Output from the computer, including from Windows Media shown at the -12dB level. -
Page 26: Menu Structure
This is an overview of basic operations. Function button assignments differ according to the screen shown on the display. Selecting items (moving vertically on a page): Turn the MULTI JOG dial. Opening a submenu from a page: Press the MULTI JOG dial. TASCAM Model 16... -
Page 27: Preparation
3 - Preparation Connecting other equipment This is an example of Model 16 connections. Precautions before making connections p Carefully read the operation manuals of the devices to be connected and then connect them correctly. p Before making connections, turn this unit and all equipment to be connected off (standby). -
Page 28: Connecting Microphones
LINE/INST (BAL) input jack will be unbalanced. Select “Model 16” (this unit) on the other Bluetooth device. When pairing succeeds, the PAIRING indicator will stop Connecting monitor speakers blinking and remain lit, and connection with the other device will be complete. -
Page 29: Inserting And Removing Sd Cards
Screen appears before the your hearing. Startup Screen to allow the date and time of the built-in clock to be set. (See “Setting the built-in clock date and time” on page 32) TASCAM Model 16... -
Page 30: Setting The Built-In Clock Date And Time
Press the MULTI JOG dial to create a system file. When system file creation is complete, the Home Screen will reopen. TASCAM Model 16... -
Page 31: Managing Songs
When the selected song is the current song, will appear and information about it will be saved. INFORMATION View information about the selected song. CLR ALL MARKS Clear all marks in the song. DELETE Deletes the selected song. TASCAM Model 16... -
Page 32: Loading Songs
The current song cannot be deleted. To delete the current song, load another song first. The song name, sampling frequency, bit rate, size, date and time last written will be shown. After checking, press the F1 button to return to the Screen. TASCAM Model 16... -
Page 33: Protecting/Unprotecting Songs
Leaving a single space open: Turn the MULTI JOG dial to select a blank space at the left end of any row, and press the MULTI JOG dial. Canceling edits: Press the F1 button. Confirming the changes: Press the F4 button. TASCAM Model 16... -
Page 34: Basic Recording
With this unit, monitoring is possible using an external monitoring system (powered monitor speakers or an amp and speakers) or using stereo headphones. Use the CR fader and PHONES knob to adjust the level of the monitoring system. TASCAM Model 16... -
Page 35: Sig Indicators And Level Meters
They do not control signals to be recorded. i If you are not satisfied with a recording, repeat the above procedure from the beginning. TASCAM Model 16... -
Page 36: Undoing Operations
NOTE To cancel redoing, press the F1 button. i Press the F4 button to set the value for the currently selected to its default. TASCAM Model 16... - Page 37 5 - Basic recording Press the F3 button to turn the built-in effect on/off. item shows the state of the built-in effect. Press the F1 button to return to the Home Screen. TASCAM Model 16...
-
Page 38: Recorder Functions
When the Home Screen is open and the recorder is stopped, press the MULTI JOG dial to enable direct locate By connecting the recommended TASCAM RC-1F footswitch mode. A cursor will appear at the location to be changed in (sold separately) to the FOOTSWITCH jack on the top of the the recorder counter. -
Page 39: Setting Up The Footswitch
An * will appear next to the selected item. NOTE Press the 8 button to stop playback. When using a TASCAM RC-1F, set the POLARITY switch to N. Press the F4 button to turn the automatic punch in/ OPEN. -
Page 40: Setting A Pre Roll Point
When the punch out point is reached, both track playback and input source signals will be monitored. The 0 button will become unlit. o Playback will automatically stop two seconds after the punch out point. The 7/9 button will blink. Rehearsal can be repeated. TASCAM Model 16... -
Page 41: Track Editing
USB cable. (See “Disconnecting” on page 49) When importing completes, the Screen reopens. NOTE i Press the F1 button to cancel importing. i The part of the track imported before canceling will remain; it will not be deleted. TASCAM Model 16... -
Page 42: Stereo Mix Export Function
Conversion is not possible if no MAIN MIX L/R bus file has been recorded. The message shown below will appear. i During conversion, press the F1 button to cancel conversion. A file with the part converted before canceling will remain. TASCAM Model 16... -
Page 43: Mark Functions
Repeat steps 1 - 3 to clear multiple marks. i To clear all marks in the current song, select the item from the menu list shown on the Screen. (See “Clearing all marks” on page 34) TASCAM Model 16... -
Page 44: Settings And Information
SONG Screen Screen shows the use status of the MTR folder. For details about how to set characters, see “Editing text” on page 35. TOTAL SONG This shows the total number of songs in the MTR folder. TASCAM Model 16... -
Page 45: Setting Midi Time Code Operation
The date and time setting is not initialized. On a regular schedule (about once per month) Before starting important recordings * Writing speed might not be restored depending on the SD card condition (including malfunction and age). TASCAM Model 16... -
Page 46: Playing Wav Files On Sd Cards (Sd Play Mode)
(See “Loading WAV files from a computer” on page 50) The following audio file formats can be played back in SD PLAY mode. WAV: 44.1/48kHz, 16/24-bit BWF: 44.1/48kHz, 16/24-bit o Press the F1 button to return to the file selection NOTE screen. -
Page 47: Using A Computer To Transfer Data
You can also export track and stereo master files from songs to the computer and import audio files from the computer. Backed up data can be restored to other Model 16 units. Since this allows you to freely move files between Model 16... -
Page 48: Loading Wav Files From A Computer
You can manage the content of MTR or MUSIC folders from the computer. i You can create subfolders in the MUSIC folder up to the second level for use with this unit. The Model 16 cannot recognize sub-folders and files located at the third layer level or below. -
Page 49: Usb Audio Interface Functions
When a Security Warning or User Account Control screen appears, click the Yes button. Read the contents of the User License Agreement, and select “I accept the agreement” if you agree to the terms. Then, click the Next > button. TASCAM Model 16... -
Page 50: Installing The Mac Dedicated Software
“‘ModelMixer_Installer.pkg’ can’t be opened because it was not downloadedfrom the Mac App Store. ” In this case, click the “OK” button to close the message. Then, control-click (or right-click) the file and click “Open” in the menu. TASCAM Model 16... - Page 51 Mac App Store” “‘TASCAM_MODEL MIXER_Installer_x.xx.dmg’ is an application downloaded from the Internet. Are you sure you want to open it?” might appear as a security warning message. In this case, click the “Open” button. TASCAM Model 16...
-
Page 52: Uninstalling The Dedicated Software
This is the firmware version used by the Firmware Ver Windows connected unit. This is the name of the connected unit. p From the “Start” menu select “TASCAM Model Mixer” under Device (No Device is shown when no device is “TASCAM”. connected.) This shows the sampling frequency of the current song. -
Page 53: Notification Function
ASIO sources stops, sound from Windows Media Player and On the Playback page, right-click Model 16, and click Set as other WDM sources will become audible. Default Device in the pop-up menu that appears. When you do this, the green check mark appears next to the selected device. -
Page 54: Messages
- Messages The following is a list of messages that appear in pop-up windows. Refer to this list if one of these pop-up messages appears on the Model 16 and you want to check the meaning or determine a proper response. - Page 55 Meaning and response If any of these errors occurs, turn the unit off and restart it. If these error messages continue to appear frequently, please contact the store where you purchased this unit or TASCAM customer support. is a number.) TASCAM...
-
Page 56: Troubleshooting
30) Playback is not possible. p If you are trying to play a WAV file, confirm that it uses a sampling frequency (44.1/48 kHz) and a bit depth (16/24-bit) that are supported by this unit. There is noise. p Confirm that the connection cables do not have contact issues. - Page 57 In addition, please use “computer’s power option“ as ”high performance setting“. p Use the shortest USB cable possible. p Use a USB port built into the computer because the computer USB port affects the USB connection. TASCAM Model 16...
-
Page 58: Specifications
SDXC card: exFAT −10dBV input jacks (13/14) Recording file formats Connectors: RCA pin jacks WAV (BWF): 44.1/48kHz, 16/24-bit (Maximum file size: 2 GB) Maximum input level: +8 dBV Playback file formats Nominal input level: -10 dBV Input impedance: 10 kΩ... -
Page 59: Control Input/Output
Mojave (10.14 or later) macOS High Sierra (10.13 or later) macOS Sierra (10.12 or later) Computer hardware requirements Mac with a USB 2.0 (or higher) port CPU/processor speed 2 GHz or faster dual core processor Memory 2 GB or more TASCAM Model 16... -
Page 60: Bluetooth
5 - 35°C (41 - 95°C) Dimensional drawings 430mm 92.8mm 31.5mm p Illustrations in this manual might differ in part from the actual product. p Specifications and external appearance might be changed without notification to improve the product. TASCAM Model 16... -
Page 61: Block Diagram
- Specifications Block diagram TASCAM Model 16... -
Page 62: Level Diagram
- Specifications Level diagram TASCAM Model 16... - Page 63 Utilisation du site mondial TEAC ............. 69 Changement de la position de lecture ........90 À propos du service d'assistance clientèle TASCAM ....69 Utilisation de la fonction d’accès direct ........90 2 – Nomenclature et fonctions des parties ......70 Fonction de lecture en boucle (répétition) .........
- Page 64 Valeurs d'entrée/sortie audio analogiques ......110 Entrée/sortie de commande ............111 Configurations informatiques requises ........111 Windows ....................111 Mac ......................111 Pilotes audio pris en charge ............111 Performances audio ................111 Bluetooth ....................112 Autres ......................112 Dessins avec cotes ................112 Schéma synoptique ................113 Schéma des niveaux ................114 TASCAM Model 16...
-
Page 65: Introduction
0 Fonctions d'interface audio USB intégrées 0 Quand nous nous référons à des touches, connecteurs o 16 pistes (14 canaux d'entrée et le bus de mixage principal et autres parties physiques de cette unité ou d'un autre G/D) peuvent être envoyées à l'ordinateur équipement, nous utilisons des caractères gras comme ceci :... -
Page 66: Précautions Concernant L'emplacement Et L'emploi
TEAC Lieux sujets à des vibrations importantes (http://teac-global.com) pour obtenir cette liste, sinon contactez le service clientèle TASCAM. Près d'une fenêtre ou à un autre endroit exposé directement au soleil Près de chauffages ou dans des lieux extrêmement chauds Précautions d'emploi... -
Page 67: Codecs
Pour bénéficier d’une assistance après l'achat, recherchez dans i Vous ne pouvez donc pas appuyer sur une touche pour la liste des distributeurs TASCAM fournie sur le site mondial sélectionner le codec. TEAC (http:// teac-global.com/) la société ou le représentant i En raison des caractéristiques de la technologie sans fil... -
Page 68: Nomenclature Et Fonctions Des Parties
Paramétrez les effets intégrés et réglez leurs niveaux de sortie pour chaque sortie dans cette section. f Section de réglage des sorties analogiques Réglez les niveaux des prises de sortie FX, MAIN OUTPUT, SUB OUTPUT et CONTROL ROOM. TASCAM Model 16... -
Page 69: Section Des Prises D'entrée Analogiques
Les boutons GAIN servent à régler le niveau d'entrée de chaque canal. Le voyant SIG s'allume en vert lorsqu'un signal est reçu (−40 dB ou plus). Si un voyant SIG reste allumé en permanence en rouge, réduisez le volume avec le bouton GAIN. TASCAM Model 16... -
Page 70: Section De Mixage Des Canaux D'entrée
MAIN MIX L/R. Il n'est pas envoyé au côté droit. i Quand un bouton PAN est tourné à fond à droite (R), le signal de ce canal n'est envoyé qu'au côté droit du bus MAIN MIX L/R. Il n'est pas envoyé au côté gauche. TASCAM Model 16... -
Page 71: Section Des Prises De Sortie Analogiques
Les fonctions affichées en bas de l'écran sont assignées à ces touches. Écran NOTE Affiche diverses informations. Pour plus de commodité dans ce mode d’emploi, les quatre touches situées sous l'écran sont appelées touches de Voyant USB TASCAM Model 16... -
Page 72: Section De Contrôle Des Effets Intégrés
MONITOR OUT 1/2. Commutateur SD MAIN MIX RETURN Quand ce commutateur est enclenché, les signaux de lecture des fichiers master stéréo enregistrés sur la carte SD sont produits par les prises MAIN OUTPUT. TASCAM Model 16... -
Page 73: Section De Réglage Des Sorties Analogiques
Branchez ici le cordon d'alimentation fourni. Ne faites pas cela pendant que l'unité fonctionne (ce qui inclut enregistrement, lecture ou écriture de données sur une carte SD). Cela pourrait causer l'échec de l'enregistrement et la perte de données enregistrées. TASCAM Model 16... -
Page 74: Écran D'accueil
95). Statut du transport Cette icône affiche le statut de fonctionnement de l'enregistreur. Indicateur Signification Arrêt au début du fichier En pause Enregistrement Lecture Position de lecture La position de lecture actuelle est indiquée par une barre. TASCAM Model 16... -
Page 75: Écran Des Indicateurs De Niveau
Indicateurs de niveau des pistes Affichent le niveau de signal pour chaque canal. NOTE Les canaux 15/16 affichent les niveaux du bus MAIN MIX L/R. Repère d’indicateur de niveau NOTE Fournit un repère pour le réglage du niveau. Ce repère Les signaux sortant de l’ordinateur, y compris venant de Win-... -
Page 76: Structure Du Menu
Répétez les étapes 5 à 6 si nécessaire pour régler d'autres L'assignation des touches de fonction varie selon l'écran affiché. paramètres. Sélectionner des paramètres Pressez la touche F1 pour revenir à l'écran MENU. (déplacement vertical dans une page) : Tournez la molette MULTI JOG. TASCAM Model 16... -
Page 77: Préparation
3 – Préparation Branchement d'autres équipements Voici un exemple de branchements du Model 16. Précautions avant de faire les branchements 0 Lisez attentivement les modes d'emploi des appareils à brancher et branchez-les correctement. 0 Avant de faire les branchements, éteignez cette unité et tous les équipements à connecter (mode veille ou standby). -
Page 78: Branchement De Microphones
Prise d’entrée STEREO (13/14) mode d'appairage s’il a été abandonné. * Quand un sélecteur INST est enclenché, l'entrée par la prise Sélectionnez le « Model 16 » (cette unité) sur l'autre appareil LINE/INST (BAL) concernée est asymétrique. Bluetooth. Une fois l'appairage réussit, le voyant PAIRING cesse de Branchement de moniteurs clignoter et reste fixement allumé, ce qui indique la réussite... -
Page 79: Insertion Et Retrait Des Cartes Sd
Des bruits forts pourraient avant l'écran de démarrage pour permettre le réglage de endommager les haut-parleurs ou votre audition. l'horloge intégrée (See «Réglage de la date et de l’heure de l’horloge intégrée» on page 82). TASCAM Model 16... -
Page 80: Réglage De La Date Et De L'heure De L'horloge Intégrée
Pressez la molette MULTI JOG pour créer un fichier système. Une fois la création du fichier système terminée, l'écran d'accueil s'ouvre à nouveau. TASCAM Model 16... -
Page 81: Gestion Des Morceaux
Un maximum de 100 morceaux peuvent être créés sur une INFORMATION même carte SD. i Les morceaux sont créés dans le dossier MTR de la carte SD. Affiche des informations sur le morceau sélectionné. CLR ALL MARKS Efface tous les marqueurs du morceau. TASCAM Model 16... -
Page 82: Chargement De Morceaux
Le morceau actuel ne peut pas être supprimé. Pour Le nom, la fréquence d'échantillonnage, la résolution en supprimer le morceau actuellement chargé, chargez d'abord bits, la taille et la date et heure de dernière écriture du un autre morceau. morceau s’afficheront. TASCAM Model 16... -
Page 83: Protection/Déprotection Des Morceaux
Saisir un espace simple : Tournez la molette MULTI JOG pour sélectionner un espace vide à la fin de chaque rangée et pressez la molette MULTI JOG. Annuler les éditions : Pressez la touche F1 Valider les changements : Pressez la touche F4 TASCAM Model 16... -
Page 84: Enregistrement De Base
Avec cette unité, l’écoute de contrôle est possible au moyen d’un système d’écoute externe (moniteurs amplifiés ou système ampli et enceintes) ou d’écouteurs stéréo. Avec le fader CR et le bouton PHONES, réglez le volume du système d'écoute. TASCAM Model 16... -
Page 85: Voyants Sig Et Indicateurs De Niveau
Voyants SIG et indicateurs de niveau Enregistrement Les voyants SIG et les indicateurs de niveau des canaux Cette unité peut enregistrer simultanément jusqu'à 16 pistes, 1-8, 9/10-11/12 affichés en écran des indicateurs de niveau composées de 14 entrées de canal et du bus MAIN L/R. -
Page 86: Annulation D'opérations
(paramètre) ou les unités. Pressez la touche F4 pour restaurer l’opération précédemment annulée et revenir à l’état d’avant l’annulation. NOTE Pour au contraire interrompre le rétablissement de l’opération, pressez la touche F1 TASCAM Model 16... - Page 87 à sa valeur par défaut. Pressez la touche F3 pour activer (ON)/désactiver (OFF) l’effet intégré. La valeur de (état actuel) affiche l’état d’ac- tivation de l’effet intégré. Pressez la touche F1 pour revenir à l'écran d'accueil. TASCAM Model 16...
-
Page 88: Fonctions De L'enregistreur
à l'emplacement pouvant être changé réenregistrement partiel (punch in/out) dans le compteur temporel de l'enregistreur. En branchant la pédale commutateur RC-1F TASCAM recommandée (vendue séparément) à la prise FOOTSWITCH sur le dessus de l'unité, vous pouvez vous en servir pour le punch in/out. -
Page 89: Réglage De La Pédale Commutateur
NOTE punch in et le point de punch out. Un * apparaîtra en face du Si vous utilisez une RC-1F TASCAM, réglez le commutateur point sélectionné. POLARITY (polarité) sur N. OPEN. Pressez la touche 8 pour arrêter la lecture. -
Page 90: Réglage D'un Point De Pré-Défilement
Quand le point de punch out est atteint, vous entendez à nouveau les signaux lus sur les pistes et ceux venant des sources d'entrée. La touche 0 s'éteint. o La lecture s'arrête automatiquement deux secondes après le point de punch out. La touche 7/9 clignote. TASCAM Model 16... -
Page 91: Édition De Piste
à l’arrêt (voir « Procédures d’utilisation du NOTE menu » en page 78). i Pressez la touche F1 pour interrompre l’importation. i La partie de piste importée avant l’interruption sera conser- vée ; elle ne sera pas effacée. TASCAM Model 16... -
Page 92: Exportation De Mixage Stéréo
Cette opération ne peut pas être annulée. i La conversion n’est pas possible si aucun fichier de bus MAIN MIX L/R n’a été enregistré. Le message ci-dessous apparaîtra. i Pendant la conversion, pressez la touche F1 pour inter- TASCAM Model 16... -
Page 93: Fonctions Des Marqueurs
Répétez les étapes pour effacer plusieurs marqueurs. i Pour effacer tous les marqueurs du morceau actuel, sélectionnez l’option (supprimer tous les marqueurs) dans le menu affiché en écran (morceau) (See «Suppression de tous les marqueurs» on page 84). TASCAM Model 16... -
Page 94: Réglages Et Informations
L'écran affiche l'état du dossier MTR (enregistrement multipiste). Pour des détails sur la façon de saisir le texte, voir « Édition de texte » en page 85. TOTAL SONG Affiche le nombre total de morceaux dans le dossier MTR. TASCAM Model 16... -
Page 95: Réglage Du Fonctionnement Du Time Code Midi
Pressez au contraire la touche F1 pour interrompre * L'état de la carte SD (y compris les mauvais fonctionnements l’exécution. et son âge) peuvent empêcher le rétablissement de la vitesse d'écriture initiale. i Le réglage de date et d’heure n'est pas initialisé. TASCAM Model 16... -
Page 96: Lecture De Fichiers Wav Sur Cartes Sd (Mode Sd Play)
Les formats de fichiers audio suivants peuvent être lus en mode SD PLAY (lecture sur carte SD). WAV : 44,1/48 kHz, 16/24 bit o Pressez la touche F1 BWF : 44,1/48 kHz, 16/24 bit pour revenir à l'écran de sélection de fichier. NOTE o Pressez la touche F2 pour activer la fonction de Le signal lu est envoyé... -
Page 97: 10 - Transfert De Données Avec Un Ordinateur
L'unité passe en mode de stockage USB et se connecte à d'autres unités Model 16. Comme cela vous permet de l'ordinateur. librement transférer des fichiers d’un Model 16 à un autre, vous pouvez facilement effectuer un enregistrement ou un mixage complémentaire à d’autres endroits. -
Page 98: Déconnexion
USB de cette unité (See «Branchement à un ordinateur» on page 99). Cliquez sur le disque Model 16 dans l’ordinateur pour afficher les dossiers MTR, MUSIC et UTILITY. Faites glisser sur le dossier MUSIC les fichiers de l'ordinateur que vous désirez transférer dans l'unité.
Need help?
Do you have a question about the 16 and is the answer not in the manual?
Questions and answers