
Related Manuals for Hardi MASTER PRO VHH


Summary of Contents for Hardi MASTER PRO VHH
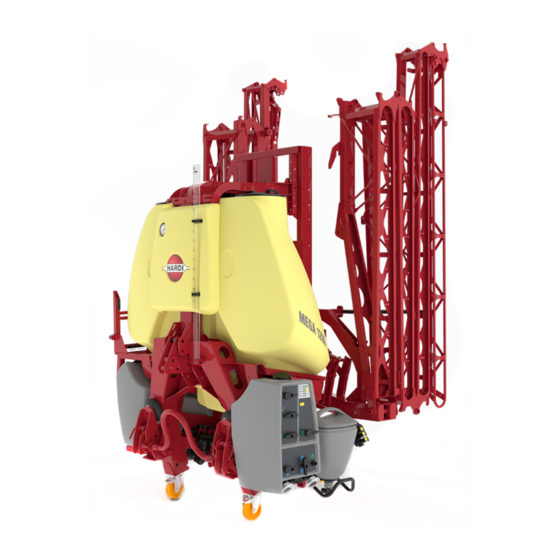
- Page 1 MASTER PRO VHH/VHY/VHZ Original Instruction book 679025-103 - Version 1.03 GB - 03.2012 www.hardi-international.com...
- Page 2 Illustrations, technical information and data in this book are to the best of our belief correct at the time of printing. As it is HARDI INTERNATIONAL A/S policy permanently to improve our products, we reserve the right to make changes in design, features, accessories, specifications and maintenance instructions at any time and without notice.
-
Page 3: Table Of Contents
Table of Contents Table of Contents 1 - EC Declaration EC Declaration of Conformity ........................7 2 - Safety notes Operator safety .............................9 Symbols ............................................9 Precautions ..........................................9 Label explanation ....................................... 10 3 - Description General info ............................13 View ............................................. 13 Roadworthiness ........................................ - Page 4 Filling of clean water tank (optional) ..............................39 External Filling Device (optional) ................................40 Safety precautions - crop protection chemicals ..........................41 Filling liquid chemicals by HARDI TurboFiller (optional) ......................42 Filling powder chemicals by HARDI TurboFiller (optional) ....................... 43 TurboFiller rinsing ....................................... 44 Operating the control unit while spraying (EVC operating unit only) ................
- Page 5 Table of Contents Drain valve seal renewal ....................................58 Adjustment of 3-way valve ................................... 58 Nozzle tubes and fittings ....................................59 Shield renewal on transmission shaft ..............................59 Replacement of transmission shaft cross journals ......................... 59 Change of bulbs ........................................59 Safety valve activation .....................................
- Page 6 Table of Contents...
-
Page 7: Ec Declaration
Helgeshøj Allé 38 DK 2630 Taastrup DENMARK hereby declare that the following product(s): MASTER PRO VHH/VHY/VHZ - Fulfils all the relevant provisions of Machinery Directive 2006/42/EC, and - All the relevant provisions of Council Directive 2004/108/EC (EMC) Taastrup, 08.04. 2011... - Page 8 1 - EC Declaration...
-
Page 9: Safety Notes
Read and understand this instruction book before using the equipment. It is equally important that other operators of this equipment read and understand this book. If any portion of this instruction book remains unclear after reading it, contact your HARDI dealer for further explanation before using the equipment. -
Page 10: Label Explanation
2 - Safety notes € Rinse and wash equipment after use and before servicing. € Never service or repair the equipment while it is operating. Always replace all safety devices or shields immediately after servicing. € Disconnect electrical power before servicing and depressurize equipment after use and before servicing. €... - Page 11 2 - Safety notes Not for drinking! Lifting point! This water must not be used for drinking water. Service! Risk of squeeze! Shut off engine and remove ignition key Never reach into the crushing danger area as before performing maintenance or repair. long as parts may move.
- Page 12 2 - Safety notes...
-
Page 13: Description
Sprayer use The HARDI sprayer is for the application of crop protection chemicals and liquid fertilisers. The equipment must only be used for this purpose. It is not allowed to use the sprayer for any other purposes. If no local law demands that the operator must... -
Page 14: Identification Plates
ATTENTION! The sprayer’s serial no. is punched into the frame in the outer of the right hand frame rail. Frame, boom centre frame and other main steel components have identification plates indicating type and part number. (not illustrated). HARDI-INTERNATIONAL A/S REFERENCE NO. is the main reference number of the complete machine. REFERENCE NO.: CE identification plate fitted on the frame indicates producer name, model and a serial number of the sprayer. -
Page 15: Liquid System
3 - Description Liquid system Pump Diaphragm pump with 3 diaphragms, model 1303 or diaphragm pump with 6 diaphragms, model 363 or 463. Standard = 540 r.p.m. (6 splines shaft). Optional = 1000 r.p.m. (21 splines shaft). The design of the diaphragm pump is simple, with easily accessible diaphragms and valves which ensures liquid does not contact the vital parts of the pump. -
Page 16: Control Unit
EVC - Electrical Valve Control. The ON/OFF is linked to the section valves, which results in a very quick response to ON/OFF. The operating unit is of modular design and is electrically controlled via a remote control box. The unit has a built-in HARDI MATIC. -
Page 17: Filters
3 - Description Filters A suction filter is fitted at the top of the tank and is indicated with red hose tail. In-line pressure filters can be fitted at each boom section as an option (J). Nozzle filters are fitted at each nozzle. All filters should always be in use and their function checked regularly. -
Page 18: Turbofiller (Optional)
3 - Description TurboFiller (optional) TurboFiller suction valve The valve is used simultaneously with the TurboFiller. The valve has 2 settings: Continuously open or spring loaded normally closed. Open the valve when chemicals are to be filled into the TurboFiller. Filling chemicals without TurboDeflection TurboDeflector valve This TurboDeflector valve activates the Vortex flushing of the TurboFiller. -
Page 19: Diagram - Bk Liquid System
3 - Description Diagram - BK Liquid system 1. Agitation valve 8. Operating unit ON/OFF 2. Pressure valve 9. Pressure regulation 3. Suction valve 10. Flowmeter (optional equipment) 4. Pump 11. Pressure filter 5. Main tank 12. Pressure gauge 6. Suction filter 13. -
Page 20: Diagram - Evc Liquid System
3 - Description Diagram - EVC Liquid system 1. Agitation valve 9. Flowmeter (optional) 2. Pressure valve 10. Pressure gauge 3. Suction valve 11. Distribution valves 4. Pump 12. Return pressure drop 5. Main tank 13. Return to tank from pressure equalization 6. -
Page 21: Diagram - Evc Liquid System With Optional Extras
3 - Description Diagram - EVC Liquid system with optional extras 1. Agitation valve 13. Return to tank from pressure equalization 2. Pressure valve 14. Distribution boom 3. Suction valve 15. Self-Cleaning filter 4. Pump 16. Return valve 5. Main tank 17. -
Page 22: Boom
3 - Description Boom Boom and terminology The sprayer is fitted with VHH, VHY or VHZ. The booms are supported by a trapeze fitted to the tank frame. The trapeze helps the boom to stay horizontal when unfolded and it protects the boom against vibrations and shocks when driving on uneven ground. -
Page 23: Equipment
3 - Description Equipment Nozzle pressure gauge The remote pressure gauge is integrated at the front of the sprayer. This gauge measures the working pressure in the boom tubes as close to the nozzles as possible. The outputs stated in the nozzle charts are always based on the pressure measured at the nozzle. Both when calibrating and spraying, the pressure must be adjusted according to the readings of this pressure gauge. -
Page 24: External Cleaning Device (Optional)
3 - Description External Cleaning Device (optional) This equipment comprises a hose reel and spray lance used to clean the complete sprayer externally in the field with clean water. The External Cleaning Device is located on the boom centre section at the back. ±... -
Page 25: Sprayer Setup
4 - Sprayer setup General info Before putting the sprayer into operation Although the sprayer has been supplied with a strong and protective surface treatment on steel parts, bolts etc. in the factory, it is recommended to apply a film of anticorrosion oil (e.g. CASTROL RUSTILO or SHELL ENSIS FLUID) on all metal parts in order to avoid chemicals and fertilizers discoloring the enamel. -
Page 26: Transmission Shaft
4 - Sprayer setup Transmission shaft Operator safety 1. Always STOP THE ENGINE before attaching the transmission shaft to the tractor P.T.O. - most tractor P.T.O. shafts can be rotated by hand to facilitate spline alignment, when the engine is stopped. 2. -
Page 27: Mechanical Connections
4 - Sprayer setup Mechanical connections Quick Hitch The sprayer is designed for three point suspension (cat. II). A Quick Hitch is supplied with the sprayer. Fit the Quick Hitch to the tractor for easy hook-up of the sprayer. ± WARNING! When hooking up the sprayer, ensure the safety hooks are fully engaged, before driving. -
Page 28: Hydraulic Systems
4 - Sprayer setup Hydraulic systems General info Ensure that the snap couplers are clean before connection! After having operated the boom and the system has been filled with oil, check the tractor’s hydraulic oil level and top up, if necessary. -
Page 29: Open Centre Hydraulics (Optional)
4 - Sprayer setup Open centre hydraulics (optional) The open centre hydraulics block is necessary if the tractor uses open centre hydraulics and/or load sensing. The valve(1) and (2) is factory set for open centre hydraulics, but if closed centre hydraulics is used (also in combination with load sensing), screw in the valve (clockwise). -
Page 30: Electrical Connections
4 - Sprayer setup Electrical connections Installation of control unit brackets Find a suitable place in the tractor cabin to mount the control units. Best recommended position is to the right of the driver seat. The supplied tractor pillar bracket (A) has a hole spacing of 100 and 120 mm that fits most tractors. -
Page 31: Power Supply
4 - Sprayer setup Power supply Power requirement is 12V DC. Always note polarity! For proper function of the electric equipment, the wires must have the following recommended cross sectional areas and correct fuses to ensure a sufficient power supply. The delivered power connectors follows the standard of most newer tractors. -
Page 32: Liquid System
4 - Sprayer setup Liquid system Self-cleaning filter - Choice of restrictor It is important to have a large flow through the filter. This is achieved by choosing the restrictor size in relation to the liquid consumption of the spray boom. 4 restrictors are supplied. Use the green one with largest orifice (A) first. -
Page 33: Adjustment Of Bk Operating Unit
μ ATTENTION! The P.T.O. revolutions must be kept between 300-600 r/min. 7. Adjust the HARDI-MATIC valve (4) so that the pressure gauge indicates the recommended pressure. ADJUSTMENT OF PRESSURE EQUALIZATION: 8. Place the first lever (3) on the distribution valve in OFF position (B). -
Page 34: Boom
4 - Sprayer setup Boom Suspension effect adjustment In order to alter the behaviour of the boom the trapeze has 4 settings. Setting Behavior For use on uneven ground with many obstacles. All-round standard setting (Factory setting). Slightly slower moving trapeze. Good at following slopes, but less compensating for obstacles. -
Page 35: Operation
5 - Operation Boom Safety info The boom must not be folded/unfolded while driving! Never use the folding/unfolding functions before the sprayer has been stopped! Failure to do so will damage the boom. € DANGER! Before unfolding the boom it is important to connect the sprayer to the tractor to prevent overbalancing of the sprayer. -
Page 36: Manoeuvring Of The Boom - Vhy
5 - Operation Manoeuvring of the boom - VHY The VHY boom is solely controlled by the tractor’s hydraulic levers. Following operations are carried out by the tractor’s hydraulic control lever(s). • Raising/lowering of the boom. • Folding/unfolding of the boom. •... -
Page 37: Single-Sided Folding
5 - Operation Single-sided folding VHZ only: 1. Raise boom half-way to the top (minimum). 2. Unfold either right or left inner section. 3. Unfold either right or left outer section. 4. Lower boom to desired working height. μ ATTENTION! Do not unlock trapeze! VHH only: Button (4) is used to select whether the whole boom or left/right wing should be unfolded. -
Page 38: Liquid System
ATTENTION! Legislation and requirements vary from country to country. Always follow local legislation in force at any time. ÷ NOTE! It is the responsibility of the sprayer owner/operator to comply with all relevant legislation. HARDI cannot undertake any responsibilities for incorrect operation and use. Filling of water The tank should normally be filled 1/3 with water before adding chemicals. -
Page 39: Filling Through Tank Lid
5 - Operation Filling through tank lid Water is filled into the tank by removing the tank lid located at the top of the tank on the sprayer’s right side. The tank lid is accessible from the optional footboard. It is recommended to use as clean water as possible for spraying purposes. Always fill water through the strainer basket to prevent foreign particles from entering the tank. -
Page 40: External Filling Device (Optional)
5 - Operation External Filling Device (optional) The External Filling Device is operated as follows: 1. Remove cover and connect suction hose to Suction Manifold. 2. Turn agitation valve to “Agitation”, pressure valve to ”Spraying”, and, if the blue return valve is mounted, turn it to “Main tank”. 3. -
Page 41: Safety Precautions - Crop Protection Chemicals
5 - Operation Safety precautions - crop protection chemicals Always be careful when working with crop protection chemicals! ± WARNING! Always wear proper protective clothing before handling chemicals! Personal protection Depending on chemical type, protective gear/equipment should be worn to avoid contact with the chemicals, e.g.: •... -
Page 42: Filling Liquid Chemicals By Hardi Turbofiller (Optional)
5 - Operation Filling liquid chemicals by HARDI TurboFiller (optional) 1. Fill the main tank at least 1/3 with water (unless otherwise stated on the chemical container label). 2. Turn the handle of the suction valve towards “suction from Main tank”. -
Page 43: Filling Powder Chemicals By Hardi Turbofiller (Optional)
5 - Operation Filling powder chemicals by HARDI TurboFiller (optional) 1. Fill the main tank at least 1/2 with water (unless otherwise stated on the chemical container label). See section “Filling of water”. 2. Turn the handle of the suction valve towards “suction from Main tank”. -
Page 44: Turbofiller Rinsing
5 - Operation TurboFiller rinsing Rinsing the TurboFiller and chemical containers are done in the following two ways: When TurboFiller lid is open For cleaning empty containers. Put container over the rotating flushing nozzle in the middle of the TurboFiller so that the nozzle is inside the container. -
Page 45: Agitation Before Resuming A Spray Job
5 - Operation Agitation before resuming a spray job If a spray job has been interrupted for a while, severe sedimentation may occur depending on the chemicals being used. Before resuming the spray job, it might be necessary to agitate sedimented material. 1. -
Page 46: Cleaning
ATTENTION! Always read the individual paragraphs. Read instructions for service/maintenance jobs carefully before starting on the job. If any portion remains unclear or requires facilities which are not available, please for safety reasons leave the job to your HARDI dealer’s workshop. μ... -
Page 47: Quick Reference - Cleaning
5 - Operation Quick reference - Cleaning In the following diagrams handle positions for different options are described. Cleaning the tank and liquid system 1. Dilute remaining spray liquid in the tank with at least 10 parts of water and spray the liquid out in the field just sprayed. 2. -
Page 48: Cleaning And Maintenance Of Filters
5 - Operation Cleaning and maintenance of filters Clean filters ensure: • Sprayer components such as valves, diaphragms and operating unit are not hindered or damaged during operation. • Nozzle blockades do not occur whilst spraying. • Long life of the pump. A blocked suction filter will result in pump cavitation. The main filter protecting sprayer compo- nents is the suction filter. -
Page 49: Using The Drain Valve
5 - Operation Rinsing when main tank is not empty Rinsing the pump, operating unit, spray lines, etc. in case of stop in spraying before main tank is empty (e.g. beginning rain etc.). Cleaning of the liquid system: 1. Turn suction valve towards . - Page 50 5 - Operation...
-
Page 51: Maintenance
6 - Maintenance Lubrication General info Always store lubricants clean, dry and cool - preferably at a constant temperature - to avoid contamination from dirt and condensed water. Keep oil filling jugs, hoppers and grease guns clean, and clean the lubricating points thoroughly before lubricating. -
Page 52: Boom Lubrication & Oiling Plan
6 - Maintenance Boom lubrication & oiling plan Lift lubrication & oiling plan... -
Page 53: Service And Maintenance Intervals
6 - Maintenance Service and Maintenance intervals 10 hours service - Spraying circuit Fill with clean water, operate all functions and check for leaks using higher spray pressure than normal. Check nozzle spray patterns visually using clean water. 10 hours service - Nozzle filters Check and clean. -
Page 54: Hours Service - In-Line Filter (Optional)
6 - Maintenance 10 hours service - In-Line filter (optional) If the boom is equipped with In-Line Filters, unscrew the filter bowl to inspect and clean the filter. When reassembling, the O-ring should be greased. Alternative filter meshes are available. See section on Technical specifications - Filters and nozzles. -
Page 55: Occasional Maintenance
Model 363 pump: Diaphragm pump overhaul kit (valves, seals, diaphragms etc.) can be ordered. Detect the pump model - kit can be ordered at following HARDI part No.: Model 363: part No. 75073700 Valves Remove valve cover (1) before changing the valves (2) - note their orientation so they are replaced correctly! μ... -
Page 56: Pump Valves And Diaphragms Renewal
6 - Maintenance Pump valves and diaphragms renewal Model 1303 pumps: Valves Remove valve cover (1) before changing the valves (2) - note their orientation so they are replaced correctly! μ ATTENTION! A special valve with white flap (2A) is used at the two upperside inlets. -
Page 57: Cone Check/Renewal For Evc Distribution Valve
6 - Maintenance Cone check/renewal for EVC distribution valve Periodically check the distribution valves for proper sealing. Do this by running the sprayer with clean water and open all distribution valves. Cautiously remove the clip (A) and pull out the hose (B) for the return line. -
Page 58: Level Indicator Cord Renewal
6 - Maintenance Level indicator cord renewal If the cord on the level indicator has to be changed, the float guide pole is removed: 1. Remove the tank drain valve (see paragraph “Drain valve seal renewal”) and loosen the fitting holding the pole in posi- tion. -
Page 59: Nozzle Tubes And Fittings
6 - Maintenance Nozzle tubes and fittings Poor seals are usually caused by: • Missing O-rings or gaskets • Damaged or incorrectly seated O-rings • Dry or deformed O-rings or gaskets • Foreign bodies In case of leaks: DO NOT overtighten. Disassemble, check condition and position of O- ring or gasket. -
Page 60: Readjustment Boom - General Info
6 - Maintenance Readjustment boom - general info Before commencing adjustment jobs please go through this check list. 1. The sprayer must be well lubricated (see section about lubrication). 2. Connect the sprayer to the tractor. 3. Place tractor and sprayer on level ground (horizontal). 4. -
Page 61: Trapeze Locking Device
6 - Maintenance Trapeze locking device The trapeze helps the boom to stay horizontal when unfolded and it protects the boom against vibrations and impacts. In order to lock the boom during folding, the chains must be tight. If this is not the case even when the cylinder is fully retracted, the chains must be strained. -
Page 62: Breakaway Section Adjustment
6 - Maintenance Breakaway section adjustment The height of this section should be adjusted if it hangs down compared to the rest of the wing. Align section be means of bolted joint (arrow). -
Page 63: Off-Season Storage
6 - Maintenance Off-season storage Off-season storage program To preserve the sprayer intact and to protect the components, carry out following off-season storage program. Before storage When the spraying season is over, you should devote some extra time to the sprayer. If chemical residue is left over in the sprayer for longer periods, it may reduce the life of the individual components. - Page 64 6 - Maintenance After storage After a storage period the sprayer should be prepared for the next season the following way: 1. Remove the cover. 2. Wipe off the grease from hydraulic ram piston rods. 3. Fit the pressure gauges again. Seal with Teflon tape. 4.
-
Page 65: Fault Finding
7 - Fault finding Operational problems General info Operational incidents are frequently due to the same reasons: 1. A suction leakage reduces the pump pressure and may interrupt suction completely. 2. A clogged suction filter may damage suction or interrupt and prevent the pump from running normally. 3. -
Page 66: Liquid System
7 - Fault finding Liquid system FAULT PROBABLE CAUSE CONTROL/REMEDY No spray from boom when turned on. Air leak on suction line. Check if suction filter O-ring is sealing. Check suction tube and fittings. Check tightness of pump diaphragm and valve covers. Air in system. -
Page 67: Hydraulic System - Z Model
7 - Fault finding Hydraulic system - Z model FAULT PROBABLE CAUSE CONTROL/REMEDY No boom movements when activated. Insufficient hydraulic pressure. Check oil pressure. Check tractor hydraulic oil level. Insufficient oil supply. Oil flow must be min. 25 l/min. and max. 130 l/min. Check tractor hydraulic oil level. -
Page 68: Hydraulic System - H/Y Model
7 - Fault finding Hydraulic system - H/Y model FAULT PROBABLE CAUSE CONTROL/REMEDY Boom slow/eradic. Air in system. Loosen ram connection and activate hydraulics until oil flow has no air in it (not whitish). Regulation valve incorrectly set. Open or close until desired speed is achieved (clockwise = less speed). -
Page 69: Mechanical Problems
7 - Fault finding Mechanical problems Emergency operation - Liquid system In case of power failure it is possible to operate all functions of the operating unit manually. First disconnect the multi plug from the control box. Now manually turn the emergency control knobs. The problem may be due to a blown fuse. - Page 70 7 - Fault finding...
-
Page 71: Technical Specifications
8 - Technical specifications Dimensions General info All measures, values and weights are depending on mounted options and specific adjustments. Overall dimensions 800 litre: Boom width A - Total height, mm B - Total length, mm C - Total width, mm 12 m 2759 1540... -
Page 72: Weight
8 - Technical specifications 1500 litre: Boom width A - Total height, mm B - Total length, mm C - Total width, mm 12 m 3247 2047 2498 12.5 m 3247 2047 2498 15 m 3247 2047 2498 16 m 3247 2047 2498... -
Page 73: Specifications
8 - Technical specifications Specifications Pump model 1303/9.0 Pump model 363/10.0 Temperature and pressure ranges Spray liquid: Operating temperature range: 2° to 40° C (36°F to 104°F) Operating pressure for safety valve: 15 bar (220 psi) Max. pressure on the pressure manifold: 20 bar (290 psi) Max. -
Page 74: Materials And Recycling
8 - Technical specifications Materials and recycling Disposal of the sprayer When the equipment has completed its working life, it must be thoroughly cleaned. The tank, hose and synthetic fittings can be incinerated at an authorized disposal plant. The metallic parts can be scrapped. Always follow local legislation regarding disposal. -
Page 75: Electrical Connections
8 - Technical specifications Electrical connections Rear lights The wiring is in accordance with ISO 1724. Position Wire colour 1. LH direction indicator Yellow 2. Free Blue 3. Frame White 4. RH direction indicator Green 5. RH rear position lamp Brown 6. -
Page 76: Charts
8 - Technical specifications Charts Boom hydraulic - Z... -
Page 77: Boom Hydraulic - Y
8 - Technical specifications Boom hydraulic - Y A. Option for slanting. B. Option for single side folding (VHH only). - Page 78 8 - Technical specifications...
- Page 79 External Filling Device, 40 Personal protection, 41 External filling device, 15 Power consumption, 73 Power requirement, 31 Filling liquid chemicals by HARDI TurboFiller, 42 Power supply, 31 Filling of water, 38 Precautions, 9 Filling powder chemicals by HARDI TurboFiller, 43...
- Page 80 Index Pulsation damper, 32 Pump, 15 Quick hitch, 27 Quick reference, 45 Rear lights, 75 Reference number, 14 Requirements tractor, 28, 29 Restrictor, 17 Return valve, 15 Returning to refill, 44 Rinsing, main tank not empty, 49 Roadworthiness, 13 Safety info, 35 Safety precautions, 41 SafetyLocker, 23 Seal, 58...
- Page 81 Spare parts To see updated spare part information visit the website www.agroparts.com. Here all parts information can be accessed when free registration has been made.
- Page 82 HARDI INTERNATIONAL A/S Helgeshøj Allé 38 - DK 2630 Taastrup - DENMARK...
Need help?
Do you have a question about the MASTER PRO VHH and is the answer not in the manual?
Questions and answers