Carrier WeatherExpert 48LC Series Installation Instructions Manual
14-26 single package rooftop gas heat/electric cooling unit with puron (r-410a) refrigerant
Hide thumbs
Also See for WeatherExpert 48LC Series:
- Controls, start-up, operation and troubleshooting (190 pages) ,
- Service and maintenance instructions (76 pages) ,
- Installation instructions manual (65 pages)
Table of Contents
Advertisement
Quick Links
NOTE: Read the entire instruction manual before starting the
installation.
CONTENTS
SAFETY CONSIDERATIONS . . . . . . . . . . . . . . . . . . . . 1
GENERAL . . . . . . . . . . . . . . . . . . . . . . . . . . . . . . . . . . . 2
Rated Indoor Airflow (cfm) . . . . . . . . . . . . . . . . . . . . . 2
INSTALLATION. . . . . . . . . . . . . . . . . . . . . . . . . . . . . . 19
Step 1 - Plan for Unit Location . . . . . . . . . . . . . . . . 19
Step 3 - Inspect Unit . . . . . . . . . . . . . . . . . . . . . . . . 19
Step 4 - Provide Unit Support . . . . . . . . . . . . . . . . . 19
Step 5 - Field Fabricate Ductwork . . . . . . . . . . . . . 23
Step 6 - Rig and Place Unit . . . . . . . . . . . . . . . . . . . 23
Step 7 - Horizontal Duct Connection . . . . . . . . . . . 24
Option . . . . . . . . . . . . . . . . . . . . . . . . . . . . . . . . . . . 24
Hood . . . . . . . . . . . . . . . . . . . . . . . . . . . . . . . . . . . . 26
Step 10 - Install Gas Piping. . . . . . . . . . . . . . . . . . . 26
Step 12 - Make Electrical Connections . . . . . . . . . 29
Humidi-MiZer® System Control Connections . . . . . 39
Integrated Staging Control (ISC) Board . . . . . . . . . . 40
Manufacturer reserves the right to discontinue, or change at any time, specifications or designs without notice and without incurring obligations.
Catalog No. 04-53480183-01
Installation Instructions
Printed in U.S.A.
Form 48LC-14-26-06SI
WeatherExpert
Single Package Rooftop
Gas Heat/Electric Cooling Unit
with Puron
®
EconoMi$er® X (Factory Option) . . . . . . . . . . . . . . 43
Staged Air Volume (SAV™) with Variable Frequency
Drive. . . . . . . . . . . . . . . . . . . . . . . . . . . . . . . . . . . . 57
Smoke Detectors. . . . . . . . . . . . . . . . . . . . . . . . . . . . 71
Step 13 - Install Accessories . . . . . . . . . . . . . . . . . 71
Step 14 - Check Belt Tension . . . . . . . . . . . . . . . . 72
START-UP CHECKLIST . . . . . . . . . . . . . . . . . . . . CL-1
SAFETY CONSIDERATIONS
Installation and servicing of air-conditioning equipment can be
hazardous due to system pressure and electrical components. Only
trained and qualified service personnel should install, repair, or
service air-conditioning equipment.
Untrained personnel can perform basic maintenance functions of
cleaning coils and filters and replacing filters. All other operations
should be performed by trained service personnel. When working
on air-conditioning equipment, observe precautions in the litera-
ture, tags and labels attached to the unit, and other safety precau-
tions that may apply.
Follow all safety codes, including ANSI (American National Stan-
dards Institute) Z223.1. Wear safety glasses and work gloves. Use
quenching cloth for unbrazing operations. Have fire extinguisher
available for all brazing operations.
It is important to recognize safety information. This is the safety-
alert symbol
. When you see this symbol on the unit and in in-
structions or manuals, be alert to the potential for personal injury.
Understand the signal words DANGER, WARNING, CAUTION,
and NOTE. These words are used with the safety-alert symbol.
DANGER identifies the most serious hazards which will result in
severe personal injury or death. WARNING signifies hazards
which could result in personal injury or death. CAUTION is used
to identify unsafe practices, which may result in minor personal
injury or product and property damage. NOTE is used to highlight
suggestions which will result in enhanced installation, reliability,
or operation.
Pg 1
®
48LC 14-26
(R-410A) Refrigerant
8-19
Replaces: 48LC-14-26-05SI
Advertisement
Table of Contents

Related Manuals for Carrier WeatherExpert 48LC Series


Summary of Contents for Carrier WeatherExpert 48LC Series
-
Page 1: Table Of Contents
® WeatherExpert 48LC 14-26 Single Package Rooftop Gas Heat/Electric Cooling Unit with Puron ® (R-410A) Refrigerant Installation Instructions NOTE: Read the entire instruction manual before starting the EconoMi$er® X (Factory Option) ....43 installation. -
Page 2: General
WARNING WARNING ELECTRICAL SHOCK HAZARD FIRE, EXPLOSION HAZARD Failure to follow this warning could cause personal injury or Failure to follow this warning could result in death, serious death. personal injury and/or property damage. Before performing service or maintenance operations on unit, Disconnect gas piping from unit when pressure testing at pres- turn off main power switch to unit and install lock(s) and lock- sure greater than 0.5 psig (3450 Pa). - Page 3 Position: 9 10 11 12 13 14 15 16 17 18 Example: Unit Heat Type Packaging 48 - Gas Heat Packaged Rooftop 0 = Standard 1 = LTL ® Model Series - WeatherExpert Electrical Options LC - Ultra High Efficiency A = None B = HACR Circuit Breaker Heat Options...
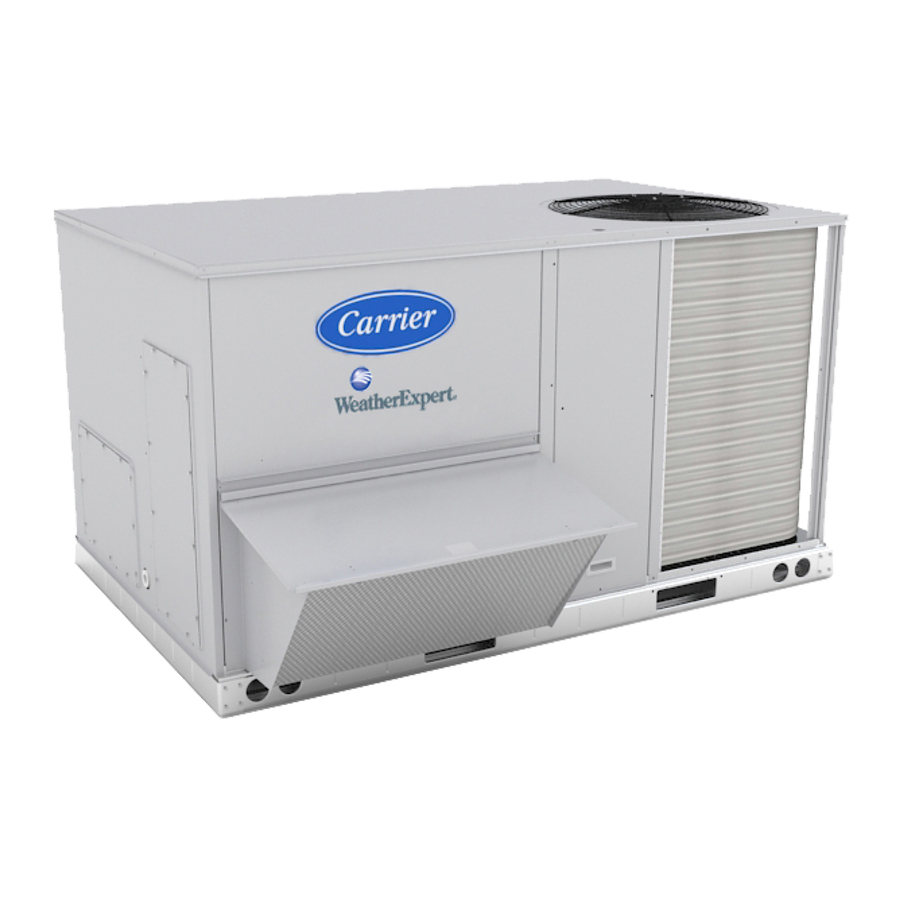
- Page 4 Fig. 2 — 48LC**14 Vertical Airflow...
- Page 5 Fig. 3 — 48LC**14 Horizontal Airflow...
- Page 6 Fig. 4 — 48LC**14 Back View and Condensate Drain Location...
- Page 7 Fig. 5 — 48LC**14 Corner Weights and Clearances...
- Page 8 Fig. 6 — 48LC**14 Bottom View...
- Page 9 Fig. 7 — 48LC**17-20 Vertical Airflow...
- Page 10 Fig. 8 — 48LC**17-20 Horizontal Airflow...
- Page 11 Fig. 9 — 48LC**17-20 Back View and Condensate Drain Location...
- Page 12 Fig. 10 — 48LC**17-20 Corner Weights and Clearances...
- Page 13 Fig. 11 — 48LC**17-20 Bottom View...
- Page 14 Fig. 12 — 48LC**24-26 Vertical Airflow...
- Page 15 Fig. 13 — 48LC**24-26 Horizontal Airflow...
- Page 16 Fig. 14 — 48LC**24-26 Back View and Condensate Drain Location...
- Page 17 Fig. 15 — 48LC**24-26 Corner Weights and Clearances...
- Page 18 Fig. 16 — 48LC**24-26 Bottom View...
-
Page 19: Installation
Install thru-base service connection fittings (affects curb and INSTALLATION unit) Jobsite Survey Rig and place unit Complete the following checks before installation. Remove top skid Consult local building codes and the NEC (National Elec- trical Code) ANSI/NFPA 70 for special installation Install outside air hood requirements. - Page 20 Fig. 17 — 48LC**14 Roof Curb Details...
- Page 21 Fig. 18 — 48LC**17-20 Roof Curb Details...
- Page 22 Fig. 19 — 48LC**24-26 Roof Curb Details...
-
Page 23: Slab Mount (Horizontal Units Only)
Curb should be level. This is necessary for unit drain to function ALTERNATE UNIT SUPPORT (IN LIEU OF CURB OR properly. Unit leveling tolerances are shown in Fig. 20. Refer to SLAB MOUNT) Accessory Roof Curb Installation Instructions for additional infor- A non-combustible sleeper rail can be used in the unit curb sup- mation as required. -
Page 24: Positioning On Curb
PLACE ALL SEAL STRIPS DETAIL A IN PLACE BEFORE PLACING (914-1371) UNIT ON ROOF CURB. 36"-54" SEE DETAIL A DUCT END DIMENSIONS MAX WEIGHT UNIT 2135 127.8 3249 59.1 1501 52.3 1328 48LC**14 2377 1080 141.5 3595 65.5 1664 60.3 1532 48LC**17 2483... - Page 25 To remove the hood parts package: into place, and then slide them back into pocket created in the filter support (item #1). Repeat this for each air screen (see Remove the back blower access panel. Fig. 27). See Fig. 28 for completed hood assembly. Locate and cut the strap, being careful to not damage any wiring.
-
Page 26: Step 9 - Install Flue Hood And Combustion Air
Table 3 — Natural Gas Supply Line Pressure Ranges UNIT MODEL UNIT SIZE 5.0 in. wg 13.0 in. wg 14, 17, 20, 24, 26 48LC** (1246 Pa) (3240 Pa) Table 4 — Liquid Propane Supply Line Pressure Ranges UNIT MODEL UNIT SIZE 11.0 in. -
Page 27: Gas Supply Line
9” MINIMUM CLEARANCE FOR PANEL REMOVAL FROM REGULATOR MANUAL GAS METER SHUTOFF VALVE BASE UNIT 48” MINIMUM DRIP LEG PER NFGC BASE RAIL FIELD- ROOF FABRICATED CURB SUPPORT LEGEND NFGC – National Fuel Gas Code Field supplied. NOTE: Follow all local codes. STEEL PIPE SPACING OF SUPPORTS NOMINAL DIAMETER... -
Page 28: Step 11 - Install External Condensate Trap And Line
When installing the gas supply line, observe local codes pertaining to gas pipe installations. Refer to the NFPA 54/ANSI Z223.1 NFGC latest edition (in Canada, CAN/CSA B149.1). In the ab- sence of local building codes, adhere to the following pertinent recommendations: Avoid low spots in long runs of pipe. -
Page 29: Step 12 - Make Electrical Connections
MINIMUM PITCH 1˝ (25 mm) PER BASE RAIL 10´ (3 m) OF LINE LOAD 3˝ (76 mm) SIDE OPEN VENT LINE SIDE TO ROOF SEE NOTE DRAIN ROOF DETAIL CURB DRAIN PLUG NOTE: Trap should be deep enough to offset maximum unit static difference. - Page 30 Fig. 38 — 48LC**14-26 Electro-mechanical Control Wiring Diagram...
- Page 31 Fig. 39 — 48LC**14-26 RTU Open Control Wiring Diagram...
- Page 32 Fig. 40 — 48LC**14-26 SystemVu™ Control Wiring Diagram...
- Page 33 Fig. 41 — 48LC Typical Power Wiring Diagram, Electro-mechanical and RTU Open Controls, (Sizes 14-20 208/230v Shown)
- Page 34 Fig. 42 — 48LC Typical Power Wiring Diagram, SystemVu™ Controls (Size 26 208/230V Shown)
-
Page 35: Units Without Factory-Installed Non-Fused Disconnect Or Hacr
UNITS WITHOUT FACTORY-INSTALLED NON-FUSED DISCONNECT OR HACR When installing units, provide a disconnect switch per NEC (Na- tional Electrical Code) of adequate size. Disconnect sizing data is provided on the unit informative plate. Locate on unit cabinet or within sight of the unit per national or local codes. Do not cover unit informative plate if mounting the disconnect on the unit cabinet. -
Page 36: All Units
Operation on improper line voltage or excessive phase imbal- Ground ance constitutes abuse and may cause damage to electrical (GR) 208/230-3-60 components. Such operation would invalidate any applicable 460-3-60 Carrier warranty. 575-3-60 CONVENIENCE OUTLETS Units With Disconnect or HACR Option Factory Equip Wiring... -
Page 37: Hacr
Remove the blank cover plate at the convenience outlet; discard confirmed. Observe National Electrical Code Article 210, Branch the blank cover. Circuits, for use of convenience outlets. See Fig. 49. Loosen the two screws at the GFCI duplex outlet, until approxi- mately -in. -
Page 38: Factory-Option Thru-Base Connections
THERMOSTAT Instructions to select Y2. Note 2: Y2 to Y3 connection required for 2-stage cooling operation and when Install a Carrier-approved accessory 3-stage thermostat according integrated economizer function is desired. to installation instructions included with the accessory. If a 3-stage... -
Page 39: Heat Anticipator Settings
CONNECTION in the low-voltage wiring as shown in Fig. 54. Fig. 52 — Field Control Wiring Raceway NOTE: 48LC**14-26 units require a 3-stage cooling thermo- stat device and are not compatible with Carrier’s Edge HEAT ANTICIPATOR SETTINGS ® thermidistat. Set heat anticipator settings at 0.14 amp for the first stage and 0.14 amp for second-stage heating. -
Page 40: Integrated Staging Control (Isc) Board
Humidistat Fig. 54 — Typical Humidi-MiZer Adaptive Dehumidification System Humidistat Wiring Integrated Staging Control (ISC) Board Indoor Fan Power Phase Phase Auxilary Condensate Economizer “On” Status Board Plug Monitor Monitor Shutdown Overflow Relay Relay Remote Shutdown Control Smoke Shutdown Smoke Alarm Control Occupancy... -
Page 41: Isc Board - Sequence Of Operation
2. Solid red LED indicates an error exists, see above LED configuration. ISC BOARD - SEQUENCE OF OPERATION Table 9 — Cooling Operation General The Carrier Integrated Staging Control (ISC) is intended for use INPUT OUTPUT with a standard thermostat or direct digital controls (DDC) capa-... - Page 42 Economizer (Optional) JUMPER ON When the economizer is in Free Cooling Mode and a demand for cooling exists (Y1 on the thermostat), the economizer will modu- late the outdoor-air damper to provide a 50°F (10°C) to 55°F (13°C) mixed-air temperature into the zone and run the indoor-fan at high speed.
-
Page 43: Economi$Er X (Factory Option)
User Interface ® EconoMi$er X (Factory Option) Provides status for normal operation, setup parameters, check- The EconoMi$er X system is an expandable economizer con- out tests, and alarm and error conditions with a 2-line 16 char- trol system, which includes a W7220 economizer module (con- acter LCD display and four button keypad. -
Page 44: Economizer Module Wiring Details
Storage Temperature Table 12 — Economizer Module –40°F to 150°F (–40°C to 65°C) (Left Hand Terminal Blocks) Shipping Temperature LABEL TYPE DESCRIPTION –40°F to 150°F (–40°C to 65°C) Top Left Terminal Block Relative Humidity 20k NTC Mixed Air Temperature Sensor (Polarity 5% to 95% RH non-condensing and COM Insensitive Connection) -
Page 45: Interface Overview
SENSOR (HOT) BLACK YELLOW ANALOG BROWN – ORANGE GREEN SWITCH POWER SUPPLY. PROVIDE DISCONNECT LABEL MEANS AND OVERLOAD PROTECTION AS REQUIRED. Fig. 61 — CO Sensor Wiring SWITCHES INTERFACE OVERVIEW This section describes how to use the EconoMi$er ® user inter- face for: •... -
Page 46: Setup And Configuration
Press the (Enter) button to display the value of the • ADVANCED SETUP currently displayed item. • CHECKOUT Press the ▲ button to increase (change) the displayed • ALARMS parameter value. NOTE: Some parameters in the menus use the letters MA or Press the ▼... - Page 47 Table 16 — W7220 Menu Structure* PARAMETER PARAMETER EXPANDED PARAMETER NAME MENU PARAMETER DEFAULT RANGE AND Notes VALUE INCREMENT † FIRST STAGE COOLING DEMAND (Y1–IN) ECON AVAIL YES/NO YES = economizing available; the system can use outside air for free cooling when required FIRST STAGE COOLING RELAY OUTPUT ECONOMIZING YES/NO...
- Page 48 Table 16 — W7220 Menu Structure* (cont) PARAMETER PARAMETER EXPANDED PARAMETER NAME MENU PARAMETER DEFAULT RANGE AND Notes VALUE INCREMENT † EXHAUST STAGE 2 RELAY OUTPUT Output of AUX1 O terminal Displays ON when damper position reaches programmed EXH2 OUT ON/OFF percentage set point.
- Page 49 Table 16 — W7220 Menu Structure* (cont) PARAMETER PARAMETER EXPANDED PARAMETER NAME MENU PARAMETER DEFAULT RANGE AND Notes VALUE INCREMENT † EXHAUST FAN STAGE 1 SETPOINT Set point for OA damper position when exhaust fan 1 is powered 0 to 100%; by the economizer.
- Page 50 Table 16 — W7220 Menu Structure* (cont) PARAMETER PARAMETER EXPANDED PARAMETER NAME MENU PARAMETER DEFAULT RANGE AND Notes VALUE INCREMENT † NONE Used for alarm for when the DA air temperature is too high. Sets 70°F to 180°F DA HI ALM 80°F (27°C) upper range of alarm;...
- Page 51 Table 16 — W7220 Menu Structure* (cont) PARAMETER PARAMETER EXPANDED PARAMETER NAME MENU PARAMETER DEFAULT RANGE AND Notes VALUE INCREMENT † Check if outdoor temperature is below the LOW Temp Lockout on set point menu. Check if Mixed air temperature on STATUS FREEZE ALARM menu is below the Lo Set point on Advanced menu.
- Page 52 Table 17 — Damper Minimum Position Settings and Readings on Checkout Menu DEMAND CONTROLLED VENTILATION FAN SPEED SETPOINTS CHECKOUT SENSOR) MIN POS VMAX–HS MIN POS H VMAX–HS MIN POS L VMAX–LS VENT MIN VMAX–HS VENT MAX VMAX–HS VENT MIN H VMAX–HS VENT MAX H VMAX–LS...
- Page 53 Table 20 — Enthalpy Operation without DCV (CO Sensor) — 1 Speed Fan DEMAND OUTSIDE AIR CONTROLLED GOOD TO Y1-I Y2-I FAN SPEED Y1-O Y2-O OCCUPIED UNOCCUPIED VENTILATION (DCV) ECONOMIZE High 0-v/Off 0-v/Off MIN POS Closed High 24-v/On 0-v/Off MIN POS Closed High 24-v/On...
- Page 54 Table 23 — Dry Bulb Operation with DCV (CO Sensor) — 2 Speed Fan DEMAND OUTSIDE AIR CONTROLLED GOOD TO Y1-I Y2-I Y1-O Y2-O OCCUPIED UNOCCUPIED SPEED VENTILATION (DCV) ECONOMIZE 0v/Off 0v/Off VENTMIN Closed 24v/On 0v/Off VENTMIN Closed HIGH 24v/On 24v/On VENTMIN Closed...
-
Page 55: Enthalpy Settings
Table 25 — Enthalpy Operation with DCV (CO Sensor) — 2 Speed Fan DEMAND OUTSIDE AIR CONTROLLED GOOD TO Y1-I Y2-I Y1-O Y2-O OCCUPIED UNOCCUPIED SPEED VENTILATION (DCV) ECONOMIZE 0v/Off 0v/Off VENTMIN Closed 24v/On 0v/Off VENTMIN Closed HIGH 24v/On 24v/On VENTMIN Closed 0v/Off... -
Page 56: Checkout
ECONOMIZING DUAL ENTHALPY AVAILABLE HIGH LIMIT NOT AVAILABLE SINGLE ENTHALPY P2 (T,RH) (T,RH) TEMPERATURE Fig. 63 — Single Enthalpy Curve Boundaries Table 27 — Single Enthalpy and Dual Enthalpy High Limit Curves POINT P1 POINT P2 ENTHALPY TEMP. DRY TEMP. ENTHALPY HUMIDITY HUMIDITY... -
Page 57: Drive
You can also navigate to the Alarms menu at any time. Clearing Alarms Once the alarm has been identified and the cause has been re- moved (e.g. replaced faulty sensor) the alarm can be cleared from the display. To clear an alarm, perform the following: Navigate to the desired alarm. -
Page 58: Multi-Speed Vfd Display Kit (Field-Installed Option)
1-20 Motor Power ALPHA NUMERIC [2] 0.12KW-0.16HP DISPLAY Setup 1 Status Quick Main MENU KEY Menu Menu Menu Com. NAVIGATION KEYS STATUS LEDs Warn. Alarm Hand Auto Reset 230V/460V OPERATION KEYS & LEDs Fig. 66 — VFD Keypad The VFD keypad as shown in Fig. 66 consists of the following sections. -
Page 59: Connecting The Keypad To The Vfd
Com. Warn. Alarm Com. LED: Flashes when bus communications is communicating. Green LED/On: Control selection is working. Yellow LED/Warn.: Indicates a warning. Flashing Red LED/Alarm: Indicates an alarm. ▲▼ Arrows : Use the Up and Down arrow keys to navigate between parameter groups, parameters and within parameters. -
Page 60: Program The Vfd For Indoor Fan Control
Male Connector - connect to VFD Front Panel Select language English [0] English SETUP 1 Status Quick Main Menu Menu Menu Com. Warn. Alarm Hand Auto Reset Fig. 73 — Keypad with Power Up Screen Displayed Selecting Regional Settings: a. Press the Off Reset key. b. - Page 61 c. Press OK. The display changes to: f. Press OK and then use the ▲ and ▼ (Up and Down Arrow) keys to scroll to the proper motor horsepower. 5—0* Digital I/O Mode Press OK again to set the selected hp. 5—1* Digital Inputs g.
- Page 62 g. Press ▼ (Down Arrow) twice, the following display c. Press OK, the following display appears: appears: 3—0* Reference Limits 1-73 Flying Start 3—1* References [1] Enabled d. Press OK again, the following display appears: h. Press OK to highlight the number in the bracket and then use the ▲...
- Page 63 e. Press ▼ (Down Arrow) once, the following display c. Press OK, the following display appears: appears: 5—0* Digital I/O mode 3-42 Ramp 1 Ramp Down Time 5—1* Digital Inputs 3.00s d. Press ▼ (Down Arrow) once to move the highlight to f.
- Page 64 12. Setting Reset Mode and RFI Filter: h. Press ▼ (Down Arrow) once, the following display a. Press the Back key until the following display appears: appears: 14-21 Automatic Restart T… 0—** Operation / Display i. Press OK to highlight the number of seconds and use 1—** Load and Motor the ▲...
- Page 65 (MUST-HOLD (Hz) SPEED (RPM) AMPS) Motor Motor Option Voltage 0–03 0–06 1–20 1–22 1–23 1–24 1–25 Carrier P/N Mfr P/N 208/230 HD58FE654 HK30WA371 131L9796 [102] [10] 1735 HD58FE654 HK30WA377 131L9864 [122] [10] 1735 HD58FE577 HK30WA383 131N0227 [132] [11] 1710 208/230 HD60FK658 HK30WA372 131L9797...
- Page 66 (Hz) SPEED (RPM) AMPS) Motor Motor Voltage 0–03 0–06 1–20 1–22 1–23 1–24 1–25 Option Carrier P/N Mfr P/N 208/230 HD58FE654 HK30WA371 131L9796 [102] [10] 1735 HD58FE654 HK30WA377 131L9864 [122] [10] 1735 HD58FE577 HK30WA383 131N0227 [132] [11] 1710 208/230 HD60FK657 HK30WA373 131L9798...
- Page 67 (MUST-HOLD (Hz) SPEED (RPM) AMPS) Motor Motor Voltage 0–03 0–06 1–20 1–22 1–23 1–24 1–25 Option Carrier P/N Mfr P/N 208/230 HD60FE656 HK30WA372 131L9797 [102] [11] 11.7 1750 HD60FE656 HK30WA378 131L9865 [122] [11] 1750 HD58FE577 HK30WA383 131N0227 [132] [11] 1710...
- Page 68 Table 30 — VFD Unit Parameters – 48LC**20 (cont) START MOTOR FLYING MIN SPEED FOR DELAY THERMAL PRESET REFERENCE START FUNCTION (Hz) (sec) PROTECTION Motor Voltage 1–71 1–73 1–82 1–90 3–10 [0] 3–10 [1] 3–10 [2] 3–10 [3] 3–10 [4] 3–10 [5] 3–10 [6] 3–10 [7] Option 208/230 52.57% 61.63%...
- Page 69 (MUST-HOLD (Hz) SPEED (RPM) AMPS) Motor Motor Option Voltage 0–03 0–06 1–20 1–22 1–23 1–24 1–25 Carrier P/N Mfr P/N 208/230 HD60FK657 HK30WA373 131L9798 [102] [14] 21.2 1760 HD60FK657 HK30WA380 131L9867 [122] [14] 1760 HD60FL576 HK30WA384 131N0229 [132] [14] 1745...
- Page 70 (MUST-HOLD (Hz) SPEED (RPM) AMPS) Motor Motor Option Voltage 0–03 0–06 1–20 1–22 1–23 1–24 1–25 Carrier P/N Mfr P/N 208/230 HD60FK657 HK30WA373 131L9798 [102] [14] 21.2 1760 HD60FK657 HK30WA380 131L9867 [122] [14] 1760 HD60FL576 HK30WA384 131N0229 [132] [14] 1745...
-
Page 71: Smoke Detectors
Smoke Detectors Smoke detectors are available as factory-installed options on 48LC 14-26 models. Smoke detectors may be specified for supply air only, for return air without or with economizer, or in combina- tion of supply air and return air. The unit is factory-configured for immediate smoke detector shutdown operation;... -
Page 72: Step 14 - Check Belt Tension
BELT TENSION METHOD Step 14 — Check Belt Tension Measure the belt span length as shown in Fig. 77. Calculate the re- Requires belt tension gage that measures tension in belt in units of quired deflection by multiplying the belt span length by . - Page 74 © Carrier Corporation 2019 Manufacturer reserves the right to discontinue, or change at any time, specifications or designs without notice and without incurring obligations. Catalog No. 04-53480183-01 Printed in U.S.A. Form 48LC-14-26-06SI Pg 74 8-19 Replaces: 48LC-14-26-05SI...
- Page 75 UNIT START-UP CHECKLIST (Remove and Store in Job File) NOTE: To avoid injury to personnel and damage to equipment or property when completing the procedures listed in this start-up checklist, use good judgment, follow safe practices, and adhere to the safety considerations/information as outlined in preceding sec- tions of this Installation Instruction document.
- Page 76 10. Restore setpoints for thermostat and humidistat (Y/N) _____ REPEAT PROCESS FOR 2 COMPRESSOR SYSTEMS © Carrier Corporation 2019 Manufacturer reserves the right to discontinue, or change at any time, specifications or designs without notice and without incurring obligations. Catalog No. 04-53480183-01 Printed in U.S.A.
Need help?
Do you have a question about the WeatherExpert 48LC Series and is the answer not in the manual?
Questions and answers