Table of Contents
Advertisement
Advertisement
Table of Contents

Subscribe to Our Youtube Channel
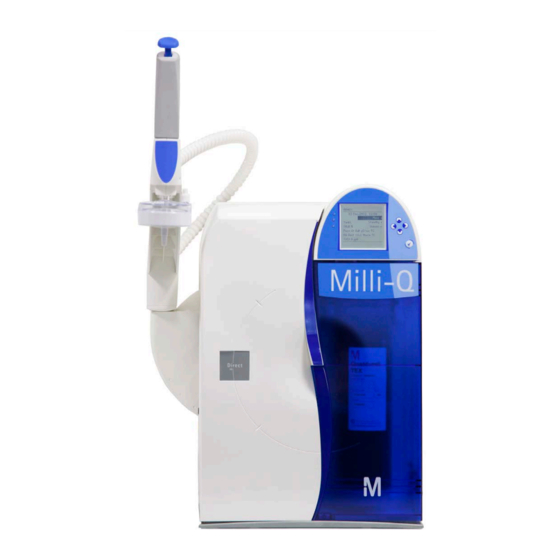
Related Manuals for Milli-Q Direct 8


Summary of Contents for Milli-Q Direct 8
- Page 1 User Manual Milli-Q® Direct 8/16 System...
- Page 3 If this User Manual is not the correct one for your Water Purification System, then please contact Millipore SAS. Terminology The term “Milli-Q® Direct Water Purification System” is replaced by the terms “Milli-Q® system” or “System” for the remainder of this User Manual unless otherwise noted. Document FTPF11486 –...
- Page 4 Conditions of Sale" applicable to your purchase transaction. liability Trademarks BioPak, EDS-Pak, Q-Pak, Milli-Q, Millipak, Millipak Express, Progard and Q-POD and are registered trademarks of Merck KGaA, Darmstadt, Germany. Millipore, the “M” logo, RoClean and VOC-Pak are trademarks of Merck KGaA, Darmstadt, Germany.
- Page 5 In particular, the hydraulic and electrical specifications should be followed and met. It is important to use this equipment as specified in this manual; using this equipment in a different manner may impair the safety precautions of the Milli-Q® Direct System. Symbols This ATTENTION symbol is used to refer to instructions in this manual that need to be done carefully.
-
Page 7: Table Of Contents
Description ....................................52 Ready Mode .................................... 57 General information ................................57 Description of Ready Menu ............................... 58 Using the Milli-Q® Direct System ........................63 Overview ....................................63 Dispensing water ................................... 64 Viewing water quality ................................. 66 Viewing Operation ................................67 Viewing Consumable Status .............................. - Page 8 Alarm Information ................................. 97 Summary of Alarm messages ............................101 Alerts ..................................104 Overview ....................................104 Alert information ................................105 Summary of Alert messages ............................110 Ordering Information ............................114 Consumables, Accessories and Systems ........................114 Milli-Q® Direct 8/16 System...
-
Page 9: Product Information
Some of the more important topics in this chapter are: • installation requirements, • consumable information, and • dimensions of various components of the System. Contents This chapter contains the following topics: Topic See Page Cabinet Reservoir Consumables Specifications and requirements Milli-Q® Direct 8/16 System... -
Page 10: Cabinet
Cabinet Overview Item Description/Name Point Of Delivery (POD) POD Pak Connections for tubings, power cord, level sensor and other cables Q-Pak Pack location Sanitisation Port Main Display Progard Cartridge location Continued on next page Milli-Q® Direct 8/16 System... - Page 11 The use of the Right Keypad button is shown below. It is used to move to the next screen. In this example, the system is changed from STANDBY Mode to READY Mode. Right Diagram 1 Action Diagram 2 Press Continued on next page Milli-Q® Direct 8/16 System...
- Page 12 Diagram 1 Action Diagram 2 Press The use of the Down Keypad button is shown below. It is used to scroll down in a menu. Down Diagram 1 Action Diagram 2 Press Continued on next page Milli-Q® Direct 8/16 System...
- Page 13 − is temperature compensated (TC) at 25°C, and − the TOC value is 4 ppb. In this example, there are no Milli-Q® water quality measurements to display. The water quality is only displayed when it is actually measured during water delivery or recirculation.
- Page 14 Power Entry connection RO Reject Port (100 – 240 V) Accessories connection Feed water Port (maximum 24 VDC) From Reservoir Port Termination Plug Connection Level Sensor Connection To Reservoir Port (maximum 5 VDC) Ethernet connection (maximum 5 VDC) Milli-Q® Direct 8/16 System...
-
Page 15: Reservoir
Reservoir Information Millipore SAS recommends using a Reservoir having the following catalogue number: Size Catalogue Numbers 30 Litre TANKPE030 60 Litre TANKPE060 100 Litre TANKPE100 Milli-Q® Direct 8/16 System... -
Page 16: Consumables
The POD Pak is the final water purification device. It is attached to the Point of Delivery outlet. The POD Pak provides additional quality and insurance that trace contaminants related to specific applications are removed just before ultrapure water is delivered. Milli-Q® Direct 8/16 System... -
Page 17: Specifications And Requirements
Power Cord use • The System is powered on and off by removing the power cord from the wall outlet. • The power cord should be plugged into a wall outlet that is accessible. Continued on next page Milli-Q® Direct 8/16 System... - Page 18 Specifications and requirements, Continued Dimensions With POD Unit up With POD Unit down Materials of Please contact Millipore SAS for a list of the Materials of Construction. construction Continued on next page Milli-Q® Direct 8/16 System...
- Page 19 The Reservoir must be located relative to the Water System: location • 0 ≤ y ≤ 2 metres, where y = vertical distance, and • 0 ≤ x ≤ 3 metres, where x = horizontal distance. Milli-Q® Direct 8/16 System...
-
Page 20: Installation
Install and Register the POD Pak Register the UV Lamp timers Register the PERFORM RO CL2 CLEANING message timer Register the EXAMINE INLET STRAINER message timer Calibrate the Product Water flow rate Perform a TOC Curve Check Milli-Q® Direct 8/16 System... -
Page 21: Alarms Generated During Installation
PROGARD • This alarm occurs because the Progard® Cartridge is not installed. CARTRIDGE OUT • This alarm goes away when the Progard® Cartridge is detected by the Milli-Q® message System. • To cancel the text display of this alarm message, follow the instructions on the LCD. - Page 22 MILLI-Q TOC > • This alarm occurs because the TOC indicator algorithm needs data after the Q-Pak® pack is fully rinsed out. • To cancel the text display of this alarm message, follow the instructions on the LCD. Milli-Q® Direct 8/16 System...
-
Page 23: Assembling The Pod Unit
Separate the POD Arm and the Point Of Delivery by cutting and removing the tape that Arm and Point holds them together. Of Delivery Placing the POD Place the POD and POD Arm onto the POD Mast as shown below. Milli-Q® Direct 8/16 System... -
Page 24: Tubing, Cables And Power Cord
Item Description RO Reject Water tubing. Goes to a drain. Feed water supply tubing to Milli-Q® Direct system. Tubing connected here comes from the bottom of the Reservoir. See the next section. Tubing connected here goes to the bottom of the Reservoir. - Page 25 • Open the feed water source. system • Plug the power cord into the Water System. • Plug the power cord into a source of electrical power. • The Main LCD shows a series of start-up screens. Continued on next page Milli-Q® Direct 8/16 System...
- Page 26 • If necessary, go to the Manager Menu Software and correct the date and time. See Check the date the Software Map in the beginning of the Software Chapter for more information. • Do not install a Progard® Cartridge or a Q-Pak® Pack until the displayed date is correct. Milli-Q® Direct 8/16 System...
-
Page 27: Installing The Progard® Cartridge
• Wet the O-rings with water. • Install the Progard® Cartridge until it is fully seated. • Close the right door. One minute later, the Main LCD shows that a new Progard® Cartridge is installed. Continued on next page Milli-Q® Direct 8/16 System... - Page 28 Installing the Progard® Cartridge, Continued Procedure (continued) Step Action Diagram Press When the Progard® Cartridge flush has finished, the Water System goes to READY Mode. Milli-Q® Direct 8/16 System...
-
Page 29: Installing The Q-Pak® Pack
2 ports of the Q-Pak® Pack. • Make sure the rubber O-rings are firmly in place. • Wet the O-rings with water. Push the top of the Q-Pak® Pack into the ports on the System. Continued on next page Milli-Q® Direct 8/16 System... - Page 30 Step Action Diagram Push the bottom of the Q-Pak® Pack inwards. Push the pack locking handle down. Close the left door. One minute later, the Main LCD shows that a new Q-Pak® Pack is installed. Press Milli-Q® Direct 8/16 System...
-
Page 31: Rinsing The Ro Cartridges
Rinsing the RO Cartridges The RO Cartridges must be flushed and rinsed when the Milli-Q® System is installed. Failure to do this results in poor water quality. Rinse the RO Cartridges Procedure Follow the steps below to flush and rinse the RO Cartridge(s). - Page 32 (continued) Step Action Diagram Press Press Press After 15 minutes, the LCD looks like this. When the 225 minute RO rinse is finished, the Milli-Q® System returns to READY Mode. The Reservoir is now being filled. Milli-Q® Direct 8/16 System...
-
Page 33: Rinsing The Q-Pak® Pack
POD Dispenser ensures water tightness. Place the System into READY Mode. Push the POD Plunger all the way down and then release it. In a few minutes, water should come out of the POD Unit. Continued on next page Milli-Q® Direct 8/16 System... - Page 34 Rinsing the Q-Pak® Pack, Continued Procedure (continued) Step Action Diagram Dispense water for at least 10 minutes. Push the POD Plunger all the way down and then release it to stop dispensing water. Leave the System in READY Mode. Milli-Q® Direct 8/16 System...
-
Page 35: Installing A Pod Pak
Follow the steps below to register the installation of the POD Pak. Step Action Diagram Start in STANDBY Mode. Select Menu. Press Select Maintenance. Press Scroll down to Install POD Pak. Select it. Continued on next page Milli-Q® Direct 8/16 System... - Page 36 Installing a POD Pak, Continued Registering (continued) Step Action Diagram Press Press In this example, you choose Millipak®. Press Press Press Press 3 times on Milli-Q® Direct 8/16 System...
-
Page 37: Registering Uv Lamp Timers
This procedure shows how to reset the timer used for the UV 185 nm Lamp. Step Action Diagram Place the System in STANDBY Mode. Select Menu. Press Select Maintenance. Press Select Install UV 185 nm Lamp. Press Continued on next page Milli-Q® Direct 8/16 System... - Page 38 Action Diagram Press Press Press Press 3 times on Reset UV After resetting the timer for the UV 185 nm Lamp timer, reset the UV Lamp timer for 254nm Lamp the UV 254 nm Lamp. timer Milli-Q® Direct 8/16 System...
-
Page 39: Registering Perform Ro Cl2 Cleaning Message Timer
This procedure shows how to reset the timer used for the message PERFORM RO CL2 CLEANING. Step Action Diagram Start in STANDBY Mode. • Select Menu. • Press • Select Maintenance. • Press • Select Reset RO CL2 Cleaning. • Press Continued on next page Milli-Q® Direct 8/16 System... - Page 40 Registering PERFORM RO CL2 CLEANING message timer, Continued Procedure (continued) Step Action Diagram Press Press 3 times on Milli-Q® Direct 8/16 System...
-
Page 41: Registering Examine Inlet Strainer Message Timer
This procedure shows how to reset the timer used for the message EXAMINE INLET STRAINER. Step Action Diagram Start in STANDBY Mode. • Select Menu. • Press • Select Maintenance. • Press • Select Clean Strainer. • Press Continued on next page Milli-Q® Direct 8/16 System... - Page 42 Registering EXAMINE INLET STRAINER message timer, Continued Procedure (continued) Step Action Diagram Press Press Press 3 times on Milli-Q® Direct 8/16 System...
-
Page 43: Calibrating The Flow Rate
Calibrating the Flow rate Introduction The Milli-Q® Water flow rate should be calibrated when the System is installed. A 1 Litre graduated cylinder is needed. Procedure Follow the steps below to perform a Flow Calibration. Step Action Diagram Go to STANDBY Mode. - Page 44 Wait until it stops dispensing water. Measure the amount of water (in ml) that was dispensed. Suppose 870 ml was collected. Input this using the Keypad. Perform the flow calibration again to improve accuracy. Press Press 3 times on Milli-Q® Direct 8/16 System...
-
Page 45: Performing A Toc Curve Check
Follow the steps below to perform a TOC Curve Check. Step Action Diagram Go to READY Mode. Select Menu. Press Select TOC Curve Check. Press Press After approximately 10 minutes, the System returns to READY Mode. Milli-Q® Direct 8/16 System... -
Page 46: Software
Software Overview Introduction The purpose of this chapter is to explain the various software used in the System. Contents This chapter contains the following topics: Topic See Page Software Map Standby Mode Manager Menu Ready Mode Milli-Q® Direct 8/16 System... -
Page 47: Software Map
Software Map Milli-Q® Direct 8/16 System... -
Page 48: Standby Mode
Standby Mode General information Purpose STANDBY mode is used primarily for: • maintenance actions, and • going to the Manager Menu. Display READY Mode from STANDBY Diagram 1 Action Diagram 2 Mode Press Milli-Q® Direct 8/16 System... -
Page 49: Description Of Standby Menu
Used to reset Alert message REPLACE POD PAK. Install ASM UV Used to reset Alert message REPLACE ASM UV LAMP Reset RO CL2 Cleaning Used to reset Alert message PERFORM RO CL2 CLEANING at installation. Continued on next page Milli-Q® Direct 8/16 System... - Page 50 Used to clean the RO Cartridge(s). System Cleaning Contact Millipore SAS for more information. Suitability Tests Diagram 1 Diagram 2 Item Description Res Suitability Test Contact Millipore SAS for more information. Temp Suitability Test Continued on next page Milli-Q® Direct 8/16 System...
- Page 51 Description of Standby Menu, Continued Language Diagram 1 Diagram 2 Item Description Language Change the displayed language. Manager Menu See the next section for information about the Manager Menu. Milli-Q® Direct 8/16 System...
-
Page 52: Manager Menu
• Change the Login and Password used to enter the Manager Menu. • Use 4 characters for the Login and the Password. Date and Time Diagram 1 Diagram 2 Item Description Date and Time Adjust your local date and time. Continued on next page Milli-Q® Direct 8/16 System... - Page 53 Change set point controlling the message PERMEATE C > SP. Tank Refill Change set point controlling the tank level where the Milli-Q® System starts to refill the tank. Milli-Q® Product Res Change set point controlling the message MILLI-Q RES < SP, REPLACE Q-PAK.
- Page 54 Pressure • Change the displayed units of pressure. • Choices are bar, psi and KPa. Milli-Q® Product • Change the displayed units of Milli-Q® Product Water quality. • Choices are MΩ.cm or µS/cm. Tank Volume • Change the displayed units of Tank Volume.
- Page 55 • See the ASM User Manual for more information. Network Settings • Change Network settings. • Contact Millipore SAS for more information. TOC Curve Check Time Change the time when a TOC Curve Check is automatically performed each day. Continued on next page Milli-Q® Direct 8/16 System...
- Page 56 Diagram 2 Item Description History Summary Used to see the day by day history of the Water System. Print System History Print RO History See the section “Printing” for more information. Print Milli-Q® History Print Options Milli-Q® Direct 8/16 System...
-
Page 57: Ready Mode
• The product water dispensed from the POD Unit has: − a resistivity of 18.2 MΩ.cm, − is temperature compensated (TC) at 25°C, and − the TOC value is 4ppb. In this example, the System is not dispensing or recirculating water. Milli-Q® Direct 8/16 System... -
Page 58: Description Of Ready Menu
View the quality of water obtained from the POD Unit. Print Menu Diagram 1 Diagram 2 Item Description MQ Instant Quality Print the parameters related to the quality of water delivered from the remote Q-POD® Unit if installed. Continued on next page Milli-Q® Direct 8/16 System... - Page 59 System Alarms View a list of active Alarm messages. See the Alarm Chapter for more information. System Measures View: • accumulated production time, • pumps electrical data, and • UV Lamps electrical data. Continued on next page Milli-Q® Direct 8/16 System...
- Page 60 Application Specialist View: • name, Service Engineer • phone number, and • email address of a Millipore SAS Representative. Tech Service NOTE: Other This information is entered by a Millipore SAS Service Representative. Continued on next page Milli-Q® Direct 8/16 System...
- Page 61 View information that explains the purpose of the major components. Version View Software versions. System Information View: • System Type, • Catalogue Number, • Serial Number, • Installation Date, and • Manufacturing Date. Continued on next page Milli-Q® Direct 8/16 System...
- Page 62 The TOC Curve Check is used to determine data that is used for the TOC Indicator. A manual TOC Curve Check can be initiated here. Otherwise, the TOC Curve Check is automatically done once per day. Milli-Q® Direct 8/16 System...
-
Page 63: Using The Milli-Q® Direct System
Using the Milli-Q® Direct System Overview Introduction The purpose of this chapter is to explain: • various ways that water can be dispensed from the System, and • how to view information, operating parameters and other things about the System. -
Page 64: Dispensing Water
Position Water flow Low Flow (push slightly) Medium Flow (push slightly) High Flow (push down and hold, release when done) Continuous high flow (push down and release; push down again to stop). Continued on next page Milli-Q® Direct 8/16 System... - Page 65 • Select Volume. • Press • Adjust the volume of water to the required value using • Press When the volumetric dispensing is finished, the System recirculates water for 3 minutes. The System stops recirculating water. Milli-Q® Direct 8/16 System...
-
Page 66: Viewing Water Quality
READY Mode. • Select Menu. • Press Select Water Quality. Press • Select the Water Quality to be viewed. • Press Note The term ‘TC’ means that the resistivity value is temperature compensated. Press 3 times on Milli-Q® Direct 8/16 System... -
Page 67: Viewing Operation
Follow the steps below to go to the System Operation menu. Operation Step Action Diagram Start in READY Mode. Select Menu. Press Select View Operation. Press Select System Operation. Press To see more, press Continued on next page Milli-Q® Direct 8/16 System... - Page 68 When the cause of this Alarm is fixed, then this Alarm is no longer shown on the SYSTEM ALARMS LCD. System Measures Various measurements related to the System are shown here. Milli-Q® Direct 8/16 System...
-
Page 69: Viewing Consumable Status
Start in READY Mode. Select Menu. Press Select Consumables Status. Press Select the consumable that you would like to see information about. Example The Progard® Cartridge status is shown here. Choose other consumables to see their status. Milli-Q® Direct 8/16 System... -
Page 70: Calling Millipore Sas
Follow the steps below to view information under Call Millipore SAS. Step Action Diagram Start in READY Mode. Select Menu. Press Select Call Millipore SAS. Press Select the type of Millipore SAS Representative you wish to contact. Press Milli-Q® Direct 8/16 System... -
Page 71: Viewing Information
Follow the steps below to see information about the System. Step Action Diagram Start in READY Mode. Select Menu. Press Select Information. Press Select the type of information you wish to view. Two examples are shown below. Press Continued on next page Milli-Q® Direct 8/16 System... - Page 72 This LCD shows information such as the Serial Number and the Catalogue Number. NOTE: The Inst Date (Installation Date) needs to be entered by a Millipore SAS Service Representative. The date is not automatically generated by the System. Milli-Q® Direct 8/16 System...
-
Page 73: Maintenance
Maintenance Schedule Replacing the Progard® Cartridge and Vent Filter Replacing the Q-Pak® Pack Replacing a POD Pak TOC Curve Check Sanitising the RO Cartridge(s) Cleaning the RO Cartridge(s) Cleaning the Inlet Strainer Calibrating the Flow rate Milli-Q® Direct 8/16 System... -
Page 74: Maintenance Schedule
Feed water. See ‘Calibrating the flow rate’ for more information. TOC Curve Check Item Maintenance needed When TOC Indicator Update TOC Curve Check New Q-Pak® Pack installed, or when prompted to by an LCD message. Milli-Q® Direct 8/16 System... -
Page 75: Replacing The Progard® Cartridge And Vent Filter
The Progard® Cartridge and Tank Vent Filter should be replaced when the following Alert message is displayed. • Alert message = REPLACE PROGARD CARTRIDGE AND TANK VENT FILTER The Progard® Cartridge must be flushed after it is installed. Attention Continued on next page Milli-Q® Direct 8/16 System... - Page 76 After water stops being dispensed, push down the POD Plunger again. Open the System right door. Remove the used Progard® Cartridge. In a few moments, the System indicates that the Progard® Cartridge is removed. Continued on next page Milli-Q® Direct 8/16 System...
- Page 77 Close the right door. When a new Progard® Cartridge is installed, the LCD looks like this. Press When the Progard® Cartridge flush has finished, the Water System goes to READY Mode. Milli-Q® Direct 8/16 System...
-
Page 78: Replacing The Q-Pak® Pack
When The Q-Pak® Pack should be replaced when one of the following Alarm or Alert messages is displayed. • Alarm message = MILLI-Q RES < SP, REPLACE Q-PAK • Alert message = REPLACE Q-PAK PACK Removing Remove the used Q-Pak® Pack by following the steps below. - Page 79 Make sure the rubber O-rings are firmly in place. Wet the O-rings with water. Push the top of the Q-Pak® Pack into the ports on the System. Push on the bottom of the Q-Pak® Pack. Continued on next page Milli-Q® Direct 8/16 System...
- Page 80 An O-ring is located inside the POD Unit. Push one end of the clear tubing onto the end of the barbed fitting. Place the other end of the clear tubing into a sink. Continued on next page Milli-Q® Direct 8/16 System...
- Page 81 Refer to the TOC Curve Check section for more information. Flow Rate The volumetric dispensing flow rate should be calibrated when the Q-Pak® Pack has Calibration been replaced. Refer to the procedure in the Installation chapter. Milli-Q® Direct 8/16 System...
-
Page 82: Replacing A Pod Pak
Replacing a POD Pak Basing on flow One possible reason for a decrease in Milli-Q® Water flow rate is a clogged POD Pak. rate The POD Pak should be replaced when it appears to be clogged. For Millipak® and BioPak® final filters, make sure the POD Pak is not air-locked. - Page 83 Replacing a POD Pak, Continued Registering (continued) Step Action Diagram Scroll down to Install POD Pak by pressing Press Press In this example, the replacement POD Pak is a Millipak®. Press Press Continued on next page Milli-Q® Direct 8/16 System...
- Page 84 Registering (continued) Step Action Diagram Press Press 3 times on Flow Rate The volumetric dispensing flow rate should be calibrated when a POD Pak has been Calibration replaced. Refer to the procedure in the Installation chapter. Milli-Q® Direct 8/16 System...
-
Page 85: Toc Curve Check
24 hours or sooner. Follow the steps below to perform a TOC Curve Check. Procedure Step Action Diagram Go to READY Mode. Select Menu. Press Select TOC Curve Check. Press Continued on next page Milli-Q® Direct 8/16 System... - Page 86 TOC Curve Check, Continued Procedure (continued) Step Action Diagram Press After approximately 10 minutes, the System returns to READY Mode. Milli-Q® Direct 8/16 System...
-
Page 87: Sanitising The Ro Cartridge(S)
Use the Sanitisation Port Removal Tool and loosen the cap. Remove the cap. Reverse the steps above. Closing the Sanitisation NOTE: Port Do not use the Sanitisation Port Removal Tool to tighten the cap. Continued on next page Milli-Q® Direct 8/16 System... - Page 88 Follow the steps below to sanitise the RO Cartridge(s). Step Action Diagram Place a chlorine tablet into the Sanitisation Port. Put the cap back on and hand- tighten it. Go to STANDBY Mode. • Select Menu. • Press Continued on next page Milli-Q® Direct 8/16 System...
- Page 89 • Select RO CL2 Cleaning. • Press • Press • The RO CL2 cleaning mode will last 19 minutes. When the cleaning is finished, the Water System automatically goes into READY Mode. Continued on next page Milli-Q® Direct 8/16 System...
-
Page 90: Cleaning The Ro Cartridge(S)
NOTE: The chemical in the pouch will dissolve during the pH Cleaning sequence. Remove the empty pouch the next time the Santisation Port cap is removed. Go to STANDBY Mode. Continued on next page Milli-Q® Direct 8/16 System... - Page 91 • Select Sanitise/Clean. • Press • Select RO pH Cleaning. • Press • Press • The RO pH cleaning will last 142 minutes. When the pH Cleaning is finished, the Water System automatically returns to READY Mode. Milli-Q® Direct 8/16 System...
-
Page 92: Cleaning The Inlet Strainer
Screw the Inlet Strainer back onto the feed water pipe. Attach the tubing to the other end of the Inlet Strainer. Open the feed water supply valve. Go to READY Mode. Continued on next page Milli-Q® Direct 8/16 System... - Page 93 Follow the steps below to register the cleaning of the Inlet Strainer. Step Action Diagram Go to STANDBY Mode. Select Menu. Press Select Maintenance. Press Select Clean Strainer. Press A picture is shown. Press Continued on next page Milli-Q® Direct 8/16 System...
- Page 94 Cleaning the Inlet Strainer, Continued Procedure (continued) Step Action Diagram Press Press 3 times on Go to READY Mode. Milli-Q® Direct 8/16 System...
-
Page 95: Calibrating The Flow Rate
• a new consumable is installed such as: − POD Pak, or − Q-Pak® Pack, • a sensor or major component is changed, • volumetric dispensing is not accurate. Procedure Follow the procedure shown in the Installation Chapter. Milli-Q® Direct 8/16 System... -
Page 96: Alarms
• to read an Alarm message, • to cancel an Alarm, and • a list of Alarm messages is shown. Contents This chapter contains the following topics: Topic See Page Alarm Information Summary of Alarm messages Milli-Q® Direct 8/16 System... -
Page 97: Alarm Information
The Alarm message is shown superimposed on the Main Display. The red LED is lit steadily when an Alarm message is shown. In this example, the Alarm Message MILLI-Q T > MAX is shown. Continued on next page Milli-Q® Direct 8/16 System... - Page 98 See the section <View Operation> for information on how to access this LCD. Viewing an Follow the steps below to view an Alarm message. Alarm Message Step Action Diagram The Alarm message is shown superimposed on the Main Display. Press Press Continued on next page Milli-Q® Direct 8/16 System...
- Page 99 Alarm message • fixing the cause of the Alarm, or • using the Keypad. This cancels the display of the Alarm message for 1 hour. In this example, the Alarm message is MILLI-Q T > MAX. Alarm – before cancelling...
- Page 100 Continued Alarm – after Main Display LEDs Main Display cancelling the text display ê Alarm – fixed Now suppose a Millipore SAS Service Representative fixes the cause of the Alarm. Main Display LEDs Main Display ê Milli-Q® Direct 8/16 System...
-
Page 101: Summary Of Alarm Messages
What it means FLOW AUTO STOP • This alarm stops the Milli-Q® portion of the system. • A safety feature of the Milli-Q® Direct system has automatically stopped dispensing water after 40 minutes to avoid risks of overflow. • Push the POD Unit Plunger all the way down and release. - Page 102 • Contact Millipore SAS if the problem continues. Q-PAK PACK OUT • This alarm stops the Milli-Q® portion of the system. • The Q-Pak® Pack is not installed correctly or it has been removed. • Verify that the Q-Pak® Pack is installed correctly.
- Page 103 • A cleaning mode was cancelled and was not fully completed. • Go to STANDBY Mode and then go to READY Mode. • The Milli-Q® System will go into a 15 minute FLUSH Mode. The system will then automatically fill the Reservoir.
-
Page 104: Alerts
• to read an Alert message, • to cancel an Alert, and • a list of Alert messages is shown. Contents This chapter contains the following topics: Topic See Page Alert information Summary of Alert messages Milli-Q® Direct 8/16 System... -
Page 105: Alert Information
Alarm are both present, then only the red LED is lit. When an Alert is shown, it is listed under the System Alerts LCD. To access the System Alerts LCD, see the Section View Operation. Continued on next page Milli-Q® Direct 8/16 System... - Page 106 STANDBY mode. Press as many times as required to reach the bottom line. Press to access detailed information about the alert. Press to view full information about the alert if needed. Press Continued on next page Milli-Q® Direct 8/16 System...
- Page 107 Example: Before cancelling, the Minor Alert message is REPLACE POD PAK IN 15 DAYS. Main Display LEDs Main Display ê Follow the steps below to cancel a Minor Alert message. Step Action Diagram Press Press The display of the Minor Alert is Press cancelled. Continued on next page Milli-Q® Direct 8/16 System...
- Page 108 A Major Alert message can be cancelled using the Keypad. This is done in the same way that a Minor Alert message is cancelled. The display of the Major Alert is cancelled for 24 hours. It appears again after 24 hours unless the maintenance action is performed. Continued on next page Milli-Q® Direct 8/16 System...
- Page 109 The Alert message has been cancelled but the cause of the message is still active. after cancelling Main Display LEDs Main Display ê Major Alert - The Alert message has been cancelled when the POD Pak has been replaced. consumable replaced Main Display LEDs Main Display ê Milli-Q® Direct 8/16 System...
-
Page 110: Summary Of Alert Messages
• Restart the System. PERFORM RO CL2 CLEANING • The Water System has determined that it is time to perform a RO Cl2 cleaning. • Start a RO Cl2 cleaning. The timer is reset automatically. Continued on next page Milli-Q® Direct 8/16 System... - Page 111 REPLACE POD PAK IN XX DAYS • The System has determined that the POD PAK should be replaced in XX days, where XX is 15, …, 1. • Replace the POD Pak and reset the timer. Continued on next page Milli-Q® Direct 8/16 System...
- Page 112 • The RO % Rejection is below the set point. • Contact Millipore SAS. SERVICE VISIT OVERDUE XX DAYS • The System has determined that a Service Visit is overdue. • Contact Millipore SAS. Continued on next page Milli-Q® Direct 8/16 System...
- Page 113 • Due to low resistivity at the inlet of TOC FEEDWATER < 15.3 MΩ.cm the UV Lamp, the TOC measurement can not be performed properly anymore. • Please replace the Q-Pak® Pack to ensure valid TOC indications. Milli-Q® Direct 8/16 System...
-
Page 114: Ordering Information
Regularly scheduled preventive maintenance/calibration will help you obtain the best performance from your Millipore SAS water purification system throughout its entire lifetime. Please contact your Millipore SAS representative to find the best options for your system including our maintenance programs. Milli-Q® Direct 8/16 System... - Page 116 Milli-Q® Direct 8/16 System - FTPF11486 – V3.0, 03/2013...
Need help?
Do you have a question about the Direct 8 and is the answer not in the manual?
Questions and answers