Table of Contents
Advertisement
Advertisement
Table of Contents

Related Manuals for YZ Systems DTEX DX1000G/L

Summary of Contents for YZ Systems DTEX DX1000G/L
- Page 3 Dual Process DTEX Instruction & Operating Manual Version: 05132020...
-
Page 5: Table Of Contents
DX1000G/L Table of Contents DX1000G/L Table of Contents ......................I Section 1: First Things To Know ....................1 How to Use this Manual........................1 Typographic Conventions ........................1 Getting Help............................1 Operation Specifications........................2 Introduction ............................2 Theory of Operation..........................3 Section 2: System Installation......................5 Standard System Components......................5 System Flow Schematic ........................6 Standard System Connections ......................7 Section 3: System Control &... - Page 6 Y Z S y s t e m s • 8 8 2 5 N . S a m H o u s t o n P k w y W e s t • H o u s t o n , Te x a s • U S A • 7 7 0 6 4 • P : 2 8 1 . 3 6 2 . 6 5 0 0 • F : 2 8 1 . 3 6 2 . 6 5 1 3 Page VI DX1000G/L ver.05132020...
-
Page 7: Section 1: First Things To Know
DTEX 1000G/L system. If the answer can with the DTEX 1000G/L System. not be found within this manual, contact YZ Systems The DTEX Instruments implement the most advanced technology available in the industry. It is recommend- T: 1.281.362.6500... -
Page 8: Operation Specifications
Section 1: First Things To Know About The DTEX Operation Specifications Introduction Maximum Operating Pressure: 5 psig (0.345 Bar (g) Congratulations on your purchase of the DTEX DX 1000G/L odorant detection system. You’ve Minimum Operating Pressure: 5” water column made a wise investment for your company. Operating Temp Range: *0 to 140 degrees F. -
Page 9: Theory Of Operation
Section 1: First Things To Know About The DTEX Theory of Operation Two procedures for determining odor intensity are outlined in ASTM D 6273, the Odorant Concentration Method, and the Odor Intensi- ty Method. Either, or both procedures may be utilized with this DTEX instrument. - Page 10 Section 1: First Things To Know About The DTEX Notes Y Z S y s t e m s • 8 8 2 5 N . S a m H o u s t o n P k w y W e s t • H o u s t o n , Te x a s • U S A • 7 7 0 6 4 • P : 2 8 1 . 3 6 2 . 6 5 0 0 • F : 2 8 1 . 3 6 2 . 6 5 1 3 Page 4 DTEX 1000G/L ver.05132020...
-
Page 11: Section 2: System Installation
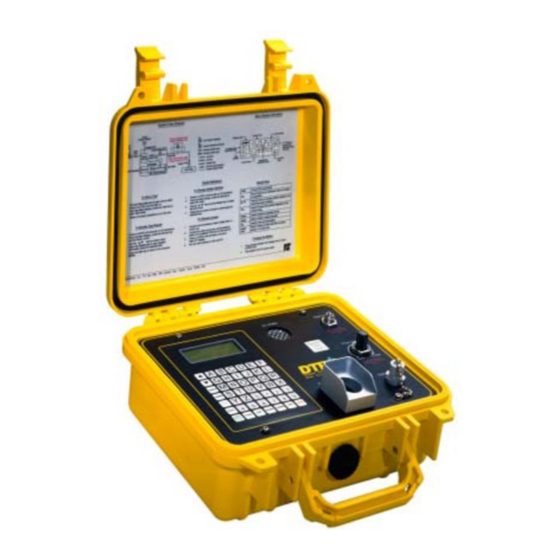
Section 2: System Installation Standard System Components The primary components of the DTEX DX 1000G/L system are illustrated here: Y Z S y s t e m s • 8 8 2 5 N . S a m H o u s t o n P k w y W e s t • H o u s t o n , Te x a s • U S A • 7 7 0 6 4 • P : 2 8 1 . 3 6 2 . 6 5 0 0 • F : 2 8 1 . 3 6 2 . 6 5 1 3 DX1000G/L ver.05132020 Page 5... -
Page 12: System Flow Schematic
Section 2: System Installation System Flow Schematic Illustrated below are the major internal components Y Z S y s t e m s • 8 8 2 5 N . S a m H o u s t o n P k w y W e s t • H o u s t o n , Te x a s • U S A • 7 7 0 6 4 • P : 2 8 1 . 3 6 2 . 6 5 0 0 • F : 2 8 1 . 3 6 2 . 6 5 1 3 Page 6 DX1000G/L ver.05132020... -
Page 13: Standard System Connections
Section 2: System Installation Standard System Connections Y Z S y s t e m s • 8 8 2 5 N . S a m H o u s t o n P k w y W e s t • H o u s t o n , Te x a s • U S A • 7 7 0 6 4 • P : 2 8 1 . 3 6 2 . 6 5 0 0 • F : 2 8 1 . 3 6 2 . 6 5 1 3 DX1000G/L ver.05132020 Page 7... - Page 14 Section 2: System Installation Notes Y Z S y s t e m s • 8 8 2 5 N . S a m H o u s t o n P k w y W e s t • H o u s t o n , Te x a s • U S A • 7 7 0 6 4 • P : 2 8 1 . 3 6 2 . 6 5 0 0 • F : 2 8 1 . 3 6 2 . 6 5 1 3 Page 8 DX1000G/L ver.05132020...
-
Page 15: Section 3: System Control & Electronics
Section 3: System Control & Electronics System Electronics Display and Keypad: Y Z S y s t e m s • 8 8 2 5 N . S a m H o u s t o n P k w y W e s t • H o u s t o n , Te x a s • U S A • 7 7 0 6 4 • P : 2 8 1 . 3 6 2 . 6 5 0 0 • F : 2 8 1 . 3 6 2 . 6 5 1 3 DX-1000G/L ver.05132020 Page 9... -
Page 16: Special Keys
Section 3: System Control & Electronics System Electronics Special Keys: Below is a quick reference for all DTEX system special keys. Function Used to move on-screen pointer up/down or to scroll the screen up/down. Space Used to insert a blank character. Delete Used to delete a character of text Used to access the symbols depicted on... - Page 17 Date of Test TDL:0.00% RDL:0.00% Note: (3) RDL Loc: YZ Systems DETAILS: The details key allows for review of all information relative to the test previously selected by the review key. Use the arrow keys to view all available infor- mation.
- Page 18 Section 3: System Control & Electronics Notes Y Z S y s t e m s • 8 8 2 5 N . S a m H o u s t o n P k w y W e s t • H o u s t o n , Te x a s • U S A • 7 7 0 6 4 • P : 2 8 1 . 3 6 2 . 6 5 0 0 • F : 2 8 1 . 3 6 2 . 6 5 1 3 Page 12 DX-1000G/L ver.05132020...
-
Page 19: Section 4: Preparing Your Dtex For A Test
Section 4: Preparing Your DTEX For A Test System Configuration The DTEX system can be up loaded with all required test location and user data prior to conducting tests via host PC and DTEX Report- er Software. This facilitates more efficient and simpler use of the DTEX system by requiring less user and location data input each time a test is conducted. - Page 20 Section 4: Preparing Your DTEX For A Test Things to Remember WARNING The DTEX system is designed to evaluate odor intensity in gas streams. Because of the potential- ly hazardous nature of conditions and elements involved in conducting tests, users are reminded to use extreme caution while operating the DTEX system.
-
Page 21: Section 5: Programming For Odor Concentration Operation
YZ Systems. Y Z S y s t e m s • 8 8 2 5 N . S a m H o u s t o n P k w y W e s t • H o u s t o n , Te x a s • U S A • 7 7 0 6 4 • P : 2 8 1 . 3 6 2 . 6 5 0 0 • F : 2 8 1 . 3 6 2 . 6 5 1 3 DX-1000G/L ver.05132020... - Page 22 Section 5: Programming for Odor Concentra tion Operation Conducting An Odor Concentration Test: (cont.) Calibration: Date system was last factory calibrated and date system is due for factory re-calibration. Step 4: Press Enter to sign on. Press the Enter key on the keypad to begin data configuration for a test.
- Page 23 Section 5: Programming for Odor Concentra tion Operation Conducting An Odor Concentration Test: (cont.) Step 6: Enter User PIN by typing in user 2 digit personal identification number and press Enter. The main display will now be present. Step 7: Press the Test button on the keypad. Step 8: Set location using the arrow keys, select the Test Location and press Enter.
- Page 24 Section 5: Programming for Odor Concentra tion Operation Conducting An Odor Concentration Test: (cont.) Set City using the arrow keys, select the city and press Enter. If the correct city is not listed, select New Item and press Enter. New City: type in the name of the New City and press Enter.
- Page 25 Section 5: Programming for Odor Concentra tion Operation Conducting An Odor Concentration Test: (cont.) Step 9: Set the altitude using the arrow keys and press Enter. (Set to nearest 500 feet.) Step 10: Verify Data: verify that all data entered for test location is correct by using arrow keys to scroll through data.
- Page 26 Section 5: Programming for Odor Concentra tion Operation Conducting An Odor Concentration Test: (cont.) Step 12: Threshold Detection Level (TDL) Test: position nose within 3/4 inch of the sniff chamber and with valve closed sniff exhaust. If an unchar- acteristic odor is detected allow the instrument to operate for an additional 2 minutes.
- Page 27 Section 5: Programming for Odor Concentra tion Operation Conducting An Odor Concentration Test: (cont.) Step 16: Test Complete: Close valve and press Enter. Step 17: Add Any Notes: type in any supplemental data to be recorded with this test and press Enter.
- Page 28 Section 5: Programming for Odor Concentra tion Operation Conducting An Odor Concentration Test: (cont.) Step 18: press the PWR key. The following will be displayed: Press: PWR to shut down V to vent unit ESC to abort When finished with a test, the operator has the option to: PWR TO SHUT DOWN: power down the system without venting.
-
Page 29: Section 6: Programming For Odor Intensity Operation
YZ Systems. Y Z S y s t e m s • 8 8 2 5 N . S a m H o u s t o n P k w y W e s t • H o u s t o n , Te x a s • U S A • 7 7 0 6 4 • P : 2 8 1 . 3 6 2 . 6 5 0 0 • F : 2 8 1 . 3 6 2 . 6 5 1 3 DX-1000G/L ver.05132020... - Page 30 Section 6: Programming for Odor Intensity Operation Conducting An Odor Intensity Test: (cont.) Calibration: Date system was last factory calibrated and date system is due for factory re-calibration. Step 4: Press Enter to sign on. Press the Enter key on the keypad to begin data configuration for a test.
- Page 31 Section 6: Programming for Odor Intensity Operation Conducting An Odor Intensity Test: (cont.) Step 6: Enter User PIN by typing in user 2 digit personal identification number and press Enter. The main display will now be present. Step 7: Press the Test button on the keypad. Step 8: Set location using the arrow keys, select the Test Location and press Enter.
- Page 32 Section 6: Programming for Odor Intensity Operation Conducting An Odor Intensity Test: (cont.) Set City using the arrow keys, select the city and press Enter. If the correct city is not listed, select New Item and press Enter. New City: type in the name of the New City and press Enter.
- Page 33 Section 6: Programming for Odor Intensity Operation Conducting An Odor Intensity Test: (cont.) Step 9: Set the altitude using the arrow keys and press Enter. (Set to nearest 500 feet.) Step 10: Verify Data: verify that all data entered for test location is correct by using arrow keys to scroll through data.
- Page 34 Section 6: Programming for Odor Intensity Operation Conducting An Odor Intensity Test: (cont.) Step 12: Threshold Detection Level (TDL) Test: position nose within 3/4 inch of the sniff chamber and with valve closed sniff exhaust. If an unchar- acteristic odor is detected allow the instrument to operate for an additional 2 minutes.
- Page 35 Section 6: Programming for Odor Intensity Operation Conducting An Odor Intensity Test: (cont.) Step 17: Test Complete: Close valve and press Enter. Step 18: Enter Intensity Rating Notes: *Typical ratings are (1) absent, (2) barely detectable, (3) RDL readily detectable, (4) strong, or (5) very strong or obnoxious.
- Page 36 Section 6: Programming for Odor Intensity Operation Conducting An Odor Intensity Test: (cont.) Step 18: press the PWR key. The following will be displayed: Press: PWR to shut down V to vent unit ESC to abort When finished with a test, the operator has the option to: PWR TO SHUT DOWN: power down the system without venting.
-
Page 37: Section 7: System Maintenance
Section 7: System Maintenance Maintenance Recommended Spare Parts The DTEX system essentially requires no in the List: field maintenance. There are NO field serviceable components. Part # Description ALL service and re-calibration must be per- G2-0052 DTEX Hose Assembly formed by the factory. G2-0067 USB Download Cable ONLY G2-0050... -
Page 38: Re-Calibration/Inspection
Section 7: System Maintenance Calibration/Inspection For system integrity and accuracy, re-calibration and inspection of the DTEX system is required at least once every two years. Annual re-calibration is available if required by local P.U.C., Company Policy, etc. The unit displays the next sched- uled calibration date at start up and also in the information section, accessed via the keypad. - Page 40 Web: www.yzsystems.com YZ Systems,represents and warrants that for a period of 2 years from receipt of the product: (1) the product will be free from defects in materials and workmanship; and (2) the product will perform substantially in accordance with product manuals, literature, or documentation. Any written or oral information or advice given by YZ representatives, agents, or employees will in no way increase the scope of this warranty.
Need help?
Do you have a question about the DTEX DX1000G/L and is the answer not in the manual?
Questions and answers