Table of Contents
Advertisement
Advertisement
Table of Contents

Related Manuals for La Crosse Technology V50


Summary of Contents for La Crosse Technology V50
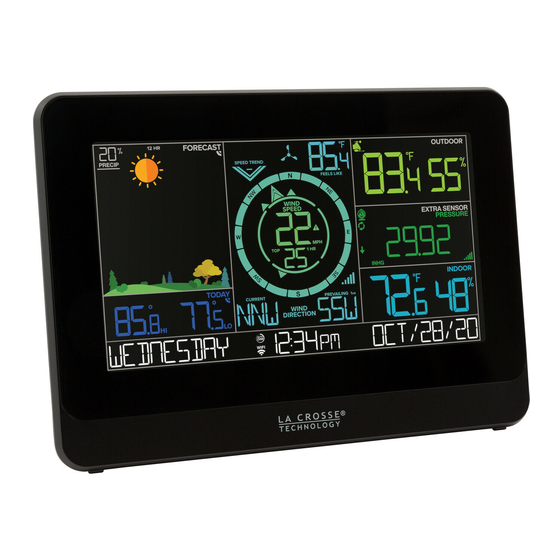
- Page 1 Wi-Fi WIND + WEATHER STATION SET UP GUIDE MODEL NUMBER V50...
- Page 2 Table of Contents BASICS LA CROSSE VIEW WIND Initial Setup Connecting to the App Viewing Your Wind Data Station Settings Connecting Your Station History Records Buttons Adding Your Sensor to Wind Speed Alert the App LCD Display Brightness Auto-Dim Settings Positioning Your Sensor Installation Options TEMP.
- Page 3 BASICS Initial Setup Power Up Bottom of Breeze Pro Sensor Back of Station Power Jack Install 3 “AA” batteries into the Battery Compartment of your Breeze Pro Sensor. Insert the 5V Power Adapter into an outlet, and then plug it into the Power Jack on the back of the station.
- Page 4 LA CROSSE VIEW Connecting to the App Stay Connected to Your Home Stay connected to your home anytime, anywhere Anytime, Anywhere. with the La Crosse View app. Monitor home conditions and set alerts so your home can get ahold of you when something seems off. Connecting your station is optional and the display will function as a standalone unit without the Wi-Fi connection.
- Page 5 LA CROSSE VIEW Connecting Your Station Now that you’ve created your La Crosse View account, it’s time to connect your station to your home router using the La Crosse View app. Connecting to Your Wi-Fi Network The La Crosse View app is required to connect the station to your Wi-Fi network. Download, install, and log into your La Crosse View account first.
- Page 6 LA CROSSE VIEW Adding Your Sensor to the App Upon getting the station connected to your Wi-Fi network, the next app screen will explain how your connected sensor(s) should be brought in. Within the next 15 minutes, you should receive an Add Device notification in your app. This is indicated by the Red Cloud and the numbers inside of it.
- Page 7 BASICS Station Settings When the station is first powered on, it will begin searching for your outdoor sensor, which should connect shortly. To manually set your time, date, and other settings, hold the button to enter the Settings Menu. Settings Menu Order Greeting •...
- Page 8 BASICS Buttons Side View Back View 1. WIND ALERTS 6. EXTRA Hold to enter Wind Alert Settings. Press to turn Press to toggle through extra sensors and Wind Alert on/off. pressure. Hold to add sensors. While viewing, hold the MINUS button delete the sensor.
- Page 9 BASICS LCD Display Brightness Adjusting the LCD Display Brightness Press the LIGHT button to adjust the backlight intensity. There are 4 brightness levels, plus an off option. Auto-Dim Settings Program your display to automatically dim during preselected times. Hold the LIGHT button to enter the Auto-Dim Settings Menu.
- Page 10 BASICS Positioning the Breeze Pro Sensor For Accurate Measurements • Ensure the sensor is mounted level with the Solar Panel facing directly to the south. This will help optimize battery life and transmit correct wind direction readings. • Ideally, the Breeze Pro Sensor should be mounted on the tallest object in your area.
- Page 11 Adjustable Base. Please note that these advanced options will require additional equipment and possibly professional help for best results. The illustrations above are not to scale and are for informative purposes only. La Crosse Technology is not responsible for any damages or injury that may occur during installation. Tripod...
- Page 12 WIND Viewing Your Wind Data 1. WIND SPEED TREND 2. COMPASS ROSE 3. CURRENT WIND SPEED INDICATOR Displays cardinal direction The top wind speed in the Shows wind speed trends with animated arrows past 31 seconds over the past 60 minutes (16 directions total) 4.
- Page 13 WIND Wind Speed History and Alerts Viewing Wind Speed History Records Press the WIND button to toggle through wind speed history records with time and date stamps. The wind speed records include: past 24 hours, 7 days, 1 month, & 1 year. Monthly Wind Speed Record Example Setting the Wind Speed Alert Hold the...
- Page 14 1. FORECASTED HIs & LOs** 2. “FEELS LIKE” 3. OUTDOOR TEMPERATURE (or Outdoor Records) TEMPERATURE Current Outdoor Temperature Daily Forecasted Highs & Lows Based on current temp. & wind from AccuWeather* speed (heat index & wind chill) 4. BREEZE SENSOR ICON 5.
- Page 15 TEMPERATURE & HUMIDITY Temperature & Humidity Records Viewing Records Press the TEMP button to toggle through indoor/ outdoor temperature & humidity history records with time and date stamps. Records Viewing Order Resetting Individual Temperature & Humidity Records • Outdoor High Temperature •...
- Page 16 FORECAST Foliage Scenes Viewing Your Forecast Data Seasonal Trees Spring (March 20 to June 20 The foliage scene in the forecast section changes seasonally. The dates are pre-programmed. Forecast Icons When using this station without Wi-Fi connection, the Summer (June 21 to Sept.
- Page 17 FORECAST Viewing Your Forecast Data Available Forecast Icons when Connected* Sunny Partly Sunny Clouds Light Rain Rain T-Storm Light Snow Snow Wintry Mix Windy Tip: icon will appear in the top right corner of the forecast section when your display is connected and receiving AccuWeather forecasts.
- Page 18 PRESSURE Relative Pressure • Your Relative Pressure reading will come from your station’s internal barometer. • Please allow up to 10 days for automatic calibration, or program your local pressure value in the Settings Menu. • The arrows located to the left of the values represents Pressure Tendency (rising/falling).
- Page 19 EXTRA SENSORS Additional Add-On Sensors Whether you choose to connect with the La Crosse View app or not, this station can display data for up to 4 extra sensors. This data will appear in the green EXTRA SENSOR section on the LCD, and in your La Crosse View app if connected.
- Page 20 • With Bracket: 6.21” L x 12.28” W x 9.87” H or Wi-Fi service. (15.77cm L x 31.19cm W x 25.07cm H) STATION SPECIFICATIONS (V50) • Without Bracket: 6.21” L x 8.25” W x 6.67” H • Indoor Temp. Range: 32°F to 122°F (0°C to 50°C)
- Page 21 • Do not mix old and new batteries. • Always purchase the correct size and grade of battery La Crosse Technology, Ltd. provides a 1-year most suitable for intended use. limited time warranty (from date of purchase) on • Ensure the batteries have with correct polarity (+/-).
- Page 22 APPENDIX FCC Statement This equipment has been tested and found to comply with the limits for a Class B digital device, pursuant to part 15 of the FCC Rules. These limits are designed to provide reasonable protection against harmful interference in a residential installation. This equipment generates, uses and can radiate radio frequency energy and, if not installed and used in accordance with the instructions, may cause harmful interference to radio communications.
- Page 23 Having Trouble? We’re here to help. For detailed product videos, manuals, and more, visit our support website: www.lacrossetechnology.com/lacrosse view support Make sure you have your product’s model number handy (V50) If you need additional support, get in touch with our friendly customer support team: Online: bit.ly/contact_techsupport...
Need help?
Do you have a question about the V50 and is the answer not in the manual?
Questions and answers
How do I change to Daylight Savings time?
The La Crosse Technology V50 automatically adjusts for Daylight Saving Time. However, you can change the DST setting manually. To do this:
1. Hold the SET button to enter the Settings Menu.
2. Use the SET button to scroll through the options until you reach the Daylight Saving Time setting.
3. Use the +/- buttons to select AUTO, ON, or OFF.
4. Press SET to confirm and move to the next setting.
If set to AUTO, the clock will adjust for DST automatically based on the WWVB signal.
This answer is automatically generated