Table of Contents
Advertisement
Quick Links
Advertisement
Table of Contents

Related Manuals for Silver Cross Kensington


Summary of Contents for Silver Cross Kensington
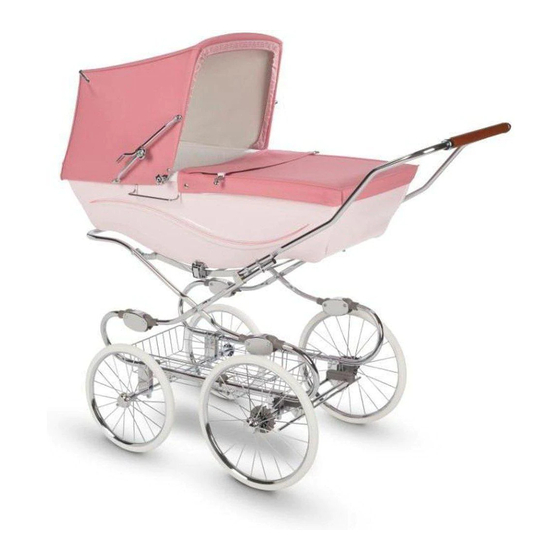
- Page 1 Kensington...
- Page 2 Repeat the same action to attach the larger wheels onto the the rear axle, Your Kensington chassis box includes: then do the same on the other side of the chassis. Kensington chassis...
- Page 3 Unfolding the chassis Attaching the pram body to the chassis Stand the chassis on its wheels. Ensure that the metal locking ring is Never try to attach the body of the pram to the chassis with the child clear of the secondary safety catch. inside.
- Page 4 Attaching the tray The hood and apron CAUTION: The child should be To fit the tray, hold in between the clear of moving parts while two ‘C’ frames, evenly positioned making adjustments. between the ‘U’ brackets. Lower onto the ‘C’ frame and click into place. Lift hood into position and push down on the levers on both sides of the Note: Do not place items, bags of...
- Page 5 Using the liner and mattress Folding the chassis Ensure the hood is in the up position. Firstly remove the pram body from Ensure the liner is the correct way up the chassis. with the elasticated corners at the bottom of the pram body. Note: never attempt to do this with the child in the pram body, or on your Secure the press studs which are half...
- Page 6 THIS PRODUCT CONFORMS Safety Notes Guarantee REMOVE ALL PACKAGING TO APPLICABLE SAFETY Your Kensington Pram is a high quality All Silver Cross products are guaranteed AND TIES BEFORE USE. CHECK STANDARDS OF BS EN 1888:2012 Silver Cross product. This product...
- Page 7 Silver Cross (UK) Ltd, Micklethorn, Broughton, Skipton, North Yorkshire, BD23 3JA silvercrossbaby.com...
Need help?
Do you have a question about the Kensington and is the answer not in the manual?
Questions and answers