Advertisement
Quick Links
1.
Remove original seat and suspension from the cab.
2.
Determine if your seat well has an angled front section or a square front section. For models with the angled front
section, use the JD W43A plate. For models with the square front section, use the JD W43B plate.
3.
Bolt W43A or W43B plate to the bottom of the PED JD 43 with two 5/16" x 3/4" carriage bolts and flange nuts.
4.
Place the PED W43 into the seat well in the location it will be fastened. It may help to bolt the JD W43 Plate to the
back of the cab using the original bolts to secure it. Check to make sure the W43A or W43B plate, which ever is
installed, is tight to the front section of the seat well. Loosen the bolts and adjust if necessary.
5.
With the PED W43 assembly in place in the seat well mark the location of the front holes onto the seat well.
6.
Remove the PED W43 assembly from the cab and drill two 11/32" holes through the seat well where you marked.
5/16" x 3/4" Carriage
Bolt (2)
JD W43B Plate
Technical Support
KM 402 Kit Air/Mech Installation (PN: 6793 & 6794)
Use these holes to mark locations
on the seat well to drill.
Phone: 1.800.328.1752 / Website: www.tractorseats.com
Installation Guide
JD W43A Plate
1
JD PED W43
PN: 6051
5/16" Serrated
Flange Nut (2)
Advertisement

Related Manuals for K&M KM 402 Kit Air

Summary of Contents for K&M KM 402 Kit Air
- Page 1 Installation Guide KM 402 Kit Air/Mech Installation (PN: 6793 & 6794) Remove original seat and suspension from the cab. Determine if your seat well has an angled front section or a square front section. For models with the angled front section, use the JD W43A plate.
-
Page 2: Slide Rails
Installation Guide KM 402 Kit Air/Mech Installation (PN: 6793 & 6794) Bolt the slide rails to the suspension using four 8mm x 12mm low profile socket cap screws. The slide rail must be assembled with the adjustment lever to the left side of the seat and suspension. - Page 3 Installation Guide KM 402 Kit Air/Mech Installation (PN: 6793 & 6794) Bolt the 6080 SAP to the slide rails using four 5/16" x 3/4" flat head socket cap screws, three flat washers, and four 5/16" jam nuts. The three flat washers go in between the 6080 SAP and the slide rails as shown below.
- Page 4 Installation Guide KM 402 Kit Air/Mech Installation (PN: 6793 & 6794) Bolt the suspension to the JD PED W43 using four 5/16" x 3/4" bolts, lock nuts, and .225" spacers. The spacers install between the suspension and the JD PED W43. You need to loosen the lower part of the rubber bellows to access the inside of the suspension to install the nuts onto the bolts.
- Page 5 Installation Guide KM 402 Kit Air/Mech Installation (PN: 6793 & 6794) Mount the JD PED W43 and suspension assembly to the back of the cab using the original bolts. Fasten the W43A or W43B plate, which ever is installed, to the cab deck where the holes were drilled in step 6.
- Page 6 Installation Guide KM 402 Kit Air/Mech Installation (PN: 6793 & 6794) If a swivel was purchased, remove the plastic knock outs from the locations shown below. If no swivel was purchased, continue to step 19 on page 9. Technical Support...
- Page 7 Installation Guide KM 402 Kit Air/Mech Installation (PN: 6793 & 6794) Rotate the swivel 45 degrees as shown below. Mount the swivel to the 6080 SAP plate using four 5/16" x 5/8" socket head cap screws, lock washers, and 5/16"...
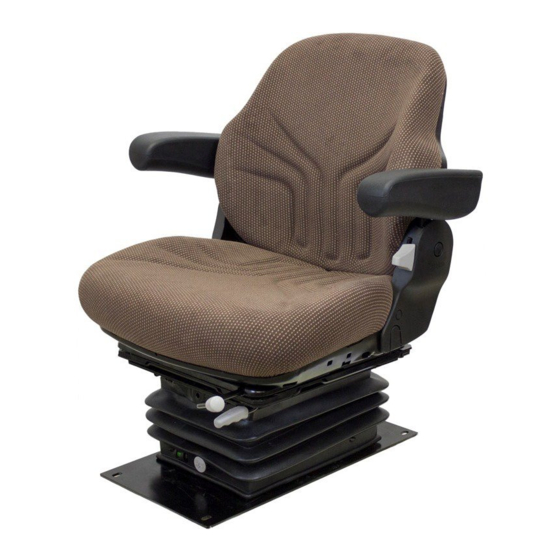
- Page 8 Installation Guide KM 402 Kit Air/Mech Installation (PN: 6793 & 6794) Remove the cushion from the new seat by taking out the three screws from the bottom front of the seat pan. Mount the seat to the swivel using four 5/16" x 5/8" socket head cap screws and 5/16" serrated flange nuts.
- Page 9 Installation Guide KM 402 Kit Air/Mech Installation (PN: 6793 & 6794) Continued from step 12. Remove the cushion from the new seat by taking out the three screws from the bottom front of the seat pan. Mount the seat to the 6080 SAP using two 5/16" flat head socket cap screws and serrated flange nuts for the front holes and two 5/16"...
Need help?
Do you have a question about the KM 402 Kit Air and is the answer not in the manual?
Questions and answers