
Related Manuals for Siemens EC6A5IB90A


Summary of Contents for Siemens EC6A5IB90A
- Page 1 Gas hob EC6A5IB90A, EC7A5RB90A This cooktop is approved for use with Natural Gas and Universal LPG. Leave these instructions with the owner. USER INSTRUCTIONS INSTALLATION INSTRUCTIONS MAINTENANCE INSTRUCTIONS...
-
Page 2: Table Of Contents
Warranty conditions ......17 Produktinfo Additional information on products, accessories, replacement parts and services can be found at www.siemens-home.bsh-group.com and in the online shop www.siemens-home.bsh-group.com/eshops... -
Page 3: Intended Use
Intended use This appliance is not intended for use by 8Intended use persons (including children) with reduced physical, sensory or mental capabilities, or R ead these instructions carefully. You will only lack of experience and knowledge, unless I n t e n d e d u s e be able to use your appliance safely and they have been given supervision or effectively when you have read them. -
Page 4: Important Safety Information
Important safety information Warning – Risk of fire! (Important safety The cooking process must be supervised. A ■ information short cooking process must be supervised without interruption. The burners get very hot. Do not rest D O NOT MODIFY THIS APPLIANCE. Risk of fire! ■... -
Page 5: Installation And Connection
Installation and connection Preparing to install 5Installation and connection Refer to AS/NZS 5601.1 for piping size details. These built-in cooktops are intended to be inserted in a S tatutory requirements benchtop cutout. I n s t a l l a t i o n a n d c o n n e c t i o n This installation must conform with the following: Do not stick the cooktop onto the worktop with silicone. -
Page 6: Clearances
Installation and connection Clearances Installation of cooktop into the kitchen bench A range hood fitted above the top must be installed according to the installation instructions for the range Side clearances: If the distance measured from the hood. A minimum distance of 650 mm is required for a periphery of the nearest burner to any vertical surface is range hood and 750 mm for an exhaust fan. -
Page 7: Gas Connection
Installation and connection This appliance must be earthed. When connecting Fit regulator (N.G.) or a test point (Universal LPG) ■ the cooktop ensure that the earth wire is connected directly to the R 1/2’’ connection. first and that all wires are connected to the correct terminals. -
Page 8: Converting The Cooktop From Nat. Gas To
Installation and connection Remove all pan supports, burner caps and Before Leaving distributors. Check all connections for gas leaks with soap and To replace the injectors, use the key that is available water. DO NOT use a naked flame for detecting leaks. from our technical service with code 340847 (for Ignite all burners both individually and concurrently to double-flame burners 340808). -
Page 9: Getting To Know Your Appliance
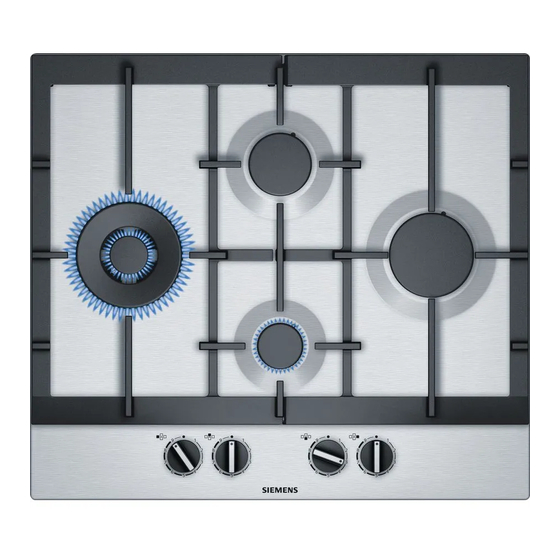
Getting to know your appliance Adjusting the gas valves *Getting to know your Turn the control knobs to the lowest setting. appliance Remove the control knobs from the gas valves. A flexible rubber sealing ring will be visible. Push down with the tip of a screwdriver on the gas valve's B urner locations setting screw. -
Page 10: Controls And Burners
Getting to know your appliance Controls and burners It is essential to ensure that all the burner parts and pan supports are correctly installed for the appliance to Each control knob is marked with the burner it controls. work correctly. Do not swap the burner caps around. You can use the control knobs to set the output Always remove the pan supports carefully. -
Page 11: Gas Burners
Gas burners Warning – Risk of deflagration! Simmer plate If the flame does not ignite after 15 seconds, switch off This accessory part is only suita- the burner and open a window or the door to the room. ble for simmering. It can be Wait at least one minute before switching the burner on used with the economy burner again. -
Page 12: Settings Table And Tips
Settings table and tips Pans should be placed on JSettings table and tips the hob carefully. Do not strike the hob and do not place excessive S uitable pans weight on it. S e t t i n g s t a b l e a n d t i p s Burner Minimum diame- Maximum diame-... - Page 13 Settings table and tips burner that was mentioned. The model overview Food Total time Step 1 Step 2 describes all of the burners on the hob. in min. Burner ˜ § v ˜ § v Example: Standard-out- 20-24 10-12 10-12 ›...
- Page 14 Settings table and tips Food Total time Step 1 Step 2 Food Total time Step 1 Step 2 in min. in min. Burner Burner ˜ § v ˜ § v ˜ § v ˜ § v Standard-out- 25-30 25-30 š Fish put burner Roman-style hake...
- Page 15 Settings table and tips Food Total time Step 1 Step 2 Food Total time Step 1 Step 2 in min. in min. Burner Burner ˜ § v ˜ § v ˜ § v ˜ § v Wok burner Dual wok 9-14 8-11 š...
-
Page 16: Cleaning And Maintenance
Cleaning and maintenance Caution! 2Cleaning and maintenance Do not remove the control knobs when cleaning the ■ appliance. The appliance may be damaged if moisture finds its way inside. C leaning C l e a n i n g a n d m a i n t e n a n c e Do not use steam cleaners. -
Page 17: Customer Service
Customer service Fault Possible cause Solution The kitchen smells of gas. A gas tap has been left on. Turn off the taps. Incorrect coupling of gas cylinder. Check that the coupling is sound. Possible gas leak. Shut off the gas supply, ventilate the premises and imme- diately notify an authorised installation technician to check and certify the installation. - Page 20 *9001124166* 9001124166 (001214)
Need help?
Do you have a question about the EC6A5IB90A and is the answer not in the manual?
Questions and answers